From Flat Clack to 3D ‘Snick’: Your Aha Moment Awaits
The difference between a traditional jigsaw and a 3D wooden puzzle is the shift from a satisfying clack to a structural snick. This is not about filling a frame; it’s about building an artifact, piece by interlocking piece, from laser-cut plywood sheets typically 3-4mm thick. The appeal lies in mindful engineering—transforming flat plates into a functional, display-worthy object that occupies physical space and, often, performs a task.
I discovered this during my own forced pause, a recovery that left me craving tactile focus. On my shelf, a tiny, laser-cut gearbox from an early build sits next to its successful successor. The first failed because I rushed the dry-fit, misunderstanding the material’s tolerance. The second, with its precisely meshing gears that turn a crank, was the ‘aha’ moment. This wasn’t just a puzzle; it was a lesson in load-bearing logic and negative space, executed in birch.
Forget the toy aisle. These are architectural studies in miniature. Where a plastic model kit asks you to follow steps toward a predetermined form, a premium wooden puzzle invites you into the design process itself. You become both builder and engineer, deciphering how a cantilevered arm supports a weight or how grain direction in the plywood adds to a structure’s integrity. The result isn’t a static replica; it’s a kinetic sculpture, a music box, or a clock with working mechanics—all born from your hands, often without a drop of glue.
The initial intimidation is real. Seeing a schematic of 200 intricate pieces can trigger doubt. But that’s the first bridge to cross. The clarity comes when you understand that these puzzles are meticulously engineered systems. Each piece has a specific structural role, and the instruction manual (from leading brands like UGears, Robotime, or WoodTrick) is your blueprint. Your job is to execute the assembly with patience, learning to read the material’s feedback—the subtle resistance of a perfect join, the slight wiggle that tells you to check orientation.
So, are 3D wooden puzzles worth it? If your satisfaction comes from the journey of construction as much as the finished piece, the answer is a resonant yes. They offer a deeply gratifying, screen-free immersion that ends with a tangible piece of design you can hold, operate, and display. It’s the difference between solving a picture and building a machine.
Consider your entry point. A decorative model, like a serene sailboat, offers a lower cognitive load focused on elegant form. It builds confidence in the fundamental language of wooden assembly—the snaps, the slots, the way the pieces feel in hand.

This is the foundation. From here, you can scale complexity toward moving parts and integrated mechanisms, a progression echoed in the experiences shared by veteran builders in reports like our comprehensive review of 3D wooden puzzles for adults. The shift from passive puzzling to active assembly is your gateway from flat clack to dimensional snick—where every connection is a small, quiet triumph of engineering.
The Quiet Payoff: More Than Relaxation, It’s Mindful Engineering
That dimensional snick is the audible reward of a deeper process. The real payoff of 3D wooden model kits for adults is not mere distraction, but a targeted cognitive workout that merges spatial reasoning, fine motor skills, and problem-solving into a state of immersive flow. In one analysis of over 1200 comment threads from dedicated builders, a consistent theme emerged: the activity was described not just as “relaxing,” but as “restorative focus” and “tangible problem-solving.”
As an architect, I was trained to think in plans, sections, and elevations—to hold a 3D structure in my mind while manipulating its 2D representations. A complex 3D wooden puzzle demands a similar mental architecture. You’re not just matching colors or patterns; you’re interpreting schematics, understanding load-bearing relationships, and anticipating how sub-assemblies will interface. This is where difficult 3D wooden puzzles for adults separate themselves. They present a problem where the solution is a physical object that must function, whether it’s a static cathedral spire or a gear train that must turn smoothly. Your brain shifts from passive recognition to active construction, engaging the same neural pathways used in engineering and design.
The process induces a flow state almost by necessity. There is no autopilot. To progress, you must be fully present: identifying pieces by their laser-etched numbers and grain direction, test-fitting connections, and troubleshooting misalignments in real-time. This hyper-focus pushes other noise to the periphery. It’s a form of moving meditation, where your hands and mind are synchronized in a single, purposeful task. I discovered this firsthand after an injury forced me away from drafting tables. The meticulous, small-scale engagement of building these puzzles became a therapeutic channel for the same spatial and structural instincts, without the physical strain. The satisfaction was—and is—in the quiet proof of a correct hypothesis: the gear meshes, the bridge stands, the drawer slides.
The benefits are cumulative and tangible. Beyond the often-cited stress relief, you are honing:
* Spatial Visualization: Rotating pieces mentally before physically placing them.
* Sequential Logic: Understanding that Step 47 depends on the alignment you secured in Step 12.
* Patience and Resilience: Learning that a forced piece will splinter, but a gently sanded one will slot home with that perfect, quiet snick.
* Mechanical Intuition: Feeling how tolerance in moving parts dictates the need for a slight gap or a firm press-fit.
This is mindful engineering. It turns abstract thought into a tactile, kinetic reality. As noted in reports on the hobby’s rise, such as the insights gathered on why adults are turning to wooden puzzles for relaxation, builders consistently cite this unique combination of mental engagement and manual craft as the hook—the reason a finished model on the shelf is not just a decoration, but a testament to a specific and deeply focused state of mind.
Reading the Grain: The Anatomy of a Superior 3D Puzzle
That mindful engineering mindset becomes most valuable when you learn to evaluate the puzzle itself. The quality of your experience is built directly into the material. Superior puzzles are defined by three pillars: material and thickness, cut precision and tolerance, and design intention. At its core, a premium 3D wooden puzzle for adults is typically constructed from 3-4mm laser-cut birch or basswood plywood, a thickness that provides structural integrity for complex assemblies without being unwieldy.
The foundation is the wood. You’ll encounter two primary types:
* Birch Plywood: The industry standard for most major brands. It’s dense, has a tight, consistent grain with minimal voids, and offers exceptional strength for its weight. This allows for finer, more delicate laser-cut pieces—like tiny gear teeth or architectural filigree—that won’t snap under careful pressure.
* Basswood (Linden): Softer and lighter in color than birch. It’s easier to sand and finish post-build, making it a favorite for models you might want to paint or stain. However, its softer nature can mean slightly less crisp detail on very small components and a gentler, more forgiving “snap” when joining.
Cut quality is where engineering meets art. A laser doesn’t just slice; it vaporizes wood, leaving a characteristic dark brown edge—the ‘char.’ In a good puzzle, this char is minimal and even, a sign of proper laser calibration. It’s not a flaw, but a fingerprint of the process. More importantly, each piece should release from its plywood sheet with gentle pressure, leaving only tiny, easily-sanded ‘nubs’ rather than tearing out splinters of material. This is your first test of precision.
Precision leads us to tolerance—the most critical architectural concept in your build. Tolerance is the designed gap or interference between mating parts. In a decorative, static model like a city skyline, pieces may have a near-zero tolerance, demanding a perfect, press-fit alignment. In a mechanical wooden puzzle kit—like a working clock or gearbox—tolerance is everything. Gears need micrometres of space to turn freely without wobbling. This is why you dry-fit first. Glue later. Test the movement, understand the friction, and only then commit. A puzzle with poor tolerance control will fight you; pieces will either fall apart or lock up permanently.
Understanding this leads to the crucial design taxonomy. Not all 3D wooden puzzles are created equal, and your choice should hinge on the experience you seek:
* Decorative Models (e.g., Wooden City Puzzles): Focus on form and aesthetics. The build is a sequence of static assemblies—walls, roofs, towers. The challenge is spatial reasoning and following complex, sometimes non-linear, instructions to achieve a stunning display piece.
* Semi-Mechanical Models: Incorporate simple movement, like a drawer that slides or a crane arm that pivots. They introduce basic principles of leverage and pivots, blending form with a hint of function.
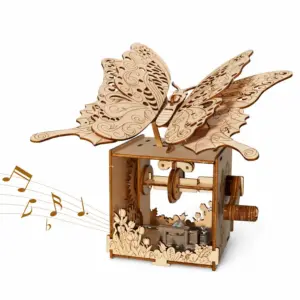
* Fully Mechanical Models (3D Wooden Puzzles That Move): These are kinetic sculptures. Think fully functional music boxes, gear-driven automata, or model engines. The build is a lesson in sequential logic and mechanical physics; the final, satisfying click of a completed mechanism is the ultimate reward. The instructions for these are less a map and more of a blueprint.
When you open a new puzzle, don’t just see a jumble of pieces on plywood sheets. Read the sheet. Look for families of similar shapes—all the identical rib pieces for a ship’s hull, or the cluster of small, complex gears. Note the grain direction indicated by the wood’s pattern; aligning the grain of mating pieces along the same axis can add subtle strength. This visual triage, breaking the chaotic whole into logical subsystems, is the first act of assembly and halves the cognitive load of the build to come. It’s a foundational practice of the micro-engineering mindset behind wooden puzzle kits.
This anatomical knowledge directly informs the Satisfaction-to-Frustration Ratio. A beautifully machined mechanical kit with clear instructions offers high satisfaction for a tinkerer, while a decorator might find it frustrating. Conversely, a simple decorative model could bore a mechanically-minded builder. The puzzle’s quality isn’t universal; it’s a measure of how well its anatomy matches your mindset.
The Satisfaction-to-Frustration Matrix: Find Your Puzzle Personality
The secret to a great build isn’t picking the puzzle with the most pieces; it’s matching the design’s intention to your psychology. This is the core of the Satisfaction-to-Frustration Ratio (SFR)—a framework I developed after one too many “puzzle fails.” A high-SFR experience means the challenge feels engaging, not enraging; the friction comes from the puzzle’s cleverness, not its poor cut quality or ambiguous instructions. With adult puzzles ranging from 40-piece decorative items to 700+ piece architectural marvels, the right starting point is defined by mindset, not metrics.
The SFR is shaped by three factors: your desired cognitive load, your tolerance for iterative problem-solving, and your need for a tangible payoff. A puzzle’s “difficulty” is not a single number. It’s a profile. Let’s match you to your build.
The Meditator: The Pursuit of Process.
You’re here for the flow state—the methodical, repetitive action that quietens mental noise. Your satisfaction comes from the ritual, not the engineering. For you, a high-SFR puzzle is decorative, with repeating patterns and a clear, linear assembly sequence.
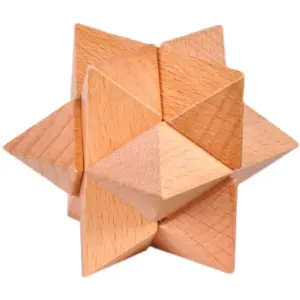
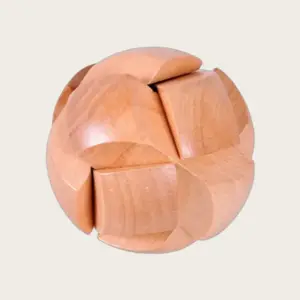
* Your Puzzle Type: Static, decorative models. Think elegant animal sculptures, floral designs, or geometric art pieces.
* Complexity Sweet Spot: Low to medium. You want enough pieces to sink into (150-300), but the connections should be intuitive.
* Brand Alignment: Robotime (Rokr) excels here. Their models like the Macro World series or decorative music boxes prioritize aesthetic cohesion and emotional resonance over mechanical complexity. The instructions are often pictorial and calm, guiding you without over-explaining.
* Build Time & Mindset: A 200-piece model might take 4-6 leisurely evenings. This is a one-and-done build; the finished piece is a monument to your calm focus. Rebuildability is low, as parts often fit with a gentle, permanent friction.
The Tinkerer: The Joy of Function.
You don’t just want to build; you need to see the gears turn. Your satisfaction is kinetic, delivered by a final, functional movement. Your frustration tolerance is higher, provided the mechanics are logical and the payoff works.
* Your Puzzle Type: Fully mechanical wooden puzzle kits. Working clocks, gear-driven tractors, puzzle boxes with secret compartments, or kinetic sculptures.
* Complexity Sweet Spot: Medium to high. You’re solving systems within systems. A 300-piece mechanical model has more cognitive steps than a 500-piece decorative one.
* Brand Alignment: This is the core Robotime vs WoodTrick comparison. UGears is also a prime player. Robotime’s mechanical kits (like their engine models) often have a polished, self-contained elegance. WoodTrick leans into raw, exposed mechanics—their models feel more like watchworks, celebrating the gear train itself. Both are excellent; Robotime can feel slightly more refined, WoodTrick more industrially clever.
* Build Time & Mindset: That 300-piece functional clock? Budget 8-12 hours. Dry-fitting is critical here; you must test gear movement before any thought of glue. The highest satisfaction is the first time you wind it and everything spins as intended. Many mechanical models are designed to be rebuildable.
The Collector: The Architectural Challenge.
You are motivated by scale, detail, and the aura of a complex artifact. You want a centerpiece. Your satisfaction is in conquering a monumental project and possessing the result. You have a high tolerance for methodical, sometimes tedious, sub-assemblies.
* Your Puzzle Type: Complex 3D wooden models of architecture, ships, or detailed cityscapes. Wooden city puzzles and iconic building replicas are your domain.
* Complexity Sweet Spot: High to very high (400-700+ pieces). You’re not just building a form; you’re creating a structure with layers, facades, and often, interior detail.
* Brand Alignment: Look to Robotime’s larger architectural series and specialized brands like Piececool. These kits demand patience. The instructions will have you building walls, window frames, and roof gables as separate modules before grand assembly—much like real construction.
* Build Time & Mindset: A major architectural puzzle is a weekend project, or a series of weeks-long sessions. It’s a campaign. The finished model is fragile and meant for permanent, dignified display. This is seldom a rebuildable project; it’s a heirloom.
The Beginner: Building Confidence.
If you’re asking “what is the best 3D puzzle for beginners adult?” the answer is simple: one with a high, guaranteed SFR. You need a clear win to fuel the addiction.
* Your Puzzle Type: Start with a small, semi-mechanical model. A treasure box with a simple hinged lid, or a small vehicle with rolling wheels. It should do something, teaching you basic moving-part principles without overwhelming.
* Complexity Sweet Spot: Low (40-120 pieces). The goal is to learn the language of the tabs, slots, and grain direction, not to be tested by it.
* Brand Alignment: Both Robotime and WoodTrick offer excellent entry-level kits. Choose based on the object you’d rather have on your desk. The instructions are the differentiator here; both use visual manuals, but spend time on their product pages looking at example instruction sheets to see which graphical style speaks to you more clearly.
* Build Time & Mindset: Aim for a 2-3 hour build. Your goal is to complete the emotional arc: from intimidation to clarity to pride. Use this first build to practice dry-fitting and to learn how much pressure a laser-cut plywood joint can tolerate before it demands adhesive. This foundational experience is what turns a beginner into a Meditator, Tinkerer, or Collector, and our guide on the 3D wooden puzzle you should build first can help pinpoint that perfect starting model.
The Quiet Tools Kit: What No Box Includes (But Every Builder Needs)
No 3D wooden puzzle kit includes everything you truly need for a smooth, frustration-free build. The box contains the architecture; you supply the precision engineering. Curating a dedicated “quiet tools” kit—named for its unobtrusive, surgical precision—is the single biggest upgrade to your building experience. For under $40, you can assemble a set of five essential tool categories that answer the perennial question, “Do I need glue or tools?” with a definitive “Yes, and here’s exactly what for.”
Think of your workspace as a miniature woodshop for delicate joinery. The laser-cut pieces are your millwork, and the provided manuals are your blueprints. Your tools are the instruments that translate intention into a snug, lasting fit.
The Core Philosophy: Non-Marking, Precision, and Control
The goal is to apply pressure without leaving evidence, to remove material without splintering, and to position pieces with absolute accuracy. Avoid common household tools like metal pliers (they crush), standard clamps (they mar), and messy super glue applicators. Opt instead for tools that feel like an extension of your fingers.
Your Essential Quintet:
1. Non-Marking Clamps: Small, silicone-tipped “helping hands” or micro spring clamps. Their sole job is to hold a critical joint under tension for the 60 seconds it takes for adhesive to grab, without scratching the wood’s surface. Use them when joining major structural modules.
2. Precision Tweezers & a Dental Pick: This is your primary manipulation duo. Angled tweezers retrieve tiny pieces from their plywood sheets and position them in tight assemblies. A dental pick (or a sculpting tool) is your probe for clearing microscopic char from a slot, lifting a misaligned piece without damage, and applying minute dots of glue.
3. Micro Files & Sanding Blocks: Laser-cutting leaves a slight char and tiny sanding nubs—those hair-like fibers where the piece was connected to the sheet. A set of needle files (round, flat, triangular) cleans up internal curves and slots. A small, dense foam sanding block wrapped with 400-grit paper quickly smooths edges and nubs for a professional feel. This is the secret to transforming a model from “craft project” to “heirloom object.”
4. A Soft-Bristled Brush: Keep a small, clean makeup or paint brush on hand. After any sanding or filing, gently brush away all dust. This prevents grit from interfering with crucial joints and keeps your workspace—and the model’s intricate gears—clean.
5. The Right Adhesive & Applicator: Glue is not always required, but for permanent display models or critical structural joints, it’s insurance. PVA wood glue (like Titebond Original) is ideal for porous wood. Its slow set time allows for adjustment, it sands cleanly, and it creates a bond stronger than the wood itself. Apply it with a toothpick or the tip of your dental pick—you need a droplet, not a flood. For a deeper dive on technique, our guide on how to glue a wooden puzzle without warping covers avoiding warping and glue-line regrets.
The Build Mindset in Practice
With your kit assembled, your approach shifts. You dry-fit first. Glue later. Test every connection, especially in mechanical assemblies, to ensure movement is free and clear. Use your pick to align. Use your clamp to secure. Use your brush to clean. This ritualistic preparation isn’t fussiness; it’s the practiced routine that replaces frustration with flow, turning the construction phase into the meditative, mindful engineering at the heart of the hobby. You’re not just following instructions—you’re ensuring every joint has the perfect tolerance, and every piece earns its place.
Entering the Flow State: A Mindset for Mindful Assembly
The quiet tools kit is your physical prep, but the right mindset is your mental blueprint. Successfully building a 3D wooden puzzle is 30% dexterity and 70% approach. The key to a rewarding build isn’t just following steps—it’s cultivating an environment and attitude that allows for deep focus, turning potential frustration into a state of meditative flow.
Consider your first 15-20 minutes non-negotiable preparation time. Clear a large, flat surface—a dining table or dedicated desk—and claim it. This establishes a psychological and physical ‘site’ for your project. Good, direct light is non-negotiable; a flexible desk lamp is ideal. Now, unpack with intention. Lay each laser-cut plywood sheet flat. Use your small containers to sort pieces not by step one, but by obvious families: long beams, small gears, decorative filigree. This initial taxonomy saves hours of frantic searching later. As you sort, run a finger over the pieces. Feel the slight char from the laser, note the wood’s grain direction. This tactile connection is your first quiet dialogue with the build.
Next, read the instruction manual like an architect reviews plans—from start to finish. Don’t just look at the pictures; understand the sequence. Identify the load-bearing moments: which sub-assembly must be perfectly square for everything else to align? Where does the mechanism engage? This high-level view prevents you from painting yourself into a corner. Remember, dry-fit first. Glue later. This is the cardinal rule. Test every connection, especially pivots and gear teeth, for smooth movement. A piece that fits with finger pressure is correct; one that requires force is a warning. My shelf of ‘puzzle fails’ is a monument to ignored warnings—a gear tower that won’t turn because one axle was glued a degree off true.
When you encounter resistance—a piece that seems not to fit—stop. This is the critical juncture. Put the piece down. Re-examine the illustration, then the actual pieces around it. Rotate the piece 90 or 180 degrees. Often, the issue is orientation, not the piece itself. This is where observation, as detailed in our guide on why observation beats brute force in 3D wooden puzzles, defeats brute force every time. If uncertainty lingers, walk away for five minutes. Make tea. Look out a window. Your subconscious will often solve the spatial problem before you return.
The goal is to enter a flow state, where time dilates and focus sharpens. This happens when the challenge of the puzzle slightly exceeds your skill level, pushing you gently. You achieve it by eliminating small frustrations: a lost piece, bad light, confusing instructions. Your prepared space and sorted pieces remove those friction points. What remains is the pure cognitive engagement of the build—the satisfying snick of a well-made joint, the gradual emergence of form from a flat sheet. It’s mindful engineering. You are not racing to a finish line; you are savoring the precision of each step, the gradual realization of a designed object from your own hands. When you finally place the last piece, the silence that follows isn’t empty. It’s full of the quiet pride of creation.
A Curated Showcase: Models That Exemplify Each Build Mindset
Having established your mindset and equipped your space, the final step is selecting a puzzle that resonates with your intent. This is where the framework pays off: a high-satisfaction build isn’t about the highest piece count, but the alignment between a model’s design and your desired experience. Leading brands like Robotime (Rokr), UGears, and WoodTrick each specialize in a different quadrant of our Satisfaction-to-Frustration Matrix, with instruction clarity and mechanism complexity being the key differentiators.
For the Meditative Builder seeking a calming, decorative outcome, look towards elegant static models. Brands like Robotime excel here with clean aesthetics and straightforward assembly. Their wooden city puzzles, such as serene street scenes or miniature bookshops, offer repetitive, rhythmic assembly that induces flow. The finished piece is a quiet sculpture of negative space and light. Another superb entry point is the classic carriage model; its curved forms are satisfying to assemble, and the result is purely visual storytelling.

For the Tinkerer, the question “are there puzzles that result in a useful object?” is paramount. The answer is a definitive yes. This domain belongs to mechanical wooden puzzle kits. UGears is the master here, with models featuring working gears, pistons, and differentials. Their tractors, gearboxes, and catapults are lessons in physics. WoodTrick follows with robust kinetic models, often incorporating wind-up mechanics. The true pinnacle for the Tinkerer, however, is a functional timepiece. It combines precise mechanical movement with a stunning display piece, answering the drive to build something that does something. For a functional storage item, a puzzle like a jewelry box offers both utility and a satisfying build, as explored in our hands-on guide to the 3D wooden treasure box.

For the Architect, scale and structural authenticity are key. This is where brands like Robotime’s Rokr line and WoodTrick shine with complex, difficult 3D wooden puzzles for adults such as cathedral facades, grand pianos with working key mechanisms, or historic ships. For a project steeped in history, a deep dive into building a historic galleon model showcases the kind of detailed, multi-stage project that defines this mindset. These builds are campaigns, often exceeding 500 pieces. They demand patience and spatial reasoning as you construct load-bearing frameworks and layered exteriors. The payoff is a breathtaking heirloom display piece that commands attention.
On the question of instruction clarity, Robotime/Rokr consistently leads with graphically intuitive, multi-language booklets that minimize text. UGears uses symbolic diagrams that are excellent once you learn their language. WoodTrick instructions can be denser, better suited to builders who enjoy deciphering engineering plans. For a complete material departure, Metal Earth offers laser-cut steel sheets for a distinctly different, tool-heavy crafting experience, resulting in dazzlingly intricate but fragile models.
Choosing among adult wooden puzzle brands ultimately means listening to the build mindset you identified. Does your patience crave the graceful arch of a carriage, the tactile click of a meshing gear, or the soaring vault of a cathedral? Your answer is the blueprint for your next perfect build.
From Puzzled to Proud: Finishing, Displaying, and Preserving Your Build
The final snap of a piece into place isn’t an end, but a transition. Your completed build shifts from an activity to an artifact, a testament to focused time. Preserving this mindful engineering project requires a final, considered phase: finishing, displaying, and caring for your wooden sculpture. With the right approach, your model can last for decades, evolving from a weekend project into a personal heirloom.
The Finish: To Seal, Stain, or Leave Raw?
Once the last gear is seated, you face a curator’s choice. Do you preserve the raw, laser-kissed wood or transform it?
Leaving It Raw is the purist’s path. It honors the material’s natural warmth and the subtle scent of birch. The laser’s char line becomes a feature, defining each piece’s edge. This is ideal for models with beautiful grain or intricate cutwork where added color might obscure detail. However, raw wood is porous and will slowly oxidize and darken over years.
Sanding and Sealing offers protection and a refined feel. Use a high-grit sanding sponge (from your quiet tools kit) to gently remove the laser char and any lingering nubs, always moving with the grain to avoid scratches. A light coat of a clear, matte sealant like a spray acrylic or a wipe-on polyurethane will lock in the color, protect against moisture, and make dusting effortless. This is my recommendation for any model you plan to handle or display in a sunlit room.
Staining or Painting unlocks a new dimension of creativity. Can the finished puzzle be painted or stained? Absolutely, but preparation is key. You must sand thoroughly to ensure even absorption. Use water-based acrylics or thin wood stains applied with a soft brush. For intricate mechanical models, test on spare plywood sheets first; a thick finish can gum up fine tolerances and impede movement. This transforms a generic castle into your weathered fortress.
Display as Design: Beyond the Shelf
A great 3d puzzle display idea considers the model’s form and function. Think of your shelf as a gallery and each puzzle as an exhibit requiring its own plinth and lighting.
- For Architectural Models: Elevate them literally. A simple acrylic riser creates negative space beneath, emphasizing structure. Position a small, warm LED spot to cast dramatic shadows across facades, enhancing depth.
- For Mechanical Models: They demand interaction. Place them on a open, accessible surface—a desk or coffee table—where guests can gently turn a crank. Ensure at least 5 inches of clearance for any moving parts.
- For Delicate, Skeletal Models: Consider a glass cloche or a deep-frame display case. This provides a micro-climate, protects from dust, and turns the puzzle into a revered specimen. For framing flat or relief-style puzzles, the principles in our definitive guide to framing and preserving your puzzle apply, using acid-free backing and spacers.
Heirloom Care: Handling Fragility
How fragile are the finished models? It depends on the design. A solid-wood animal figure is surprisingly robust, while a filigreed clock tower with thin spires is delicate. Treat every model as a piece of fine woodworking.
Dust with a soft, dry makeup brush or a can of compressed air held at a distance. Never use a feather duster; it will snag. For deeper cleaning, a slightly damp microfiber cloth can be used on sealed models, followed immediately by a dry cloth. Avoid prolonged direct sunlight to prevent warping and fading. If moving a model, lift from its most solid base—never from a protruding turret or gear.
Your build, now finished and displayed, is far more than a toy. It is a record of hours spent in mindful flow, a physical echo of focus. It sits within the long tradition of mechanical puzzles and jigsaw puzzles, yet it stands apart as a unique fusion of art, engineering, and personal accomplishment. The final step? Admire your work for a day, then let your eyes wander back to that empty shelf space. It’s waiting for your next act of quiet engineering.