The Dreaded Click: When Your 6-Band Ring Falls Apart in Your Hands
It starts with a click. A faint, metallic sound you feel more than hear. Then, the weight in your palm shifts from a solid band to a loose, jangling handful. You stare down at the six independent loops of metal, cold and chaotic. Your stomach drops. The intricate interlocking bands of your puzzle ring have just become a disassembled, seemingly impossible tangle. The first wave is always cold dread: Did I break it? Will it ever go back together?
Relax. You’re holding a puzzle, not a catastrophe. That moment of panic is a universal rite of passage for every new owner of a 6 band puzzle ring. It’s the point where fascination meets tactile reality. Are 6 band puzzle rings hard? They’re a deliberate challenge—a step-change from a 4-band’s logic into a more elegant, three-dimensional mechanical knot. The difficulty isn’t a flaw; it’s the entire point. That disassembled state in your hand is its natural, resting form, waiting for your understanding to coax it back into wearable art.
As a bench jeweler, I’ve seen this exact look of bewildered defeat countless times. Someone walks into the workshop, carefully unfolding a cloth napkin to reveal a sterling silver tangle, their voice a mix of hope and embarrassment. They’ve tried following a static diagram or a YouTube solution for a different model, only to end up with crossed wires and mounting frustration. The one crucial mistake everyone makes at this stage is forcing it. You start pushing bands against each other, applying torque, trying to make them fit through sheer will. Metal, especially on thinner, handcrafted bands, will bend. It will warp. And the delicate tension that makes the final assembly click will be lost.
This guide exists to short-circuit that cycle of anxiety. We’re not just going to give you a puzzle ring tutorial; we’re going to build the understanding that makes any tutorial make sense. We’ll move from the “oh no” in your palm right now, through the satisfying mechanics of how these rings lock, to the confident reassembly that feels less like magic and more like a skill you own. The journey from a pile of metal to a seamless, high-polish ring on your finger is one of the most satisfying tactile feedback loops you can get from an object. Let’s begin where you are: with the pieces in hand, and the curiosity to see how they truly fit.
Inside the Machine: A Visual Guide to 6-Band Puzzle Ring Anatomy
That cold dread gives way to a more useful emotion: curiosity. You’re no longer just holding a chaotic handful of metal. You’re holding a dismantled machine, and every machine has a logic. To reassemble it, you first need to understand what the parts are and how they’re meant to relate. Think of a 6-band puzzle ring not as a single ring, but as a meticulously engineered 3D jigsaw, where every piece’s shape is defined by the space it occupies and the pieces it must avoid.
Let’s name the parts. You have six individual bands. They are not identical. In most classic designs, two bands are fundamentally different—they form a continuous, interlocking figure-eight at the heart of the puzzle, often called the “knot” or “core.” The other four bands weave around this core. These bands are further divided: some are “inner” bands, sitting closest to your finger, and others are “outer” bands, forming the visible surface of the assembled ring. This hierarchy is the first key to demystifying the intricate design.
The central knot is the anchor. Everything else hangs, loops, and pivots around it. This is where we encounter the core mechanical principle: controlled entanglement. Unlike a solid band of sterling silver or 14k gold, a puzzle ring’s structure relies on precise clearances and opposing tensions. The bands are not soldered; their unity is a dynamic equilibrium. When correctly assembled, each band is held in place by the geometric pressure of its neighbors, creating a surprisingly rigid and seamless high-polish finish.
To grasp this concept of interlocking tension, it can help to look at a simpler cousin in the world of mechanical puzzles like the classic disentanglement puzzle. A toy like the Interlocking Double-Ring Lian Puzzle demonstrates the pure principle of disentanglement—two independent pieces that must be maneuvered apart along a specific path. A 6-band puzzle ring is that concept, inverted and multiplied. Instead of taking apart, you’re putting together. And instead of two pieces, you have six, with the added constraint that they must form a perfect, wearable circle.

This is why band count matters. A 4 band puzzle ring has a simpler weave with more obvious symmetry, a perfect starting point for understanding the basics. An 8 band puzzle ring introduces even more layers of interference and precision. The six-band sits in a sweet spot of complexity: challenging enough to feel like an accomplishment, but mechanically straightforward once you see the pattern. The difficulty isn’t in brute force; it’s in sequence. You must build the ring in stages, allowing specific bands to “hang” freely at precise moments to create the necessary gaps for the next band to slide through. This is the tactile feedback you’ll learn to recognize—the slight shift in weight, the alignment of a channel, the moment of slack that means you’re on the right path.
Understanding this anatomy transforms the task. You’re not wrestling a monster; you’re conducting a precise, mechanical ballet with six interlocking bands. You now know the goal: to reconstruct that state of balanced tension around the central knot. With the parts identified and the principle in mind, you’re ready to move from theory to fingers. The next step is the sequence that brings this machine back to life.
Your Reassembly Bible: A Bench Jeweler’s Step-by-Step Walkthrough
Now that you see the machine, it’s time to put your hands to work. The theory of interlocking bands is clean; the practice is a methodical dance. This isn’t about a secret trick. It’s about sequence and patience, learning to feel the tactile feedback of the metal as the channels align. Forget every frantic, cross-threaded attempt. We’re starting over, with a clean bench and a clear head.
First, your workspace. A soft, neutral-colored cloth on a table is ideal. It prevents bands from rolling away and provides contrast. Good lighting is non-negotiable. Wash and dry your hands—oils and lotions make the metal slippery. Now, lay out your six bands and identify the central knot piece. With a standard 6-band, you will typically have two distinct band types: four longer, identically shaped outer bands, and two shorter, often slightly different inner bands that form the core of the weave. Your goal is not to force, but to guide.
Here is the writer-tested sequence. I’ve reassembled dozens of these, from modern sterling silver models to antique 14k gold ones, and the principle remains constant.
Stage 1: The Foundation – Creating the “Hanging” Core
1. Pick up the knot. Hold it between the thumb and forefinger of your non-dominant hand, with the dome (the top that will face your knuckle) pointing up. This is your anchor. Everything builds from here.
2. Introduce the first inner band. Take one of the two shorter inner bands. Hook one of its ends into one of the knot’s four slots. Let the rest of the band dangle freely below the knot. Don’t try to loop it yet. Just attach and let it hang.
3. Attach the second inner band. Take the other short inner band and hook it into the slot directly opposite (180 degrees across) from the first. You should now have the knot held aloft, with two bands hanging down in a straight line, forming a loose “I” shape. This is your core axis.
The One Crucial Mistake Everyone Makes (And How to Avoid It)
Here is the critical juncture where panic sets in and errors cascade. The instinct is to immediately try to link the hanging bands together, creating a tight, small loop. Do not do this. If you connect them now, you will have created an impenetrable block with no room to weave the four remaining outer bands through. The correct move is counterintuitive: leave them hanging separately. The space between them is your future workspace.
Stage 2: The Weave – Building the Cage
4. Take your first outer band. With your dominant hand, pick up one of the four longer outer bands. Position it horizontally. You are going to thread it through the gap between your two hanging inner bands.
5. Weave it onto the knot. Slide one end of this outer band into an empty slot on the knot. Now, thread the other end of this same band between the two hanging inner bands, and then hook it into the slot opposite on the knot. You have now created a second axis, perpendicular to the first. The knot should now have four bands attached: the two hanging inner bands (up and down), and this first outer band (left and right). The inner bands should still be hanging freely through the loop of the outer band.
6. Repeat for the second outer band. Take another outer band and attach it to the two remaining empty slots on the knot. You are essentially repeating Step 5, creating another perpendicular axis. You will now have what looks like a loose, three-dimensional cross. The two inner bands should still be hanging straight down through the center of this cross. This is the “cage” stage. All bands are attached to the knot, but the structure is wildly loose. This is correct.
Stage 3: The Lock – Securing the Inner Bands
7. Lift and link the inners. Here comes the satisfying click. Carefully lift the two dangling inner bands up toward the knot dome. Their free ends are now near each other. Gently link these two ends together. You will feel them engage. Not tight. Just linked. The ring now has a loose, floppy integrity.
8. The Final Outer Bands – Patience Required. You have two outer bands left. Your partially assembled ring has gaps. Your job is to trace the path of the existing weave and thread these final two bands through it. This is where you must follow the pattern, not force a path. For each final band:
* Observe which channels in the existing weave are open.
* Slowly, deliberately, thread one end of the band through the correct sequence of loops—usually under one band, over another, as dictated by the established pattern.
* Connect this end to its mate, which you will thread through the complementary path. This is the most puzzle-like part. If it doesn’t slide, backtrack. You missed a loop.
Stage 4: The Final Tension – From Floppy to Firm
9. The Collective Pull. Once all bands are linked end-to-end, the ring will be assembled but loose. Hold the knot firmly. With your other hand, gently pull on the interconnected bands evenly around the circumference. You will see slack disappear and the weave will tighten symmetrically. Continue this gentle, even tensioning until the ring is firm and the knot is seated firmly at the apex. The high-polish finish of a new ring will now show its full, intricate design.
Writer-Tested Tips for Common Sticking Points:
* If a band binds: Stop pulling. Apply a tiny drop of lubricant—pure glycerin or even a dry bar of soap rubbed on the metal. Never force.
* Managing frustration: If you cross-thread, don’t yank it apart. Reverse your last step slowly. Setting it down for five minutes resets your mental image.
* Metal matters: A handcrafted sterling silver ring will have a different flex and feel than a heavier 14k gold or platinum one. Sterling is more forgiving for learning; solid gold requires a softer touch.
* The “Aha” moment is physical: You’ll know you’re threading correctly when bands slide with a slight, smooth resistance, not a hard stop. This is the tactile feedback you’re learning to trust.
This method works for the vast majority of classic 6-band designs, whether a men’s puzzle ring with a wider band or a more delicate ladies’ puzzle ring. The principle of building the hanging core, then the cage, then locking it, is universal. Practice it three times. The first time is for understanding. The second time confirms the sequence. The third time, you’ll do it without thinking, and the cold dread is replaced by the quiet confidence of having mastered the machine. For more foundational techniques, our guide on how to solve a puzzle ring without losing your mind offers a great mental framework.
The One Critical Mistake That Stops Everyone (and the Simple Fix)
That quiet confidence you just earned is real. But there’s a single, universal error waiting to undermine it on your next attempt, or trap a first-timer for hours. It’s not a lack of dexterity or a flawed ring. It’s a fundamental misunderstanding of the puzzle’s physics that causes every band to bind and lock up prematurely.
The mistake is this: trying to force all six bands into alignment at the same time.
I see it constantly. After the first few bands are threaded, the natural impulse is to pinch the whole tangle and try to squeeze it into a ring shape. You apply pressure, the bands cross and jam against each other, and you’re left with an immovable metal knot. Frustration spikes because you were so close, yet now it feels more broken than before you started. This is the precise moment most people give up, convinced the ring is defective or they lack the skill.
Here’s why it happens. A six-band puzzle isn’t a static sculpture; it’s a dynamic interlocking bands mechanism with a specific order of operations. When you try to align everything prematurely, you bypass the designed sequence. The bands, which need to slide past one another in a precise dance, are instead forced into direct, perpendicular conflict. In a handcrafted sterling silver ring, this might just lock up. In a harder 14k gold or platinum version, you risk microscopically deforming a band or creating a weak stress point. The metal’s intricate design is telling you to stop forcing.
The fix is counterintuitive but absolute: Let go.
Specifically, identify the central anchor knot—the heart of the puzzle you built in the previous section—and let the two (or sometimes four) key bands hang freely from it. Don’t pinch them. Don’t try to curve them into a circle. Your job at this stage isn’t to form the ring, but to let gravity and dangle create the necessary space and orientation for the final bands to be threaded. This is the core tactile feedback you must learn to trust. If you feel consistent, firm resistance, you have a threading error. If you feel a sudden, hard stop, you are forcing alignment.
This is why animated instructions or a YouTube solution can be so helpful for visual learners—they show this crucial “hang time” that static photos miss. The hanging bands are not a mess; they are the puzzle presenting you with the correct entry points. Your final moves involve gently gathering this hanging assembly after the last band is threaded, allowing the whole structure to collapse elegantly into its final, locked form. This principle holds true whether you’re wrestling with a substantial men’s puzzle ring or a more delicate ladies’ puzzle ring.
It’s a lesson in spatial humility, as much as mechanics. The ring solves itself if you follow its logic. Your job is to provide the sequence, not the force. Master this one concept—the strategic dangle—and you’ve defeated the primary obstacle between you and consistent, panic-free reassembly. This challenge of spatial reasoning is part of what makes why the metal puzzle ring remains the ultimate test of spatial humility such a compelling topic.
Before You Buy: Decoding Metals, Sizing Quirks, and ‘Retired’ Rings
With the reassembly process demystified, your confidence is building. Now, you can pivot from “Can I solve this?” to “Which one should I buy?” This is where many people stumble, lured by a pretty picture into a purchase they regret. As someone who’s repaired the aftermath, my advice is to think like a jeweler first, a puzzle-solver second. Three pillars hold up a smart purchase: the metal, the fit, and the design’s provenance.
First, the metal. This isn’t just about color; it’s about feel, weight, longevity, and—frankly—your daily reality. The most common options are sterling silver, gold-plated silver, and solid 14k gold.
Sterling silver is the workhorse. It has a satisfying, substantial weight, develops a soft patina over time, and is durable enough for daily wear. When a well-made sterling silver 6 band puzzle ring clicks together, it has a distinct, authoritative feel—a solid snick of interlocking bands settling into place. It’s also the most accessible entry point, with quality pieces starting around the price of a nice dinner out. The downside? It can tarnish, and those with skin acidity may find it leaves a slight green mark (a barrier coat from the jeweler can fix this).
Gold-plated silver is a compromise. You get the gold look for a sterling silver price, but the plating will wear at friction points—especially on a puzzle ring where bands constantly move against each other. Over time, the underlying silver will show through. If you want gold aesthetics for occasional wear, it’s fine. For a daily companion, expect it to age, not always gracefully.
Then there’s solid 14k gold. This is the realm of heirloom pieces. The weight is immediately noticeable—denser, warmer in the hand. The intricate design feels more robust, and the metal will wear, not flake. A solid gold puzzle ring is a statement of intent. It says you’re committed to the craft, to wearing this mechanical marvel as permanent jewelry. The price reflects that, vaulting into the thousands. There are also tri-gold variants (alternating bands of yellow, white, and rose gold) and even rarer platinum models for the ultimate in durability and prestige. The choice boils down to this: is this a fascinating trinket, or a lifelong artifact?

Second, the fit. A 6 band puzzle ring size guide is not a suggestion—it’s gospel. This is the most critical step, and the one I’ve seen cause the most post-purchase heartache. A standard ring has a continuous, flexible band. A puzzle ring is a rigid cage of metal. If it’s too tight, it won’t slide over your knuckle without painful force. If it’s too loose, the assembled puzzle will spin and feel insecure, increasing the chance it snags and comes apart.
You must get your finger professionally sized, preferably at the end of the day when fingers are slightly swollen. Be explicit: you are sizing for a rigid, non-adjustable puzzle ring. Most reputable sellers will have specific sizing advice. A common recommendation is to go up a quarter to a half size from your standard ring size to account for the interlocking bands’ bulk.
Here’s the jeweler’s hard truth: these rings are not easily adjustable. Resizing a standard ring involves cutting, stretching, or adding metal. With a puzzle ring, you’re dealing with six geometrically aligned components. Altering one band’s diameter throws the entire symphony of tension off. A master jeweler with puzzle ring experience might attempt it on a simple band design, but it’s risky, expensive, and can ruin the handcrafted balance. It’s far better to measure twice, buy once.
Finally, the listing’s language. You’ll see ‘Made to Order’ and ‘In Stock’ and ‘Retired.’ Made to Order means the jeweler fabricates the ring after you purchase it. This allows for customization (like specific sizes or gold types) but means a wait, often 2-3 weeks. In-Stock ships immediately but may have limited size or metal options.
Then there’s ‘Retired.’ This isn’t marketing fluff. When a designer stops producing a particular model, remaining stock becomes finite. This makes retired puzzle rings collectible. Their value isn’t just in the metal; it’s in the uniqueness of a design no longer being made. If you find a retired design that speaks to you, understand you’re buying a piece of puzzle ring history, often from a secondary marketplace or a jeweler’s remaining inventory. It’s worth it for the right enthusiast.

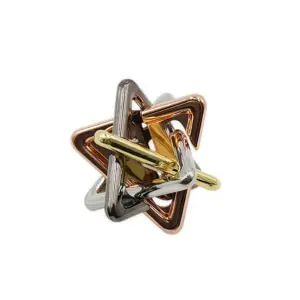
Metal Starfish Puzzle Ring — $13.99
Unique designs, like the Metal Starfish Puzzle Ring, often fall into this collectible category. They represent a specific creative vision within the intricate design world of puzzle jewelry and offer a different style of challenge, which you can explore in the I Ching puzzle toy: a metal starfish ring that teaches patience. Understanding these categories—metal, fit, and status—transforms you from a passive buyer into an informed collector. You’re not just acquiring a puzzle; you’re selecting a durable, well-fitted artifact, whether it’s a current made to order piece or a coveted retired design. This knowledge is your final layer of confidence before you click “add to cart.” The next step is learning to live with your choice, from daily care to handling the unthinkable: a broken band.
Living with Your Puzzle Ring: Care, Wear, and the Inevitable ‘What If’
That final click of purchase, armed with knowledge of metals and sizing, is just the beginning. Now you move from collector to curator. Owning a 6-band puzzle ring isn’t like owning a standard band; it’s a relationship with a tiny, intricate machine. It requires a different mindset, one that balances appreciation for its intricate design with practical wisdom for its upkeep. Let’s talk about what happens after the box arrives.
The Daily Wear: Durability Decoded
Are these rings durable enough for everyday wear? The short answer is yes, but with an asterisk. A well-made sterling silver or 14k gold puzzle ring is as robust as any other ring of the same metal. The interlocking bands are hand-soldered at the central knot, creating a surprisingly resilient unit. You can type, drive, and go about your day.
The asterisk is about impact, not abrasion. The greatest risk isn’t slow wear; it’s a sharp, direct blow that can torque a single band. Think catching it on a heavy gym weight or a car door frame. The tactile feedback you’ll learn is key here—if you feel the ring sustain a hard knock, take a moment to inspect it. Run your fingernail along each band near the knot, feeling for any catch or slight lift that might indicate a weakened solder joint. For most daily office or social wear, it’s perfectly suitable. For manual labor, sports, or gardening, the bench jeweler’s universal advice applies: take it off.
Care and Cleaning: Preserving the Patina and Polish
Cleaning a puzzle ring isn’t just about shine; it’s about maintaining the precise gaps between bands where grime can solidify. Avoid ultrasonic cleaners. The high-frequency vibrations can, in rare cases, stress solder points over time and will certainly force gunk deeper into the puzzle’s heart.
The right method is gentle and manual. Use a soft-bristled toothbrush (a child’s size is perfect) dedicated to the task, mild dish soap, and lukewarm water. Work the soapy bristles gently along the length of the bands, not just across the top. Rinse thoroughly under running water, ensuring no suds remain trapped inside the interlocking structure. Pat completely dry with a soft, lint-free cloth. For a high-polish finish, a final buff with a Sunshine Cloth will restore the luster without chemicals. This routine every few weeks keeps it looking handcrafted, not neglected.
When It Comes Apart Uninvited
It will happen eventually. A curious friend, an over-enthusiastic hand gesture, and suddenly you’re back to six separate bands. Don’t panic. This is not an emergency; it’s a feature. Refer back to your reassembly bible. The muscle memory will build. Keep a soft surface (a towel on a table) as your dedicated solving station to prevent scratches and lost bands. If you get stuck, walk away. The solution often clicks into place with fresh eyes. And if frustration peaks, remember the wealth of animated instructions and specific YouTube solution videos out there—your ring’s exact model has likely been solved on camera.
The Bench Jeweler’s Frank Advice on a Broken Band
This is the core of the ‘What If’. You’ve inspected it after a knock and found a band is bent, or worse, snapped cleanly. Can a jeweler fix a broken band without destroying the puzzle mechanism?
Yes, but it is one of the most delicate jobs in my old workshop. The challenge isn’t soldering the metal; it’s doing so without flooding the joint with solder, which would fuse the moving bands together, destroying the puzzle forever. A general jeweler might see a simple break. A specialist sees a miniature engine.
If you need broken band repair, you must find a jeweler who explicitly works on puzzle rings or antique mechanical jewelry. They will use micro-torches and specialized solder with a lower flow point. The ring will likely need to be partially or fully disassembled for the repair—ask if they are comfortable doing that and reassembling it. For a sterling silver ring, this is often economically viable. For a 14k gold or platinum piece, it’s essential. The cost may be a significant fraction of the ring’s value, but for an heirloom-quality piece, it’s the only way.
The Final Satisfaction
Living with your puzzle ring is where the initial anxiety fully transforms into quiet confidence. You’ll know its weight, its sound, the specific way light catches its woven channels. You’ll clean it with care, remove it for risky tasks, and reassemble it with decreasing glances at the instructions. It becomes less of a puzzle and more of a companion—a testament to clever design that you now understand intimately. This journey from cold dread to mastered mechanics is the real value, long after the purchase is complete. It’s the satisfaction of not just owning a conversation piece, but of truly knowing it.
A Bench Jeweler’s Frank Advice: Can a Broken Band Actually Be Fixed?
That quiet confidence of living with your mastered puzzle ring can evaporate in an instant with a single, sharp ping and the sight of a broken band. This is the moment all owners dread. The immediate, panicked question isn’t about symbolism or cost—it’s purely practical: “Is this ruined forever?”
Let’s be frank. The repair of a broken band on a 6 band puzzle ring is one of the most challenging tasks in my workshop. It is not impossible, but it is a world away from soldering a standard wedding band. The primary adversary is the ring’s engineered tension and precise geometry. Every band is a calculated spring. Adding a foreign material—solder—to mend a break changes the metal’s properties at that joint, disrupting the balance that allows all six interlocking bands to nest together perfectly. A clumsy repair will leave you with a ring that either won’t reassemble or feels perpetually loose and misaligned on your finger.
When It Can’t Be Saved
First, the hard truths. Some breaks are terminal.
* Fatigue Breaks at the Knot: If the band snaps right where it meets the central knot, there is often insufficient metal to create a strong joint. Any repair here would be structurally weak and visually obvious.
* Multiple Breaks or Severe Kinking: If more than one band is broken, or if the metal is badly bent and work-hardened from the incident, the cost and complexity of repair often exceed the value of a base-metal or plated ring.
* “Pot Metal” or Mystery Alloys: Many inexpensive rings are made from alloys that do not take solder well. A jeweler cannot create a strong bond, making a lasting repair infeasible.
When Repair Is Possible (and How to Proceed)
For a sterling silver or solid gold (14k gold, tri-gold, or platinum) ring of quality, repair is a viable, if specialized, path. Here is how to navigate it.
Find the Right Professional. Do not go to the first mall jeweler. You need a bench jeweler, preferably one with experience in antique or mechanical jewelry. Tell them explicitly it is a puzzle ring. Ask if they are comfortable with the full disassembly and reassembly required. A good jeweler will want the ring brought in disassembled to assess each band.
Understand the Process. A proper repair isn’t just a dab of solder. The jeweler will likely need to:
- Fully disassemble the ring.
- Carefully prepare the broken ends, often cutting them back slightly to create clean, fresh ends.
- Use a high-precision micro-torch and hard solder for strength.
- Re-file and re-contour the soldered joint to match the band’s original profile and thickness.
- Re-patinate or re-polish the area to blend it in.
- Crucially, reassemble the entire ring and test its fit and tension.
Weigh Cost vs. Replacement. For a sterling silver ring you bought for $150, a repair costing $80-$150 might be worth it for sentimental value. For a solid 14k gold ring worth over $1,800, repair is almost always the prudent choice. Get an estimate upfront. The complexity means this is not a $30 fix.
A Practical Alternative: The Manufacturer
Before seeking a local jeweler, contact the ring’s manufacturer or seller. Many reputable puzzle ring artisans, especially those selling made to order or retired design pieces, offer repair services. They have the exact specifications, materials, and jigs to either repair your ring or, in some cases, replace the single broken band. This is often your best chance for an invisible repair.
If all else fails, and the ring holds deep value, remember that its intricate design is a blueprint. A skilled goldsmith can use the old ring as a model to craft an entirely new one. It’s the most expensive option, but for an heirloom, it preserves the legacy.
The bottom line is this: a broken band is not an automatic death sentence for a quality puzzle ring, but it is a call for specialized help. Don’t panic. Don’t attempt a DIY fix with super glue. Seek out the right expertise, and you may well restore not just the metal, but the satisfaction that comes with it. This kind of repair is a deep dive into the craft, similar to the specialized knowledge needed for other intricate puzzles, like understanding the metal starfish puzzle ring: a hands-on guide.
Navigating the Marketplace: How to Spot Quality and Avoid Buyer’s Remorse
So you’ve considered the worst-case scenario of a broken band and know your options. The best defense, of course, is a good offense: buying a well-made ring from the start to minimize those risks. The marketplace for puzzle rings is a fascinating blend of genuine artisan craftsmanship and mass-produced novelty. Your goal isn’t just to find a ring, but to find the right puzzle—one that offers satisfying tactile feedback and lasting durability. Let’s translate the listing jargon.
First, understand the two primary seller archetypes. On one side, you have dedicated artisans and small workshops—think “puzzle ring emporium” operations run by individuals who live for the mechanics. On the other, large-scale jewelers and e-commerce sites that add puzzle rings to a catalog of thousands of items. There’s a place for both, but their priorities differ. The artisan sells an engineered experience; the catalog sells a product.
The language in a listing is your first clue. “Hand-forged” and “handcrafted” are meaningful, but probe deeper. Hand-forged implies the bands were shaped and formed with tools, allowing for tighter tolerances in the intricate design. “Hand-assembled” is more common; it means the pre-made bands were woven together by a person, which is still crucial for initial alignment. “High-polish finish” should be a given on any sterling silver or gold ring; look instead for mentions of tumbling or vibratory finishing. This means the ring was polished in a medium of small pellets after assembly, softening edges and work-hardening the metal slightly—a sign of care that improves comfort and durability.
Let’s decode metals in practical terms. A sterling silver puzzle ring offers the best balance of affordability, weight, and workability. It develops a patina, telling the story of your solves. 14k gold is heavier, more decadent, and resists tarnish, but its higher price is about material value as much as craftsmanship. Tri-gold (bands of yellow, white, and rose gold) is a visual feat but ensure the listing specifies it’s solid gold, not plating over a silver core. “Gold-plated” or “gold-filled” are budget entries. The plating will wear at the friction points where bands endlessly slide against each other, eventually revealing the base metal beneath. For a men’s puzzle ring meant for daily wear, solid metals are worth the investment.
Beware the photographic red flags. Stock photos on a pure white background tell you nothing. Seek out sellers who show the ring from multiple angles, especially a side profile. You should be able to see the clean weave of the interlocking bands. Blurry photos or listings with no close-ups are an easy pass. If the listing mentions “imported” or “alloy” without specifying which alloy (e.g., “925 sterling,” “316L stainless”), be skeptical.
Your most powerful tool is a question. Before you buy a 6 band puzzle ring, message the seller. Ask: “Are the bands soldered at the knot, or are they individual?” (Soldered is standard and stronger). “What is the band thickness?” (Thicker bands resist bending). “Can you provide the exact internal diameter in millimeters?” This separates the responsive expert from the drop-shipper.
Finally, manage your expectations around retired design pieces. They are often in-stock only while supplies last because the artisan has moved on to new designs. Snagging one can feel like acquiring a collectible, but don’t pay a massive premium solely for the “retired” status unless you truly love that specific pattern. For a current made to order piece, embrace the 2-3 week wait—it’s the time needed to weave your puzzle to life.
Buying a puzzle ring is the first move in solving it. Choose a partner—the seller—who understands that. Look for the evidence of thought, the clarity of information, and the willingness to engage. That’s how you find a ring that won’t just challenge your mind, but comfortably live on your hand for years. For those who enjoy the hunt, understanding the broader category of these objects is useful; they are a classic form of disentanglement puzzle, a genre with a rich history.
From Tangled Metal to Heirloom: Your Journey to Confident Ownership
That careful, informed purchase is your foundation. Now, it transforms. The journey that began with that cold dread of a tangle of sterling silver or 14k gold bands ends not with a solved puzzle, but with an understood one.
You’ve moved from anxiety to curiosity by learning its anatomy. From frustration to empowerment by mastering the reassemble sequence—the hanging bands, the specific twist, the satisfying click of interlocking bands finding their home. You’ve built confidence by knowing why a handcrafted, made to order ring is worth the wait, and how to care for it. This isn’t just ownership; it’s a dialogue between your hands and a precise mechanical object.
The true value of a 6-band puzzle ring isn’t locked in its metal type, be it tri-gold or classic silver. It lives in the muscle memory you develop, the tactile feedback you learn to trust. It becomes an intricate design you don’t just wear, but operate. This is what elevates it from a curious trinket to a potential heirloom—an object layered with personal history and hard-won understanding. It joins a proud tradition of objects that challenge the mind, much like other classic finds explored in our look at the I Ching puzzle toy from Indiana Jones to your pocket.
So when it inevitably comes apart again, there will be no panic. Just the quiet knowledge of the process. You’ll hold the knot, let the bands fall into their familiar arcs, and guide them back together. This is the satisfaction. Not a magic trick, but a learned skill. Not a mystery, but a known, mechanical friend.
Your next step is simple. Handle your ring. Solve it one more time, feeling each step not as a memorized sequence, but as a conversation with the craft that made it. That is where confident ownership lives.