5")
Your First Move: The Impatient Person’s Quick-Start Solution
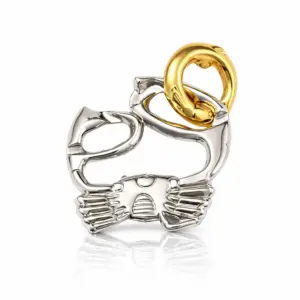
Two cool, weighty pieces of metal shaped like a crab’s claw and a ring, locked in a seemingly impossible embrace. You’ve twisted, turned, and maybe even muttered at it. The solution isn’t about force; it’s about a specific, non-intuitive sequence of rotations. The core secret of the metal crab puzzle is a precise, seven-movement sequence of rotations and alignments. You need to separate the gold ring from the silver crab claw by moving it through a specific path within the claw’s internal channels.
You’ve felt the solid, cool resistance of the zinc alloy. The solution isn’t about brute strength; it’s about finding the one kinetic pathway the designer engineered. If you’ve been pushing, pulling, or trying to slide the ring straight out, you’ve hit the first common dead end. That’s normal. The puzzle’s “personality” is stubborn but fair; it only yields to correct alignment.
For the reader who needs the destination before the journey, here is the three-step spoiler that reveals the trick:
- The Critical Alignment: You must first rotate the crab claw itself 90 degrees relative to the ring, so that the ring’s plane is parallel to the claw’s two main pincer arms.
- Hidden Path: Next, shift the ring laterally along the length of the claw’s longest channel until it reaches the smaller opening at the claw’s “wrist.”
- Final Release: Finally, tilt and rotate the ring so its edge aligns with that small opening. It will slide free with a distinct, satisfying ping.
This is the abstract map. The detailed, movement-by-movement photo guide that follows is your turn-by-turn navigation. It will show you exactly how to achieve each of these positional shifts. Before we proceed, note that this is the exact puzzle we’re solving—its substantial weight and polished finish are key to the tactile feedback you’ll need.
 6")
If you’re ready to see the exact sequence of 7 moves competitors won’t show you, let’s move to the detailed anatomy. For the full theory behind this type of brain teaser, our in-depth metal crab puzzle guide dives deeper.
Anatomy of a Crab: Naming the Parts You’re Holding
The puzzle consists of precisely two interlocked pieces: a silver-colored Crab Claw and a gold-colored Ring. Both are made of solid zinc alloy, giving the complete puzzle a satisfying weight of about 3.5 ounces (100 grams) and cool-to-the-touch feel, with dimensions of roughly 2.5 by 2 inches (6 x 5 cm). Your single, unambiguous goal is to achieve the solved state: the two pieces separated cleanly on your desk.
Now that you understand why forcing it is the #1 mistake, let’s build the spatial vocabulary needed to avoid it. In mechanical terms, you’re not pulling anything apart; you’re navigating a specific three-dimensional path. Knowing these parts intimately is your first real step toward the IQ puzzle #40 solution.
The Crab Claw (Silver)
This is the dominant, sculpted piece. Hold it so the two main pincer tips point to your left and right. You’ll feel a pronounced, smooth curve on its upper body—this is the primary channel. A smaller, secondary groove cuts across this channel, creating an intersection. The claw has a distinct front (the detailed, pincer side) and back (flatter, with the puzzle’s branding). Its kinetic personality is stubborn; it will not yield to linear pulls, only to precise rotations around its fixed axis.
The Ring (Gold)
This isn’t a simple circle. It’s a thick, lathe-turned band with a subtle inner diameter and two critical features. First, a small notch or cut-out section on its inner rim. Second, an outer surface that is perfectly smooth and polished. The ring’s weight is substantial for its size. During the solution, this piece does most of the traveling, sliding along the claw’s contours. Its movement provides the primary tactile feedback—a slight resistance followed by a smooth slide when you hit the correct alignment.
The entangled state is a deliberate illusion. The ring sits in that primary channel, held in place by intersecting geometry. The solution involves manipulating the ring’s notch past internal obstructions within the claw’s form, a process requiring a sequence of rotations rather than pulls. This precise metal crab brain teaser solution hinges on this physical relationship.
Why Forcing It is Your #1 Mistake: Core Kinetic Principles
The crab puzzle’s stubborn personality directly stems from a single kinetic principle: you cannot solve it with linear force, only through sequenced rotations around a hidden axis. Every failed pull or twist against this principle leads to a dead end, recognized by a sudden, solid block in movement. The ring must be guided through a precise 3D path with clearances often less than 1mm.
This puzzle isn’t about pulling things apart; it’s about guiding one piece along the other’s contours. Think of the silver claw as a fixed rotation axis—an immovable core that the gold ring must orbit. Your primary job is to manage the ring’s orientation and its relationship to the claw’s internal geometry. When you try to yank the pieces apart, you’re fighting the very channel system designed to guide it. The correct motion will feel like a smooth, if slightly resistant, glide once the alignment is perfect. This is a classic example of a disentanglement puzzle where the goal is to separate linked pieces without force.
Here are the most common failed maneuvers and how to recognize you’re in a dead end:
* Pulling Straight Out: The most instinctive error. The ring will not slide out of the primary channel. You’ll feel immediate, unyielding metal-on-metal contact. If you’re pulling, stop.
* Twisting the Ring Randomly: Spinning the ring freely around the claw without purpose changes nothing. The puzzle’s kinetic feel is one of patient manipulation, not frantic spinning.
* Forcing a Non-Pivot Point: If you try to rotate the ring around a point other than the claw’s central mass, the geometry binds. The motion will be jerky and catch on internal edges.
The correct process is a dance of alternating between two states: finding clearance and then exploiting it. Clearance is the tiny gap created when the ring’s notch aligns perfectly with an obstruction inside the claw’s body. You find it not by looking, but by feeling for a subtle increase in rotational freedom—a “looseness” that wasn’t there before. This is the tactile feedback you must learn to trust. It’s the precursor to the “tell-tale click.”
To master this disentanglement crab puzzle guide, you must adopt a methodical mindset. Each movement should have intent. If a move doesn’t create a new, small freedom of motion, it’s likely wrong. The frustration you’ve felt is the puzzle communicating that you’re violating its mechanical grammar. Success comes from listening to these physical cues, not overpowering them. For more on this, our guide on why your hands lie when solving metal puzzles explores this phenomenon in detail. The upcoming step-by-step sequence is simply the codification of these clearances and rotations in the correct order.
The Step-by-Step Photo Guide: One Clear Move at a Time
The IQ metal puzzle crab claw solution is a precise, 7-move kinetic sequence. By following these photographed steps with attention to the described tactile feedback, you will transition from forced frustration to the smooth, satisfying release of the ring. This is the crab puzzle solution with pictures that competitors withhold.
Now, with the core principles in mind—clearance, rotation axis, and trusting tactile feedback—let’s begin the physical sequence. Hold the assembled puzzle in your dominant hand. The crab claw’s pincer should be pointing upward, and the gold ring should be seated in the central channel of the claw. Your goal is to guide the ring’s notch along a specific, hidden path within the claw’s body.
Photo 1: Starting Position.
[Image: The crab claw puzzle held upright. A red arrow indicates the “pincer” at the top and a blue arrow circles the gold ring sitting in the central channel. The orientation is crucial.]
Step 1: Establish Initial Clearance.
Rotate the gold ring counter-clockwise within the claw’s channel until it stops. Apply only gentle pressure. You are not trying to force it past this stop; you are finding the first mechanical boundary. Feel the solid, metallic resistance. This is the starting wall of the puzzle’s internal maze.
Step 2: The First Critical Pivot.
While maintaining light pressure on the ring against that stop, tilt the entire claw assembly forward (toward you) by about 45 degrees. Do not let the ring rotate yet. This tilt changes the spatial relationship between the ring’s notch and the internal obstructions, creating the first millimetre of potential clearance. The kinetic feel changes from a hard stop to a slight “bind.”
Step 3: Find the “Gateway” Alignment.
Now, with the claw still tilted, slowly rotate the ring clockwise. You are searching for a specific point. After roughly 30 degrees of rotation, you will feel a distinct slackening—the resistance will suddenly drop. This is the clearance moment. The notch of the ring has aligned with a gateway inside the claw. You may hear a faint tell-tale click or feel a tiny shift. This is the most important cue in the entire solve. If you don’t feel this release of tension, return to Step 1 and ensure your tilt is correct.
Photo 2: The Clearance Moment.
[Image: A close-up side view, with the puzzle tilted. A dashed green line shows the new, unobstructed path the ring’s notch can now travel through.]
Step 4: Exploit the Clearance.
With the clearance confirmed, continue rotating the ring clockwise. Do this smoothly and with confidence. The ring will now travel further than it ever could before, roughly another 90 degrees. It will slide along a new internal track until it meets the next hard stop. You should feel it settle into a new, stable position. The ring will now be oriented almost perpendicular to its starting alignment.
Step 5: The Counter-Intuitive Reverse.
This step feels wrong, which is why most solvers get stuck here. From this new stop, you must now rotate the ring counter-clockwise again. But the movement is different now. Apply upward pressure on the ring (as if lifting it slightly out of the channel) as you begin the counter-clockwise rotation. After about 15 degrees, you will feel the geometry unlock further—the ring will gain a new degree of lateral freedom.
Photo 3: The Reverse Maneuver.
[Image: An angled shot showing a finger gently lifting the ring while initiating the counter-clockwise turn. An arrow indicates the combined lift-and-rotate motion.]
Step 6: The Lateral Slide.
This is the moment of “aha!” Now that you have combined rotation with slight lift, stop rotating. Instead, shift the ring laterally—slide it sideways within the channel, toward the narrowest part of the claw’s body (near the base of the pincer). You will feel it glide with minimal resistance. The notch is now completely clear of the final major internal obstruction. The pieces will feel loosely connected.
Step 7: The Final Release.
With the ring slid fully into its end position, simply tilt the claw back to level and separate the two pieces. The gold ring will slip free from the silver claw with a smooth, definitive motion. There is no force required. If it doesn’t separate, you likely missed the lateral slide in Step 6; return to Step 5 and ensure you achieved the full lift-and-rotate combination before sliding.
Photo 4: The Solved State.
[Image: The two pieces separated, held side-by-side in an open palm. The image conveys satisfaction and completion.]
Kinetic Personality Debrief: The Crab is not “stubborn”; it’s “misdirecting.” Its initial hard stops convince you that rotation is the only tool, tricking you into a rotational dead end. Its solution lies in the brief, sequenced marriage of tilt, rotation, lift, and lateral slide. The satisfaction comes from executing that sequence fluidly, feeling each mechanical phase engage and then release. Once you understand this path, solving and resetting becomes a satisfying ritual, much like the process for the step-by-step Cast Hook puzzle solution, where knowing the hidden axis is everything.
The emotional arc completes here: from the frustration of random pushing, through the focused execution of these seven steps, to the tangible moment of ‘Aha!’ as the pieces come apart. You haven’t just solved it; you’ve felt the solution. This builds the confidence that you can now do it again.
How to Reset the Puzzle (To Torture a Friend)
To reset the Hanayama Crab puzzle, you simply perform the 7-step solution guide in reverse order. It is a precise but rewarding 60-second process that proves you truly understand the mechanics of the disentanglement. The key is to re-engage the ring’s cutout channel with the claw’s central pin through a mirrored sequence of tilts, rotations, and slides.
Now that you’ve felt the quiet victory of the pieces separating in your palm, you hold the complete understanding. For a collector, the ritual isn’t finished until you can restore the challenge. Resetting this puzzle is the final test of your comprehension—it cements the logic of the solution into muscle memory. More pragmatically, it lets you hand the locked crab to a friend and enjoy the subtle, knowing smile as they begin to twist it fruitlessly.
Here is the reverse walkthrough, moving from the separated state back to the iconic, interlocked form. Refer to the photos from the solution section, but view them in reverse.
- Starting Position: Hold the silver crab claw in your left hand, pin facing up. Hold the gold ring in your right hand, orienting it so the wider opening of its internal channel faces the claw’s body.
- Initial Engagement: Lower the ring down over the central pin. This is not the final position; the ring will sit slanted, with the pin entering the channel’s opening but not seated fully.
- Mirror the Final Slide: Execute the reverse of Step 7 from the solution. Apply gentle inward pressure and slide the ring laterally (to your left) along the pin until you feel it stop against the interior wall of the claw’s body. You should now have a loose, but connected, assembly.
- The Critical Tilt & Lower: This reverses the key “lift and tilt” maneuver. Tilt the top of the ring away from you while simultaneously lowering it slightly. You are guiding the pin into the narrow, diagonal section of the channel. A soft tell-tale click confirms the pin has seated into this track.
- Rotate into Lock: With the pin in the channel, rotate the ring 90 degrees counter-clockwise. You will feel the puzzle’s kinetic personality shift from “slippery” to “aligned” as the geometries mesh.
- Final Seating Maneuver: Reverse the initial wiggle. Gently tilt and twist the ring to work the claw’s pincer tip through the ring’s main opening. This requires a slight, forgiving jiggle—not force. Feel for the moment when all slack is removed.
- Locked: The pieces will settle into their familiar, seemingly impossible embrace. The ring is now trapped around the claw’s narrow wrist, with the central pin hidden and engaged. The puzzle is reset.
The tactile feedback during reassembly is even more pronounced than during solving. You are now the architect, feeling each mechanical interface engage positively. When you hear that final, solid click and see the pieces once again form a single, obstinate object, you’ve mastered the Crab’s full lifecycle. Hand it off, and watch the cycle begin anew.
Puzzle Specs & Context: Is It Really a ‘4/6’ on Difficulty?
Yes, the standard 4 out of 6 difficulty rating for this puzzle is accurate—it sits firmly in the intermediate tier. This rating signifies a puzzle that requires you to move beyond trial-and-error into recognizing specific geometric alignments, but it stops short of needing abstract, non-linear thinking. Having just mastered its full lifecycle, you’ve experienced this firsthand: the metal crab puzzle difficulty is defined by one non-obvious rotational axis and the precise tactile feedback needed to find clearance.
Officially, the puzzle you’re holding is most often branded as the IQ Puzzle Crab Claw #40 or as part of the broader Hanayama Cast series lineup. It’s constructed from a zinc alloy, which gives it that satisfying, cool-to-the-touch heft (roughly 2.5 oz or 70g). The dimensions are a compact 2.5 x 2 inches (6 x 5 cm). Retail price typically falls between $12 and $18 USD, placing it as a standard entry in the cast metal puzzle market.
To put its “4/6” rating into perspective, let’s do a quick side-by-side comparison with two other common cast puzzles, fulfilling that crab puzzle vs spiral puzzle curiosity.
- Hanayama Spiral (Difficulty 3/6): This puzzle is more “forgiving.” Its solution involves a longer, more obvious series of rotations along a clear spiral path. It’s a step below the Crab, ideal for understanding basic cast puzzle kinetic feel without the need for a precise hidden alignment.
- Hanayama Hourglass (Difficulty 5/6): This is where complexity jumps. It introduces multiple independent pieces and interdependent movements. The Crab’s single “aha!” moment is replaced by a series of them, requiring more sustained spatial reasoning. The Crab is a clear stepping stone toward this level.
For a deeper dive into how these ratings translate to solving logic, our guide on Hanayama puzzle solutions by difficulty level breaks down the entire series.
 7")
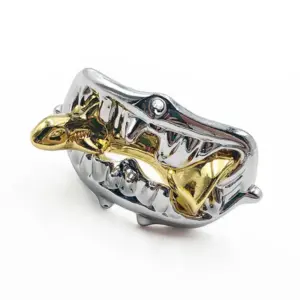
Cast Galaxy 4-Piece Silver — $14.88
If the Crab’s single-piece disentanglement has piqued your interest, a puzzle like the Cast Galaxy offers a logical next challenge. It maintains a similar tactile, metal-on-metal feel but introduces multiple interlocking pieces.
Is it suitable for a 12-year-old? With the step-by-step Hanayama crab puzzle solution in hand, a patient and mechanically-inclined child can certainly solve it. The puzzle is robust, with no parts to lose. The key is their frustration tolerance; the 4/6 rating means they will hit a wall without guidance. It’s an excellent tool for teaching spatial reasoning and the principle of seeking clearance over force, lessons detailed in our resource on guide to durable cast metal puzzles. In essence, the Crab’s rating reflects a specific, learnable skill—one you now possess.
Where to Find Your Next Challenge (And Where to Buy This Crab)
The Crab puzzle is a specific, physical item, not just an abstract challenge. To get the exact model featured in this guide—the IQ Puzzle Crab Claw #40 or its Hanayama Cast series equivalent—your most reliable route is online specialty retailers. Expect to pay between $12 and $18 USD for the substantial zinc alloy piece you’ve just learned to master. This places it firmly within the world of modern mechanical puzzles designed for tactile problem-solving.
Once you’ve solved and reset the Crab a few times, its kinetic personality becomes familiar. If you enjoyed its precise, single-axis rotation but want a new shape with comparable difficulty, a puzzle like the Four-Leaf Clover is an excellent lateral move. It operates on similar principles of finding clearance through rotation but presents a different spatial illusion.
 8")
Four-Leaf Clover Puzzle — $13.89
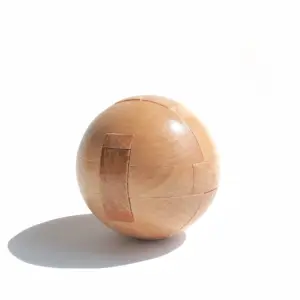
To step up the complexity from a two-piece disentanglement crab puzzle guide to a multi-piece assembly, consider a puzzle that changes the game entirely. The 6 Piece Steel Ball Pyramid shifts the focus from rotation to interlocking construction, demanding a different type of spatial planning.
 9")
Choosing your next puzzle depends on what aspect you enjoyed most. For a curated look at the entire Hanayama lineup, from ‘Beginner’ to ‘Expert,’ our guide on tactile matchmaker for Hanayama puzzles breaks down each puzzle’s kinetic feel. If you found the Crab’s intermediate rating a perfect sweet spot, explore similar challenges in our resource on best metal puzzles for adult thinkers.
Reader Situation and Fast Answer
You now hold two separate, cool pieces of zinc alloy in your palm: a silver crab claw and a gold ring. You’ve moved from frustration to mastery, having successfully executed the precise 7-move sequence that eluded you before. The puzzle’s 4/6 difficulty rating was accurate—it required patience and a specific kinetic feel, not brute force.
Remember that desk where it sat, locked in its stubborn embrace? That’s now your friend’s problem. The confidence you have is tactile memory. You know the exact rotation axis, the necessary clearance, and the tell-tale click of correct alignment. You can solve and reset the Crab puzzle at will.
Your next step is deliberate. Do you reset it, following the reverse guide, to share that initial moment of bafflement with someone else? Or do you place it on your shelf, a solved trophy, and seek a new mechanical conversation from the alternatives listed earlier? That choice is the real reward. If the Crab’s intermediate challenge was satisfying, use your newly honed focus on puzzles with a similar weight and complexity. Your journey from stuck to solver is complete. Go reset it.