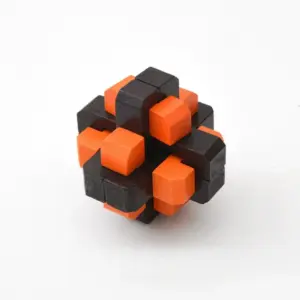
Building a puzzle box isn’t just a craft project; it’s a commitment to a different kind of problem-solving. You’re not just assembling a box—you’re engineering a secret. Before you touch a single piece, understand this: the goal is to create an object that delights and frustrates in equal measure. The satisfaction comes from knowing you’ve built a mystery that someone else must unravel.
Forget the idea of a simple, straightforward build. As noted in the Wikipedia entry on puzzle boxes, these are “boxes that can only be opened through a series of often-complicated moves.” Your job is to internalize that principle from the start. You’re working in reverse: first, you must understand the solution, then you must build the problem around it. This requires a blend of spatial reasoning, patience, and a touch of theatricality. It’s why many enthusiasts start with a kit, which provides the precision-cut pieces and mechanical blueprint, letting you focus on the assembly and the “aha!” moment of the finished mechanism.
This mindset shift is crucial. You’re not failing when a piece doesn’t fit; you’re debugging a logic gate. The most common mistake first-timers make is rushing to glue or force parts together. True puzzle box construction is about friction, alignment, and sequenced movement. If you approach it with the patience of a watchmaker, you’ll end up with more than a box—you’ll have a functional conversation piece. For a deeper look at the foundational concepts, our guide on understanding trick box mechanisms is an excellent next read.
Before You Cut a Single Piece: Tools, Materials, and Workspace Setup
The difference between a frustrating mess and a satisfying build often comes down to preparation. Before you touch a piece of wood, get your environment and tools in order. This isn’t just about having stuff; it’s about creating a controlled space where precision is possible.
The Non-Negotiable Workspace: You need a clean, flat, and well-lit table. A cluttered desk is the enemy of tiny, intricate parts. Good lighting is critical—a desk lamp you can angle will help you spot subtle grain directions and laser-cut numbers. Cover the surface with a cutting mat or a large piece of cardboard. This gives you a slightly forgiving surface for pressing pieces together and protects your table from accidental glue drops or scratches.
Essential Tools (The Short List):
* Tweezers: A fine-point pair is indispensable for placing small gears and manipulating tiny wooden tabs. Don’t skip this.
* Sandpaper or a Nail File: Even laser-cut kits can have microscopic burrs. A quick, light pass on any piece that feels resistant can make assembly smooth. Have both fine-grit (220+) and a small emery board on hand.
* Wood Glue (PVA) & a Toothpick: While many modern kits are designed for glue-free, friction-fit assembly, having a small bottle of wood glue and a toothpick for precise application is wise for reinforcing critical joints or fixing a rare manufacturing flaw. Do not use super glue (cyanoacrylate) on wood puzzles—it bonds instantly, leaves residue, and can warp or stain the material.
* A Soft Mallet or a Wooden Block: For gently tapping larger interlocking sections together without damaging the edges. The heel of your hand works in a pinch, but a soft tool is better.
What You Don’t Need (Yet): Power tools, clamps, or a full woodshop. If you’re starting with a pre-cut kit, the heavy fabrication is done. Your job is precision assembly. The allure of designing from scratch is strong, but it requires a different toolkit entirely. For your first project, a kit provides the materials and the guarantee that the pieces can fit together. It removes variables, letting you learn the language of mechanisms.
For instance, the 3D Wooden Carousel Music Box ($43.99) kit includes all 281 laser-cut wooden pieces, the music movement, and mirrors. Your tool focus shifts entirely to careful fitting and sequencing, not measurement and cutting. This is the smart way to build foundational skills. If you find yourself struggling with the “why” behind a mechanism during assembly, our resource on solving complex wooden puzzles can help decode the logic.

Finally, allocate time. Don’t start an hour before bed. These projects demand focus. Clear 2-4 hours of uninterrupted time. Having everything within arm’s reach—tools, instructions, a cup of tea—means you stay in the flow state, which is where the real joy of building lives.
Core Mechanism 1: The Sliding Panel Secret
Now, with your workspace prepped and a kit selected, we turn to the fundamental logic that makes a puzzle box a puzzle. The sliding panel is the most common and elegant starting point. It’s deceptively simple: a panel that moves, but only when other panels are in a precise, often hidden, sequence. Your goal isn’t just to make something that slides; it’s to create a conditional slide—a move that is only possible when the puzzle is in a specific state.
Think of it as a wooden logic gate. In a basic 3-step Japanese puzzle box, you might have three side panels. Panel A can only slide if Panel B is in position X. Panel B can only move if Panel C is recessed. And Panel C won’t budge unless Panel A is fully closed. This interdependency creates the “solution path.” When building from a kit like the Carousel Music Box, you’re assembling a pre-designed version of this principle. The gears and rotating platform are the grand finale, but the structure that holds them often relies on precisely aligned layers and joints that must be assembled in order—a built-in lesson in sequential logic.
The critical insight for a builder is tolerance. This is where most first attempts fail. If the sliding channel is too tight, the panel binds. Too loose, and it slides freely, ruining the puzzle. In kit building, this is engineered for you. The laser-cut pieces are designed to have just enough “breathing room.” When you’re dry-fitting pieces (assembling without glue), you should feel a slight resistance, a whisper of friction. That’s correct. If you have to force it, stop. Sand the mating edges lightly with fine-grit sandpaper. I keep a small piece of 220-grit next to me and make two or three gentle passes, then test again. The goal is a smooth, controlled slide.
You can see a brilliant application of layered, sequential assembly in the 3D Wooden Puzzle Treasure Box ($29.99). Its 150-200 pieces build up a structure where the final act of opening the lid is dependent on the correct alignment of internal gears and panels you built hours earlier. It teaches you to think several steps ahead during assembly—a core skill for later design.

A common mistake is to fixate on the first move. In a well-designed box, the first move is often invisible; it’s a slight press on a panel that seems solid, or a tiny rotation of an entire side. As you assemble your kit, pay attention to pieces that have unusual notches or protrusions. These are your clues. They aren’t for decoration; they are physical “if-then” statements. That small half-moon cutout on piece #47 might be the clearance needed for piece #112 to rotate five steps later. This is the “secret” you’re building in: a chain of cause and effect made from wood. For a deeper look at the tricks hidden in wooden construction, our guide on opening trick boxes without damage explores these concepts from a solver’s perspective, which directly informs your building mindset.
Master this concept of conditional movement, and you’ve grasped the soul of the classic puzzle box. It transforms your view from “I’m putting together a model” to “I’m engineering a secret.”
Core Mechanism 2: The Hidden Magnetic Lock
If the sliding panel is the magician’s misdirection, the hidden magnetic lock is the trapdoor—a silent, invisible force that controls access. This mechanism is a favorite among modern builders because it feels like pure magic to the solver; there are no visible seams or buttons, just a solid box that suddenly releases. For you, the builder, it’s a lesson in precision, polarity, and the power of concealed forces.
The principle is simple: a small, powerful neodymium magnet is embedded within a moving piece (like a lid or a drawer), and a corresponding steel pin or a second magnet is hidden in the frame. When aligned, the magnetic attraction or repulsion either locks the piece firmly in place or releases it. The genius lies in the execution. The magnet must be strong enough to provide a definitive “click” into the locked position, yet weak enough that the intended solving action—a specific slide, a twist, or the placement of a key piece—can overcome it. During your build, you’ll often be working with tiny, cylindrical magnets (2mm or 3mm in diameter). Handle them with care; they are brittle and can shatter if they snap together violently. A pro tip: use a toothpick or a dedicated non-magnetic tool to position them in their laser-cut pockets. A dot of wood glue secures them, but ensure no glue seeps onto the face, as it can inhibit movement and feel gritty to the solver.
The real design challenge is creating the trigger. The magnet itself isn’t the puzzle; it’s the lock. The puzzle is the hidden key that manipulates it. In one common design, sliding a specific external panel brings a steel shim into alignment with the internal magnet, canceling its hold and allowing the lid to open. In another, you might build a rotating gear inside that, when turned to the correct position via an external dial, moves a steel pin away from the magnet, breaking the bond. As you assemble, you must think in reverse: first, understand where the final “open” state is, then trace the magnetic force back to its source, and finally, build the sequence of moves that gets the solver there. This reverse-engineering mindset is what separates a functional box from an elegant one.
I learned this the hard way on an early build. I’d glued my magnets in with perfect polarity, but the release action required sliding a panel upward. The friction from the wood grain was greater than the magnetic hold, so the box felt stuck and cheap, not cleverly locked. The fix was to sand the sliding channel to a glass-smooth finish, reducing friction so the magnetic “break” was the dominant force. This is a critical checkpoint: after installing any magnetic lock, test the release action repeatedly during assembly. It should feel like a crisp, clean break, not a grinding struggle. If it grinds, your tolerances are too tight or your surfaces need finishing.
For your first foray into magnetic mechanisms, I recommend studying a kit that uses them elegantly but accessibly.
While not a wooden box, the Alloy Triangle Lock Puzzle ($11.88) is a masterclass in magnetic interaction on a small scale. Solving it involves feeling for subtle magnetic repulsions and attractions to navigate its pieces. Building a wooden box with a magnetic lock applies the same tactile sensitivity, but in reverse—you are placing the sources of those forces. Working with this metal puzzle first tunes your hands and mind to the subtle language of magnetic fields, making you a more intuitive designer when you embed them in wood. For a broader look at different locking traditions that can inspire your designs, explore our resource on traditional puzzle lock mechanisms.

Alloy Triangle Lock Puzzle — $11.88
Mastering the hidden magnetic lock opens a new tier of design possibilities. It allows for “impossible” openings and solutions that feel deeply satisfying because they bypass brute force entirely. The solver must listen with their fingers, not their eyes.
Core Mechanism 3: The Sequential Dial Combination
If the sliding panel is a whisper and the magnetic lock is a secret handshake, the sequential dial combination is a full conversation. This mechanism transforms your puzzle box into a miniature, tactile safe, requiring the solver to input a specific series of rotations or movements to release the lock. It’s the heart of classic Japanese puzzle boxes and offers immense satisfaction because the solution is repeatable and feels earned. The core principle isn’t about brute strength or hidden seams; it’s about ordered memory and precise alignment.
The most common implementation uses a series of internal wooden pins or blocks that are attached to sliding panels or rotating dials on the exterior. Only when all dials or panels are moved into their exact, pre-determined positions do the internal pins align, creating a clear path for a final panel to slide free or for the lid to lift. The genius—and the challenge for the builder—is ensuring the sequence is neither too obvious nor impossibly obscure. You’re designing a rhythmic dance for the solver’s hands.
Let’s break down the key components you’ll be engineering:
* The Dials or Sliders: These are the user interfaces. They can be rotating discs with markings, numbered slats, or even unmarked panels that move in specific directions (up/down, left/right). Their movement must be smooth but with enough resistance to feel deliberate.
* The Gate Array: This is the hidden brain of the puzzle. It’s a series of fixed internal walls with notches or gates. The pins attached to the dials must all line up with these gates simultaneously.
* The Locking Bar or Panel: This is the final barrier. Once the pins are aligned in the gate array, this piece—often spring-loaded or held by gravity—is free to move, unlocking the box.
The builder’s trap here is tolerance. If your dials wobble or your internal pins are even half a millimeter too thick, the alignment will never happen. The solver will rotate and slide endlessly, convinced they have the right sequence when the mechanism is simply too sloppy to engage. I learned this the hard way on an early build; the sequence was correct, but my handmade dowel pins were inconsistently sanded. The fix wasn’t more force, but returning to the lathe for perfect cylinders.
For your first attempt at this mechanism, I strongly advise working from a known-good kit. It teaches you the spatial relationship between the external control and the internal gate without the agony of debugging your own flawed measurements.

Antique Lock Puzzle — $11.99
While not a box, the Antique Lock Puzzle ($11.99) is a pristine, self-contained lesson in sequential alignment. Its “hidden keyhole mechanism” and “sophisticated internal gearing” described in its listing are exactly what you’re building. Solving it requires rotating multiple internal disks to specific positions so their notches align, allowing the shackle to release. Building a wooden dial combination box is the inverse process: you are creating those notched disks and the path they must align to. Handling this metal puzzle imprints the feel of precise rotational alignment into your muscle memory. It’s a low-cost, high-value training tool before you commit to wood.
When designing your own sequence, start simple—a 3-move sequence (e.g., Left, Right, Left) is a monumental achievement for a first-time builder and a fair challenge for a solver. Document your sequence meticulously as you build; it’s embarrassingly easy to forget your own solution. For more inspiration on complex sequences and traditional designs, our guide on the history and mechanics of trick boxes delves into centuries of innovation. The true art of the sequential combination lies in crafting a journey that feels logical in hindsight but wonderfully mysterious on the first attempt.
Assembly Walkthrough: From Flat Pack to Functional Box
With your mechanisms designed and your materials prepped, it’s time for the moment of truth: assembly. This is where your flat pieces of wood transform into a three-dimensional secret. The process is less about brute force and more about a patient, methodical dance of dry-fitting, adjusting, and finalizing. Rushing here is the single greatest cause of failure for first-time builders. I learned this the hard way when I glued a panel in place only to realize it blocked a critical sliding path, forcing me to chisel it out and start over. Let’s avoid that.
Phase 1: The Dry-Fit Marathon
Do not touch the glue bottle yet. Your first task is to assemble the entire box using only masking tape or gentle hand pressure. Start with the core compartment—the innermost box that will actually hold your treasure. Assemble its five sides (minus the lid) to ensure the joints are square and the interior space is clear. Next, build the first layer of the puzzle shell around it. This is where you’ll integrate your first mechanism, likely the sliding panel. Insert the panel into its channel and test its movement. It should slide smoothly with minimal side-to-side wobble. If it binds, now is the time to sand. Use 220-grit sandpaper on the sliding edges only; removing more than a few strokes of dust can make the panel too loose. A useful trick is to rub a plain candle (unscented) on the sliding surfaces; the wax acts as a perfect dry lubricant for testing without committing to glue.
As you add the second and third layers of the shell, constantly test every mechanism. After adding a layer, can you still access the magnetic lock’s release point? Does the dial turn freely, or is it now pinched by an outer wall? This iterative testing is crucial. I mark any piece that requires sanding with a tiny pencil dot on its face, so I don’t lose track. If you’re incorporating a sequential dial, ensure the alignment pin on the dial can pass through the notches in the internal disks at the correct positions. This stage might feel tedious, but it’s where you transition from designer to craftsman.
Phase 2: Strategic Gluing and Clamping
You will not glue the entire box at once. Glue is a permanent commitment, and puzzle mechanisms require precise alignment that clamping pressure can distort. Follow this order:
1. Permanent Internal Structure: Glue and clamp the innermost compartment box. Let it cure fully.
2. Fixed External Walls: Identify which walls of the puzzle shell are not part of any moving mechanism. Glue these to the internal core, creating a stable foundation. Use a square to ensure perfect 90-degree angles.
3. Mechanism Integration: This is the delicate part. For a sliding panel, do not glue the panel itself. Instead, glue the tracks or channels that guide it into place on the fixed structure. Apply glue sparingly with a toothpick to avoid squeeze-out that could glue your panel shut. For magnetic locks, glue the magnet and its steel strike plate into their recesses. Let these sub-assemblies cure.
4. Final Shell Layers: Only after all internal mechanisms are securely mounted and moving freely should you glue the final decorative outer layers. These layers often provide the final concealment for your mechanism’s access points.
Clamping strategy is key. Use cauls—scrap pieces of wood—between your clamps and the project to distribute pressure evenly and prevent denting the soft puzzle wood. Tighten clamps just until you see a thin, even bead of glue squeeze out; cranking them down further can warp thin pieces and ruin your tolerances.
Phase 3: The Final Test and Finishing
Once all glue has cured for at least 24 hours, remove all clamps and tape. Now, perform the complete solve sequence. Does the box open? If a mechanism fails, don’t panic. Often, a bit of cured glue has seeped into a channel. A sharp craft knife or a needle file can carefully clear the obstruction. If the sliding panel is still too tight, use your candle wax lubricant on its edges again.

For a beautiful and relevant finishing touch, consider the principles used in the Layered Butterfly Wooden Music Box ($28.99). Its assembly requires aligning a series of layered plates to create a smooth, continuous motion—a skill directly applicable to ensuring your puzzle box’s layers move in harmony. Once mechanically sound, you can finish your box. A light sanding with 320-grit paper, followed by a wipe with a tack cloth, prepares the surface. I prefer a simple paste wax or a light coat of Danish oil for a natural feel that doesn’t gum up moving parts. Avoid thick polyurethane; it can seep into cracks and glue your puzzle shut permanently. Your first puzzle box is now complete—a functional secret born from your own patience and precision.
The Finishing Touches: Sanding, Staining, and Secret Markings
With the core mechanisms tested, you’ve built a functioning secret. Now, you transform it from a workshop prototype into a personal heirloom. This stage is about feel, finish, and embedding your own story into the wood. Rushing here can undo hours of careful assembly, so patience remains your most important tool.
Start with a meticulous sanding progression. Use 150-grit paper to knock down any dried glue beads and smooth sharp corners, but avoid rounding edges so much that the puzzle’s precise fits become sloppy. Move to 220-grit, sanding with the wood grain to prevent scratches. Your final pass should be with 320-grit or higher; the goal is a silken texture that invites touch. After each sanding, use a tack cloth or a vacuum with a brush attachment to remove all dust. Any grit left behind will get trapped in your finish, creating a permanently rough surface.
Now, decide on your finish. For a puzzle box, the rule is: the finish must not inhibit movement. I strongly recommend a hard paste wax (like beeswax or carnauba) or a pure tung oil. Apply a thin coat with a lint-free cloth, let it penetrate for 15 minutes, then buff vigorously. This protects the wood and provides a slight lubricity to moving parts. Avoid polyurethane, varnish, or thick lacquer. These can seep into microscopic gaps in your mechanisms and glue your puzzle shut, a heartbreaking outcome after all your work. If you desire color, use a gel stain before waxing, as it sits on the surface and is less likely to warp thin pieces than liquid stain.
This is also the stage for secret markings—the personal signature that makes this box uniquely yours. Consider a discreet symbol carved or wood-burned on the underside of the lid or inside a hidden compartment. You could also use the principles of sequential discovery found in trick boxes; for inspiration on creating a multi-step reveal, our guide on opening a trick wooden puzzle box without breaking it explores the mindset needed to design such layers.

Finally, consider an added challenge for the solver. Just as the 5 Piece Cast Spiral Metal Puzzle presents a deceptively simple exterior that hides a precise internal configuration, you could install a small, final “key.” This could be a shaped alloy piece, like a miniature version of that spiral puzzle, that must be inserted into a disguised slot to release the final panel. It’s a nod to the tradition of puzzle locks and a gift to the eventual solver, offering one more moment of satisfying discovery. Your box is no longer just a container; it’s a crafted narrative in wood and mechanism.
Troubleshooting Your Build: When Pieces Stick and Mechanisms Fail
Even with meticulous planning, building a puzzle box is an exercise in problem-solving, and that includes fixing your own mistakes. Don’t see a stuck piece or a silent mechanism as failure—it’s simply the next puzzle to solve. Here’s how to diagnose and fix the most common build-time headaches.
The Dreaded “Too Tight” Fit: This is the number one issue. If a sliding panel or rotating dial won’t budge, don’t force it. Forcing can split wood or permanently bind your mechanism. First, remove the piece entirely if possible. Examine the edges for burn marks from the laser cutter (a common cause of swelling) or tiny wood fibers (burrs). Use fine-grit sandpaper (220-grit or higher) and lightly sand the sides of the piece, not the face that shows. Test the fit frequently—the goal is to remove thousandths of an inch. A pro tip from laser cutter forums is to account for “kerf” (the width of the laser beam); if your pieces are consistently tight, you may need to adjust your design files by making interior cuts slightly larger and exterior cuts slightly smaller in future projects.
The Loose, Wobbly Panel: The opposite problem undermines the satisfying precision of a good puzzle box. If a panel slides too easily or rattles, your mechanism loses its authority. The solution often lies in the “wax trick” shared by a woodworker on Reddit who built a box from parquet flooring. Rubbing a plain candle (beeswax is ideal) on the contacting surfaces of the loose piece and its channel can add just enough thickness and lubrication to create a smooth, sticky-fit resistance. This is a reversible, non-damaging fix that often perfects the action.
The Silent or Skipping Music Movement: If you’ve integrated a music box mechanism and it doesn’t play or sounds erratic, check three things. First, ensure the winding key or handle is fully engaging the internal spring post—sometimes it needs a firmer push. Second, verify that no wooden gear or structural element is pressing against the metal comb of the movement, which will dampen the sound. Finally, listen as you turn slowly; if the tune skips, the pinned cylinder might be misaligned on its axle. Loosen any set screw, nudge the cylinder minutely, and retighten.
The Magnet That Doesn’t Catch: Your hidden magnetic lock feels dead. First, confirm polarity. Flip one magnet. If that doesn’t work, the distance is likely too great. The strength of rare-earth magnets falls off dramatically with even a millimeter of extra gap. You can either recess the magnet deeper into its pocket (bringing it closer to its partner) or shim the opposing piece with a thin cardstock spacer to decrease the air gap. Use a compass or a spare magnet to verify the magnetic field is active through the wood.
The Sequential Dial That Won’t Align: If your combination dials, inspired by ratchet mechanisms, don’t click into their correct notches, the issue is usually cumulative tolerance error. Each disk’s center hole might have a hair of wiggle room, and those fractions add up. The fix is to ensure your central axle is absolutely vertical and that each disk is seated flat before you lock the assembly down. Sometimes, adding a thin washer between disks can eliminate side-to-side play that causes misalignment. For more on the principles behind these clever locks, our deep dive into traditional puzzle lock mechanisms explores their historical precision.
When you hit a wall, walk away. The solution often appears when you’re not staring directly at the problem. And remember, the frustration you feel and overcome is the exact experience you’re crafting for the eventual solver. It’s all part of the authentic process.
From Builder to Solver: Testing and Iterating Your Design
The moment of truth arrives not when you apply the final coat of finish, but when you hand your box to its first tester. This phase transforms you from a builder into a puzzle designer. Your goal is to ensure the solve is a satisfying journey, not a frustrating dead end.
Begin with a “blind solve” yourself. Put the completed box aside for a full day, then attempt to open it without referencing your plans or relying on builder’s intuition. Time yourself and narrate your actions aloud. Where do you hesitate? Which movements feel unnatural? This is your first map of the user experience. You’ll likely discover unintended “false solves”—sequences that feel promising but lead nowhere. These need to be eliminated by refining the mechanism to be more decisive.
Next, recruit a naive tester—someone with no knowledge of the internal mechanism. Give them no hints, just the box. Observe silently. Do they explore all surfaces? How long before they discover the first moving part? The most valuable data comes from their failures. If they repeatedly try to force a panel that should slide, its resistance needs to be adjusted or a visual cue needs to be added. As noted in the Wikipedia entry on puzzle boxes, a core principle is that the solution should be non-obvious but fair; the solver should feel clever, not cheated.
Based on feedback, you enter the iteration loop. This might mean:
* Adjusting tolerances: A slide that’s too tight frustrates; too loose, and it feels cheap. A few passes with fine-grit sandpaper can make all the difference.
* Adding subtle guidance: A slightly different wood grain direction near a hidden latch, or a barely-audible click when a magnet engages, can subconsciously steer a solver toward the right path without giving the answer away.
* Simplifying the sequence: If every tester gets stuck at the same step, the mechanism may be over-engineered. Can you achieve the same “aha” moment with one fewer move? Elegance often beats complexity.
This process mirrors the refinement seen in commercial puzzles. A kit like the 3D Wooden Carousel Music Box has undergone this very testing to ensure its 281 pieces create a predictable, rewarding challenge. Your handmade box deserves the same scrutiny.
Finally, document the final solve sequence and any special reset instructions. This isn’t just for the solver; it’s for future you. When you revisit this design in six months to build a better version, these notes will be invaluable. The cycle of build, test, and refine is what separates a simple box with a trick lid from a true, enduring puzzle.
Your Next Build: 5 Kits and Puzzles to Level Up Your Skills
Completing your first puzzle box is a massive achievement. The natural next question is, “What now?” The best way to sharpen your design instincts is to study and solve more puzzles. By experiencing a variety of mechanisms—from elegant sequential discovery to clever spatial tricks—you build a mental library of ideas for your next original creation.
Think of these kits and puzzles not as competitors to your own work, but as masterclasses in compact engineering. Each one teaches a different principle. Here are five curated next steps, moving from assembly-focused kits to pure, head-scratching solves.
1. For Mastering Visible Mechanics: The 3D Wooden Treasure Box
If you enjoyed the process of building a functional mechanism, this is your logical progression. This kit builds into a stunning jewelry box with a fully visible gear train that operates the lid. The challenge is less about a hidden sequence and more about understanding how interlocking gears translate motion. Assembling it teaches you about gear ratios, axle placement, and creating a satisfying mechanical action—all crucial knowledge if you want to add moving parts to your future puzzle boxes.
2. For Understanding Sequential Discovery: The Antique Lock Puzzle
This isn’t a kit, but a pre-assembled puzzle that embodies the core philosophy of a good puzzle box: sequential discovery. You can’t see the mechanism, but you must deduce it through touch, sound, and careful manipulation. Solving this replica lock, based on ancient Chinese principles, trains your brain to think in steps. You learn how a designer can use false solutions, dead ends, and subtle auditory feedback to create a narrative of discovery. It’s a pure lesson in user experience from the solver’s perspective.
3. For Appreciating Precision & Patience: The Layered Butterfly Music Box
This build combines the detailed assembly of a music box movement with the aesthetic payoff of a kinetic sculpture. You’ll assemble a gearbox and a pinned cylinder music mechanism from the ground up. The lesson here is in precision and cause-and-effect. A single misaligned gear can stop the entire melody. Completing it builds immense respect for the tiny tolerances and precise alignment required in miniature mechanical puzzles—a humility that will make you a more careful designer.
4. For Spatial Reasoning & Non-Linear Thinking: The 5-Piece Cast Spiral
After working in wood, try the different language of metal. This palm-sized puzzle has no moving parts in the traditional sense; its challenge is purely spatial. Finding the one piece that moves requires a systematic search pattern, and reassembly is a notorious configuration puzzle. It teaches you that a puzzle doesn’t need a dozen steps to be deeply satisfying. Sometimes, one perfect, non-obvious move is all it takes. This kind of “aha” moment is the gold standard for any puzzle box step.
5. For Pure, Abstract Mechanism Logic: The Alloy Triangle Lock
This puzzle distills the concept of a locking mechanism into its most geometric, abstract form. There are no traditional keys or hinges, just intersecting plates and a hidden path. Solving it feels like manipulating a 3D logic diagram. It’s a brilliant exercise in thinking about constraints, pathways, and internal geometry without the distraction of a “box” shape. The principles you uncover here—how shapes can block and reveal pathways—can directly inspire entirely new locking mechanisms for your wooden designs.
By solving these, you stop being just a builder and start thinking like a puzzle designer. You begin to see the hidden mechanisms in everyday objects and ask, “Could that be a puzzle?” For more inspiration on the vast world of trick boxes and their secrets, explore our dedicated guide to puzzle trick boxes and their mechanisms. Your next great idea is waiting.
Puzzle Box Building FAQ: Your Top Questions, Answered
What’s the best wood for a first puzzle box?
For your first build, you want wood that’s forgiving and easy to work with. Avoid hard, brittle woods like exotic hardwoods. Instead, go for a stable, medium-density wood like Baltic birch plywood (excellent for laser-cut kits), poplar, or maple. These woods sand smoothly, hold precise edges from laser cutting or careful saw work, and are less likely to split when you’re fitting snug, moving parts. The key is consistency—you want a material without wild grain variations that could cause pieces to bind.
I don’t have a workshop. Can I still build one?
Absolutely. The modern puzzle box builder’s toolkit often revolves around precision pre-cut kits, not a full woodshop. High-quality laser-cut kits, like our 3D Wooden Carousel Music Box ($43.99), provide all the pieces. You mainly need a clean table, some fine-grit sandpaper for smoothing edges, and patience for assembly. This approach removes the barrier of expensive tools and lets you focus purely on the engineering and assembly puzzle, which is where the real fun begins.
How do I design a locking mechanism from scratch?
Start by studying existing mechanisms. Take apart simple commercial puzzles, analyze how a basic cabinet catch works, or explore the internal logic of dedicated puzzle locks. The Alloy Triangle Lock Puzzle ($11.88) is a masterclass in minimalist geometric locking. Reverse-engineer these principles: how does one piece block another’s path? How can a sliding panel conceal a latch? Your first mechanism should have one, clear objective (e.g., “slide panel A to release panel B”). Sketch it in 3D, then build a crude prototype from cardboard to test the movement before committing to wood.
My pieces are too tight and stick. What did I do wrong?
This is the most common issue. It’s almost always a “kerf” problem—the width of material removed by your laser or saw blade. If you designed the parts to fit exactly, the missing material makes them too tight. The fix is to design with “kerf compensation”: make the male parts (tenons, tabs) slightly smaller and the female parts (slots, holes) slightly larger. For a pre-cut kit that’s too tight, lightly sand the sides of the moving pieces with 220-grit sandpaper. Go slowly, test frequently, and remember: a puzzle box should move with deliberate pressure, not force.
How can I make my puzzle box more challenging?
Difficulty comes from misdirection and sequential dependencies. A simple box becomes a puzzle when the solution isn’t linear. Add a red herring—a piece that moves but does nothing. Require a specific sequence: maybe Panel B only slides after Knob A is rotated three times. Look at the Antique Lock Puzzle ($11.99); its challenge comes from hidden internal gearing and no obvious keyhole. Incorporate a principle like that. For more ideas on layering challenges, our page on solving trick wooden boxes without damage breaks down common deceptive techniques.
Is glue allowed in puzzle box building?
For the structural shell of a non-moving box, yes. For the internal, moving mechanism, it