Why Glue a Wooden Puzzle? From Display to Functional Build
You’ve just spent hours—maybe days—carefully fitting each piece of your wooden puzzle into place. The final piece clicks in, and there it is: your masterpiece. Now what? Leaving it on the table isn’t an option, and taking it apart feels like a loss. This is the moment you consider gluing it. But the “why” behind gluing a wooden puzzle isn’t one-size-fits-all; it splits into two distinct paths with different goals and consequences.
Path 1: Preserving a Flat Jigsaw for Display
This is the classic reason. You have a beautiful, flat wooden jigsaw puzzle with an intricate image, and you want to hang it on your wall like art. Gluing it transforms a temporary activity into a permanent decoration. The primary goal here is preservation—locking the pieces in place to prevent accidental breakage so you can mount and frame it. The objections are real, though. Wooden puzzles are often expensive art objects, and some purists argue that gluing them, especially with the wrong adhesive, can ruin the piece’s fit or leave visible, shiny seams in the cuts. The key is choosing a method that secures the puzzle without detracting from its visual appeal.
Path 2: Creating a Permanent, Functional 3D Object
This is where gluing shifts from preservation to construction. It’s essential for the world of 3D wooden puzzles—those architectural models, animal figures, or mechanical marvels like puzzle boxes. Here, gluing isn’t optional; it’s the final, critical step in the build process. The glue provides structural integrity, turning a fragile assembly of interlocking pieces into a solid, functional item you can handle, use, or display without it collapsing. The goal isn’t just to hang it on a wall; it’s to create a durable object.
Consider our 18 Piece Wooden Puzzle. On its own, it’s a satisfying, self-standing geometric sculpture. But if you want it to be a permanent fixture on your shelf, able to withstand dusting or the occasional bump, gluing it is the difference between a temporary model and a lasting display piece. For more complex 3D builds, as noted in our 200-solve report, glue is what transforms a puzzle into a stable, functional object you can be proud of.
Navigating Objections & Making Your Choice
The common hesitation is permanence. Once glued, you can’t easily take the puzzle apart again. This is a feature, not a bug, for a display or functional item, but it’s a commitment. The fear of visible glue lines or warping is valid, but it’s a solvable problem with the right technique and adhesive.
Your decision boils down to a simple scenario-based question:
* Is your puzzle a flat picture? You’re in Display Mode. Your priority is an invisible, even seal that won’t warp the wood, with aesthetics as the top concern.
* Is your puzzle a 3D model or sculpture? You’re in Functional Build Mode. Your priority is strong, clear-drying bonds at the joints for structural strength, with handling durability as the top concern.
Understanding your “why” from the start dictates every choice that follows—from the type of glue you buy to the way you apply it. Let’s get you the right glue for the job.
The Glue Arsenal: Choosing the Right Adhesive for Wood & Your Goal
Choosing your glue isn’t about grabbing the first bottle you see. It’s about matching the adhesive’s properties to your wood and your end goal. The wrong glue can mean visible lines, warping, or a fragile structure. Let’s break down the contenders you’ll find in stores and forums, using real-user wisdom to cut through the marketing.
Puzzle-Specific Glue (Liquid or Gel)
* What it is: A premixed, water-based adhesive like Mod Podge Puzzle Saver or Ravensburger Puzzle Conserver.
* Best for: Display Mode for flat puzzles. It’s the beginner-friendly choice.
* Pros: Dries clear and glossy, is non-toxic, and is formulated to minimize warping on paper-backed puzzles. The applicator cap often doubles as a spreader.
* Cons: Can be expensive per volume. Its strength is adequate for hanging but not for structural stress. On raw wood (common in artisanal puzzles), it can soak in unevenly.
PVA Wood Glue (The “White Stuff”)
* What it is: Standard woodworking adhesive (e.g., Titebond, Elmer’s Carpenter’s Wood Glue).
* Best for: Functional Build Mode for 3D puzzles, and a top budget pick for flat wooden puzzles among enthusiasts.
* Pros: Forms a bond stronger than the wood itself, dries clear, is sandable, and is highly cost-effective. This is the “standard wood glue” Reddit users swear by.
* Cons: Viscosity is high. Applying it straight from the bottle can leave thick, visible seams and cause warping as it dries and contracts.
* Real-User Hack: The single most common piece of advice from experienced builders is to water it down. A mix of 2 parts glue to 1 part water (give or take) creates a milk-like consistency that soaks into the wood fibers for a strong bond without surface globs. Test your mix on a spare piece or the puzzle’s backing sheet first.
Mod Podge (Matte, Gloss, or Satin)
* What it is: A decoupage medium—a combination of glue, sealer, and finish.
* Best for: Display Mode where you want an all-in-one adhesive and topcoat. It’s versatile.
* Pros: Applies evenly, comes in different sheens, and seals the surface as it glues. Users report success on wooden puzzles.
* Cons: Can remain slightly tacky in humid environments. Multiple thin coats are better than one thick coat to avoid a plastic-y look.
Cyanoacrylate (CA/”Super Glue”)
* What it is: Fast-acting, instant-bond adhesive.
* Best for: Spot repairs in Functional Build Mode. It is not for whole-surface application.
* Pros: Incredibly strong and fast. Ideal for fixing a single, stubborn joint in a 3D model or reattaching a broken puzzle tab.
* Cons: Bonds skin instantly, fumes are unpleasant, and it can leave a frosty residue. Using it everywhere would be a messy, expensive disaster.
Spray Adhesive (Spray Mount)
* What it is: An aerosol glue, often repositionable.
* Best for: Mounting a pre-glued, flat puzzle to a backing board.
* Pros: Provides a perfectly even, thin layer. Excellent for the final mounting step.
* Cons: Offers zero structural strength for joints. Requires well-ventilated area (ideally outdoors). Overspray is messy.
Your Buying Criteria Checklist
When you’re in the aisle, judge the options by these four factors:
1. Drying Clarity: Must dry completely transparent. Yellowing glues are for construction, not your artwork.
2. Strength vs. Flexibility: For a 3D model that will be handled, you need rigid, high-tensile strength (wood glue). For a flat display that may expand/contract with humidity, a more flexible bond (puzzle glue) can prevent cracking.
3. Viscosity & Working Time: Thin, watery glue soaks in and can warp. Thick glue sits on top and gaps. A moderate viscosity, or a glue you can thin yourself, gives you control. Wood glue gives you 5-10 minutes to adjust; CA glue gives you seconds.
4. Working Time: Wood glue gives you 5-10 minutes to adjust parts; CA glue gives you seconds.
Scenario-Based Recommendations
- For a Flat, Artistic Wooden Puzzle (Display Mode): Use watered-down PVA wood glue (for a budget, professional-grade bond) or a puzzle-specific glue (for ultimate convenience). Apply to the back to avoid any potential surface texture.
- For a 3D Mechanical Model (Functional Build Mode): PVA wood glue is your workhorse. Use it thinned for general assembly. Keep CA glue on hand for critical, hard-to-clamp joints or quick fixes.
For example, assembling a functional item like a 3D wooden puzzle safe requires joints that can withstand the friction and pressure of use. A strong, clear-drying PVA wood glue is the correct choice here, ensuring the locking mechanism remains solid and the drawers slide smoothly long after the puzzle is complete.
Essential Toolkit: Beyond the Glue Bottle
Choosing the right glue is only half the battle. A successful, frustration-free gluing session depends entirely on your preparation. Having the right tools at your fingertips transforms a delicate operation into a smooth, controlled process. Here’s your essential checklist, moving beyond the adhesive itself.
Surface Protection & Workspace
* Wax or Parchment Paper: This is non-negotiable. Placing a large sheet under your puzzle before you start gluing protects your table from permanent adhesive damage. It also prevents the puzzle from sticking to the surface if glue seeps through.
* Well-Ventilated Area: Many glues, especially CA (super glue) and spray adhesives, emit fumes. Work near an open window or in a garage with good airflow.
Application & Cleanup Tools
* Foam Brushes or Small Sponges: For liquid glues like PVA or Mod Podge, a 1-2 inch foam brush allows for thin, even application without leaving brush strokes. Have a few on hand to swap if one becomes too gummed up.
* Sandpaper (Fine-grit, 220+): For 3D wooden puzzles or any project where you need a perfectly flush joint, a small piece of fine sandpaper is crucial for lightly sanding away dried glue squeeze-out or smoothing rough edges before final assembly.
* Tack Cloth or Microfiber Rag: After sanding, you must remove all dust. A tack cloth (a sticky cheesecloth) or a slightly damp microfiber rag picks up fine particles that would otherwise get trapped under your sealant, creating a bumpy finish.
Clamping & Weight System
* Clamps or Rubber Bands: For 3D puzzles with interlocking pieces or angled joints, small spring clamps or rubber bands are indispensable. They hold pieces under pressure while the glue sets, ensuring a tight, gap-free bond. Don’t rely on your hands.
* Weights (Heavy Books, Board with Weights): For flat puzzles, even pressure is key to preventing warping. After applying glue, place a large, flat, rigid board (like a cutting board or piece of plywood) over the entire puzzle, then stack heavy books or weights evenly on top. This presses all pieces flat as the glue dries.
Finishing Touches (For 3D & Display Items)
* Protective Sealant: If your glued puzzle will be handled (like a 3D model) or displayed in a high-humidity area, a clear matte or satin polyurethane spray or brush-on sealant adds a protective layer against moisture, UV light, and skin oils. Always apply in thin, even coats.
Think of assembling a complex, functional piece like a 3D wooden puzzle treasure box. You’ll need clamps to secure the lid mechanism while the glue sets, sandpaper to ensure the drawers slide smoothly without catching on dried adhesive, and a sealant to protect the finished heirloom from dust and tarnishing. Gathering these tools before you start is the single best way to guarantee a professional, permanent result.
Step-by-Step: Gluing a Flat Wooden Jigsaw for Display
You’ve conquered the puzzle. Now, let’s make it permanent. This process is about patience and precision, transforming your temporary assembly into a solid piece of art ready for the wall. Follow these steps in order for a flawless, warp-free finish.
1. Prepare Your Workspace & Puzzle
First, protect your surface. Lay down a large sheet of wax paper or a plastic tablecloth. This creates a non-stick barrier, so your puzzle won’t become a permanent fixture on your dining table.
Next, ensure your puzzle is perfectly flat. Slide sheets of wax paper or parchment paper underneath its edges. Gently press down on any raised pieces or curled corners. For stubborn warping, place a large, flat board (like a cutting board or a piece of smooth plywood) on top and weigh it down with books for a few hours before you even touch the glue. A flat start is non-negotiable.
2. The Great Debate: Front or Back?
This is where puzzle enthusiasts diverge. Here’s the practical breakdown to help you decide:
- Gluing the Front (The Most Common Method): You apply adhesive directly to the puzzle’s image side. This seals and bonds the pieces in one step, creating a protective, often glossy, top coat. Best for: Most display puzzles where you want to enhance colors and protect the image. Use a dedicated puzzle glue or a thin, clear-drying craft glue like Mod Podge.
- Gluing the Back (The Reinforcement Method): You carefully flip the entire puzzle over (this is a two-person job for large puzzles) and apply glue to the bare wood back. Best for: Puzzles where you want to preserve the raw, matte finish of the front or for extra-heavy puzzles needing maximum structural integrity. White wood glue, slightly thinned with water, is a favorite here among hobbyists.
Pro-Tip from the Forums: Many experienced users on Reddit recommend a hybrid approach for wooden puzzles: “Glue the front first before gluing the back.” A thin layer on the front seals the pieces and image, then a layer on the back provides immense structural strength, virtually eliminating any chance of pieces coming apart.
3. Apply & Spread the Glue
Whichever side you choose, the technique is the same: thin and even.
- Pour: Start by pouring a generous puddle of your chosen adhesive into the center of the puzzle. Don’t skimp initially—it’s easier to spread a sufficient amount than to go back and add more.
- Spread: Using a flat, wide foam brush or a stiff piece of cardboard, spread the glue outward in all directions. Work methodically to cover every piece, pushing the glue into the seams between pieces. This is critical—the bonds in the cracks are what create a single, solid panel.
- Remove Excess: After full coverage, use a plastic scraper or the edge of your cardboard to squeegee off the excess glue. The goal is a thin, uniform film, not a gloopy pool. Excess glue is the primary cause of warping and prolonged drying times.
4. The Crucial Dry & Weight Stage
This step prevents warping. Immediately after spreading the glue:
- Place a fresh sheet of wax paper or plastic wrap over the entire wet puzzle surface.
- Place a large, perfectly flat and rigid board (foam core board, plywood, a large hardcover book) directly on top.
- Weigh it down evenly. Stack heavy books, weights, or boxes across the entire board. Ensure the pressure is distributed uniformly. Leave it completely undisturbed for at least 24 hours, or as long as your glue’s instructions recommend.
5. Mounting Options for Display
Once fully cured (48 hours is safer), your puzzle is a solid panel. Now, how do you hang it?
- Adhesive Foam Board (The User Hack): A popular method from discussion threads is using adhesive-backed foam core board. You can have it cut to the exact puzzle size at a sign or framing shop. Simply peel the backing and carefully press your solid puzzle onto it. This adds rigidity and a clean, lightweight backing for hanging.
- Traditional Mounting: For a more permanent solution, apply a strong, even coat of spray adhesive or rubber cement to a piece of foam board or thin plywood cut to size. Then, firmly press your puzzle onto it, weight it down again, and let it set. You can then frame it or attach picture-hanging hardware directly to the backing board. For a deep dive on framing, our guide on how to frame a puzzle covers all the options.
Troubleshooting Tip: If you notice slight curling at the edges after drying, it’s often due to uneven glue application or moisture. Place the puzzle under weights with a damp (not wet) cloth on the opposite side for a few hours to counteract the warp, then let it dry flat under weights again.

The principles of patience and precision apply even to dynamic displays. Imagine preserving a completed Galleon Ship 3D Wooden Puzzle Model Kit. You wouldn’t just glue the sails; you’d apply thin, careful coats to each assembled section, using clamps and supports to hold the intricate rigging in place as it dries, ensuring your majestic ship remains seaworthy as a display centerpiece for years to come. For a detailed look at such a build, see our deep dive into building the Galleon ship model.
The 3D Puzzle Protocol: Assembling & Permanently Sealing Your Puzzle Safe
Gluing a flat puzzle is about preservation. Gluing a 3D wooden puzzle, especially a functional one like a safe or a box, is about engineering. Your goal shifts from creating a static display to constructing a durable, working object that can withstand handling. This requires a strategic approach to assembly and adhesive application, focusing on structural integrity without compromising mechanical function.
Think of it in two distinct phases: Dry-Fit Assembly and Strategic Sealing.
Phase 1: The Critical Dry-Fit & Verification
Never glue as you build. For a complex mechanical model, this is non-negotiable.
- Assemble Completely Without Glue: Follow the instructions to put the entire model together. For a safe, this means building the body, the door, and the internal locking mechanism. This ensures all pieces fit and the mechanism works smoothly.
- Test the Function: Open and close the door. Spin the combination dials. Does the bolt slide freely? Does the door align perfectly? Any friction or misalignment must be solved now, by sanding a tight joint or ensuring a pin isn’t catching.
- Mark Load-Bearing Joints: With the model assembled, use a pencil to lightly mark the key structural joints. On a safe, these are the corners of the main box, the joints where the door frame attaches, and the points where internal supports meet the walls. These are your primary gluing targets.
- Identify No-Glue Zones: Crucially, identify every part of the locking mechanism. The sliding bolt, the tumblers, the dial spindles—these must remain completely free of glue. Any adhesive here will permanently lock your safe. Mark these areas mentally or with a small piece of tape as a reminder.
This verification process is the bedrock of a successful build. For a deeper dive into the mechanics, our exploration of Wooden Puzzles Through The Lens Of Structural Engineering breaks down why these joints matter.
Phase 2: Strategic Sealing for Strength & Function
Now, disassemble the model just enough to apply glue to the marked structural joints. You don’t need to take it completely apart; often, you can work on sub-assemblies.
Choosing Your Glue:
For a 3D wooden model, you need a strong, gap-filling, sandable adhesive. White PVA wood glue is excellent, but for the ultimate bond on tight-fitting laser-cut plywood, a cyanoacrylate (CA) “super glue” in a thin viscosity is the enthusiast’s choice. It wicks into seams, sets quickly, and forms a bond often stronger than the wood itself. Have accelerator spray on hand to instantly set glue in hard-to-clamp spots.
Application & Clamping Technique:
- Apply Sparingly with Precision: Use a toothpick, fine applicator tip, or a small brush. Apply a tiny bead of glue to one side of the joint only. For CA glue, less is more—capillary action will draw it into the seam.
Clamp for Contact, Not Crushing: Your goal is to hold pieces in perfect contact while the glue sets. Use:
- Rubber Bands: Ideal for applying even pressure around cylindrical or irregular shapes.
- Spring Clamps or Mini Bar Clamps: For right-angle corners and flat seams.
- Masking Tape: Perfect for holding small, flat layers together or securing trim pieces.
- A “Third Hand” Tool or Blu-Tack: To hold small parts in position at odd angles.
Pro Tip: Always place a small scrap of wood or cardboard between the clamp jaw and your puzzle piece to prevent denting the finished surface.
Staged Assembly: Don’t try to glue everything at once. Build and seal the main carcass of the safe first. Let it cure completely. Then, attach the door frame, ensuring it’s square. Finally, install the pre-assembled, unglued locking mechanism into its slot. This modular approach gives you control and access.
Final Seal (Optional): Once fully assembled and the structural glue is cured, you may choose to apply a very light, controlled coat of a clear sealant like Mod Podge or a diluted PVA glue to the exterior surfaces only to unify the finish and protect against dust. Use a soft brush, avoid pooling, and absolutely keep sealant away from the door seam, dials, and any moving parts.
Imagine applying this protocol to a 3D Wooden Puzzle Safe with Combination Lock. You’d dry-fit the entire box, test the dials and bolt, then meticulously glue only the double-walled panels and corner joints that give the safe its rigidity. The cleverly interlocking gears and the bolt itself would be left dry, ensuring the satisfying “click” of the lock works forever. The result isn’t just a glued puzzle; it’s a heirloom-quality functional object, a real conversation piece that secures small treasures.
This process transforms a kit into a craft. It’s the difference between a model that might eventually sag or loosen and one that feels solid, permanent, and expertly made in your hands. For more on the philosophy behind these builds, see our guide on How To Build A Puzzle Box.
Troubleshooting the Stick: Warping, Haze, and Weak Joints
Even with careful preparation, things can go sideways. Here’s how to diagnose and fix the most common gluing problems, so your hard work isn’t wasted.
Problem: The Puzzle is Warping or Curling
This happens when one side dries faster than the other, causing tension. It’s most common with thin puzzles or when using water-based glues (like PVA/white glue or Mod Podge) applied too heavily.
* Fix: Place the warped puzzle face-up on a perfectly flat, protected surface (like wax paper on a table). Cover it with a sheet of wax paper, then stack heavy, flat objects—textbooks, baking sheets with cans, a cutting board with weights—evenly across the entire surface. Leave it under weight for at least 24-48 hours. The pressure should coax it back to flat as the glue fully cures.
* Prevention: Always apply glue in thin, even coats. For water-based adhesives, consider a 50/50 mix with water to reduce moisture content and drying stress. Ensure your puzzle is on a flat surface from the moment you apply glue until it’s fully dry.
Problem: Cloudy Residue or “Glue Haze”
A milky, white film appears on the surface after drying. This is often caused by excess glue that wasn’t fully spread or absorbed, or by applying glue in a humid, cold environment.
* Fix: For a mild haze, sometimes a second, very thin and perfectly even coat of the same adhesive can re-dissolve the residue and dry clear. Test this on a corner first. If the haze is severe, prevention is your only real cure; sanding or removing it risks ruining the puzzle’s image.
* Prevention: Use less glue. Spread it meticulously with a foam brush or a plastic card, ensuring no puddles remain in the seams. Work in a warm, dry, well-ventilated room. Puzzle-specific glues and acrylic sealants are less prone to hazing than standard white glue.
Problem: Weak Bonds or Pieces Coming Loose
The puzzle feels fragile, or you hear cracking when you lift it. This indicates insufficient adhesive penetration or the wrong glue type.
* Fix: For a flat puzzle, you can often carefully apply a small amount of thin glue (like diluted PVA) with a fine brush or syringe into the gap of the loose piece, then weight it. For a 3D structure, disassembly might be needed. Clean old glue from the joint with a fine-grit sandpaper, reapply adhesive, and re-clamp.
* Prevention: Ensure your glue matches the material. For bare wood puzzles, a dedicated wood glue or puzzle conserver is best. For pre-finished puzzles, a puzzle glue or PVA is fine. Always press pieces firmly together after application and use adequate, even pressure (clamps, weights, rubber bands) during the full cure time—not just the dry time.
Problem: Glue Seepage Onto the Front or Work Surface
This creates sticky spots on your table or a glossy, discolored patch on the puzzle face.
* Fix: For fresh seepage, wipe it away immediately with a barely damp cloth. For dried seepage on the puzzle face, it’s often permanent. On the back, you can sand it lightly once fully cured.
* Prevention: This is non-negotiable: always protect your work surface. Use wax paper, parchment paper, or a disposable plastic sheet. When applying glue to the front, use a minimal amount and spread from the center outward to control flow.
Problem: 3D Puzzle Feels Wobbly or Structurally Unsound
This is a critical failure for mechanical models. It’s usually due to rushed assembly, skipping the dry-fit, or not clamping key joints.
* Fix: Identify the weak joint. If possible, apply a small drop of cyanoacrylate (super glue) with a precision tip into the joint for a quick, strong bond. For major instability, partial disassembly and regluing with wood glue may be the only permanent solution.
* Prevention: Never glue as you build on a first attempt. Complete a full dry-fit to understand how stress is distributed. Glue in sub-assemblies, clamping each until set. For large models, let the glue cure for the full recommended time (often 24 hours) before stressing the structure.

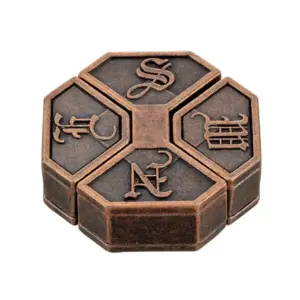
18 Piece Wooden Puzzle — $16.99
A great project to practice these troubleshooting techniques is a simpler 3D object like an 18 Piece Wooden Puzzle. Its small scale and minimal pieces let you focus on perfect joint alignment and controlled glue application. If a joint seeps or warps, it’s a low-stakes lesson that will prepare you for more complex builds. The goal is to learn from small mistakes, so when you tackle that intricate galleon or treasure box, you’ll have the confidence to create a rock-solid display piece. For a full breakdown of such a project, check our 18 piece wooden puzzle guide.
Resetting or Reassembling: Can You Undo a Glued Puzzle?
You’ve glued your puzzle masterpiece, but what if you need to move, store it flat, or repair a damaged piece? The short answer is: it depends almost entirely on the glue you used. Most methods are designed to be permanent, but with the right adhesive and some careful technique, disassembly isn’t always a lost cause.
The Permanence Spectrum: From Reversible to Rock-Solid
Your ability to undo a glued puzzle exists on a spectrum defined by the adhesive:
- Most Reversible: Diluted PVA (White/Wood Glue). This is your best bet for future disassembly. A thin, water-based PVA glue bond can often be softened with moisture and gentle heat. Applying a damp (not wet) cloth to the back of the puzzle and letting it sit can slowly reactivate the glue, allowing you to carefully pry pieces apart with a thin spatula or palette knife. This works best on flat jigsaws glued to a non-porous surface like wax paper.
- Nearly Permanent: Full-Strength PVA, Puzzle Glue, or Mod Podge. These dry to form a flexible plastic film that penetrates the puzzle surface. While water can eventually soften them, complete separation without damaging the printed layer or warping the wood is very difficult. You’re more likely to tear the puzzle face.
- Effectively Permanent: Cyanoacrylate (Super Glue) & Epoxy. These adhesives create a chemical bond that fuses materials. They are not water-soluble and cure into an extremely hard plastic. Attempting to disassemble a puzzle glued with these will almost certainly result in broken pieces. They are the definition of a permanent fix.
Techniques for Careful Disassembly (PVA Glue Only)
If you used diluted PVA and need to take the puzzle apart, proceed with extreme patience:
1. Protect the Face: If possible, apply clear packing tape to the front of the puzzle to hold the image layer together during the stressful process.
2. Apply Moisture from the Back: Place a damp cloth or paper towel on the puzzle’s back. Use a clothes iron on a low, no-steam setting to gently warm the cloth, introducing heat and moisture to reactivate the glue. Do not over-wet the wood.
3. Work Slowly: Start at a corner and gently work a thin, flexible putty knife between the puzzle and its backing (or between layers of a 3D puzzle). Apply steady, gentle pressure rather than prying.
4. Expect Damage: Even done perfectly, some pieces may delaminate or the image may be slightly affected. Consider this a salvage operation, not a clean reset.
Implications for Storage, Moving, and Repair
This adhesive choice has real-world consequences:
* Storage: A permanently glued and mounted puzzle is a rigid object. You can’t roll it or slide it under a bed. If future space is a concern, consider a temporary mounting method like puzzle-specific tape on the back, or choose a diluted PVA glue for potential future disassembly.
* Moving: A large, glued puzzle is fragile. Glass in a frame protects the image but not the substrate from shock. For valuable puzzles, a permanent glue job should be considered a final display decision.
* Repair: If a single piece of a PVA-glued puzzle gets damaged, you might be able to carefully cut it out from the back with a razor and glue in a replacement. With super glue or epoxy, repairing an individual piece is typically impossible without damaging surrounding ones.

7 Color Soma Cube Puzzle — $21.88
This is why the choice of glue is a strategic decision from the start. For a puzzle you might want to solve again or whose form you’d like to change, like a 7 Color Soma Cube Puzzle, a reversible adhesive is wise. This classic 3D brainteaser consists of seven pieces that can be assembled into a cube and countless other shapes. Using a diluted PVA to lightly tack it together for display allows you to later dissolve the glue, take it apart, and challenge yourself with a new configuration. It turns your display into an interactive piece for another day. For heirloom-quality art puzzles you never intend to touch again, a stronger, permanent adhesive is the appropriate final step.
Frequently Asked Questions (FAQ)
Can I use regular Elmer’s white glue?
Yes, but with a major caveat. Standard white school glue (PVA) is water-based and can warp thin wood veneer puzzles if applied too heavily. For a safer result, dilute it with a little water (a 2:1 glue-to-water ratio is common among puzzle enthusiasts) and apply it sparingly to the back. It dries clear but may remain slightly flexible.
Do I glue the front or the back of the puzzle first?
Always glue the back first. Applying glue to the front first can seal gaps, trapping air and moisture that leads to warping. By gluing the back first, you create a stable foundation. Once that’s dry, you can apply a thin, even coat to the front for a protective, finished seal if desired.
Will glue ruin the wooden finish or make it look cloudy?
It can, if you use the wrong type or apply it poorly. Water-based glues (like diluted PVA or Mod Podge) can raise the wood grain or leave a hazy film if applied too thickly. Always test your glue mixture on a spare piece or inconspicuous area first. Applying multiple thin coats, sanding lightly between coats with fine-grit paper, can prevent cloudiness.
How long do I have to wait before I can hang or move my glued puzzle?
This depends entirely on the adhesive. Fast-drying cyanoacrylate (super glue) on a 3D model might be handleable in minutes but needs 24 hours for full cure. PVA wood glue on a flat puzzle typically needs 4-6 hours to set and at least 24 hours to fully cure before you attempt to mount or frame it. Always check the product label.
Can I still use the combination lock on the Safe after gluing?
No. If you permanently glue a functional mechanical puzzle like a 3D Wooden Puzzle Safe, you will almost certainly immobilize its moving parts, rendering the lock and opening mechanism inoperable. Gluing is only for creating a permanent static display, not for preserving function.

What’s the best way to avoid warping?
The twin enemies of warping are moisture and uneven pressure. Use glue sparingly, apply it to the back on a perfectly flat, protected surface (like wax paper), and weigh the entire puzzle down evenly with a large, flat board and heavy books while it dries. This counteracts the natural curl of the wood as the glue moisture evaporates.
Can I use spray adhesive?
For mounting a flat puzzle to a backing board, spray adhesive can be excellent because it applies a very thin, even layer. However, for the actual process of gluing the wooden pieces to each other, it’s not ideal. The overspray is messy, and it doesn’t fill the micro-gaps between pieces as well as a liquid glue.
My glued puzzle has a sticky residue or haze. How do I fix it?
A sticky surface means the glue hasn’t fully cured (give it more time) or was applied too thickly. A permanent hazy film can sometimes be carefully removed by very lightly buffing the surface with a fine (0000) steel wool, followed by a wipe with a slightly damp cloth. Always test this method on a corner first.
Is puzzle-specific glue worth buying?
For convenience and guaranteed results on paper-backed puzzles, yes. For solid wood puzzles, it’s often just a branded PVA glue. You can achieve the same or better results with a quality wood glue or Mod Podge for less money, giving you more control over thickness and finish.
Can I undo a glued puzzle if I change my mind?
It depends on the glue. Puzzles glued with diluted PVA can sometimes be carefully loosened by applying a damp cloth to the back to reactivate the glue. Puzzles assembled with super glue or epoxy are permanently fused. Mechanical puzzles glued with PVA might be salvageable with patience and a thin blade, but you risk breaking delicate wooden connectors.
Do I need to clamp my 3D puzzle while the glue dries?
For 3D puzzles, clamping is often more critical than for flat ones, as gravity can pull pieces apart before the glue sets. Use rubber bands, masking tape, or specialized micro-clamps to hold joints firmly. Always wipe away any squeezed-out glue immediately with a damp cloth.
How do I handle puzzle dust and debris before gluing?
This step is crucial. Use a soft, dry brush or a can of compressed air to gently remove all sawdust and debris from the surface and the cracks between pieces. Any grit left behind will prevent a tight glue joint and create visible bumps under your finished seal.
Your Next Masterpiece: From Preservation to Advanced Building
You’ve now mastered the craft of gluing—a skill that transforms a temporary assembly into a permanent heirloom. But this isn’t the end of the road; it’s the gateway to a more