Reader Situation and Fast Answer
You know the feeling. The weight in your hands is wrong. It’s too light to be solid, but no seam gives it away. There’s no lid, no latch, no keyhole. Just six silent, accusing sides of a wooden puzzle box. Maybe you’ve seen a Japanese puzzle box (a Himitsu-Bako, from 19th century Hakone) and thought, “I could never make that.” You’re holding a saw, eyeing a board, and the gap between that simple wood and the complex opening mechanism in your mind feels impossible.
Here’s the fast answer: You don’t start with wood. You start with cardboard.
Every intimidating box is just two or three core puzzle box mechanisms—sliding panels, hidden pins, false bottoms—stacked together. Your goal today isn’t a flawless masterpiece (a word we’ll avoid). It’s understanding the why. Why that panel slides here. Why that pin locks that piece. That’s the craftsman’s pride, not just following a plan.
So, your next step is to bypass the intimidation. Before you make a single cut in good lumber, you’ll build a full-scale mock-up from a cardboard box. This lets you test sliding moves and secret compartment placements with zero cost, figuring out the precise work of moving parts before committing. It’s the single most important step every competitor skips, and it’s the key to moving from baffled to builder. For a complete foundational look at this philosophy, see our guide on how to make a puzzle box from first principles.
By the end of this step-by-step guide, you’ll have the principles to understand any set of DIY puzzle box plans and the confidence to start tweaking them. Let’s turn that solid block of intimidation into a box full of secrets.
What This Puzzle Really Demands
So you’re starting with cardboard, which is the smartest move you can make. But before you even fold that first flap, we need to demystify what you’re actually building. A puzzle box isn’t magic. It’s a mechanical lie. Its entire purpose is to convince someone that a series of moving parts is, in fact, a solid, impenetrable block. That deception hinges on two non-negotiable demands: tolerances and misdirection.
Tolerances are your religion now. In my machining days, it meant thousandths of an inch. Here, for a wooden puzzle box, it means the gap—or reveal—between a sliding panel and its slot. Too tight, and it binds. Too loose, and the secret is visible. You’re aiming for a friction fit that moves with deliberate pressure, not wiggly play. This is where precision woodworking separates a frustrating trinket from a satisfying mechanical puzzle.
Misdirection is the art of the lie. You use grain continuity, strategic stains, and false seams to draw the eye away from the real opening mechanism. A slight, uniform gap around the entire box looks like poor construction—it doesn’t look like a door. That’s your ally. (My first successful box had a visible 1/32″ seam I couldn’t fix, so I replicated it on all six sides as a “design feature.” It worked.)
Now, about tools. The core question: Can I make a puzzle box with only hand tools? Absolutely. A fine-tooth saw, a sharp chisel, a hand drill, sandpaper, and clamps are the essentials. Power tools just make the precise work faster. But the true “tool” is patience. You’ll measure three times, cut once, and then sand for what feels like three days. That’s the job.

Kits like this one are fantastic intermediate steps. They provide the precise work of assembly process—fitting tiny parts, understanding sequencing—without the stress of milling lumber. Think of it as practicing your tolerances on a pre-cut woodworking project. It builds the dexterity and spatial reasoning you need for designing your own from scratch. For younger makers, a great introduction to these concepts can be found in this PBS Parents guide on how to Create a Puzzle Box.
This brings us to wood. What kind of wood is easiest to work with for precise parts? For your first wooden box, choose a stable, fine-grained hardwood like maple, cherry, or birch plywood. They cut cleanly and sand to a tight seam. Avoid porous oak or splintery pine for small mechanisms. Remember the key fact: critical thickness for moving parts is often 1/8″ to 1/4″. That’s not much wood. Your cuts must be clean.
Your next step is to look at any box—even this castle kit—and see not a Japanese puzzle box or a gift, but a system. Identify the load-bearing walls, the sliding track, the hidden stop. This is the mindset shift. You’re no longer just building a box; you’re engineering a deception. Now, let’s break down exactly how those core deceptions work.
Preparation Before the First Move
You’ve got the mindset and the wood. Now, before you make a single cut, we need to translate that abstract “system” into tangible, physical principles. This is where most tutorials drop you into a step-by-step guide and say “follow along.” We’re going to do the opposite. We’re going to pull the curtain back on the puzzle box mechanisms themselves so you understand the why, which makes the how infinitely clearer.
Think of it like a magician learning sleight of hand. You don’t start by performing the trick; you start by studying the false transfer, the misdirection, the hidden palm. For puzzle boxes, the core “sleights” are sliding, locking, and sequencing. Let’s deconstruct three common ones.
The Sliding Panel with Pin Lock: This is the foundational move. A panel slides in a groove, but a hidden dowel pin (often spring-loaded or gravity-fed in fancy versions) drops into a hole in the track, blocking it. To open, you must find the secret release—maybe a magnet, a specific tap, or sliding a different panel first to retract the pin. The principle here is the blind assembly and the friction fit of the pin. The panel’s groove is cut so the pin is invisible from the outside, and the fit must be tight enough to hold, but loose enough to disengage when the secret action is performed. (My first attempt here used a pin that was too tight. I had to whack the box on the table to get it to drop—not exactly a subtle secret mechanism.)
The Sequential Sliding Panel: Often seen in Japanese puzzle box designs, this is where sliding moves must be performed in a precise order. Panel A can only move after Panel B has slid 20mm to the left, which releases a hidden stop for Panel A. This is achieved through internal tabs, ramps, and stops. The principle is mechanical sequencing, like a tiny, wooden combination lock. The tolerances are critical; if the stop is a millimeter too short, the sequence fails. If it’s a millimeter too long, the panel binds.
The False Bottom/Secret Compartment: This is less about movement and more about perception. You create a compartment, then build a second, shallower bottom above it, hiding the true depth. The principle is visual misdirection. You use identical wood grain, continuous lining, or a perfectly fitted insert to disguise the secret compartment. The key is that all visible seams—the interior corners—look exactly like the seams of a normal box. This is where your craftsman’s pride in perfect joinery actually helps the deception. A slight gap would give it away.
These mechanisms are rarely used alone. A good wooden puzzle box might combine a sliding lid (Principle 1) that only moves after you slide a side panel (Principle 2) to reveal a secret compartment (Principle 3) inside.
So, how do you design the steps to open a puzzle box? You start with the end. Decide what the final opening action will be—a lid lifting, a drawer sliding out. Then, work backwards. “To get this lid to lift, what must be moved first? And to move that piece, what must be unlocked before it?” You’re building a chain of dependencies. Sketch it sideways, like a cutaway diagram. This backward planning is the single most useful skill for designing boxes.
Which brings us to your absolute, non-negotiable first move. You will not touch your good wood.
You will build a cardboard box. Not a metaphorical one. A physical, taped-together, crude prototype. This is the “Cardboard Prototype” method missing from every woodworking-centric guide. Use cereal box cardboard for thin, rigid parts. Your goal isn’t beauty; it’s proof of concept. Cut your panels, mock up your groove by gluing cardboard strips as rails, and use a trimmed toothpick as a pin. Test the sliding moves. Feel for binds. Does your sequence work? You will spot design flaws in ten minutes with cardboard that would ruin two hours of precise work in maple. It’s the cheapest, smartest insurance you can buy.
Finally, lay out your tools. For a first wooden build, you can absolutely make a puzzle box with only hand tools: a fine-toothed backsaw, a drill, sandpaper, clamps, and wood glue. A sharp chisel helps. A small square is mandatory. The fancier tools—a table saw for consistent grooves, a router with a straight bit—are for efficiency and repeatability, not possibility. Set your workspace up for precision woodworking. Good light. A clean, flat surface. This is a project of millimeters, and sawdust is the enemy of a good friction fit.
Now you’re prepared. You see the principles, you have your throwaway prototype material, and your tools are ready. The real work—the satisfying work—can begin.
Step-by-Step Solve Path
With your cardboard prototype validated and tools laid out, we translate theory into wood. This is where the workshop rubber meets the road. We’ll build a classic “trick lid” box—a wooden puzzle box with a secret compartment accessed by a single, non-obvious sliding move. It’s the perfect first woodworking project to teach precision woodworking through direct, actionable steps. For an even more detailed walkthrough of a first build, check out our step-by-step guide to building a puzzle box.
Cut to Size, Not to Perfection.
Start with 1/2″ thick stock for the main box. Pine or poplar are forgiving for a first attempt. Cut your six pieces: front, back, two sides, top, and bottom. Aim for a finished outer dimension you can easily handle—say, 4″ x 3″ x 2″. The crucial step here is to cut your top and bottom panels oversized by at least 1/4″ on all sides. You will trim them to a perfect friction fit later. This one habit saves more frustration than any fancy tool.
Now, the mechanism. The trick is a lid that slides, not lifts. Cut a groove 1/4″ wide and 1/8″ deep along the inside top edge of your front and back pieces. This is your track. A table saw or router with a straight bit makes this trivial, but a sharp chisel and a steady hand work fine (clamp a straightedge as a guide). These grooves must be parallel.
Dry Fit. Always Dry Fit.
Assemble the four side pieces with rubber bands or light clamping pressure—no glue. Drop in your oversized bottom panel. Does it sit flat? Good. Now, take your oversized top panel—this will become the sliding lid—and sand its edges gently until it slides into the grooves with just a whisper of resistance. You should be able to push it with one finger, but gravity alone won’t move it. This is the feel you’re after. Test the sliding moves. The lid should travel its full path without binding. Mark its open and closed positions with a pencil on the inside.
The Blind Assembly.
Disassemble everything. This is the nerve-wracking part. Apply wood glue sparingly to the joints of your four sides. A glue syringe is fantastic here for control. Assemble the box, ensuring the grooves are aligned. Clamp square. Wipe any squeeze-out immediately with a damp cloth. Let it cure fully. (This is a good time to walk away for a few hours. Impatience warps tolerances).
Once the carcass is solid, insert the bottom panel. Run a tiny bead of glue only along the very bottom edges where the panel meets the sides. Do not glue it into the grooves; it must float slightly to allow for wood movement. Clamp it flush.
The Final Fit: Creating the ‘Reveal’.
Your oversized lid now needs its final disguise. With the box body complete, place the lid into its closed position. Using a sharp pencil, scribe a line along the lid’s edge, tracing the outline of the box body beneath. This line shows you exactly where to trim. Remove the lid and carefully saw or sand right up to that line. What you’re left with is a lid that perfectly matches the box’s footprint, with a seam so tight it disappears against the grain—the core of the deception. Sand all parts to 220 grit. The action should be smoother now. If it’s still stiff, a minuscule amount of candle wax rubbed on the sliding edges works wonders (graphite powder is the traditional choice for Japanese puzzle box artisans).
Test the opening mechanism one last time. The satisfying slide, the hidden space within—you’ve built it. This fundamental assembly process is the bedrock. Every complex puzzle box, from a 4-move to a 50-step mechanical puzzle, is just a layered iteration of this same disciplined approach: cut, fit, dry assemble, glue, finalize.
Common Failure Points and Fixes
That satisfying slide of the final piece into place is a high point, but it’s not the end. Right now, you’re holding a bare bones assembly process that works. The transition from a functioning mechanism to a deceptive wooden puzzle box happens in the next phase. But first, you must navigate the valley of frustration where most first attempts fail. I’ve been there—my shop floor is littered with the ghosts of boxes that squealed, stuck, or gave up their secrets with a glance. Let’s turn your likely stumbles into planned detours.
Failure Point 1: The Glue Flood. You’ve done a perfect dry fit. You apply wood glue, clamp, and wipe the squeeze-out. An hour later, your sliding panel is permanently welded to its groove. The opening mechanism is dead.
* The Fix: The machinist in me winces at imprecision, but the puzzle maker knows glue is the enemy of motion. For any moving part, you must glue only the static structure. Assemble the outer carcass of the box, let it cure fully, then wax the channels where moving parts will slide. Candle wax or paraffin is perfect. This creates a barrier. When you later glue the moving panel’s sub-assembly elsewhere, any seepage won’t bond to the waxed channel. For static joints, use a glue syringe to apply a tiny, controlled bead. More is not better.
Failure Point 2: The Tell-Tale Gap. You’ve sanded for an hour, but a hairline shadow betrays the seam of your secret compartment. The craftsman’s pride stings.
* The Fix: First, ask if it’s truly a failure. A uniform, knife-edge gap around a panel can look intentional, part of the puzzle box design principles. But if it’s uneven, you have options. For a gap that’s too tight, more sanding. For a gap that’s too wide, you can’t add wood back. Here’s the veteran tip: Mix fine sanding dust from your project wood with a drop of glue to make a filler, press it in, sand smooth. It will accept stain similarly, camouflaging the flaw. Often, the best fix is psychological misdirection—draw the eye away from the seam with a striking grain pattern or a decorative inlay on the opposite side.
Failure Point 3: The Sloppy Slide. The panel moves, but it wiggles. It feels cheap, and worse, it visually reveals its path. The tolerances are too loose.
* The Fix: This is where your cardboard box prototype pays off. If you’re already in wood, all is not lost. You can line the groove with a veneer strip to take up space. Or, build out the sliding tongue itself with a layer of veneer or even a careful application of wood filler, sanded to a perfect friction fit. Remember, the goal is not a vise grip, but a silent, deliberate motion. A properly fitted part will move under gentle pressure, but will not sag or shift side-to-side.
Failure Point 4: The Immovable Object. The opposite problem: your mechanism binds. It moves two inches and jams. This is usually a geometry issue you missed in the dry fit.
* The Fix: Don’t force it. Forcing a stuck wooden puzzle box is a one-way trip to splinter city. Disassemble if you can. Inspect the channel for glue blobs or a stray wood fiber. The most common culprit is an unseen high spot inside the groove. Blacken the sliding edge of your panel with a pencil lead, reassemble, and work it slightly. Where it binds, the graphite will transfer to the high spot inside the groove. Sand that spot only. Repeat until the slide is smooth. This is the essence of precision woodworking: locating the thousandth of an inch that makes the difference.
Failure Point 5: The Premature Reveal. The box is meant to open in a sequence, but a sharp shake makes the whole thing rattle and a panel shifts, spoiling the secret.
* The Fix: You need a detent—a subtle “click stop.” For a simple puzzle box for kids, a small ball bearing and a spring from a pen, set into the path, works. For all-wood puzzle box mechanisms, a shallow drilled dimple and a corresponding rounded nub on the moving part creates a gentle catch. The opening force must overcome this slight bump, preventing accidental movement. It’s these hidden details that transform a box with moving parts into a challenging to solve puzzle.
Remember, the goal isn’t perfection on the first try. It’s understanding why a failure happened and having a quiet, confident fix in your toolkit. Every one of these “fixes” is actually a design lesson in disguise. Now, with a solid, functioning box in hand, we move from troubleshooting to the true art: the finish and the final layers of deception. For a deeper look at the solver’s mind during this phase, my colleague has some brilliant insights in how to solve a puzzle box without losing your mind.
Reset and Reassembly Workflow
So you’ve solved it, or you’ve fixed it. Now you hold a collection of finely-tuned parts. This is the quiet, methodical moment that separates a rickety prototype from a polished wooden puzzle box. Reassembly isn’t just reversing the steps; it’s a final calibration. Do it with care, and you lock in that satisfying, silent operation. Do it hastily, and you’ll cement a lifetime of gritty slides and misaligned seams.
Treat this like a step-by-step guide to a sacred workshop ritual.
First, lay everything out in order. Every pin, every panel, every false bottom. Wipe away any dust or excess graphite. This is your last chance to inspect. Check the edges of your sliding moves for burrs. Feel the channels. A quick pass with 400-grit sandpaper can make the difference between a smooth glide and a frustrating stick.
Now, the assembly process. You’ll do a full dry fit—no glue. Assemble the entire sequence, open it, close it, three times. This isn’t just checking fit; it’s warming up the wood and your own memory of the mechanism’s dance. Listen. A perfect Japanese puzzle box doesn’t whisper its secrets; it’s utterly silent. Any scrape or click is a note to file away.
When the dry fit is flawless, it’s time for the commitment: glue. Forget drowning the joints. For precision woodworking like this, you want a glue syringe or a toothpick. Apply the barest film to only one joining surface. Your goal is a friction fit secured by glue, not a glue joint forced together. (My first five boxes squeaked from trapped glue in the seams—a lesson in humility and cleanup.)
Assemble in sub-units. If your box has an inner cage that holds the secret compartment, glue that square and let it cure. Then fit the sliding panels to it. Build from the inside out. Use masking tape as clamps for small parts; it applies even pressure without twisting your careful moving parts.
The final closure is the most tense. Apply your minute bead of glue, align the last panel or lid, and press. Don’t force it. If it stops, back it out, find the hitch. Once seated, wipe away any squeeze-out immediately with a damp cloth. Then, walk away. Let the chemistry do its work for a full 24 hours. This is where craftsman’s pride is patience.
After the cure, work the mechanism again. It will be stiff. This is normal. The glue has slightly sealed the wood. A light application of wax or a pencil-lead graphite in the channels will restore the buttery motion. Cycle it open and closed fifty times. You’re not playing; you’re wearing in the puzzle box mechanisms, polishing the contact points to a mirror finish.
This workflow—inspect, dry fit, minimal glue, sub-assembly, patient cure—is the unsung hero of the build. It turns a collection of parts into a single, deceptive object. It’s the difference between a box that works and a box that feels alive in the hands. For a fascinating look at a more complex reassembly puzzle, the principles here are the same as those used in the disassembly and reassembly guide for a complex puzzle, just on a different scale.
Now, with a fully functional, perfectly assembled box, we can move to the final act: the art of the finish. This is where we learn to hide our work in plain sight.
Related Puzzles to Try Next
So you’ve felt the quiet click of a hidden latch giving way, the smooth slide of a panel that reveals nothing until the third move. That satisfaction—the blend of craftsman’s pride in the build and the sheer cleverness of the mechanism—is addictive. It’s a specific itch. And now that you’ve built a box, your hands and mind are tuned to a new frequency. You’ll start seeing puzzle box mechanisms in everything. Here’s where to point that newfound perspective next, moving logically from the principles you’ve just mastered into related realms of precision woodworking and mechanical delight.
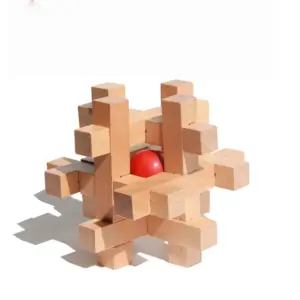
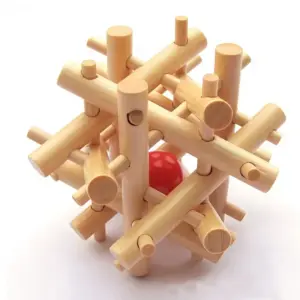
First, consider puzzles that teach through assembly. You’ve learned the supreme value of the dry fit and blind assembly. A perfect next step is the classic Six Piece Burr Puzzle. It looks like a simple crossed block, but its construction is a masterclass in interlocking geometry and thinking in three dimensions. Assembling one (especially from a kit) drills directly into the spatial reasoning needed to design your own sequential locks. It’s all about tolerances and the order of operations—sound familiar? For a deep dive, our guide on the classic six-piece burr puzzle is a worthy read.
If you enjoyed the precise, sliding moves of your box, graduate to a puzzle where every move is the mechanism. Look for puzzles that focus on a single, elegant action executed to perfection. The broader category of mechanical puzzles is vast and fascinating, encompassing everything from your box to disentanglement puzzles.

A piece like the 3D Zodiac Owl Clock Puzzle shown here is a fantastic bridge. It’s a mechanical puzzle with a clear, functional goal (telling time) achieved through a series of precise, interactive moves. Building it reinforces the same discipline you used: following a logical sequence, ensuring moving parts don’t bind, and creating a final object that is both beautiful and brain-teasing. It’s the opening mechanism of your box, expanded into a full narrative.
Next, expand your workshop to include motion for motion’s sake—pure kinetic joy. This is where the principles of leverage, gear trains, and cam action come into play. Understanding these can inspire incredible future puzzle box designs, like boxes that require turning a hidden crank or aligning gears to release a latch.

A kit like this Wooden Ferris Wheel Music Box isn’t a puzzle to solve, but a puzzle to build. The challenge is in the assembly process of dozens of tiny, interlocking moving parts. It teaches you about pin joints, axle alignment, and transferring motion—all advanced concepts that can later be miniaturized into a secret compartment trigger. The reward is twofold: the deep focus of the build and the mesmerizing performance at the end.
For direct skill-building, seek out sets that offer variety. Remember our talk about core principles? A curated collection, like the ones discussed in our guide to the 6-in-1 wooden brain teaser set, is a gym for your puzzle-solving muscles. It exposes you to different locking strategies (wedge, notch, twist) without a major time or material commitment. Solve them. Then, take them apart. Study how the friction fit and angles create the challenge.
Your path from here is a choose-your-own-adventure. Want more DIY puzzle box plans? Search for “sequential panel” or “trick lid” plans, but now you’ll read them with a designer’s eye, asking why each step works. Intrigued by the Japanese puzzle box heritage? Explore the classic Himitsu-Bako, but appreciate the sheer number of sliding moves as a feat of planning, not magic. Feel limited by tools? The cardboard box prototype method is your forever friend—use it to sketch mechanical ideas in 3D.
The through-line is this: you’ve moved from consumer to creator. Every puzzle you interact with now is research. How does it resist? How does it finally reveal? Keep a notebook. Sketch the clever bits. That odd little latch on a commercial puzzle might become the heart of your next wooden puzzle box. And when you get stuck, remember the old machinist’s mantra that applies to both building and solving: slow down. Look at it from the other side. The solution, and the inspiration, is usually already in your hands.
FAQ
Alright, you’ve got your hands dirty. You’ve built a prototype, maybe even finished a wooden puzzle box. The questions that pop up now are less about “can I do this?” and more about “how do I do it better?” or “what’s next?” Let’s tackle the ones I hear most at the market booth.
Can I make a puzzle box with only hand tools?
Absolutely. In fact, the classic Japanese puzzle boxes from Hakone were made with nothing but handsaws, chisels, and planes. For a beginner, a sharp tenon or dovetail saw, a coping saw for curves, a hand drill, a few chisels, and a block plane will let you build nearly any mechanism. The key is sharp tools and a shooting board to ensure perfect 90-degree cuts. It’s slower, but the control is unparalleled. Power tools get you to the rough shape faster; hand tools get you to the perfect friction fit.
What’s the easiest type of puzzle box to make for a first-timer?
The “trick lid” box. It looks like a standard lidded box, but the lid is held in place by a hidden pin or a sliding internal catch. The build is 95% standard box-making, which builds your confidence with joinery and squareness. The final 5% is installing the sneaky latch. It teaches the core principle of misdirection: the obvious solution (prying the lid) is wrong, but the real mechanism is hidden in plain sight. It’s a perfect beginner project.
What kind of wood is easiest to work with for precise parts?
For your first few boxes, choose stability and forgiveness. Poplar is my top recommendation. It’s cheap, has a fine, even grain that cuts cleanly, and doesn’t splinter as easily as pine. Basswood is another excellent choice for intricate, small parts, especially if you’re carving. Avoid open-grained woods like oak early on—they can telegraph seams. Once you’re confident, move to hardwoods like cherry or walnut for their beauty and wear resistance.
How do you design the steps to open a puzzle box?
Start backwards. Know what the final “reveal” is (the open box, the secret compartment). Then, design the last step that conceals it—a sliding panel that locks into place, for instance. Now, what locks that panel? Add another step. Think of it as building a mechanical sentence where each action is the subject that unlocks the next verb. Sketch it in layers. And always, always test the sequence with a cardboard box prototype. It’s the only way to feel if the steps have a logical, satisfying flow.
How do you make the sliding parts move smoothly but not too loose?
This is the art of tolerances. Cut your sliding pieces so they are a hair wider/thicker than their grooves. I’m talking 0.005 to 0.010 of an inch. Then, patiently sand the moving parts down until they slide with firm, even pressure. The test? The piece should hold its position at any point in the groove without sliding freely. For lubrication, rub a plain beeswax candle on the contacting surfaces, then buff it in. Never use liquid oil—it attracts dust and gums up.
How do you hide the seams so well?
Three ways: precision, distraction, and deception.
1. Precision: Perfectly square cuts and absolutely flush glue-ups. Any gap over 0.002 inches will catch light.
2. Distraction: Use wood grain or veneer tape to run a continuous pattern across what is actually a seam. The eye follows the grain, not the split.
3. Deception: Create false seams (scratches or shallow grooves with a marking knife) in places where there is no joint. It overloads the solver’s perception. A little trick I learned: a slightly rounded over edge on a panel can hide a tiny reveal better than a razor-sharp edge.
Where can I find free plans to practice with?
Start with the community. Forums like the woodworking project section of LumberJocks or the puzzle design area on the Puzzle World Forums often have members sharing simple, tested plans. Pinterest and Instructables have a wealth of DIY puzzle box plans, especially for cardboard and basic sliding moves mechanisms. (Just sift through for the well-documented ones). Don’t overlook buying one $10-$15 plan from a reputable designer—dissecting a professional assembly process is an education in itself.
Can you make a puzzle box that opens in more than 5 moves?
You can, but complexity isn’t always better. A well-designed 3-move box that’s utterly deceptive is more satisfying than a 15-move box that feels arbitrary. Adding moves requires exponentially more planning to ensure each step is necessary, logical, and doesn’t create a dead end. It’s a deep dive into puzzle box mechanisms. If you want to explore this, study sequential movement puzzles like burrs before designing your own multi-step opening mechanism. You can learn more about the general history and types in the Puzzle box Wikipedia entry.
How do I keep glue out of the moving parts during assembly?
Blind assembly is the goal. Use a glue syringe for pinpoint application. For a tricky internal channel, apply glue to the static part, not the moving part. A veteran tip: for sliding panels, a tiny piece of painter’s tape over the contact surface of the groove during glue-up acts as a perfect barrier. Peel it out once the glue is dry but not fully cured. For a comprehensive look at the other side of the process—the solving—I always recommend folks check out how to open a puzzle box. Seeing the struggle from the solver’s perspective makes you a better designer.
My box is finished, but it feels “sticky” or rough to operate. Can I fix it?
Usually, yes. First, identify the friction point. Dust the moving parts with graphite powder (from a pencil lead) or talc, then work the mechanism. The powder will collect in the tight spots. Gently sand or scrape only those high spots. Re-lubricate with wax. If the stickiness is from swollen wood (due to humidity), you might have to wait for a drier day—wood is a living material, and your tolerances have changed.
Is it worth learning 3D CAD for designing boxes?
If your brain thinks in vectors and spatial relationships, yes. A program like Fusion 360 (free for hobbyists) lets you model mechanisms, check for interferences, and even create routing tab templates before you touch wood. It’s fantastic for planning. But it’s not mandatory. Many brilliant designers work with pencil, graph paper, and foam core mock-ups. The tool is less important than the clarity of thought.
What’s the one mistake you see beginners make most often?
Rushing the “dry fit” stage. They cut all the parts, see that they sort of fit together, and immediately reach for the glue. The craftsman’s pride is in the test assembly. Assemble the entire box with only masking tape or rubber bands. Operate the mechanism a dozen times. Feel it. Find the bind. Then, and only then, do you commit with glue. That patience is the difference between a frustrating trinket and an heirloom.
Final Recommendation and Next Step
So you’ve survived the dry fits, the glued fingers, and the quiet panic of a mechanism that should work. Now you hold a silent, sealed box in your hands. This is where that initial, intimidating curiosity transforms into pure, crafty pride. The final recommendation from this old machinist isn’t about another tool or technique. It’s this: Build your next one to give away.
The real joy of this craft isn’t in a box sitting on your own shelf. It’s in handing a seemingly solid block of wood to a friend and saying, “There’s something inside.” Watch their face. They’ll shake it. They’ll peer at the seams you worked so hard to hide. They’ll feel the same deceptive weight you now understand intimately. That’s the loop closing.
Your next step is to take the principles you’ve learned—sliding panels, hidden pins, sequential moves—and apply them to a new design. Don’t just replicate your first build. Modify it. Add a step. Change the locking method. Use the cardboard prototype method to work out the kinks. If you’re looking for a structured challenge that builds on these precision woodworking concepts, a pre-cut kit can be a fantastic way to study more complex assembly processes without the initial layout and cutting.

A kit like this 3D wooden safe teaches a different kind of mechanical puzzle logic—think combination locks versus sliding panels. It’s a satisfying next project that reinforces the fundamentals of moving parts and blind assembly. For more inspiration on turning these puzzles into functional art, have a look at our guide on the 3D wooden puzzle treasure box guide, which dives into creating a beautiful secret compartment for jewelry or keepsakes.
Now, go. Build it. Finish it. Then give someone the delightful, frustrating, wonderful weight of a mystery they have to earn the right to open. That’s the craftsman’s true signature.