The Panic in Your Palm: Why Your Ring Came Apart (And Why That’s Okay)
You were just fidgeting with it, feeling the smooth, cool metal glide under your thumb. Then, a subtle shift, a faint click, and a sudden, unsettling looseness. Now four silver bands sit in your palm, mocking you. The once-solid symbol is a jumble of loose ends. Your first thought is likely a silent, internal scream.
This is the universal initiation rite for every new puzzle ring owner. Welcome. The mechanical puzzle has done its job.
I’ve seen this moment play out hundreds of times, from frantic emails to customers literally walking into my old workshop with a handkerchief full of silver pieces. In the back, I kept what my apprentices called the “wall of shame”—a small board of rings I’d had to cut off fingers. Every one was a 4 band puzzle ring assembled incorrectly, its interconnected bands seized into a knot of metal around a swollen knuckle. The cause was never malice, just a misunderstood interlock.
So, take a breath. The fact that your ring came apart isn’t a failure; it’s a feature. It means the mechanism is working. Your frustration, that feeling that the assembly instructions online look like a plate of spaghetti? That’s because most guides skip the why and jump straight to a confusing sequence of moves. They treat it like a magic trick to memorize, not a simple mechanical principle to understand.
The good news is that all four-band rings, whether a wide men’s style or a delicate sterling silver band, operate on one single, elegant rule. Once you see it, the re-assemble process shifts from bewildering to logical. It’s the difference between blindly following a map and finally understanding the layout of the city streets.
The panic you feel is just the first step. The next is curiosity. Look at the pieces in your hand. They aren’t random. Their shape, their curves, their specific band orientation—they are designed to fit together in exactly one way. Your job isn’t to force them, but to listen to the tactile feedback they give you. That tightness, that resistance you’ll feel during assembly? This is normal. It is the geometry of the puzzle aligning.
Let’s move from the “oh no” to the “aha.” The solve begins not with your hands, but with your understanding.
The One Rule That Governs Them All: The Infinity Link Principle
So, we’ve moved past the panic. Now, let’s look at the mechanical puzzle in your palm with new eyes. Every solution for a 4 band puzzle ring you’ll find is just a variation on a single, foundational concept. It’s not a sequence of seven magic moves; it’s one principle applied a few times. Think of it like learning to tie your shoes. Once you understand the underlying knot, you can tie any lace, regardless of its color or length.
The core of every four-band design is what I call the Infinity Link. It’s the essential interlock that makes the whole structure stable. Here’s the rule: A four-band puzzle ring is comprised of two interlocked infinity (∞) shapes.
Let’s break that down. Pick up any two bands. If you were to link them end-to-end in a continuous loop, you’d form a circle. But in a puzzle ring, they are not soldered shut. Instead, each band is an open, cleverly bent piece of wire. When you interlace two of them correctly, their paths trace the figure of an infinity symbol. Do this with the other two bands, and you have a second infinity. Then, you weave these two completed infinity units together. That’s it. That’s the entire architecture.
To visualize this, imagine two bicycle chains lying flat. Each link in a chain is connected to the next, forming a continuous, flexible loop. Now, picture taking two such chains and weaving them together so they can’t be pulled apart, yet each remains its own distinct loop. That’s the relationship your four bands have. They are not one tangled mess; they are two paired systems in a precise embrace.
Here’s a simple 2D diagram you can hold in your mind:
Infinity Unit 1: Band A + Band B = ∞
Infinity Unit 2: Band C + Band D = ∞
Final Ring: ∞ (Unit 1) + ∞ (Unit 2) = One Solid Ring
The process of re-assemble is simply the act of constructing these two infinity units in the correct orientation and then marrying them. This principle is universal. Whether you have a classic flat-band style, a modern round-wire version, or the angular “X-style” ring, they all resolve to this same underlying structure. Understanding this transforms the task. You’re no longer performing rote steps; you’re building a known, logical assembly. You are listening for the tactile feedback of the bands slipping into their designed channels.
This is why forcing it never works. If you feel a hard stop or a band twisting unnaturally, you’ve likely tried to create a link outside of this infinity principle. Back up. The solve is in the geometry, not in muscle. When you get it right, the bands will guide each other home with a satisfying sense of alignment, often culminating in a soft click. This is the disentanglement puzzle locking into its solved, wearable state—a perfect example of the clever design behind many mechanical puzzles.
Remember, a sterling silver ring, a platinum plated one, or a hefty for men’s wide band—they all obey this rule. The metal, the ring size, the craftsmanship—these affect the feel and durability, but not the fundamental law of their assembly. Grasping the Infinity Link Principle is your master key. It turns frustration into focused construction, and it ensures that no matter the variant in your hand, you can reason your way through to the solution.
Pre-Flight Check: Identifying Your Ring’s Band Type
Now that you hold the key principle—that every 4-band ring is built on interlocked infinity links—you’re ready for the most overlooked step in the entire assembly instructions: identification. Before you attempt to solve your mechanical puzzle, you must know which puzzle you’re holding. Rushing this is the prime reason people end up posting “puzzle ring won’t go back together” in frustration. Think of it like knowing if you’re holding a flathead or a Phillips screwdriver before you start turning; using the wrong technique damages the tool and strips the screw.
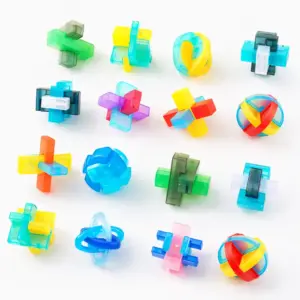
Not all 4 band puzzle ring designs are created equal. While they all obey the same infinity link principle, the physical form of the interconnected bands changes the grip, the visual landmarks, and the ease of the final “click.” Your first job is to lay the four separate bands on a clean, flat, well-lit surface. Sort them. We’re looking for two defining characteristics: the cross-section of the bands, and the style of their center junction.
First, feel the bands. Are they flat, like a tiny belt, or are they round or D-shaped in cross-section? A classic sterling silver puzzle ring often uses flat or gently curved bands, which are more forgiving and easier to grip during the re-assemble process. These were the retired design staples of the 20th-century commercial boom. Wider bands, say 10mm wide, common in styles for men, are almost always flat for comfort. Round-wire bands, sometimes found in 14K gold, platinum, or copper rings, are trickier. They roll in your fingers and offer fewer visual cues, making the assembly a more purely tactile endeavor.
Second, examine the center. Look at where the bands would meet when assembled. Do they simply cross at right angles, or is there a distinct, pre-soldered “X” or square knot-like unit in the middle? This is the critical difference.
- The Traditional Cross: Most common. Here, four independent bands interlace purely through their geometry. When disassembled, you have four identical, separate loops. This is the pure, classic form that directly demonstrates the infinity link. Every step of the upcoming sequence is actively constructing the interlock.
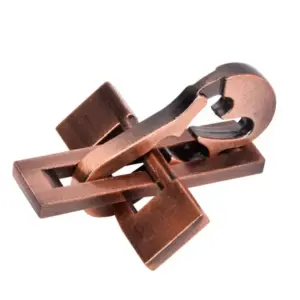
- The ‘X-Style’ or Pre-Joined Center: A modern variation. In this type, two bands are permanently joined at the center to form an ‘X’, or sometimes a small cube or knot. You’re left with three pieces: the X-unit and two separate bands. The assembly instructions are subtly different because the puzzle is partially pre-assembled. The principle remains the same, but you’re building onto a fixed core. Failing to recognize this leads to forcing and bending.
Why does this matter so much? Because your band count—four—isn’t the whole story. Putting an X-style ring together using instructions for a traditional cross will result in a dead end, a twisted mess, and the genuine fear of a wedding band you can’t remove. Identifying your type tells you which set of tactile steps to follow, preventing the damage and frustration that fills my “wall of shame.”
This diagnostic step is what separates a tense chore from a smooth, almost meditative process. It’s the hallmark of good craftsmanship in guidance. You are no longer fumbling in the dark with a generic “puzzle ring.” You are handling your specific object, understanding its form, and preparing your mind and fingers for the logical construction ahead. With your ring type identified, your hands are now ready to build.
The Universal Sequence: A Tactile Walkthrough
Now that you’ve identified your ring’s type, we move from theory to action. This is the moment where your fingers learn what your brain just understood. If you’ve identified a traditional cross-style ring (four separate, independent bands), follow the sequence below precisely. For an X-style ring, the principle is identical, but your starting point is different—you’ll begin with the pre-assembled X-core as your “first band,” and the following steps will guide you on how to integrate the remaining two loose bands. The goal is the same: to create two perfectly interlocked, perpendicular infinity links.
This isn’t about memorizing a magic spell. It’s about executing the mechanical principle with your hands. Listen for the clicks. Feel for the snugness. The tactile feedback is your guide.
Before you begin, clear a flat, well-lit surface. Lay your four bands out. For a traditional ring, designate them in your mind as Band 1, 2, 3, and 4. For an X-style, you have your X-core (which functions as Bands 1 and 2 already linked) and two loose bands (3 and 4).
We’ll break it into three phases. Follow the directional cues (North, South, East, West, notch-up) closely. They are your landmarks.
Phase 1: Forming the First Infinity Pair
This creates the foundational link. For traditional rings, pick up Bands 1 and 2.
Step 1: The Cross.
Hold Band 1 vertically in front of you, like a capital ‘I’. This is your North-South band. Now, take Band 2 and hold it horizontally, like a dash, passing it through the loop of Band 1. You should now see a plus sign (+). Ensure both bands are flat in your fingers, not twisted.
Step 2: The First Fold.
Here is the first application of the infinity link principle. You will fold Band 2 around Band 1. Keeping the ‘+’ shape intact, rotate the right end of Band 2 (East) down and around, so it moves South, then under, then comes back up on the left side of Band 1. The band will now form a loose, open loop encircling Band 1. It will look wrong. This is normal.
Step 3: The Interlock.
This is the crucial move. You now need to pass the left end of Band 2 (West) through the loop it just created. Pinch the left end and thread it down through the loop from above. As you do this, gently guide the right end to meet it. You will feel resistance. Use your thumbs to encourage the bands to nest together. With a little coaxing, they will snap into a neat, flattened, figure-eight-like link around Band 1. This is your first stable, interlocked pair. It should look like a small, tight infinity symbol. Set this assembly down on the table. It is your foundation.

(Note: The ring in the card above is a classic example. If yours looks like this, you’re on the right path. For a more detailed visual walkthrough, our companion step-by-step guide for the 4 band puzzle ring offers a visual reference. Many also find animated instructions helpful for seeing the motion.)
Phase 2: Introducing the Third Band
Now you integrate Band 3. This step begins to form the ring’s circumference.
Step 4: Orientation.
Pick up your infinity pair. Orient it so the linked bands are horizontal. Now, take Band 3 and hold it vertically. You will slide Band 3 through both loops of the infinity pair. Think of it as threading a needle twice. Insert the top end (North) of Band 3 down through the top loop of the infinity link, then continue, guiding it up through the bottom loop. Band 3 should now pass cleanly through the center of the first pair, forming a new, loose ‘+’ shape.
Step 5: The Second Infinity.
Repeat the infinity folding process, but this time, you are folding Band 3 around the entire first assembly. Carefully bring the right end of Band 3 around and under, creating a loop around the core, then thread its left end through that loop. This is trickier because the core is now bulkier. Work slowly. Use your fingernails to tuck and guide. You will feel a distinct, soft click as the second infinity link interlocks and snaps flush with the first. You now have three interconnected bands forming a chain. It should feel sturdy but not yet ring-like.
Phase 3: The Pivotal Fourth Band Insertion
This is where most people, per countless Reddit threads, get stuck. “I’m at the infinity symbol but lost, what next?” Here’s what next: you complete the circle. Band 4 is the keystone.
Step 6: Creating the Gateway.
Hold your three-band assembly in a loose ‘C’ shape, with the open ends of the ‘C’ facing you. Look at the two open ends of the chain—these are the ends of Bands 1 and 3. Their orientation is critical. You must position them so their open loops are facing each other, like two tiny gates ready to receive a key. Manoeuvre the assembly until the notch or opening at one end points directly at the notch at the other end.
Step 7: The Final Thread.
Take Band 4. This band will not form an infinity link. Its job is to bridge the gap. Insert one end of Band 4 into the open loop at one end of your ‘C’. Now, gently flex the ‘C’ open just enough to guide the opposite end of Band 4 into the open loop at the other side. This requires a slight bending of the assembly. Don’t force it. If it won’t go, re-check that both receiving loops are notch-up and aligned. This is the tightest part of the process.
Step 8: The Closing Click.
As you push the ends of Band 4 home into their respective loops, apply equal, firm pressure from both sides, closing the ‘C’ into an ‘O’. There will be significant resistance. This is the ring’s mechanical puzzle locking into its solved state. Keep pressing evenly. Suddenly, the entire structure will align, compress, and emit a final, satisfying click. The interconnected bands will all appear symmetrical and flush.
You have just reassembled your 4 band puzzle ring. It will feel tight, unified, and surprisingly rigid. This is correct. The tension is what holds it together. Do not try to solder it; that defeats the entire purpose and history of the object. The triumph you feel isn’t from following steps blindly—it’s from having your hands understand the craftsmanship of the interlock. Now, try taking it apart and doing it again. The second time is always faster. For a broader perspective on how to solve a puzzle ring without losing your mind, the principles of patience and systematic thinking apply universally.
Stumbling Blocks & Bench Jeweler Pro Tips
You felt the click. You’re holding a solid ring. So why does a sliver of doubt remain? This is the moment where, in my workshop, I’d hear a hesitant, “It’s together… but is it right?” Let’s troubleshoot the common hiccups and translate that doubt into confidence.
First, the most frequent post-assembly question: “Is it normal for it to feel tight and ‘click’ during assembly?” Yes. Unequivocally, yes. A properly assembled mechanical puzzle ring is held together by precise tension. The interconnected bands are designed to bind against each other. That final, firm click is the sound of all four bands finding their home in the interlock. If it feels like a solid, slightly stiff unit, you’ve succeeded. If it feels loose, wobbly, or gappy, a band is likely flipped.
Let’s diagnose the usual suspects.
The Band That Won’t Behave: You’re at the final step, but Band 4 simply will not seat into its opposing loop. Ninety percent of the time, this means an earlier band is notch-down when it should be notch-up. Go back to your starting two bands. Lay them flat. The receiving loops must be open to the sky, like two little hammocks waiting for a guest. If one is inverted, the entire geometry fails. This is the core of the infinity link principle in practice.
The Lumpy Ring: You got it together, but it doesn’t look like the product photo. It’s asymmetrical; one band sits higher, creating an uncomfortable bump. This is a classic case of a band being twisted within the link. Gently try to rotate the offending band along its long axis while holding the assembly. You should feel it settle flush with its neighbors. A quality sterling silver or 14K gold ring will have the craftsmanship to allow this minor adjustment.
The Fear of the Final Push: You’re applying pressure and it feels like you’re about to break it. This is where material quality screams. A plated, base-metal ring might bend. A well-made, hallmarked ring won’t. Use the meat of your thumbs, not your nails, and apply steady, increasing pressure directly over the joints. If you need leverage, a blunt, soft tool can help. I’ve used the eraser end of a pencil a thousand times. Place it on the stubborn joint and press. The goal is to direct force squarely, not at an angle.
Workshop Wisdom (From My Bench to Your Table):
* Surface Matters: Work on a solid, light-colored surface. A white kitchen plate or a sheet of paper makes those silver bands much easier to track than a dark wood grain.
* The Pencil Trick: As mentioned, a standard pencil is your best friend. Use the non-writing end to nudge loops open, guide band ends, or apply final closing pressure.
* Patience Over Force: If something won’t budge, stop. Take your hands off it for ten seconds. Look at it from a different angle. The solution is almost always a re-orientation, not more muscle. Forcing it is how rings get misshapen. This lesson in composure is a true masterclass in patience.
* Comfort & Fit: Are puzzle rings comfortable to wear? Once assembled, a well-made one is. But understand its nature: it’s often 10mm wide or more, composed of multiple interconnected bands. It will have more presence and heft than a simple band. It is not typically a dainty piece. For ring sizing, note that the complex internal structure makes traditional resizing by cutting and soldering nearly impossible without destroying the puzzle. Always buy the correct size from the start.
Finally, the ultimate pro tip: Do it twice. The first solve proves you can follow the sequence. The second solve, starting from a pile of bands minutes later, begins to build the muscle memory of the disentanglement puzzle itself. That’s when you move from following a recipe to understanding the meal.
The ‘What If’ Fear: Safely Removing an Incorrectly Assembled Ring
You’ve mastered the sequence, felt the satisfying click, and slid the assembled ring onto your finger. But then, a subtle wrong twist while fidgeting, and suddenly the mechanical puzzle isn’t a game anymore. The bands cinch tight, the metal bites, and panic sets in. This is the moment that filled my wall of shame—a gallery of rings I’ve had to cut from swollen fingers. Let’s talk about why is my puzzle ring stuck and, more importantly, how to get it off without a trip to the jeweler’s saw.
First, understand why it seizes. A correctly assembled 4 band puzzle ring has a specific internal geometry where bands slide against each other within a defined range of motion. Assemble it wrong—even by just one band flipped the incorrect way—and you create a mechanical bind. The interconnected bands can cross and tension against each other like a tiny, metal Chinese finger trap, tightening with any attempt to pull it straight off. This is a flaw in the assembly, not the ring’s design.
If you feel it tighten, stop pulling immediately. Force is the enemy. Here is the bench jeweler’s protocol, in order of escalation:
- Stay Calm & Diagnose. Your finger will not be amputated. Anxiety increases blood flow and swelling, making the problem worse. Take slow breaths. Look at the ring. Can you see where two bands are crossed or pinching in a way they shouldn’t? Identifying the bind is half the battle.
- The Soap and Cool Water Method. Go to a sink. Run cool water (cold contracts metal and tissue slightly) and coat your finger and the ring liberally with liquid soap, creating a slippery barrier. Gently try to rotate the ring back and forth around your finger, not off it. The goal is to work the soap into the binding junction and encourage the bands to slip back into alignment through rotation, not brute-force pulling.
- The Dental Floss Trick. If rotation fails, get unwaxed dental floss. This is a classic jeweler’s technique for stuck wedding bands. Take one end of the floss and tightly wrap the finger behind the ring, compressing the swollen tissue. Wrap towards your fingertip, coil over coil, like bandaging a sprain. Once the finger is tightly wrapped, start unwinding the top end of the floss. As you unwind, it will pull the ring, millimeter by millimeter, over the compressed, slickened flesh and off the finger. It requires patience, not strength.
- The Strategic Disassembly On the Finger. This is advanced but often the gentlest solution. If you can identify one key band causing the bind, you can sometimes manipulate just that band’s orientation—tipping it up or sliding it laterally—to release the tension enough to slide the whole ring off. It requires recalling the infinity link principle and working in reverse with calm precision.
What not to do: Don’t yank. Don’t use ice cubes to the point of numbness (you’ll lose dexterity). Never use lubricants like butter or oil (they’re messy and won’t help the mechanics). And absolutely do not reach for pliers, which will crush the metal and likely hurt you.
The stark truth is that a poorly-made ring—one with rough, unfinished junctions or soft, plated metal that bends easily—is far more prone to seizing catastrophically. A quality sterling silver or 14K gold ring with smooth, hallmarked craftsmanship has precision that allows for correction. If your ring repeatedly binds even after correct assembly, it’s telling you something about its craftsmanship.
Remember, this isn’t a failure. It’s part of the tactile education of owning a disentanglement puzzle you wear. Learning to calmly undo a bind is the final, unspoken step in truly mastering it. It’s a humbling reminder of why the metal puzzle ring remains the ultimate test of spatial humility.
From Turkish Puzzle to Modern Novelty: A Brief, Clear History
Now that you can confidently assemble and, if necessary, safely free yourself from your ring, you might be looking at it with a new curiosity. You’ve mastered its mechanics, but what about its story? You’ve likely heard the tale: that these are ancient Turkish wedding puzzles, given as a test of fidelity. The truth, like the interlock of the bands themselves, is a bit more tangled—and more interesting for it.
Let’s be clear: while intricate linked rings have existed for centuries across cultures, the specific four-band mechanical puzzle you’re holding is largely a 20th-century commercial creation. According to research from the Puzzle Museum, the four-band linked ring became the most common commercial type by the early 1900s. The romantic “Turkish wedding” attribution appears to be a marketing flourish, a bit of exotic mythology grafted onto a clever disentanglement puzzle to enhance its appeal as a love token. It’s a good story, but history doesn’t substantiate it as a widespread tradition.
So, what is its history? Its proliferation tracks with mass production and global trade. It was a perfect novelty: inexpensive to produce in base metals or sterling silver, endlessly engaging, and carrying just enough symbolic weight to make it a popular friendship ring or symbolic wedding band. Its rise is less about ancient artisans and more about savvy post-war manufacturers catering to a market hungry for interesting accessories and conversation pieces. For a deeper dive into the fascinating evolution of puzzles, our exploration of where puzzles came from and where they’re going provides more context.
This shift from purported ancient artifact to modern fidget piece is key to understanding its value. The four band puzzle ring you buy today, especially from a quality jeweler, is the product of this evolution. The best ones inherit the precision of a true bench jeweler‘s craft—clean hallmarks, smooth junctions, and durable sterling silver or 14K gold—applied to a design perfected for modern appeal. Cheaper, plated versions are direct descendants of the novelty trade, often sacrificing precision for price.
Ultimately, its true history isn’t found in a dubious legend, but in your own experience. Its history is the satisfying click of final assembly, the weight on your finger, and the decades it spent as a clever, wearable puzzle moving from factory to store to your hand. Its meaning isn’t locked in the past; it’s in the tactile focus it demands and the quiet triumph you now feel every time it comes together. That’s a tradition worth keeping.
If You’ve Caught the Bug: What Makes a Quality Puzzle Ring
After learning its history and mastering its reassembly, you may start to view your ring not as a frustrating object, but as a piece of clever engineering. And once you appreciate the mechanics, the natural next question is: what separates a well-made puzzle ring from a cheap novelty? If you’re considering an upgrade or buying one as a lasting gift, here’s what a bench jeweler looks for.
The most glaring difference between a $30 ring and a $100+ one is in the material and its honest marking. A high-quality ring will be made from a solid, precious metal. For sterling silver, this means a clear hallmark—look for “925” or “Sterling” stamped inside one of the bands. This isn’t just a label; it’s a promise of durability. Sterling silver (.925 pure silver) has the strength to withstand the repeated friction of assembly without wearing through to a base metal. In contrast, a plated ring at a lower price point has only a microscopic layer of silver over a base metal like brass or copper. Every time you solve and re-solve it, you wear that plating down. Eventually, the underlying metal shows through at the junctions, and the ring loses its luster permanently.

Metal Starfish Puzzle Ring — $13.99
Rings in this price range serve as perfect examples of the novelty end of the spectrum. They are fun fidget pieces and great for testing your interest in the mechanical puzzle, but understand their limits. The craftsmanship at this level is often about mass production, not precision. For a more intricate and challenging wearable puzzle, see our article on the metal starfish puzzle ring challenge.
The true test of a puzzle ring’s quality, however, happens at the junctions. On a well-made ring, the points where the bands cross and interlock are filed smooth and polished. Run your fingertip over them. You should feel a seamless transition, not a pinch or a sharp edge. This smoothness is critical for comfort and for preventing the interconnected bands from grinding against each other and seizing. Poorly finished junctions feel ragged and can actually deform over time, locking the puzzle in a partially assembled state—the very scenario that lands rings on my “wall of shame.”
Weight and proportion are your next clues. A quality sterling silver four-band ring has a substantial, reassuring heft. The bands themselves should have a consistent thickness and a width (often around 10mm wide) that feels balanced. Cheap rings feel suspiciously light and the bands can be thin, making them prone to bending out of shape. A bent band will never assemble or disassemble correctly. This is the fundamental logic behind all robust metal puzzles, a principle explored in our guide to metal puzzles that don’t break: a veteran’s guide.
This brings us to a common question: can I resize a puzzle ring? The short answer is: it’s highly complex and often not advisable. Resizing a traditional band involves cutting, adding, or removing metal and soldering it back together. On a puzzle ring, that solder joint would create a stiff point that destroys the flexible, interlocking mechanical puzzle action. A quality manufacturer will offer a range of ring sizes, typically from 5 to 12, often in-stock for common sizes. It is far better to get your size measured accurately and purchase the correct size from the start. Some high-end artisans may offer made to order sizing, but expect to pay for that customization. This even applies to more elaborate variations like a diamond puzzle ring, where resizing would compromise both the puzzle mechanism and the security of the stone setting.
So, should you buy one? If you’ve enjoyed the tactile challenge and want a durable, lasting piece, invest in a solid metal, well-finished ring from a specialist. It will age beautifully, developing a unique patina from your hands, and its crisp click upon final assembly will never get old. You’re not just buying a puzzle; you’re buying a piece of precise, wearable craft. And that is a satisfying solution no diagram can provide.
Final Adjustments: Sizing, Wear, and Your Newfound Skill
Now that you’ve solved it and are perhaps considering wearing your four-band puzzle ring, a few practical notes will ensure it remains a pleasure, not a problem.
First, fit. A properly assembled puzzle ring will fit more snugly than a standard band of the same ring size. This is normal. The interconnected bands create a double-thickness shank, so a size 8 puzzle ring will feel tighter than a solid size 8 band. When trying it on, it should slide over your knuckle with a firm push and sit comfortably without cutting off circulation. If you’re between sizes, size up. This is your puzzle ring size guide: when in doubt, go a half-size larger than your usual.
A common question after the triumphant ‘click’ is, “How do I keep it together? Can I solder it?” My professional advice is an emphatic no. Soldering it defeats the entire purpose. The joy and the mechanical puzzle lie in its dynamic nature—a fidget piece for your fingers. Soldering creates a stiff point that stresses the metal and ruins the elegant interlock. The ring is designed to hold its shape when worn correctly; trust the engineering. This understanding of internal stress and material is a core tenet of puzzle design through the lens of mechanical engineering.

If you’ve enjoyed the logic of the disentanglement puzzle (a broader category you can read about on Wikipedia), you might appreciate other classics like the one above. They operate on similar principles of spatial reasoning and tactile feedback.
For care, a sterling silver ring will develop a soft patina over time. If you prefer a shine, a gentle polish with a sunshine cloth works. Avoid harsh chemicals. The ring is surprisingly robust for daily wear, but remember it is not a monolithic band—don’t use it to pry things open.
Finally, is it a good puzzle ring gift? Yes, but with a caveat. It is perfect for the patient, mechanically-minded person. It can be a unique friendship ring or a symbolic engagement ring for the right couple, though it’s more commonly a wedding band alternative or a Claddagh ring style for those who love meaning and mechanics. It is not suitable for someone with arthritis or significantly poor dexterity. The assembly requires precise finger pressure and manipulation. Gifting one is offering a shared secret—a small, wearable triumph.
You started with four bands mocking you in your palm. Now you understand the single rule that governs them. You haven’t just memorized a sequence; you’ve learned a principle central to a whole class of mechanical puzzles (learn more about their fascinating world on Wikipedia). That skill is yours for good. So put it on, feel that satisfying click, and share the solution with the next frustrated soul you meet.