That Sickening Sound: Why Your Ring Isn’t Broken (And Never Was)
You had it in your hand, a solid, beautiful knot of metal. Then, with a twist of curiosity or a moment of fidgeting, it happened. The quiet clink-clink-clatter of pieces hitting the table. A wave of cold dread. What was once a ring is now a small, confusing pile of bands.
Let me be the first to say: breathe. You haven’t broken it. In fact, you’ve just successfully completed the first half of its intended purpose.
What you’re holding isn’t damaged jewelry. It’s a mechanical disentanglement puzzle, one of the cleverest little pieces of puzzle ring engineering to come out of the centuries. That moment of panic? It’s a tradition. For hundreds of years, these were given as “trust” or “betrothal” rings. The idea was poetic: if the wearer took it off and it fell apart, well, they had some explaining to do. More practically, it was a brilliant fidget spinner for the Renaissance mind—a conversation piece and a test of dexterity.
So, the rings on your table are supposed to do that. Their beautiful, interlocked state is the solved condition. Your current situation is simply the puzzle waiting to be put back together. The goal isn’t to wrestle stubborn metal. It’s to understand the elegant, three-dimensional logic that makes the whole thing click—literally.
I’ve seen the frustration. A customer once brought me a lovely 4 band sterling silver ring, convinced a tiny hinge had snapped. “It just came apart in my sleep!” He’d spent an hour trying to force the bands back into a shape they were never meant to take, risking a permanent bend. The relief on his face when I showed him it was designed for this was all the payment I needed.
This is the most important rule, one I’ll repeat like a mantra: Never force it. Applying pressure is the only way to truly break a puzzle ring. The solution relies on precise alignment, not muscle. If you’re met with resistance, you’ve missed an alignment. Back up, breathe, and look for the notches.
Forget “magic tricks” or memorizing a rigid sequence. We’re going to reverse-engineer the logic. Think of it like learning why a key turns a lock, not just memorizing how to jiggle the key. Once you see the figure of eight heart of it, you can reassemble any standard 4 band ring, even if the one in your hand looks slightly different from the pictures in a guide. For more on the calm, focused mindset needed for this, see our companion piece, How To Solve A Puzzle Ring Without Losing Your Mind.
The path forward is clear: frustration melts into understanding, then into the focused calm of solving. Let’s move from that pile of pieces to the triumphant snap of completion.
The Figure-8 Secret: The One Visual You Must Get Right First
So, we’ve banished the fear of breaking it and embraced the logic. Now, let’s build the foundation. Forget the other two bands for a moment. Your entire success hinges on understanding and creating one single, stable shape: the figure-eight.
Hold two bands in your hands. Any two. Try to interlock them. You’ll likely make a cross, or a loose tangle. Now, manipulate them so each band curves in opposite directions, weaving over and under to form that familiar sideways ‘8’ or infinity symbol. This is your mechanical puzzle’s keystone. In every standard 4 band puzzle ring, two specific shanks are designed to lock together in this precise configuration. They become the immovable base upon which everything else is built.
Why does this work? Look closely at the bands. You’ll see notches (small cut-outs) and humps (the raised arches between notches). The magic isn’t random; it’s elegant engineering. When formed correctly, the figure-eight aligns the hump of one band perfectly into the notch of the other, and vice versa. This creates a stable, interlocked unit that cannot pull apart sideways. It’s not a knot in the string sense; it’s a three-dimensional lock.
Here’s the One Visual You Must Get Right First: your starting position. The most common mistake is trying to build on a wobbly, incorrect base. To find your two base shanks, look for the pair that have matching, symmetrical notches. Lay them flat on a table and mentally trace their path. When correctly interlocked, the completed figure-eight will lie flat and symmetrical. If your base is twisted or uneven, the remaining bands will have no clear path to nest.
Think of it as building an arch. The figure-eight is the central capstone. You cannot place the supporting stones (your other two bands) without that key piece being perfectly set. This is the core spatial logic every other step flows from. Once you see this, the assembly transforms from a memorized sequence into a understood structure. You’re not performing a trick; you’re engineering a solution.
Pro Tip from the Workbench: Can’t identify the base shanks? Don’t guess. Use the ‘Reverse Engineering’ method. If you have a picture of your ring assembled, study it. Zoom in. You will see that figure-eight at its heart. On the ring itself, look for wear patterns—tiny scratches on the indents that show where bands have been sliding against each other for years. Those marks often trace the path of the primary figure-eight.
Your hands-on task before moving to the numbered steps: practice making this shape. Use the two bands that seem to fit together most naturally. Rotate them, flip them, until they click into that stable, flat, interlocked infinity symbol. Feel how the notches accept the humps. When it’s right, you’ll know. It will feel secure. That feeling is your green light. That is the visual and tactile anchor for everything that follows.
Meet the Cast: Naming and Understanding Your Four Metal Bands
You’ve practiced that fundamental figure-eight. Now, let’s introduce the specific players that will form it. I’ve seen many a frustrated puzzler fail simply because they treated all four bands as anonymous strangers. They are not. Each shank—the proper jeweler’s term for these individual metal bands—has a distinct role in the assembly. Think of them not as four separate rings, but as four interlocking parts of a single, elegant mechanical puzzle.
Hold all four loose bands in your palm. Let’s give them names to cut through the confusion.
- Band A (The “Key” or “Master” Band): This is the protagonist. It will have one deep, square-cut notch (or groove) on one side and a corresponding raised bump (or hump) on the opposite side. Its job is to lock the entire structure together. In most common 4-band designs, it’s often the one that, when the ring is worn, faces outward with a decorative flourish.
- Bands B & C (The “Figure-Eight” or “Base” Bands): These two are the supporting actors. They are typically mirror images of each other. Each will have two notches—one on each of its longer sides—and often a simpler, flatter profile. These are the two you just practiced with to form the infinity symbol. Their notches are what the other bands will nest into.
- Band D (The “Final” or “Clasp” Band): This one often looks similar to Band A, but it is not identical. It will have a notch and a bump, but their placement or the band’s curvature is subtly different. Its function is to slide in last, threading through the others to complete the knot.
But what if yours look almost the same? This is where most written instructions fall short. Here’s your diagnostic tip: use the ‘Reverse Engineering’ method on the pieces themselves. Lay them out on a flat surface. Look for the tell-tale signs. The bands that form the core figure-eight (B & C) will often have symmetrical, opposing notches. The key band (A) usually has the most pronounced, singular notch. Compare them side-by-side; the differences, though subtle, are deliberate and functional.
Never force a band into a role it doesn’t fit. If a shank won’t interlock smoothly, you likely have it misidentified. This careful identification is not pedantry—it’s the foundation. Just as a mason must know which stone is the keystone before building an arch, you must know your Band A from your Band D. The beauty of this disentanglement puzzle is that once you understand the logic of these roles, you can adapt it to solve 4 band, 6 band, and even 8 band variations. The principle scales; only the number of players changes.
Now, with your cast identified, you are ready to move from understanding to action. Let’s take Bands B and C and build our stage.
The Master Sequence: Photo-Anchored Steps for the 4-Band Ring
With your cast of characters—Bands A, B, C, and D—identified and laid out before you, the real magic begins. This isn’t about memorizing a secret handshake; it’s about constructing a tiny, beautiful machine. Remember, our stage is the figure-eight we formed with Bands B and C. Now, we’ll build upon it. Keep that mental image of the final, smooth ring in your mind. Every move we make is bringing us closer to that satisfying, metallic click.
Before we move a muscle, let’s settle on the correct ‘Starting Position.’ This is the single point where most first-timers veer off track, leading to the dreaded “Why won’t my puzzle ring go back together?” search. Here it is, clearly:
Hold the Figure-Eight upright. Imagine the infinity symbol (∞) standing on your table. The two loops should be side-by-side, not one on top of the other. Your thumbs and forefingers should be pinching the figure-eight at its central crossing point. This is your control point. The two ends of each band—the parts that will eventually become the top and bottom of the ring—should be pointing up and down, free to move. If your starting position looks like a tangled pretzel, you’ve already lost. Straighten it out. A clear beginning is 90% of the solution.
Now, breathe. The following steps are a dance, not a wrestling match. Let’s begin.

Step 1: Introducing Band A (The Key)
Pick up Band A, your key shank with the single, deep notch. You’re going to lower it onto the figure-eight from above.
Hold the figure-eight steady. Position Band A so it is perpendicular to the plane of the figure-eight. In simpler terms: if your figure-eight is facing you like a picture on a wall, Band A should come in from the side, like a pole poking through the picture.
Lower it down. Carefully pass Band A down through the top loop of the figure-eight (let’s call it the left loop), then immediately up through the bottom of the opposite (right) loop.
Do not twist Band A. Its notch should be facing you. You’re essentially creating a three-dimensional cross. At this point, Band A is loosely interlocked with B and C, but nothing is secure. This is correct.
Step 2: The First Critical Alignment
This is where spatial reasoning kicks in. Look at where Band A passes through the two loops.
Rotate the entire assembly. You need to see the side profile. Still pinching the center crossing with one hand, use your other hand to gently rotate the figure-eight 90 degrees, so you’re looking at the edge of the loops. They should now look like two circles, one in front of the other.
Align the notch. Your goal is to hook Band A’s notch onto the central wire of the figure-eight (the point where Bands B and C cross). With your free hand, tilt and slide Band A until its deep notch neatly nests over that central crossing point. You will feel a slight settle. This alignment is non-negotiable. If it’s not seated, the final assembly will fail. A clear photo of this side-view alignment is worth a thousand words here.
Step 3: Bringing in Band D (The Keeper)
Now for the final piece, Band D—the plain band with two notches.
Position Band D. Hold it parallel to Band A. Its two notches should be facing inward, toward the complex heart of the puzzle.
This is the trickiest maneuver. You must thread Band D through the maze created by Bands A, B, and C.
Start from below. Bring Band D up from the bottom of the assembly. It must pass inside the lower arch of Band A, but outside of the figure-eight’s lower wires. Then, guide it upwards.
Navigate the upper path. At the top, Band D must pass outside the upper arch of Band A, but inside the figure-eight’s upper wires.
This path—inside/outside, then outside/inside—creates the final lock. It may feel like you’re trying to thread a needle in mid-air. Go slowly. Wiggle the bands gently to find the path of least resistance.
Step 4: The Final Lock and the “Click”
Once Band D is fully seated along its correct path, the entire assembly should feel coherent, but still loose.
Apply gentle, opposing pressure. Here is the final move. With Band D in place, use both hands. One hand holds the side of the figure-eight near where Band A is hooked. The other hand holds the opposite side of the ring’s emerging shape, where Band D now sits.
Slowly push the ends together. Think of compressing a spring along its intended axis. You are not crushing or bending. You are guiding the pre-tensioned bands along their natural path.
If every notch is correctly aligned, you will feel a distinct, smooth slip, followed by a solid click. It’s a precise, mechanical sound. The ring will suddenly transform from a loose bundle of shanks into a single, cohesive unit. The bands will draw tight, forming that familiar, woven knot pattern. You have just solved it.
Never force it. If you meet solid resistance, stop. The ‘click’ is a smooth transition, not a crunch. Forcing is the enemy of this mechanical puzzle. Back up to Step 2 and re-check your alignments. Is Band A’s notch truly hooked on the center? Is Band D following the correct in-out path? Ninety-nine percent of “stuck” moments are due to a missed alignment one or two steps back. For a visual companion to these steps, you can always reference our dedicated photo guide for the 4-band puzzle ring.
Holding It All Together: A Practical Tip
Your hands are full during this process. It’s okay to set the partial assembly down gently on a soft, well-lit surface to adjust your grip. A microfiber cloth on your table prevents scratching and keeps the pieces from rolling. Some puzzle ring veterans even practice over a bed or sofa during their first few attempts for a soft landing. The goal is to reduce anxiety, which stiffens your fingers. Stay relaxed.
How long should this take a first-timer? If you’re truly understanding the logic, not just mimicking motions, expect 10 to 20 minutes of thoughtful effort. It’s not a race. The triumph isn’t in speed, but in comprehension. Once you’ve felt that click, you own the principle. You can now put back together any standard 4 band puzzle ring, even if the bands look slightly different. The 3D logic is universal.
This master sequence is the heart of the disentanglement. But what if you hear the click, but the ring still looks or feels wrong? Let’s move on to diagnose those common snags.
The Diagnostic Table: Why Your Ring Won’t Align and How to Fix It
So you’ve followed the steps, but something’s off. The assembly feels wrong, or the final piece simply won’t click. Take a deep breath. This is normal. In my decades at the bench, I’ve seen every snag imaginable. Each one is a clue, not a failure. Below is a diagnostic table for the most common hiccups, their root causes, and the gentle corrections to get you back on track.
| The Snag | The Likely Culprit | The Gentle Correction |
|---|---|---|
| Bands feel locked or jammed; nothing slides. | A band is flipped 180 degrees. Its notches are facing the wrong way, creating a physical deadlock. | Carefully disengage the last two bands you joined. Examine each. Every band has a specific “right-side-up” where its curves cradle others. Flip the suspect and try again. |
| The final band won’t drop into its seat. | The three assembled bands are not perfectly aligned in their final configuration. The “tunnel” for the last band is crooked. | Don’t push. Loosen your grip slightly and gently shuffle the three connected bands. Feel for them to settle into a symmetrical, stable nest. The last band should then slide, not force, into place. |
| The ring looks lopsided or twisted when ‘complete’. | One band is following the wrong path through another’s notch. The 3D logic of the over-under weave is broken. | Trace the path of each band visually. Each must pass through its partner’s notch in the correct sequence (in-out, in-out). Backtrack to the figure-eight base and verify the weave. |
| A gap remains; the ring won’t form a perfect circle. | The central “knot” is not fully compressed. This is often a matter of final seating, not a structural error. | With all four bands connected, apply equal, palm-wide pressure from all sides to coax the knot tight. Use the pads of your fingers, not your nails. |
| It fell apart again immediately after assembly. | The notches were not fully engaged in their interlocks. The ring was in a “false solve,” a precarious but convincing arrangement. | This is a good sign! It means you’re very close. Repeat the final step, ensuring you hear or feel a definitive click as each notch passes its partner’s hump. |
Why Force is the Enemy: A Micro-Lesson on Metal Fatigue
When a step doesn’t work, your first instinct might be to push. Please don’t. Here’s the jeweler’s truth: forcing a band just 1mm out of its intended alignment can permanently deform the metal. This is called metal fatigue—the subtle bending that changes the geometry of the notches and indents. Once bent, the bands no longer align. The puzzle ring becomes truly impossible to solve.
The metal, especially in sterling silver or gold puzzle rings, is designed for precise movement, not brute strength. If you think you’ve bent a band, place it on a flat surface. Does it rock? Can you see a curve where there should be a straight line? If so, it may need a professional jeweler’s touch with proper forming tools. This is a core principle of handling any disentanglement puzzle: finesse over force. For a deeper dive into this philosophy, I recommend reading about the real way to solve metal puzzles without forcing them.

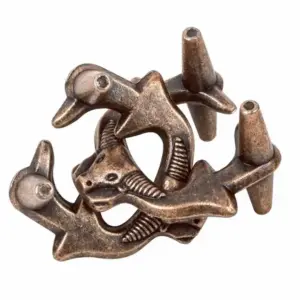
Horseshoe Lock Puzzle — $13.00
The same logic applies to all mechanical puzzles. The satisfaction comes from understanding the design, not defeating it. If you find this 3D logic fascinating, you might enjoy exploring other forged puzzle types that test similar spatial reasoning—where the solution lies in seeing the alignments, not applying muscle.
The Frustration Reset
If you’ve hit a wall, set the pieces down. Wash your hands to remove skin oils that make metal slippery. Clear your mind. Often, the error is in the very first step—the figure-eight foundation. Revisit it. As covered in guides like our own on metal puzzles that don’t break—a veteran’s guide to cast logic, success is 90% preparation.
Remember, this diagnostic process is building your confidence. By learning to read the rings’ resistance, you’re not just memorizing steps for a 4 band puzzle ring solution; you’re learning the language of the puzzle itself. Soon, you’ll feel the correction before you even see the problem. Now, with your ring hopefully aligned and secure, let’s look at what lies beyond the classic four bands.
Beyond Four: The Conceptual Leap to 6 and 8 Bands
So you’ve mastered the 4 band logic. You feel the click, understand the nesting, and can diagnose a flipped shank. It’s a wonderful foundation—and precisely what you need to appreciate the elegant complexity of its bigger siblings. Let’s talk about what happens when you move beyond four.
The first thing to understand is this: a 6 band puzzle ring is not simply a four-band ring with two extra bands slapped on. That’s the hook. From 4 to 6 Bands: Not Just Twice as Hard. The conceptual leap is significant. Instead of four independent bands intertwining, you are often working with pairs that move and function as a single unit. Think of it as graduating from a solo act to a coordinated dance duet.
Here’s the core principle. In many classic 6-band designs, the rings are grouped. You might have two central bands that form the core of the knot, while the remaining four act as interlocking sheaths or cages. Your initial assembly focus shifts from creating a single figure-eight to creating a stable, paired foundation. You’re building a scaffold, then weaving the others around it. The indents and notches become more specialized, guiding not just one band, but the relationship between partners.
This introduces the critical concept of internal vs. external bands. In a 6-band puzzle ring, some bands are meant to be completely hidden within the final assembly, serving as the structural heart. Others are designed to be visible, forming the outer weave. Misidentifying an internal band for an external one is the most common reason a solve attempt dead-ends. Your best strategy? Before you start, gently lay the bands out and look for matching profiles or linked pairs. Ancient puzzle ring instructions were often oral, but the clue is in the metal itself.
For 8 band and more complex versions, this logic of grouping and layering expands further. You might be working with two separate interlocked 4-band cores, or a central cage with multiple woven layers. The process becomes architectural. Patience and a clear mental image of the target are your most vital tools. If you have a picture of your specific ring assembled, study it. Reverse engineer the final shape to identify which bands cross over and which run underneath. This is why the puzzle ring remains the ultimate test of spatial humility.
Where should you look for these more intricate challenges? Reputable jewelers and specialty mechanical puzzle retailers are your best bet. Brands and craftspeople like Norman Greene or Stuller have been associated with quality forged puzzle ring designs. A quick search for “where to buy a puzzle ring” will lead you to dedicated shops—just be sure to check that they provide instructions for the specific band count you’re purchasing. Communities on Reddit or YouTube can also be treasure troves for video instructions and visualizing the assembly of these advanced disentanglement puzzles.
The journey from 4 to 6 or 8 bands is one of deepening your spatial reasoning. It’s less about memorizing a sequence and more about perceiving the layered relationships between metal strands. If the classic four-band ring taught you the alphabet, the six-band ring asks you to form sentences. Take it slow, trust the 3D logic you now possess, and remember the jeweler’s mantra: observe first, then act. Never force it.
If Your Ring Looks Different: Adapting the Universal Principle
So, you’ve mastered the classic 4-band puzzle ring, and perhaps you’re even eyeing ones with more bands. But what if the ring in your hand right now doesn’t quite match the simple woven bands we’ve used as our model? This is where understanding the principle, not just a memorized sequence, pays off. The core 3D logic remains your true north.
First, don’t panic. Examine your bands. The two main types of puzzle rings are woven and forged. Woven rings, like the one in our master sequence, have bands that look like flattened, interwoven strips. Forged puzzle ring designs are often made from round or D-shaped wires, where the notches are deep, milled grooves. The assembly logic is identical—the difference is tactile. The grooves in a forged ring will feel more precise, and the “click” of alignment might be more pronounced.
The real variable is the notch configuration. Some rings have notches on both the inner and outer curves of a band; others only on one side. Some have a central band with a distinctive “key” notch. Your job is diagnostic. Lay your bands out and identify:
1. The Central Anchor: Look for the band that has notches designed to accept multiple other bands. This is often your “Ring A.”
2. The Locking Pair: Find the two bands whose notches only seem to deeply interlock with each other. These will form your foundational figure-eight.
3. The Pass-Through Order: Observe the depth of the notches. A shallower notch typically means that band passes over another. A deeper notch is designed to nest another band inside it.

This is where The ‘Reverse Engineering’ Method proves invaluable. If you have a picture of the assembled ring, study it. Trace the path of one band with your eye. Does it go over or under its neighbor? That tells you the notch relationship. How does a puzzle ring work? It’s always a constrained path—each band is a road with specific overpasses and underpasses (the notches) that must line up.
Apply the universal steps, but be flexible with the starting orientation of your figure-eight. If the pieces refuse to nest, rotate the entire starting formation a quarter turn, anti-clockwise or clockwise—the metal will guide you. The metal is telling you something. Listen to it. This adaptable approach is what lets enthusiasts solve rings from different makers—whether it’s a classic design from Moores Jewellers or a modern mechanical puzzle from a specialty maker. For the foundational steps, always feel free to return to our core guide on how to solve a puzzle ring.
The principle is constant: form a stable core, then add bands in the order their notches dictate. Whether your ring has 4, 6, or 8 shanks, and whether it’s forged or woven, you’re not starting from scratch. You’re applying a fundamental language of interlock. Now you can truly put back together any ring you encounter.
Stewardship for a Heirloom: Care, Handling, and Your New Confidence
You’ve mastered the language of interlock. Now, let’s ensure your puzzle ring remains a source of satisfaction, not frustration, for years to come. Owning one of these is less about possessing a trinket and more about becoming the steward of a tiny, ingenious machine.
First, care for the metal. If your ring is sterling silver, a simple polish with a soft cloth is all it needs. For a more thorough clean, use warm water, mild soap, and a soft-bristled toothbrush to gently work into the notches, then dry it immediately and completely. Never use harsh chemicals or ultrasonic cleaners, as they can damage the fine mechanics. This is puzzle ring metal care at its simplest: gentle and non-invasive.
Storage is your best defense against damage. When not wearing it, or before attempting assembly again, place it in a soft pouch or a dedicated box compartment. This prevents the delicate bands from being bent or pressed against harder objects. Which brings us to the most important rule: know when not to wear it. Gardening, gym workouts, heavy manual labor—any activity that risks a sharp impact or lateral pressure should be done ring-free. Remember, force is the enemy. A sudden knock can misalign a shank just enough to make the solve feel impossible.
So, how long should it take a first-timer? If you’re holding a standard 4-band ring, with clear instructions and patience, anywhere from 5 to 20 minutes is perfectly normal. The triumph isn’t in the speed; it’s in that final, satisfying click. You’ve moved from anxiety to confidence. This journey is beautifully explored in our piece on when a simple ring becomes a masterclass in patience.
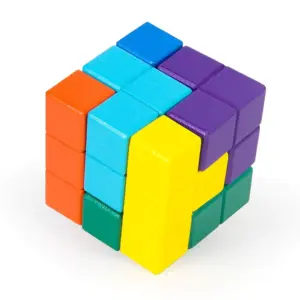
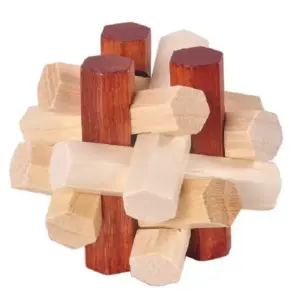
This confidence opens a door. You now understand a fundamental class of mechanical puzzles (as categorized on Wikipedia), specifically a disentanglement puzzle (see Wikipedia). Your hands have learned a new skill. Why stop there? The world of disentanglement puzzles is vast and deeply rewarding. The same spatial reasoning you used to put back your ring applies to countless other handheld challenges.

Consider a piece like the one above—a different kind of mechanical logic to explore. For more curated ideas, our guides on the best metal puzzles for the over-thinker are a perfect next step.
You started with pieces clattering on a table. Now, you hold a solved puzzle and the knowledge to do it again. That is the true purpose of this puzzle ring gift to you: a quiet, personal triumph of logic and patience. Treat it well, practice occasionally, and let it be a reminder that complex problems have elegant solutions. You’ve earned it.