The Pieces in Your Palm: Why Your Ring Fell Apart (And That’s Okay)
You took it off, and now you’re holding four separate bands of metal in your palm, wondering how something so elegant turned into a jigsaw puzzle for your fingers. That moment of disbelief—maybe it slipped off in your sleep, or you fidgeted with it once too often—is universal. Don’t worry. This isn’t broken, it’s by design.
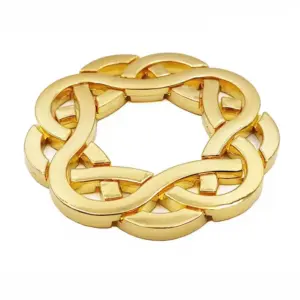
What you’re holding is a 4 band puzzle ring, a mechanical puzzle disguised as jewelry. Its entire purpose is to come apart and challenge you to restore its seamless shape. That initial spike of frustration? Every single owner feels it. I’ve seen it on the faces of customers handing me a tangle of bands in a baggie, muttering, “I think it’s ruined.” My bench jeweler’s instinct was always to reassure them: this is the ring working as intended. You haven’t broken a precious object; you’ve activated its core function, beginning a true masterclass in patience.
The concept is ancient, often traced back to Ottoman-era Turkish ‘harem rings’ given as tokens of fidelity—the idea being if the wearer removed it, the complex interlocking weave would fall apart, revealing the act. Today, it’s less about secrecy and more about the satisfying, tactile pleasure of a disentanglement puzzle you can wear. It’s a fidget toy with centuries of history.
Most 4-piece puzzle ring boxes include a small, often cryptic, instruction sheet. It’s the first thing to get lost. If you’re reading this, that flimsy paper is probably long gone, tucked into a drawer never to be seen again. That’s why you’re here. The good news is, four bands represent the entry point. When people ask “are puzzle rings hard to solve?”, the answer for a 4 band puzzle ring is: it’s the easiest level of complexity. It’s the perfect place to learn the logic that governs all puzzle rings.
So, let’s shift the emotion. The anxiety of “I broke it” becomes the relief of “it’s supposed to do that.” And relief is the perfect runway for curiosity. How do four independent loops of metal—whether sterling silver, gold plated, or 14k gold—hold together without solder, glue, or magic? The answer is pure mechanical cleverness, a lesson in tension and alignment.
Take a closer look at your four bands. You’ll likely notice two look identical, often with a simpler curve. These are the outer bands. The other two have a more complex, figure-eight-like bend in their center—these are the heart of the mechanism, the interlocking keys. Understanding this is your first step out of frustration and into focused determination. Let’s see how they fit together.
The Hidden Loom: Understanding the Interlocking Weave
Now that you know the ring is supposed to come apart, the real fun begins. This isn’t about memorizing a sequence of random twists. It’s about seeing the pattern, the hidden structure that turns four separate bands into a single, locked unit. Think of it like a woven basket: the strength isn’t in any single reed, but in the over-under tension of the entire weave. Your 4 band puzzle ring operates on the same principle of interlocking tension.
Let’s name the parts. You have four bands, but they play two distinct roles. First, you have the two outer bands. These are usually simpler, U-shaped arcs. Their job is to act as the frame, the basket’s rim, holding the weave in its final circular shape.
The real magic—or rather, the real mechanics—lies in the other two. These are the interlocking bands, sometimes called the key bands. Look closely, and you’ll see each has a distinct, symmetrical figure-eight bend at its center. This is the core mechanism. These two bands are identical, and they are designed to weave through each other and the outer bands in a specific, locked alignment. If you’ve ever wondered how to put together a 4 band puzzle ring for good, it all starts with getting this central pair correctly engaged. The puzzle ring instructions that got lost were just a map to this specific weave.
Here’s the core concept: when assembled, the figure-eight centers of these two key bands sit perpendicular to each other, like two links in a chain that can’t be pulled apart. They create a locked central hub. The outer bands then slide into notches on this hub, applying outward tension. This tension is what holds the entire assembly together. It’s a perfect balance—too loose, and the ring falls apart with a casual twist; too tight (in a poorly made ring), and it’s impossible to assemble. A well-crafted sterling silver or 14k gold puzzle ring will have this balance engineered into its bends.
This is why a simple pull won’t disassemble a solved ring. You must release the tension first by pushing the outer bands toward the center, which then allows the interlocking bands to slip free of their perpendicular lock. When you solve a 4 band puzzle ring, you are essentially re-creating this tensioned weave from scratch. It’s a classic exercise in the philosophy of play first, understand later, where hands-on manipulation leads to deeper comprehension.
Understanding this changes everything. You’re not just following steps; you’re building a miniature machine on your finger. You begin to feel for the “click” of alignment, the point where the figure-eight hubs seat against each other. You learn that forcing it is always wrong—if something won’t slide, the alignment is off by a millimeter. This foundational knowledge, this glimpse into the hidden loom, is what turns a frustrating mechanical puzzle into a deeply satisfying ritual. It’s the pattern-thinking that transforms you from someone following a map to someone who understands the terrain.
With this picture in mind—a central locked hub cradled by a tensioned frame—the step-by-step process you’re about to follow will make logical sense. Let’s move from theory to practice.
Step-by-Step Reassembly: A Visual Method That Actually Works
Now that you understand the hidden weave, you can start the satisfying work of re-creating it. Forget the confusing, diagramless paper instructions. This method is about building a visual scaffold in your hands. You’ll start by forming the locked central hub, then add the supporting frame. Your goal is to create that final, satisfying tension that turns four loose bands into a solid whole. The process breaks into three clear phases. For this walkthrough, I’m using a classic platinum plated style, but the steps are universal for any 4-piece puzzle ring, be it base metal or solid sterling silver.
Phase 1: Forming the Core Basket
This phase creates the locked central figure-eight structure.
- Identify Your Bands: You have four identical-looking bands, but for assembly, we’ll designate two as figure-eight bands (the interlocking ones from our previous discussion) and two as outer bands. You can use any two as figure-eight bands to start.
- Create the First ‘U’: Hold one figure-eight band vertically so it looks like a tall, narrow letter ‘U’. The two rounded ends (the ‘hubs’) are at the bottom, and the arch of the ‘U’ is at the top. This is your first band.
- Weave the Second Band: Take your second figure-eight band and hold it perpendicular to the first, like you’re going to make a plus sign (+). Now, lower this second band down through the arch of the first ‘U’. Keep lowering it until the arch of the second band clears the bottom of the first band’s legs. You should now have one band passing through the loop of the other.
- The Pivot and Lock: This is the critical move. Rotate the second band 90 degrees, so it is now also oriented as a ‘U’, parallel to the first band. As you do this, the hubs of the two bands will naturally want to nest together at the bottom. Gently guide them so they interlock, sitting side-by-side. You should now have what looks like a small, two-pronged basket or a square-bottomed ‘W’ shape. This is your core. Jiggle it slightly; the two bands should be securely linked and move as one unit. If they feel loose, the hubs aren’t seated together properly—gently press them into alignment.
Phase 2: Adding the Frame (The Outer Bands)
The core basket is fragile. The outer bands act as a stabilizing frame, cradling it.
- Position the First Outer Band: Take one of your remaining (outer) bands. Position it horizontally, so it looks like a wide, flat letter ‘C’ or a taco shell. Place your vertical core basket inside this ‘C’.
- Thread the Legs: You need to capture the legs of your core basket. Carefully guide the left leg of the core down through the top loop of the horizontal ‘C’ band, and the right leg down through the bottom loop of that same ‘C’. This is easier to do by slightly tilting the core. Once threaded, slide the horizontal band up so it sits near the top arches of the core. This band now loops around both legs, holding them together. Your assembly now looks like a basket with a handle.

- Add the Final Outer Band: This is the mirror of step 6. Take your last band and orient it as another horizontal ‘C’, but turn it 180 degrees from the first outer band—if the first ‘C’ opened upward, this one should open downward. Place it around the core basket from the opposite side. Now, thread the core’s legs again: the left leg goes through the bottom loop of this new band, and the right leg through its top loop. Slide this band down to sit near the bottom hubs of the core.
- Check Your Structure: You should now have all four bands connected. The two outer bands form a crossed, saddle-like frame around the central core. If you look from the side, the assembly has a distinct ‘X’ shape where the bands cross. Everything is loose but linked. This is the pre-tension state.
Phase 3: The Final Twist (And The One Wrong Twist Everyone Makes)
Here is where you apply the final, correct force to create the ring’s locked tension. This is the step where almost everyone goes wrong by twisting in the wrong direction.
- Grip for the Twist: Hold the assembly at the top and bottom with your thumbs and forefingers. Your grip should be on the two outer bands.
- Apply the Correct Rotational Force: Now, gently but firmly rotate the top and bottom of the assembly in opposite directions. Think of wringing out a very small towel. The correct twist is to rotate the top toward you and the bottom away from you (or vice-versa). You will feel significant resistance—that’s the bands sliding against each other into their final seats. This is normal.
- The Wrong Twist: If you twist in the opposite direction (top away, bottom toward), the outer bands will simply unhook from the core and the whole assembly will fall apart in your hands. This is the frustrating “one wrong twist” that undoes all your work. If this happens, don’t despair. Just return to Phase 1—you now know what not to do.
- Feel for the ‘Click’: As you apply the correct twisting pressure, the loose ‘X’ shape will begin to collapse into a tight, cylindrical form. Keep twisting steadily. You will feel, and often hear, a soft click or a series of clicks as the figure-eight hubs at the core fully seat and the outer bands snap into their grooves along the ring’s perimeter. This is the moment of triumph.
- Final Adjustments: Once the ring is formed, it may look slightly uneven. Gently roll it between your fingers, applying light pressure to round it out perfectly. Check that all bands are flush and no single band is protruding.
You’ve just solved a classic mechanical puzzle. The ring is now under tension and will not come apart unless you deliberately push the outer bands toward the center to release the weave. This method, focusing on building the core basket first, is the most reliable way to assemble a puzzle ring of this design. For more insights into the mindset needed for these spatial challenges, which some consider the ultimate test of spatial humility, remember the goal isn’t just to follow steps, but to internalize the structure. After a few solves, your fingers will learn the dance of tension and alignment on their own.
When the Puzzle Fights Back: Pro Tips & Fixing Common Stumbling Blocks
You’ve felt that satisfying click, and the ring sits whole in your palm. But sometimes, victory is fleeting. You slip it on, and a few hours later, you’re fishing four separate bands from your pocket. Or, during assembly, you hit a wall—a persistent gap, a floppy mess that refuses to tighten. This is the puzzle fighting back, and it’s where most guides leave you hanging. Don’t default to frustration. This is a diagnostic process. As someone who has reassembled rings brought in in mint tins, I can tell you the issue is almost always one of three things: fit, a subtle assembly error, or the metal itself learning a bad habit.
Why Does My Puzzle Ring Keep Coming Apart When I Wear It?
This is the most common complaint, and the answer is almost always about ring sizing nuance. A standard ring is a continuous circle. A 4 band puzzle ring is a dynamic assembly held together by mechanical tension. If the ring is even a half-size too large for your finger, the slight, constant movement and impact of daily life will work the bands against each other, eventually pushing the outer bands inward and releasing the weave. It’s not breaking; it’s unlocking.
- The Fit Test: The ring should fit snugger than a standard ring. When you push it over your knuckle, there should be noticeable, but comfortable, resistance. It should not spin easily on your finger. If it slides off with a gentle shake, it’s too big. This is why standard ring sizers lie to you. The puzzle’s assembled diameter is often slightly larger than a solid band of the same marked size due to its woven structure.
The “One Wrong Twist” Everyone Makes
Even with correct assembly steps, a subtle error creates a weak structure. It happens during the final twist (Step 11 from the previous section). The instinct is to twist the two ends around each other. Instead, you must twist them in unison, as if turning a key in a lock. Imagine the central figure-eight hub as a spindle. You are rotating the entire, partially-formed loop around this spindle. If you twist one band over the other, you create a crossover that destroys the intended interlocking weave. The result is a ring that looks assembled but has a visible diagonal gap or collapses with light pressure. The fix? Go back to Step 10, ensure your core basket is symmetrical, and perform the final twist slowly, watching the bands spiral into place together. This is a perfect example of when you need to stop forcing the solution and instead correct the underlying alignment.
Diagnosing a Floppy or Gappy Assembly
- The Core Basket Wasn’t Square: If your initial four bands (Step 4) weren’t lying perfectly flat and square before you lifted them, the geometry is off. The ring will never achieve proper tension and alignment. Disassemble and start over, taking an extra 30 seconds to nudge each joint to 90 degrees.
- Resistance is Normal: When sliding the second outer band into the core (Step 9), you should feel firm resistance. This is the metal bands beginning to press against each other, creating the spring tension that will eventually lock everything. A common mistake is to back off at this point, leaving everything too loose. Push through steadily until the band seats fully at the top of the arch.
- The “Click” is Non-Negotiable: If you didn’t feel or hear the soft satisfying click at the end, it’s not fully locked. Gently try to press the outer bands toward the center of the ring. If they move, apply a bit more rotational pressure during the final twist.
Pro Tips from the Bench
- Break It In: A new, especially plated or very stiff sterling silver ring, can be tight. Assemble and disassemble it a dozen times on your desk. This gently wears in the microscopic contact points and makes the action smoother.
- The Pencil Trick: For a stubborn final twist, use a rounded pencil (not a pen—too sharp) as a mandrel. Slide the partially assembled ring onto it. The pencil gives you leverage and helps maintain a perfect circular form as you twist.
- Addressing a “Trained” Ring: If a ring has been incorrectly assembled and worn for a long time, the metal can develop a memory for the wrong shape. You need to retrain it. Disassemble it completely. Take each band and gently flex it back into its original, gentle arc. Lay them all flat on a table. They should all have an identical, smooth curvature. If one is kinked or flattened, that’s your culprit.
- Know When to Walk Away: If you feel genuine anger building, put the pieces down. This isn’t a test of force, but of spatial logic. Forcing a solution often worsens the problem. Clear your head, then come back and focus on the band orientation, not just the steps.
Finally, if your ring fits well and is correctly assembled but still comes apart under specific conditions (like typing or lifting weights), the activity may simply be too aggressive for its delicate nature. It’s a finely-balanced disentanglement puzzle (a category of mechanical puzzle), not a forged wedding band. For daily hard use, a perfectly fitted, solid metal ring is your best bet. If the fit is the issue, the next section on sizing will be your essential guide.
The Sizing Lie: Why Your Normal Ring Size Doesn’t Apply Here
So, your ring is correctly assembled, but it still feels wrong—either pinching your finger or slipping off too easily. This isn’t a failure of your assembly skills. It’s the most common, under-reported fact about these rings: your standard ring size is a lie when it comes to a puzzle ring.
You’ve asked, “Is a size 7 puzzle ring the same as a size 7 normal ring?” The honest, bench-jeweler answer is: almost never. A standard ring is a single, smooth circle. A 4 band puzzle ring is a hollow lattice of four sterling silver or gold plated bands, all rubbing against each other. That internal geometry and metal-on-metal friction add bulk. If you order your usual size, you’re almost guaranteed a ring that feels tight, uncomfortable, and may even cut off circulation when the weave settles.
Here’s the nuance. The four bands, when interlocked, create a tube. Your finger must pass through the entire internal diameter of that tube, not just sit under a single band. For most people, this means a puzzle ring needs to be a half to a full size larger than your standard size.
How to Find Your True Puzzle Ring Size:
Forget the paper sizers at the jewelry counter for a moment. Here’s the method I use for customers, and you can do at home:
1. Find Your Baseline: Use a proper metal ring sizer (the kind with multiple loops) or visit a jeweler to get your most accurate standard size on the finger you intend to wear it. Let’s say it’s a 9.
2. The +0.5 Rule: For a standard 4-piece puzzle ring, immediately add half a size. Start your search for a size 9.5.
3. The Variable Adjustments:
* For Wider Bands: If the individual bands are thick (over 2mm each), consider a full size up.
* For Knuckle Consideration: Your puzzle ring will have give due to its weave, making it easier to get over the knuckle. Focus more on how it feels on the base of your finger. It should be snug but not tight, with no pinching on the sides.
* The Paper Test: If you’re buying online and are unsure, cut a strip of paper 3/4-inch wide. Wrap it snugly around the base of your finger, mark where it meets, measure the length in millimeters, and use an online ring size chart. Then, add that half size to the result.
This puzzle ring sizing guide is crucial because most online listings, from Puzzle Rings Creations to general retailers, use standard ring sizes. They aren’t lying; they’re just not accounting for the mechanical reality. Knowing this ring sizing nuance is the difference between a ring you’ll wear daily and one that lives in a drawer.
Can You Resize a Solid Metal Puzzle Ring?
This is the other big question. The short answer: it’s a complex, expensive, and risky job that most jewelers will refuse. Resizing a traditional ring involves cutting, adding or removing metal, and soldering it back together. With a puzzle ring, you’re not dealing with one band, but four interlocking ones. To resize it properly, a jeweler would have to disassemble it, resize each individual band perfectly in proportion, and then reassemble it—a task requiring specialized puzzle knowledge. For solid gold or sterling silver rings, it’s sometimes technically possible but rarely cost-effective. For plated or two tone gold rings, the heat from soldering would destroy the plating. The best policy is to get the size right the first time.
Think of it this way: you’re not just buying jewelry; you’re commissioning a tiny, wearable machine. Getting the fit right is the first step to turning a moment of frustration into a lifetime of satisfying, fidget-friendly wear.
Choosing Your Ring: Solid Metal vs. Plated, and What You Really Pay For
So you’ve mastered the reassembly, understand the sizing nuance, and now you’re considering buying your first—or maybe an upgrade. This is where the real-world question hits: should you spend $15 or $100 on a 4 band puzzle ring? The choice between plated and solid metal isn’t just about price; it’s about how the ring feels, wears, and survives a lifetime of solving.
Let’s cut through the finish. Plated puzzle rings—often brass or copper with a thin layer of silver, gold, or platinum plating—are the entry point. You’ll find these in the $15-$30 range. They’re fantastic for first-time buyers, gifts, or testing if you enjoy the mechanical puzzle without a major commitment. The caveat? That plating will wear. Solving the ring creates friction between the interlocking weave of bands. Over months of frequent assembly, the plating on the inner contact points will rub off, revealing the base metal beneath. It’s a cosmetic issue, not a structural one, but it’s inevitable. If you’re the type to fidget with it daily, tumbling it in your pocket, a plated ring will show its history.

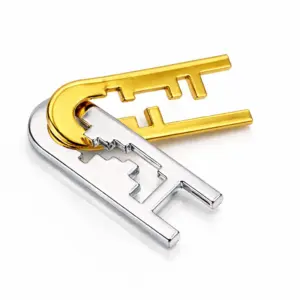
Metal Starfish Puzzle Ring — $13.99
A ring like the one above is a perfect example of the plated category—an accessible way to explore puzzle mechanics. For deeper dives into similar disentanglement puzzles, our guide to the Metal Starfish Puzzle Ring explores another wearable brain teaser.
Now, solid metal. When we talk about a sterling silver puzzle ring 4 band, we’re in the $70-$100 territory from specialty retailers. Solid gold versions, like 14k yellow gold or white gold, are a significant leap in price. What you’re paying for is permanence. The heft is different—it feels substantial on your finger. The tension and alignment during assembly feel smoother, more precise. Most importantly, the wear is even and dignified. Sterling silver will tarnish and develop a patina, but it polishes back. The metal you see is the metal you get, all the way through. It’s designed for a lifetime of solving.
Band style is your other key choice. Bands come in flat, round (half-round), or patterned profiles like some Claddagh puzzle rings. For your first 4-piece puzzle ring, I recommend flat or gently rounded bands. They’re easier to handle during reassembly and more comfortable for long-term wear. Intricately patterned or faceted bands can dig into adjacent fingers slightly.
Is a puzzle ring a good gift? Absolutely, but with guidance. For a puzzle enthusiast, it’s a brilliant, wearable challenge. Gifting a plated ring is a safe, intriguing option. If it’s for a partner as a friendship ring or unique wedding band, lean toward solid sterling silver for its longevity. Always include the size—and remind them of the sizing quirk.
When shopping, especially on large marketplaces, read between the lines. A listing for a “sterling silver puzzle ring” at $25 is almost certainly plated. True solid silver will be marked “.925” and priced accordingly. Look for sellers that specify band count, metal purity (like tri-color gold or solid gold), and offer a clear ring sizer or size guide. Reputable puzzle ring store sites and specialists often provide the most accurate descriptions, secure payment, and policies like money back guarantee or free shipping on in-stock items, unlike made to order pieces which may have longer lead times.
In the end, your choice boils down to intent. Want a fascinating, temporary fidget? A plated ring from Amazon fits the bill. Seeking a permanent piece of mechanical art you’ll solve for decades? Invest in solid metal. Both get you to the same satisfying click of completion, but only one is built to echo that click for a lifetime.
Daily Wear & Care: Keeping Your Solved Ring Happy
Now that you’ve chosen your ring—be it a budget-friendly plated piece for curious fidgeting or a solid sterling silver heirloom—it’s time to move from solving to living with it. A 4 band puzzle ring is a mechanical puzzle meant to be worn, not just solved and shelved. Its longevity depends entirely on how you handle, wear, and care for it.
Putting It On & Taking It Off: The Two-Finger Rule
The primary reason a puzzle ring keeps coming apart during daily wear is improper handling. Never pull it straight off your finger like a standard band. That lateral pressure exploits the weak points in the weave.
* To put it on: Ensure it’s fully solved and “locked.” Slide it on carefully, avoiding any twisting motion against your skin.
* To take it off: Use your thumb and index finger of the opposite hand to gently push the ring straight off, applying even pressure all around. Imagine you’re removing a rigid tube, not a flexible chain. This prevents putting diagonal tension on the interlocking weave.
Cleaning: The Ultrasonic Cleaner is Your Enemy
Forgetting its puzzle nature is the biggest mistake here. Never, ever use an ultrasonic jewelry cleaner. The violent vibrations will absolutely shake the ring apart inside the tank, leaving you to fish out four separate bands. Stick to manual methods.
For plated rings, use a soft, lint-free cloth dampened with a bit of warm water and mild dish soap. Dry thoroughly. Avoid harsh chemicals, as they can accelerate plating wear.
For solid metal rings like sterling silver, the classic baking soda, aluminum foil, and hot water bath works wonders for removing tarnish. However, ensure the ring is fully assembled and locked. Submerge it, let it fizz for a minute or two, rinse with cool water, and pat dry. For light daily cleaning, a dedicated silver polishing cloth is perfect (it’s slightly abrasive, so go gentle). For 14k gold or other solid gold variants, warm soapy water and a soft toothbrush are safe for getting into the weave’s crevices.
The Tarnish Reality for Sterling Silver
Sterling will tarnish, especially in the tight, moisture-trapping spaces of the puzzle’s weave. This isn’t a flaw—it’s chemistry. Regular wearing actually slows tarnish. When storing it, keep it in a dry place, ideally in an anti-tarnish pouch. Don’t panic if a dark patina develops in the grooves; it highlights the intricate structure and is easily cleaned.
Breakage vs. Disassembly: Diagnosing the “Click”
Know the difference between a feature and a failure.
* Normal Disassembly: The ring comes apart into its four clean, undamaged bands. This is by design. It’s not broken; you just have a project for later.
* Actual Damage: This is almost always a bent band. Look for a kink, a flat spot, or a band that no longer sits perfectly flat on the table. This usually happens from impact (dropping it on a hard floor) or force (trying to pry bands apart with a tool). A slightly bent band can sometimes be carefully straightened with smooth-jawed pliers and a very gentle touch, but you risk weakening the metal. For a valuable solid gold or wedding bands-grade ring, take it to a jeweler experienced with puzzle rings.
The goal is confidence. A well-cared-for puzzle ring transitions from a frustrating novelty to a reliable companion—a piece of wearable engineering that rewards a bit of mindful attention.
Mastered the 4-Band? Here’s What Comes Next.
Now that you’ve confidently reassembled and cared for your 4-band puzzle ring, you might be wondering what’s beyond this initial challenge. That curiosity is the point. You’ve just learned the basic vocabulary of tension and alignment—the satisfying click of a solved ring is your diploma. So, what’s the next level?
The natural progression is in band count. Your 4-band ring, with its two interlocking figure-8s and two outer bands, is universally considered the entry point. It’s the perfect introduction to the mechanical puzzle genre, a subcategory of the broader world of disentanglement puzzles. When people ask, “Are puzzle rings hard to solve?” the answer starts with, “It depends on the band count.”
A 6-band puzzle ring introduces a more complex weave. Where the 4-band has a relatively straightforward crossover, the 6-band adds layers of interlocking that require you to manage three moving relationships instead of two. It’s not just twice as hard; the difficulty scales geometrically. The 8-band and 12-band versions are for dedicated enthusiasts. The ring’s profile becomes thicker, and the reassembly can feel like engineering a tiny, wearable machine. For daily wear, many find the 4-band or 6-band to be the sweet spot—challenging enough to be engaging, but not so complex that you avoid taking it off.
This progression from 4 piece puzzle ring to higher band counts mirrors a broader truth: you’ve developed a skill for spatial reasoning and patience. If that tactile problem-solving itch has been scratched, there’s a whole world of three-dimensional brain teasers waiting.

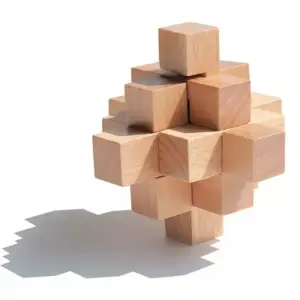
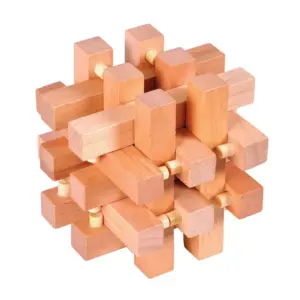
Sets like the 12 Piece Crystal Luban Lock Set are the desk-bound cousins of the puzzle ring. They operate on similar principles of interlocking geometry and precise alignment, but without the constraint of fitting on a finger. For a slightly different take, the Luban Lock Set 9 piece offers a wooden alternative. They’re fantastic for deepening that three-dimensional thinking.
So, where should you go from here? Your next step depends on what hooked you. If it’s the wearable art aspect, browse reputable puzzle ring store sites for a 6-band in solid sterling silver or 14k gold—the heft of a precious metal makes the solve feel more substantial. If it’s the pure puzzle mechanics, grab a Luban lock or similar mechanical puzzle. And if you simply enjoy the fidget-friendly ritual of solving your 4-band ring, you’re already done. You’ve turned a moment of frustration into a lifetime of quiet satisfaction. That’s the real solution.