5")
Before You Weave: The Two-Minute Triage for Frustrated Fingers
You’ve done it. You’ve taken apart your four-band puzzle ring, and now the four gleaming bands sit on your table, looking more like a tiny, confusing metal puzzle than a ring. Don’t worry—this is part of the ritual. Every single person who owns one of these beautiful mechanical puzzles has faced this exact moment. The panic is normal, but it’s also unnecessary. Before you try to weave, you must identify. This is where most attempts fail.
Take a deep breath and lay the four bands out on a flat, clean surface. Ignore the urge to start threading them together. First, we must see what makes each band unique.
Most 4 band puzzle rings are not made of identical loops. Their magic is in subtle, manufactured differences. Look closely at your bands. You are searching for two key features: a dimple (a small indentation) and a plaque (a flat, slightly wider section). These are your visual anchors.
Let’s label them. This is your ring identification guide:
- Band A: This is often the “frame” or outer band. Look for a band that has two plaques. These flat sections are sometimes smooth or may carry an engraving. It typically lacks the pronounced dimple of the other bands.
- Band B: Find the band with a single dimple. This small, round indentation is a key lock in the puzzle’s mechanism. This band usually has no plaque.
- Band C: This is the trickster. It looks nearly identical to Band B, also featuring a single dimple. The difference is often in the spacing of the arches or a slight variation in the dimple’s placement. Its role in the sequence is distinct.
- Band D: Identify the simplest band. It is usually a plain, unadorned loop with no dimple and no plaque. It acts as the final, securing link.
If your ring is new, know that instructions are almost always included with a new ring. They are often a small, cryptic diagram. Our goal here is to translate that diagram into a tactile reality. Whether your ring is a classic sterling silver puzzle ring or a modern gold puzzle ring, the principle of identification is the same. The metal doesn’t change the puzzle—it just changes the shine.
Now that you’ve found Band A with its two plaques, and Bands B and C with their single dimples, and the plain Band D, the intimidation starts to fade. You’ve moved from seeing a jumble of metal to recognizing distinct components. This is the first, crucial win. You’re no longer staring at a puzzle; you’re holding its parts, ready to learn their dance.
The Methodical Weave: A Step-by-Step Assembly for a Perfect Fit
You’ve identified your four distinct bands. That moment of recognition—seeing components, not chaos—is the foundation of any good mechanical puzzle. Now, we move from identification to assembly. This is where patience becomes your most valuable tool. For centuries, from the hands of Ottoman jewelers to modern workshops, this process has been a test of sequence and dexterity. While the specific weave can vary by model code (like the 4KNS or 4PSL you might find on a product tag), the core principle of interlocking a framework and securing it remains universal.
Think of the process in two distinct phases: first, you form the loose, three-band core that defines the ring’s shape; second, you lock that core permanently into place with the fourth band. A good puzzle ring tutorial video can be invaluable for visualizing this dance, but the written guide allows you to proceed at your own, deliberate pace.
Let’s begin the weave.
Phase One: Forming the Core
This phase uses three of your four bands. For most standard four-band weaves, you will start with Bands A, B, and C.
- Lay Band A flat. Position it horizontally on your table. This band, with its two small plaques, is the keystone. Orient it so the plaques are face-up. Think of it as a track that the other bands will run through.
- Insert Band B vertically. Hold Band B (one dimple) so it stands upright, perpendicular to Band A. Now, slide it through the center of Band A. The goal is to hook Band B’s dimple over the central bridge of Band A. You are not forcing anything; you are seeking a specific intersection. The dimple should catch, creating a simple cross.
- Introduce Band C. Here is where your tactile attention is key. Pick up Band C (the other single-dimple band). Rotate the nascent cross you’re holding so you can see the openings. Slide Band C into the structure, perpendicular to Band B. Its dimple must hook over Band A’s bridge from the opposite side as Band B. If done correctly, you will now have a three-dimensional, somewhat floppy cage. This is your core. It should hold together loosely if you handle it gently.
At this stage, the assembly feels tentative. That’s correct. It is a scaffold awaiting its final, stabilizing member.
 6")
Phase Two: Locking the Weave
Now, Band D—the plain, unadorned loop—enters. Its simplicity is deceptive. This band is the lock.
- Position Band D. Hold your three-band core in one hand. With the other, hold Band D ready. You must feed Band D through the weave in a very specific path. It will not go over or under all the bands at once. Instead, you will thread it through the openings created by the intersections of A, B, and C.
- Execute the weave. This is the most intricate step. Carefully slide one end of Band D through one of the side openings of the core. Rotate the core as you work, guiding Band D so it passes over one arch of Band A and under another, while also weaving between Bands B and C. Your fingers are learning the topography of the puzzle. There is a single, correct path. If you meet resistance, stop. Do not force it. Backtrack and try a different angle. For more complex weaves, like some diamond puzzle rings or intricate wedding puzzle rings, this path can be more nuanced, but the principle of seeking the natural channel remains.
- Seek the click. As Band D finds its final position, you will feel a distinct shift. The entire structure will stiffen. The loose cage becomes a cohesive unit. Apply gentle, even pressure to fully seat Band D. When it is perfectly in place, there is often a subtle but satisfying click of metal settling into its grooves. This tactile feedback is your confirmation. The ring is now a solid, interlocked circle.
The Moment of Truth
Lift the assembled ring. It should feel firm, a continuous loop of woven metal. Gently twist the bands; they may have a slight, intended flexibility, but they should not separate. If one band pops loose, you are likely one sequence step off—often, Band C and Band D were swapped in the core phase, or the final weave of Band D was incomplete. This is normal. Dismantle it calmly and return to your identified bands. The process is not about speed, but precision. Each successful puzzle ring assembly deepens your understanding of the mechanism.
Remember, whether you’re working with an affordable sterling silver puzzle ring or a lavish 14K gold one, the solve is identical. The value of the metal doesn’t change the dance of the bands. For further visual guidance, our step-by-step photo guide to solving the 4 band puzzle ring reinforces these steps. And if the ring still resists, consider the perspective in our article on the real way to solve metal puzzles when your hands are lying to you, which discusses the mental shifts needed for puzzles like this.
You’ve now solved it. The parts have become a whole. This completion is a small, personal triumph—a connection to a long line of people who have felt that same click of resolution. But what you hold is more than a solved puzzle; it’s an object with a story. Its journey from a tangled mass to a unified ring mirrors its own fascinating history.
Why Does My Solved Ring Feel Loose? (The #1 Post-Assembly Question)
That feeling of triumph, holding your fully assembled ring, can be quickly shadowed by a nagging concern. It’s on your finger, but it doesn’t feel right—it shifts too easily, has a subtle wobble, or even threatens to slide apart with a gentle shake. This is a common, almost universal, experience for new solvers. Take heart: it is not a defect in the ring, nor a failure of your skill. It is, almost invariably, a sign that the final, crucial interlock has not been fully seated.
A correctly assembled four-band puzzle ring is a marvel of mechanical tension. Each band acts as both lock and key, pressing against its neighbors to create a unified, snug structure. When one band is resting beside its proper groove instead of within it, the entire assembly loses that integral tension. It feels like a loose basket of wires rather than a solid ring. This is often the final hurdle between a “technically correct” weave and a truly “solved” one. The ring looks complete, but it hasn’t yet delivered that definitive, satisfying click of final engagement.
So, where does this missed connection typically happen? Often, it’s with the last band you wove into place. In your focus on getting all four bands to finally circle your finger, you may have forced the final curve without ensuring the tiny notch or dimple on one band has fully captured the edge of another. For sterling silver puzzle rings, which are softer than gold alloys, bands can sometimes deform just enough under pressure to seem interlocked without actually being so. The solution is not force, but finesse. Gently rotate the ring in your hands, examining the inner weave from multiple angles. Apply light, opposing pressure to different bands, listening and feeling for a soft snap as a band settles deeper into its correct position. This tactile feedback is your true guide.
For a persistently loose ring—especially a well-worn vintage piece or one you intend for daily wear as a wedding puzzle ring—the online community of collectors and wearers has developed a practical, reversible fix. A minuscule dab of museum wax (a non-permanent, putty-like adhesive used to secure objects on display) pressed into the key junction inside the ring can provide just enough friction to stabilize the weave without damaging the metal. Some, as noted in forum threads, have used a single, nearly invisible loop of fine craft wire threaded through the center of the weave for the same purpose. This isn’t cheating; it’s practical conservation, allowing you to enjoy the ring’s beauty and symbolism without the constant anxiety of it disassembling in public. For more on managing the frustration that can accompany these beautiful mechanical puzzles, our general guide on how to solve a puzzle ring without losing your mind offers further perspective.
Remember, the goal is a ring that feels confident on your hand. Achieving that fit confirms you’ve moved beyond simply following steps to genuinely understanding the puzzle ring assembly. It transforms the object from a fiddly challenge into a wearable piece of history.
From Ottoman Secret to Modern Mystery: The Ring’s Twisted History
That satisfying click of the final band locking into place is more than just the end of a task—it’s the echo of a tradition centuries old. Having just navigated the tactile logic of the weave, your curiosity likely turns to its origin: what is the point of all this intricate, deliberate assembly? The story of the four-band puzzle ring is a winding path from a potent (if likely apocryphal) myth to a modern symbol of connection, a journey that mirrors the very act of solving it: separate strands that, when understood, form a coherent whole.
The most enduring tale, repeated in jewelry shops and collector forums for generations, places its origin in 16th-century Ottoman Turkey as a so-called “harem ring.” According to this lore, a wealthy sultan, wishing for absolute certainty of his wives’ fidelity while he was away, commissioned a clever goldsmith to create a ring that would fall apart if removed. The intricate, interlocking bands would, in theory, betray any attempt to take it off and then clumsily reassemble it. The story is compelling, a perfect blend of romance, suspicion, and mechanical ingenuity. Yet, as a curator, I must note that while the history of puzzle rings is deeply rooted in Turkish and Middle Eastern jewelry-making traditions, the “infidelity detector” narrative is largely unverified, a romantic gloss applied by Western dealers in the early 20th century. The truer purpose was likely symbolic—a complex, inseparable knot representing the unbreakable bonds of marriage, worn as a wedding puzzle ring long before the commercial taglines. The Puzzle Museum notes that the oldest known examples from this region are indeed marvels of the goldsmith’s art, prized more for their symbolic weight and display of skill than as functional alarms.
This symbolic complexity is what fueled its journey westward. By the Victorian era, examples of these exotic mechanical puzzles began appearing in European curiosity cabinets, objects of fascination for their engineering as much as their adornment. The mid-20th century saw their true commercial boom. Companies recognized that the blend of timeless symbolism, interactive engagement, and personal challenge had immense appeal. The standardized four band puzzle rings became a staple, mass-produced in sterling silver and 14K gold, transforming an artisanal artifact into an accessible mystery. Instructions were tucked into small plastic bags, and the ring was marketed not just as jewelry, but as an experience—a conversation piece for the hands.
This commercialization also sparked evolution and adaptation. The basic four-band weave became a canvas for other symbolic systems. In Ireland, the pattern was adapted to hold the classic Claddagh elements—hands, heart, and crown—creating a Claddagh puzzle ring that added a layer of physical interaction to its message of love and friendship. Similarly, Masonic symbols were integrated for fraternal brothers, and the concept of interlocking bands was reimagined as unity rings for couples, where two separate bands could be linked to form one. Whether as a simple sterling silver puzzle ring for a teenager fascinated by disentanglement puzzles or an elaborate diamond puzzle ring for an anniversary, the core appeal remained: a wearable proof of patience and understanding.
So, when you look at your assembled ring, you’re not just seeing a solved puzzle. You’re holding an object that spans from the workshops of Ottoman craftsmen to modern online puzzle ring stores, a piece that has morphed from a purported tool of marital control to a voluntary token of commitment and intellectual delight. Its meanings are as layered as its bands, defined not by a single “secret,” but by the personal significance you assign it through the act of solving and wearing it. For a deeper reflection on this journey from functional object to personal touchstone, consider the perspective in our companion piece on why the metal puzzle ring remains the ultimate test of spatial humility.
Living With the Puzzle: Sizing, Wearing, and Care for Daily Use
That rich history you now hold in your hands begs the next, practical question: can this piece of mechanical folklore live comfortably in a modern, busy life? The answer is a qualified yes. Wearing a four-band puzzle ring daily is entirely possible, but it requires a slightly different relationship than a standard band. It’s less a passive ornament and more a quiet companion that demands a little understanding.
First, let’s address durability. A properly assembled four-band ring is surprisingly robust. The interlocking weave distributes force. More bands generally mean a denser, stiffer structure once solved. Sterling silver is the most common metal for a reason—it’s durable, affordable, and develops a warm patina. Gold puzzle rings, particularly 14K and above, are softer but more malleable; they may solve with a slightly smoother, more forgiving feel but can show fine scratches more readily. Platinum and platinum plated rings are the most durable and heaviest, offering a distinct, substantial tactile feedback. For daily wear, the choice is less about hardness and more about your commitment to the metal’s character and care. For broader thoughts on durable mechanical objects, my fellow puzzle enthusiasts often discuss principles in a veteran’s guide to durable metal puzzles that don’t break.
Sizing is the most critical factor for a secure fit, and this is where standard advice fails. You must size for your knuckle. A puzzle ring must slide over the knuckle with a firm push, then fit snugly on the base of the finger. If it’s sized for the base alone, putting it on and taking it off will put immense strain on the weave, causing it to spring apart. For men’s puzzle rings, which tend to be wider and less flexible, this knuckle clearance is paramount. Try this: if your solved ring feels perfect at the base but you have to force it over the knuckle, you need a half-size, or even a full-size, larger. A reputable puzzle ring store will understand this nuance. Standard ring sizes available typically range from 4 to 12, so finding your fit is straightforward with accurate measurement.
Now, for wearing. The initial instinct is to treat it as fragile. Resist that. Once solved, wear it with normal confidence. The gentle pressure of your finger helps keep the bands in their grooves. You’ll likely develop a subconscious awareness of it—a slight extra caution when gardening, typing, or washing dishes. It’s not that the ring is weak; it’s that you become attuned to its mechanics. If your specific model has a tendency to come apart with specific hand motions (a common forum complaint), a dab of clear museum wax—the type used to secure objects on pedestals—applied to one key junction inside the ring can work wonders. It’s non-permanent, clear, and provides just enough friction for daily security without compromising the solve.
Cleaning a sterling silver puzzle ring without disaster is a common worry. Never clean it while disassembled. The process is simple. Use a lukewarm bowl of water with a drop of mild dish soap. Soak the assembled ring for a few minutes. Gently agitate the water, letting it flow through the ring’s intricate channels. Use a very soft child’s toothbrush to lightly brush the exterior surfaces, avoiding any prying motion between bands. Rinse thoroughly under a gentle stream of lukewarm water. The crucial final step: dry it immediately and completely with a soft, lint-free cloth, paying close attention to the hidden seams where moisture can linger and cause tarnish or, in plated variants, accelerate wear. For a deeper shine, use a polishing cloth designed for silver or gold, again working only on the external surfaces.
In the end, living with a puzzle ring is about accepting its dual nature. It is jewelry, yes. But it is also a preserved moment of focus, a solved equation you carry with you. With the right size and a modicum of care, these rings can last for decades, becoming not just a personal touchstone but a potential heirloom—a story of patience, literally woven in metal, ready to be passed on to the next curious pair of hands.
Choosing With Confidence: A Condensed Guide to Your Next Ring
Now that you’ve lived with a solved ring—knowing its feel, its care, and its history—you might find yourself looking at your own collection, or a shop display, with a more discerning eye. That first ring is an introduction, but the next one can be a choice, selected for its material, its engineering, or the story it tells. Here’s how to navigate that decision.
The Material, Beyond the Shine
When selecting your next puzzle ring, the metal is more than an aesthetic or budgetary choice; it directly influences the solving experience and long-term wear. Sterling silver is the classic entry point for a reason. It offers a distinct, satisfying tactile feedback—a soft click as bands interlock—and develops a personal patina over time. For daily wear, it’s robust, though it requires the occasional polish outlined in our care section.
Gold puzzle rings, particularly 14K gold, present a different character. The metal is softer and more malleable, which can make the initial weaving feel slightly more forgiving, but also means a solved ring may hold its shape a bit less rigidly than sterling silver. This isn’t a flaw, but a property of the material. Platinum puzzle rings offer a harder, cooler feel and exceptional durability, but their slickness can sometimes make the final locking step feel less defined until you’re accustomed to it. The question isn’t which is “better,” but which interaction you prefer: the gentle give of gold, the firm certainty of silver, or the cool solidity of platinum.
Gifting a Puzzle: A Considered Act
Is a puzzle ring a good gift for someone who isn’t ‘puzzle-minded’? It can be, with forethought. The key is to frame it not as a test, but as a shared experience. Assemble it yourself first, then carefully disassemble only one or two key bands—just enough to invite participation, not frustration. Present it with the story of its Ottoman origins or its symbolism of interconnectedness. For a partner, it becomes a metaphor for patience and unity; for a friend, a unique piece of wearable mechanics. The gift is not just the ring, but the moment of collaborative solution. Whether as a mother’s ring or a ladies puzzle ring with a delicate band count, the principle of a thoughtful presentation remains.
Finding Your Source: Trust and Authenticity
For new rings, established specialty retailers like Bits and Pieces are reliable starting points. They typically provide clear model codes (like 4KNS or 4PSL), which correspond to specific weave patterns, and include those all-important printed puzzle ring solutions. When browsing, look for detailed photos of the ring both assembled and disassembled; this shows a seller who understands the product.
The hunt for a vintage puzzle ring is a different, often rewarding, pursuit. Check estate sales, antique jewelry shops, and online marketplaces. Examine photos closely for wear at the bands’ friction points—this is normal and adds character—but be wary of significant bends or kinks that could affect the interlocking sequence. A vintage ring may not come with a solution, but your hard-won skill from solving your first ring is now the key. You can often deduce the weave pattern by studying the bands’ shapes and plaques.
Remember the core truth: a well-made four-band puzzle ring, whether a simple sterling silver band or an ornate gold puzzle ring, is a testament to a centuries-old design principle. It needs no embellishment. Your confidence now comes not from guesswork, but from understanding—the sequence of the weave, the history in your hand, the subtle differences between a modern precision-struck band and a vintage find with a story whispered in its wear marks. Choose for the feel, for the story, for the enduring satisfaction of the solve. That is how a curious purchase becomes a curated collection.
Beyond the Four Bands: When a Simple Puzzle Becomes a Lifelong Fascination
That quiet confidence you now have—to choose, to wear, to solve—is the true destination of this journey. It’s the point where a mere object, a set of four interlocking bands, transcends its physical form. The initial frustration, the focused tracing of each band’s path, the final, solid click of the completed puzzle ring… this sequence is more than assembly. It is a miniature masterclass in patience, a tactile ritual that roots you in the present. You are not just wearing jewelry; you are carrying a functional piece of history, a mechanical conversation between your hand and centuries of craft.
So, what is the point? For the original wearers of those Ottoman-era bands, the point was vigilance, a test of fidelity encoded in silver or gold. For us, centuries removed, the point has wonderfully evolved. It is the personal challenge, the quiet pride of mastering a discreet, elegant system. It is the meditative focus required, a few moments where the world narrows to the weave of metal in your fingers. It transforms the ring from passive adornment to an interactive artifact, a touchstone for mindfulness you can carry in your pocket or on your hand.
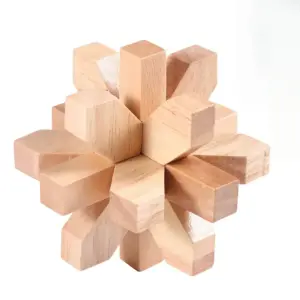
This is where the four-band puzzle ring reveals its true family: it is a classic disentanglement puzzle, one of the oldest and most enduring forms of mechanical puzzle. Its cousins are the nail puzzles, wire dexterity games, and interlocking wooden burrs that have fascinated cultures globally. The fundamental pleasure is the same—a logical path concealed within a seemingly impossible tangle, solved not by force but by understanding sequence and constraint, a core principle of disentanglement puzzles.
 9")
This is why a solved ring that feels a bit loose isn’t a failure, but a feature of its puzzle nature—a reminder of the precise alignment required. It’s also why the advice from seasoned collectors, like using a minute dab of museum wax for daily security, makes perfect sense. You’re not “cheating”; you’re adapting a historical mechanical puzzle to modern, active life. You move from solving a challenge once to integrating it into your routine, which is the hallmark of any great puzzle design.
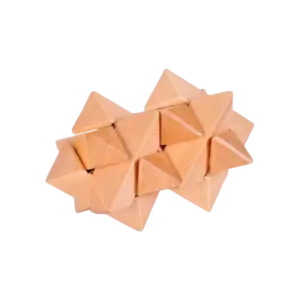
The fascination often doesn’t stop at one. You’ve mastered the common four-band sterling silver puzzle ring. Perhaps you’re curious about the different feel of a heavier gold puzzle ring, or the intricate symbolism of a Claddagh or Masonic rings variant. You might seek out a vintage piece, wondering about the hands that fumbled with the same sequence decades ago. Or your interest may expand to the broader world of mechanical puzzles, seeking that same tactile feedback in other forms like rolling rings or chain rings. This progression from a single moment of frustration to a deeper appreciation is, I’ve found, a common thread. For those whose curiosity is piqued, exploring a guide to the best metal puzzles for the over-thinker or even tackling something like the metal starfish puzzle ring as a 20-minute challenge can be a natural next step.
In the end, the four-band puzzle ring sits at a beautiful crossroads. It is wearable art, a historical echo, a personal test, and a conversation starter. It answers the question of “what to give” not with a generic suggestion, but with an experience—one that can signify unity, patience, or simply a shared moment of curiosity between giver and receiver. Whether it remains your one elegant, solvable token or becomes the first in a collection of puzzle rings, its value lies in the engagement it demands. You started with pieces on a table, intimidated. You end with a unified circle on your finger, and the quiet knowledge of how it all fits together. That is a satisfaction no ordinary ring can ever provide.
Reader Situation and Fast Answer
You’ve reached the end of the guide, but this is likely just the beginning of your story with this ring. So, where are you now? Perhaps you’ve just felt that satisfying click of the final band sliding into place, the puzzle ring now a solid, unified circle in your palm. Or maybe you’re reading this before the purchase, weighing whether a sterling silver puzzle ring or a gold puzzle ring is the right choice for a gift. Your situation dictates your very next step.
If the ring is solved and on your finger: Wear it for a day. Notice how it feels. Does it spin freely? Does the weave catch on threads? This is the practical test no guide can simulate. If it feels secure, you’ve mastered the puzzle ring assembly. If it feels loose, remember the advice on museum wax or a temporary wire—these are tools for making the mechanism suit your life, not failures of your solution.
If you’re considering this as a gift: Move from curiosity to confidence. You now understand it’s not merely a trinket but an experience. For a wedding puzzle ring, the history you now know adds profound meaning. For a friend who enjoys dexterity, the gift is the solve itself. Use the buying guide to select a trusted source, and always, always include the puzzle ring instructions with the present. Your gifting becomes an act of thoughtful provision, not just a hand-off.
And if this small, mechanical marvel has sparked a deeper fascination? That is a common and wonderful outcome. You might find yourself browsing the digital archives of the Puzzle Museum, seeking out a vintage piece, or eyeing more complex weaves. The four-band ring is a perfect gateway into the world of disentanglement puzzles.
Your fast answer, your immediate next step, is this: Act on the knowledge you now hold. Re-solve the ring once more, just to feel the sequence in your muscles. Bookmark this page for the sizing and care tips. Or, make the informed choice to buy. You started with pieces and frustration. You now hold the complete picture—of the mechanism, the history, and the practicalities. The final step is yours.