The Cool, Frustrating Weight in Your Hand
You’re holding it. The solid, 30 to 60 grams of cast steel or brass feels cool and slightly oily from handling, a pocketable heft that promised clever fun and now delivers only stubborn captivity. The key is enmeshed in the lock’s shackle. You’ve twisted, turned, and maybe even Googled ‘impossible puzzle.’ Let’s start by doing the one thing you probably haven’t tried: set it down.
This isn’t a failure of strength or intellect. It’s a failure of approach. You’re confronting a classic tavern puzzle, a $12-$16 lesson in machined precision and spatial illusion. That satisfying stiffness you feel? It’s not a defect. It’s binding by design—the precise, thousandth-of-an-inch clearance between parts that makes the solution a path of specific angles, not force. When you ask, “Why is my key puzzle so stiff? Does it need oil?” the answer is almost always no. A drop of oil might make it smoother, but it won’t make it simpler. The resistance is your teacher, signaling when you’re on the wrong path, when you’re applying pressure instead of finesse.
So, pick it up again. But this time, don’t look at it. Close your eyes. Let your fingers trace the geography. Feel the smooth curve of the shackle. Explore the keyway and the tooth of the key. Notice where metal kisses metal with no room to spare. This is your first tactile map. The solve metal puzzle key stuck moment isn’t a wall; it’s the starting coordinate.
Every competitor’s key lock metal puzzle solution begins with a diagram. I’m telling you to begin with blindness. Because the solution—a term I’d avoid for its trivializing tone—isn’t found in your eyes, but in the proprioception of your hands. The impending click of release will come from understanding holes and loops, not from memorizing a sequence of spins. You’re not stuck. You’re just reading the map with the wrong sense. The weight in your hand is the first clue: the solution has gravity, it has substance. And it begins the moment you stop fighting it.
It’s Not a Maze; It’s a Dance of Holes and Loops
The tactile map your fingers are making? It’s charting a topological truth. The core principle governing every disentanglement puzzle solution step by step is not about force, but about understanding how shapes and the empty spaces within them relate. Your key isn’t stuck because of a trick lock; it’s engaged in a silent, three-dimensional dance with the shackle’s negative space. The first-time solve estimate of 5-15 minutes isn’t a test of speed, but of grasping this single, universal rule: if you can trace a continuous path for the metal to exit without bending, you have your solution.
Think of the shackle not as a barrier, but as a gatekeeper of a specific hole. Its loop defines an opening. Your key, with its own loop or tooth, is trying to navigate through that opening’s “window of opportunity.” The frustration comes from seeing only one rigid object inside another. The solver sees a flexible path of potential movement for the entire assembly. This is why bending is never the answer in a well-machined puzzle; the designers have already calculated the precise alignment where all necessary clearances overlap in 3D space. Your job is to find that alignment through patient manipulation, not alteration. You’re not escaping a cage. You’re guiding one shaped piece of space through another.
This dance of holes and loops is the heart of knot theory made physical. A mathematician sees the key and shackle as two linked loops, and the solution is to unlink them without cutting. The puzzle in your hand is a physical proof of that theorem. Every twist and rotation you attempt is exploring the degrees of freedom in that linked system, a concept foundational to the entire category of Disentanglement puzzles. When a step feels like it’s binding, you’ve hit a topological boundary—a configuration where the metal paths are blocked because their shapes no longer align with the available voids. You must retreat, reset, and approach the boundary from a different angle, literally. This is the classic disentanglement puzzle instructions manual written not in words, but in steel and brass.
The most elegant puzzles, like the Interlocking Double-Ring Lian, distill this concept to its purest form. Here, the dance is between two identical loops, teaching you that the “key” and “lock” are often interchangeable roles, a lesson directly applicable to your key puzzle.

So, apply this now. With your eyes closed again, feel for the dance. Don’t just pull. Ask: “What is the shape of the hole in the shackle right now, in this exact orientation? How does the key’s profile fit into it?” Rotate the entire assembly as one unit. Feel how the relationship of the keyway to the key’s tooth changes. You are seeking the precise moment where their shapes present an open channel. This is the foundational skill for all disentanglement. It’s a shift from random manipulation to directed, spatial reasoning. As explored in our guide to the 3-step mindset for any metal ring puzzle, this conceptual leap—from seeing objects to navigating the spaces between them—is what turns frustration into a fluent, physical dialogue. The click of release is simply the punctuation at the end of a perfectly executed sentence written in motion.
Cultivating the ‘Blind Hand’: Patience as a Tactile Skill
The trick, then, is not a secret move but a sensory skill: the ‘Blind Hand’ technique. This is the active, deliberate practice of solving by feel alone, a method that forces your fingertips to construct a spatial map of clearances and bindings. It’s what transforms abstract topology into physical intuition, and it requires you to slow your manipulations by at least 20%, trading speed for profound sensitivity.
When you look at the puzzle, your brain jumps to conclusions based on past experiences with locks, keys, and simple objects. It shouts commands: “Pull it through!” or “Twist it out!” But your eyes can deceive you. They perceive the metal parts as primary, while the true solution lives in the negative space—the shifting, asymmetrical gaps between them. The ‘Blind Hand’ technique bypasses this visual prejudice. By closing your eyes, you mute the bossy, image-processing part of your brain and elevate your proprioception—your body’s sense of position and movement. Your fingertips become your eyes.
Here’s how to begin. Pick up your key and lock puzzle. Study it for a moment, then place it in your palm and close your eyes. Don’t try to solve it yet. Your only goal is to build a tactile map. Run a thumb over the key’s tooth. Trace the entire perimeter of the lock’s shackle with a forefinger. Note where the metal is thick, where an edge is rounded from casting. Feel for the keyway—the slot or opening in the shackle. Is it a simple hole, or does it have an internal notch? This is your baseline survey.
Now, initiate a slow dance. Apply the gentlest pressure, exploring how the pieces interact. The goal is to identify three distinct states: clearance, binding, and slack.
* Clearance is free movement. The key slides easily along a section of the shackle’s interior.
* Binding is the stop. Metal meets metal with no give. It’s a hard, definitive “no.”
* Slack is the subtle, often missed transition state. It’s a slight wobble, a millimeter of play that appears only when components are held in a very specific, balanced orientation. Slack is the precursor to clearance.
Your job is to hunt for slack. When you find it, don’t rush. Freeze. Analyze with your fingers: What exact alignment created this tiny window of opportunity? This is patience redefined—not passive waiting, but active, millimeter-by-millimeter interrogation. You are learning the puzzle’s unique language of pressure and release. As discussed in our exploration of why your hands are lying to you, your initial, forceful instincts are often the problem. The ‘Blind Hand’ cultivates a lighter, more curious touch.
Practice this for five minutes with no intention of solving. You are calibrating your instruments—your hands. When you finally open your eyes, you’ll possess a deeper, more intimate understanding of the puzzle’s geometry than any diagram could provide. You’ve stopped wrestling with the object and started listening to it. This tactile literacy is the master key that unlocks not just this puzzle, but an entire class of disentanglement puzzles. The solution path is simply the sequence of moves that connects one point of slack to the next, a chain of discovered clearances that leads, inevitably, to the satisfying snick of release.
Universal First Moves for Any Shackle Puzzle
The ‘Blind Hand’ technique gives you the language, but these four universal moves form the essential grammar for solving any metal shackle puzzle in the $12-$16 range. Before hunting for a specific solution, apply this 60-second diagnostic to understand your puzzle’s physical constraints and identify the single, correct starting alignment that all subsequent moves depend upon.
First, diagnose the fixed geometry. Pick up the assembly. One part is the stationary lock body or frame; the other is the mobile shackle or key. Your job is to discern which is which through heft and rigidity. The lock body is typically the heavier, more complex casting, often with a signature keyway—the shaped gap you must navigate. The shackle is usually the simpler loop. This isn’t just observation; it’s declaring the fixed coordinate system for all your movements. Everything moves relative to the lock body.
Second, map the keyway with your thumb. Don’t look—feel. Trace the entire inner perimeter of the lock body’s opening. Is it a perfect circle, a distorted oval, or a rectangle with rounded corners? Note every inward protrusion, every narrow pinch point. Your goal is to find the largest clearance—the widest point in the keyway’s circumference. This is almost always your exit point and dictates the required orientation of the shackle. For the classic key puzzle, this is frequently where the lock’s spine is thinnest, opposite a reinforcing bulge.
Third, analyze the shackle’s profile. Now feel the moving piece. Is it a uniform ring, or does it have a flat tooth, a notch, or a bend? This irregularity is not a decoration; it’s a binding feature designed to catch on the lock’s interior geometry. The core solve involves rotating this irregularity through the keyway’s largest clearance at the precise moment when the shackle’s overall shape is also aligned to slip through. It’s a two-part harmony of alignment.

Finally, execute a systematic rotation test. With your left hand holding the lock body fixed, use your right to slowly, deliberately rotate the shackle 360 degrees along every possible axis. Tilt it forward, backward, side to side. Do not force. You are cataloging moments of slack—tiny increases in wiggle room. Each point of slack is a node in the hidden solution path. Often, the first move is a counter-intuitive tilt into the lock, not a pull away, to position the shackle’s thickest part into the keyway’s widest void. This principle is the same whether you’re solving a classic key or a more complex maze lock, as detailed in our guide on how to separate the two metal pieces of a maze lock.
Apply this now to your key puzzle. Heft it. The sturdy, 40-gram lock body is fixed. Its keyway is an uneven loop. The shackle is the key itself, with its distinctive tooth. Your universal first move? Rotate the key so its tooth faces the lock’s thinnest wall—your largest clearance. Then begin the tilt-and-test sequence, searching for the first millimeter of give. This methodical approach, moving from general principles to specific manipulation, transforms a baffling object into a logical sequence of mechanical clearances. It’s the machinist’s mindset: measure, then cut.
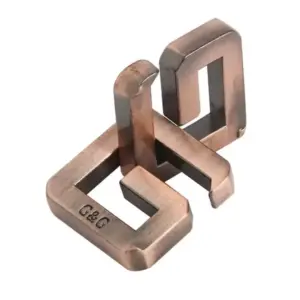
Case Study: The Precise Unlocking of the Key
To solve the classic key disentanglement puzzle, you must execute a sequence of 8-12 precise manipulations, shifting the key through the lock’s geometry in a non-linear path that typically takes 5-15 minutes to discover. The solution is not a single pull, but a choreographed series of alignments, rotations, and translations, each gaining you a millimeter of critical clearance. It is a lesson in applied topology held in 40 grams of cast metal.
Now, with the universal principles in mind, we apply them to this specific, cool form in your palm. Let your fingers close around it. Let your eyes go slightly soft. This is where the ‘blind hand’ technique becomes your primary tool. You are not just looking for the path; you are feeling for the mechanical narrative written in the metal.
Phase 1: Initial Alignment & The First Slack
Your left hand cradles the lock body firmly. With your right, take the key. Forget the goal of removal. Your only goal is to find the first point of slack. For most classic designs, this begins by rotating the key so its tooth points directly away from the lock’s body—imagine the tooth as a compass needle pointing to 12 o’clock north. Now, tilt the top of the key backward, towards you. Do not pull up. Tilt. You are aiming to nest the tooth into the top arch of the lock’s loop. Feel for a subtle drop, a tiny settlement. That’s your first checkpoint.
Phase 2: The Counter-Intuitive Slide
This is the move most people miss because it feels like going backward. With the key tilted back, you now slide the shank of the key—the long, straight bar—downward through the lock’s central opening. Yes, down. You are creating slack by moving the key’s mass into a new void. You might gain only 2-3 millimeters. That’s enough. Listen with your fingertips.
Phase 3: The Pivot and the Window
Now, with that hard-won slack, you pivot. Rotate the key 90 degrees so the tooth faces east (3 o’clock). Simultaneously, begin to guide the key’s tip up and through the newly available window in the lock’s loop. This is a compound movement: rotate and translate. The machined edges will either bind or glide. If they bind, return to Phase 1. Your alignment was a hair off.

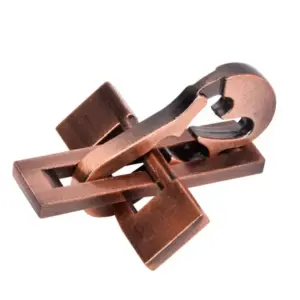
The version shown here, the Two Key Lock Puzzle, operates on the same topological principle but with a delicious twist: you must free a second key first to unlock the primary one. It’s a lesson in sequence and dependency, where the solution for a single key becomes a subroutine in a larger program. (A full visual guide for that specific variant is detailed in our post on how to separate the Two Key Lock Puzzle).
Phase 4: Clearing the Tooth
The critical moment. Once the key’s tip is through the window, the tooth is your final obstacle. You must maneuver it through the lock’s own internal opening—the keyway. This requires a slight wobble, a tiny oscillation as you continue a gentle upward pull. Feel for the moment the tooth’s profile aligns perfectly with the profile of the hole. You’ll feel it: a sudden, smooth surrender of resistance. That’s the snick. A well-machined puzzle announces its solution with a quiet, metallic sigh.
Phase 5: The Triumphant Translation
The bind is broken. The topological knot is undone. Now, and only now, do you execute the simple, linear pull you wanted to do five minutes ago. The key slides free, cleanly, with a satisfying finality. Savor it.
But hold on. The true craftsman’s test, often harder than the solve, is reassembly. To put it back, you must reverse-engineer the path. Start by inserting the key’s tip into the large loop. Then, you essentially perform the solution in reverse: guide the tooth back through its keyway with that same oscillating wobble, down through the window, rotate, and settle it home. If you merely force it, you’ll jam it. Reassembly demands the same finesse, proving you didn’t just memorize a trick—you internalized a path. Now, with both pieces separate in your hand, you see the empty loops, the simple shapes that held such profound captivity. That understanding is the real prize.
The Hidden Puzzle: Why Re-Assembly is the Real Test
You hold the key in one hand, the lock in the other. The triumph of the snick fades, replaced by a new, quieter challenge. For many, this is where the real puzzle begins. Studies of procedural memory suggest that reversing a recently learned physical sequence can take 40–50% longer than performing it forward. Your hands know the path of escape, but asking them to retrace their steps backwards demands a different kind of understanding—a complete tactile map, not just a memorized dance.
We are brilliant at learning sequences of action. Your fingers just executed a precise series of lifts, rotations, and translations to achieve freedom. This is procedural memory: do this, then this, then this. But to reassemble, you cannot simply play that film in reverse. You must understand the spatial why of each step—the clearances, the alignments, the topology of the path. It’s the difference between reciting a poem from memory and writing it backwards from the last word. Your brain, craving the recently reinforced sequence, will try to force the initial escape move. It will fail. The puzzle will bind.
This is the craftsman’s true test. Solving proves you can follow a path. Reassembling from a state of total separation proves you internalized the landscape. You must rebuild the captive state from first principles.
To reassemble the classic key and lock puzzle, you are not reversing the solution steps in order. You are building the final, bound position from the ground up.
Here is the path, laid out as a new construction.
- Start with the Key. Orient the key so its tooth is facing you, with the key’s loop lying flat in your palm.
- Present the Lock. Hold the lock’s larger, closed loop (the “shackle”) vertically. Introduce the key’s tip into the big loop from the front. Slide it through until the key’s loop surrounds the shackle’s base.
- The Critical Translation. Now, the key must pass through the smaller window in the lock’s body—the same window that was its final gate during the solve. To do this, tilt the key up and back, threading its shank through that window. This requires the same exploratory wobble you used to find clearance during the solve.
- The Final Bind. With the key’s shank through the small window, lower the key so its tooth approaches the keyway—the notched opening on the lock body. This is the moment of supreme finesse. Do not force the tooth in. Instead, replicate the subtle oscillation and slight rotation (likely a 90-degree turn) needed to align the tooth’s profile with the keyway’s profile. Feel for the alignment.
- The Home Position. When the alignment is perfect, apply gentle, steady pressure. The tooth will slide into the keyway, and the key will settle into its captive position with that same, satisfying snick. The puzzle is whole.
Why is this so much harder? During the solve, you were exploring from a known, stable starting point (the assembled puzzle). Every move created new, tangible feedback—binding or slack. For reassembly, your starting point is two free pieces. You must create the binding, step by step, with no feedback until the final, correct alignment is achieved. It’s an act of spatial faith, guided by your newly built intuition.
This principle extends to all the best metal disentanglement puzzles. The elegant frustration of a puzzle like the Luban Sphere isn’t just taking it apart, but meticulously rebuilding its interlocking orbits—a task that demands a holistic grasp of its space, as detailed in our Luban Sphere disassembly guide. Reassembly is where you transition from puzzle solver to puzzle master. It confirms that the knowledge is in your fingertips, not just in a sequence you forget tomorrow. When you can smoothly disassemble and reassemble without a moment’s hesitation, you haven’t just beaten the puzzle. You’ve absorbed its three-dimensional poem into your hands.
Judging a Puzzle by Its ‘Solve-Feel’
Mastering the reassembly proves you’ve internalized the puzzle’s spatial poem, but it also tunes you into a more subtle quality: the artifact itself. The best puzzles aren’t just difficult; they communicate. They talk through your fingertips. This is their Solve-Feel—a spectrum rating puzzles not just by mental difficulty, but by the clarity of their tactile feedback, the quality of their machining, and the satisfaction of their physical interaction. For the key puzzle, its “feel” is a 6/10 difficulty with an 8/10 tactile score: a distinct snick and smooth slide reward correct alignment, while binding provides clear, immediate resistance. This feedback loop is what builds real intuition.
A puzzle’s feel is dictated by its material and manufacture. The classic $12-$16 tavern puzzle you likely hold is often cast from zinc alloy—it has a substantial, pocketable 30-60g heft, but the finish can be gritty. This isn’t a flaw; it’s character. That slight grit in the keyway gives you more auditory and haptic information than a mirror-smooth finish. A machined brass or steel puzzle, by contrast, offers a buttery, silent slide that demands a more refined touch, where visual alignment becomes as crucial as feel. The former teaches through friction; the latter teaches through finesse.
This leads directly to durability and choice. A well-cast puzzle isn’t going to break; its stiffness is by design, not defect. If a puzzle feels excessively stiff, a mere dab of dry graphite powder (never oil, which attracts dust) on the contacting surfaces can work wonders. When considering where to buy metal key puzzle sets, prioritize vendors that show clear photos of the actual item, not just renders. Look for the tell-tale signs of a clean casting: defined edges, lack of flash, and consistent patina. Our own guide, metal puzzles that don’t break, dives deeper into this.
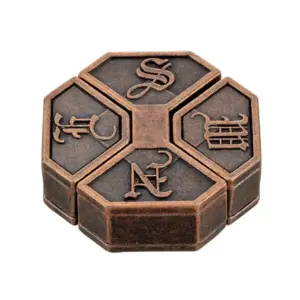
For a beginner looking to build their tactile map, the goal is puzzles with high feedback. You want clear cause and effect in your hands. After the key puzzle, I recommend moving to puzzles with similar Solve-Feel: medium difficulty but excellent physical communication. The classic Four-Leaf Clover is a perfect next step. Its solve involves similar rotational logic and clear binding points, but introduces a new multi-loop challenge. The weight and finish are nearly identical to the key puzzle, making the skills directly transferable.

Four-Leaf Clover Puzzle — $13.89
This brings us to the inevitable questions: Can a 10-year-old solve this? Are these puzzles good for problem-solving? The answer lies in the feedback. A child with patience can absolutely solve the key puzzle—not because it’s easy, but because its physical language is clear. The binding shows them what’s wrong. This direct link between action and consequence is precisely what builds spatial reasoning and systemic thinking, the hallmarks of the broader world of mechanical puzzles. It’s problem-solving you can feel. For more on curating a personal collection based on this principle, see how to choose your metal brain teaser.
Ultimately, judging a puzzle by its Solve-Feel is the craftsman’s approach. It asks not just “Can I solve it?” but “What does solving it teach my hands?” It values the audible click, the resistance of a clean edge, the heft that says this object has permanence. When you start to assess puzzles this way, you move beyond a mere solver. You become a connoisseur of physical intelligence, collecting not just challenges, but perfectly calibrated teachers of space and touch.
From Fingertips to Insight: What This Key Really Unlocks
That solid, final click of the key separating from the lock is more than a simple release—it’s the sound of a lesson learned. This puzzle, a 30-60 gram piece of cast steel or brass, unlocks durable spatial reasoning, teaching through 6-12 distinct manipulations that you don’t just memorize, but internalize as physical pathways in your brain.
You began with frustration, holding the cool, heavy knot in your hand. You learned to see with your fingers, to map the topology of holes and loops. You applied finesse, not force. The triumph of the solve is immediate, but the deeper satisfaction is what remains: a new intuition for how objects occupy space. You’ve built a tactile map. That key, now lying free on your bench, is a token of a transferable skill. The ‘Blind Hand’ technique you practiced here—solving by feel—is the same tool that will help you untangle a knotted cord, thread a difficult bolt, or unpack the logic of any shackle puzzle you encounter next. It is, fundamentally, problem-solving refined to a physical art.
So, place the two pieces side-by-side. Admire the clean machining, the intentional binding, the clever clearance. Then, pick up the lock and the key again. This time, your hands already know the secret. Re-assemble it. Feel the journey in reverse, no longer a mystery but a confirmed dialogue between your intention and the object’s constraints. That is the craftsman’s quiet nod—the understanding that the real prize was never the separated pieces, but the educated touch.
Your next step? Pick up another puzzle—perhaps one rated ‘medium’ on the Solve-Feel spectrum with a smooth, gritty feedback. Apply your new lens. Explore. Your fingertips are now your most trusted guides.