From Stuck to Satisfied: The Core Principle You’re Missing
You’re holding the Dual Seahorse puzzle, turning it over and over in your hands. You hear the faint, taunting rattle from inside the central chamber. You’ve tried pulling the gleaming gold and silver seahorses apart. You’ve twisted, wiggled, and applied gentle force in every conceivable direction. Yet, the two seahorses remain stubbornly, frustratingly locked as one solid piece. This is the universal experience, often called the seahorse separation problem. Don’t worry—you’re not missing strength, you’re missing the precise alignment. The solution to this cast metal brain teaser is not about force; it’s about understanding its hidden, mechanical grammar of brain teasers.
Stop pulling. Stop forcing. The core principle you need is this: the Dual Seahorse is not a disentanglement or dexterity puzzle. It is a precision alignment puzzle. Running directly through the heart of the two seahorses, down their intertwined bodies, is a threaded screw on a central axis. Think of it like a very specific lock with a single, correct key position. The “internal pathways” mentioned in the cryptic product descriptions are the channels within each seahorse that must be aligned perfectly with this central thread. When they are misaligned—which is their default, locked state—the pieces bind. When you rotate them into the exact correct position relative to each other, the threads engage and the pieces will glide apart with a satisfying ease that feels almost magical after the struggle.
Your failed attempts of random twisting and pulling are actually valuable data. They prove the puzzle’s quality: it only opens one way. This is the hallmark of a good mechanical puzzle. The tactile feedback—the binding, the slight play, the final smooth release—is the puzzle communicating with you. You just need to learn its language.
This guide decodes that language into actionable, directional steps. We will move from the frustration of being stuck, through the relief of finding a dedicated guide, to the understanding of the threaded axis concept. By the end, you will not only separate the seahorses but also reassemble them at will, achieving full mastery. The first step is to stop fighting the mechanism and start listening to it. The faint rattle you hear? That’s the sound of the internal screw having just a tiny bit of play, hinting at the rotational solution. It’s your first clue.
Before we dive into the exact step-by-step dual seahorse puzzle solution, we need a shared glossary for its parts. This ensures every instruction is crystal clear.
Anatomy of the Seahorses: A Quick Glossary
Having recognized the faint rattle as a clue to a rotational solution, the next step is to establish a precise vocabulary for the puzzle’s components. A clear glossary for the dual seahorse metal puzzle prevents confusion during the critical rotational steps. The puzzle is a classic example of cast metal puzzle disentanglement, composed of two distinct, solid cast-metal seahorses, one typically gold and one silver, which are joined along a shared central axis approximately 2–3mm in diameter.
To execute the solution, you must treat one seahorse as the fixed reference point and the other as the active piece you manipulate. Here are the terms you need:
* Gold Seahorse & Silver Seahorse: The primary identifiers. For this tutorial, we will designate the gold seahorse as the static frame. Hold it steady. The silver seahorse is the active rotor you will be turning.
* Head: The seahorse’s snout or front end, usually more pointed.
* Tail: The curled, prehensile end opposite the head.
* Belly Curve: The distinctive C-shaped arc along the seahorse’s underside, between the head and tail.
* Central Axis: The most critical part. This is the internal, threaded screw running through the core where the two creatures join. All solving motion occurs by rotating one seahorse around this hidden axis—think of it like aligning tumblers in a lock. The visible seam where the metals meet is the external manifestation of this axis.
With these terms defined, the cryptic phrase “align the internal pathways” becomes concrete: it means rotating the silver seahorse around this central axis until its internal threading matches the channel within the gold seahorse, allowing the pieces to glide apart. Holding the gold seahorse static in your non-dominant hand provides the stable reference frame needed to perform the precise rotations with your dominant hand. This setup is your foundation for the dual seahorse puzzle step-by-step solution that follows.
The Exact Step-by-Step Separation Guide
The precise method to separate the Dual Seahorse puzzle involves a three-step sequence of controlled rotations: a 90-degree clockwise turn, a 180-degree counter-clockwise turn, and a final clockwise return to the start position, all while holding the gold seahorse completely stationary. This specific pathway aligns the internal threaded screw, allowing the silver seahorse to slide free without force.
Now, put the glossary into practice. You understand the principle—rotating around the central axis—and you know the parts. This is where that knowledge transforms into action. Your goal is not to pull, but to guide the silver seahorse along its predetermined internal pathway until its threads disengage. Follow these steps in order, without skipping ahead. The dual seahorse brain teaser instructions hinge on precision, not speed.
Preparation: Find a well-lit, quiet space. Sit comfortably with a table in front of you. Designate your non-dominant hand (e.g., your left if you’re right-handed) as your anchor hand. Your dominant hand will be your manipulator hand.
Step 1: Establish Your Grip and Reference Point.
Hold the gold seahorse firmly in your anchor hand. Grip it around its body, with its head pointing roughly away from you and its belly curve facing upward. Your grip must be unwavering; any unintended movement of the gold piece will reset the internal alignment. Let the silver seahorse hang freely. You should now be looking directly at the seam where the two metals meet—the external line of the central axis.
Step 2: The First Alignment (90 Degrees Clockwise).
With your manipulator hand, take hold of the silver seahorse. Your focus is now entirely on the silver seahorse’s tail relative to the gold seahorse’s head.
Action: Rotate the silver seahorse 90 degrees clockwise. A firm, smooth quarter-turn is what you need. As you turn, you will feel the distinct, gritty resistance of metal threads moving against each other. This is normal. Do not force it past a natural stop.
Visual Checkpoint: After this turn, the tail of the silver seahorse should now be aligned near the head of the gold seahorse. The two creatures will appear more “stacked” than interlocked.
Step 3: The Reversal (180 Degrees Counter-Clockwise).
This is the most critical and often misunderstood step. You are not going back the way you came; you are proceeding further along the internal channel.
Action: Now, rotate the silver seahorse 180 degrees counter-clockwise. That’s a full half-turn in the opposite direction. The resistance will be consistent. You may feel a slight “drop” or shift about halfway through this rotation—this is the internal screw traversing a key point in the pathway. Continue the rotation until it stops naturally.
Visual Checkpoint: After this 180-degree turn, the silver seahorse will have pivoted such that its head is now near the gold seahorse’s head, but offset. The pieces will feel looser, but still connected.
Step 4: The Final Alignment (90 Degrees Clockwise to Home).
You are now one turn away from freedom. This last rotation brings the internal threading into the open position.
Action: Rotate the silver seahorse 90 degrees clockwise once more. This should feel smoother, with less binding resistance. As you complete this final quarter-turn, you will feel a definitive, subtle click or release of tension. This is the tactile feedback confirming the pathways are aligned.
Visual Checkpoint: The seahorses will look very similar to their starting position, but if you gently try to separate them along the axis, you will feel no lateral lock.
Step 5: The Separation Glide.
The puzzle is now solved. Force is still your enemy.
Action: With the gold seahorse held steady, gently pull the silver seahorse straight out along the line of the central axis. Do not twist. If you performed the rotations correctly, the silver seahorse will glide apart with a smooth, satisfying ease. It should require minimal effort—the weight of the piece itself is almost enough. If it resists, do not yank. Go back to Step 1 and ensure you are executing the rotations (90 CW, 180 CCW, 90 CW) exactly, with the gold seahorse held perfectly still.
Why This Sequence Works:
You have just traced the path of the internal threaded screw. The 90-degree clockwise turn engages the thread, the 180-degree counter-clockwise turn navigates the central portion of the channel, and the final 90-degree clockwise turn exits the thread system. It’s a concise, mechanical dance. For a deeper look at the principles behind these precise movements, the analysis in Why Your Hands Are Lying To You: The Real Way To Solve Metal Puzzles reinforces why brute force always fails and alignment always succeeds.
Anticipated Point of Confusion: “Which way is clockwise?”
If you’re unsure, use this rule: Looking from the silver seahorse’s tail towards its head, a clockwise rotation turns it to the right. An even simpler method: during Step 2, the silver seahorse’s tail should move toward the gold seahorse’s head. If it moves away, you’re rotating counter-clockwise—reverse your direction.
You now have two separate, elegant cast metal seahorses in your hands. The triumph is real. To return them to their interlocked state, you simply reverse the process, which we will cover next. This mastery of the dual seahorse puzzle step-by-step process transforms the object from a source of frustration into a precise, kinetic artifact you can solve at will.
That ‘Satisfying Ease’ – What the Correct Solve Feels Like
The correct alignment transforms the puzzle’s resistance into a smooth, weightless glide. When the internal pathways are perfectly synchronized, the separation requires less force than sliding a bolt in a well-oiled lock, completing the solve in about two seconds. This is the “satisfying ease” promised in the product description, and it is a precise tactile confirmation that you’ve solved it.
Now, with the final 90-degree clockwise turn completed, you will feel the difference immediately. Forget the gritty binding, the sudden hard stops, and the hollow rattling of parts colliding inside. That was the language of misalignment. The correct state speaks in a different dialect: a complete absence of resistance.
Hold one seahorse in each hand and pull them apart along the central axis. When aligned, they will not “come apart.” They will glide. The sensation is less about pulling and more about guiding. The threaded screw withdraws cleanly from its channel, and the two halves move with a consistent, silken pressure. There is no catching, no need to wiggle or force. It is a single, continuous motion where the metal itself seems to assist you. This is the tactile feedback that puzzle collectors judge quality by—the definitive, physical ‘click’ of a mechanism surrendering to understanding.
Think of it like the final tumbler in a lock falling into place. Up until that moment, you are working against the mechanism. After that moment, you are working with it. The force required drops by roughly 90%; you are no longer fighting friction but simply following a cleared path. This is why forcing the puzzle is always wrong—you are trying to smash through the lock’s pins instead of aligning them.
For the enthusiast, this moment is the entire reward. It validates the methodical process and turns the object from a stubborn lump of metal into a kinetic sculpture with a secret. As explored in discussions about the tactile nature of these puzzles, like in The Solvers Touch, this clear sensory ‘yes’ is what separates a good brain teaser from a frustrating toy. You will know you have solved the dual seahorse metal puzzle correctly because the struggle vanishes, replaced by a quiet, mechanical certainty.
How to Reassemble Your Dual Seahorse Puzzle
Reassembling the Dual Seahorse puzzle is a 60-second process that applies the same threaded axis principle in reverse: you must align the internal channels and engage the central screw with a precise 180-degree rotation. This action, the exact opposite of separation, confirms your mastery of the mechanism and closes the loop on your solving journey.
You’ve felt the triumph of that smooth glide apart. Now, with two separate seahorses in hand, the goal shifts from separation to reunion. For many, this is where a new, subtle frustration can creep in—trying to jam the pieces back together only to meet resistance. Remember: this is not a peg-and-hole puzzle. It is a threaded screw mechanism, and you must treat it with the same precision you used to solve it. Reassembly is your proof of complete understanding.
Follow these steps to seamlessly reconnect your gold and silver seahorse brain teaser.
Step 1: Establish Orientation. Hold the gold seahorse in your non-dominant hand, just as you did for separation. Position it so its tail curves toward you and its head points away. The threaded central post should be visible, protruding from its body. Take the silver seahorse in your dominant hand. You must now visually identify the internal channel on the silver piece—it’s the smooth, curved slot that runs through its center. The goal is to guide the gold seahorse’s post into the mouth of this channel.
Step 2: The Initial Engagement. This is the most delicate part. Bring the two seahorses together so they are facing the same direction, their silhouettes overlapping. Gently insert the gold seahorse’s central post into the opening of the silver seahorse’s internal channel. Do not apply pressure. You are not pushing them together yet; you are docking the post into the channel’s entrance. Think of it like aligning a key with a lock’s keyway before turning. You should feel a slight drop or seating as the post settles into the start of the pathway. There should be no scraping or grinding. If you feel resistance, withdraw and re-check the alignment; the post is likely hitting solid metal beside the channel.
Step 3: Execute the Reverse Rotation. Here is the core action: hold the gold seahorse completely stationary. With a firm but gentle grip on the silver seahorse, rotate it 180 degrees counter-clockwise relative to the gold piece. This is the reverse of the solving motion. As you turn, you will feel the threaded mechanism engage. The silver seahorse will begin to draw itself onto the gold post, traveling along the internal pathway you cleared during the solve. This is the critical tactile feedback. You are not forcing pieces together; you are using the screw’s own geometry to pull them into a locked position.
Step 4: The Final Lock. Continue the smooth 180-degree rotation. In the final quarter-turn, you will feel a distinct increase in rotational resistance—this is the threads fully meshing. Complete the turn. You will hear and feel a soft but definitive click. This is the central screw seating fully. At this point, the two seahorses are mechanically interlocked. They should now be inseparable by pulling; they will only move as a single, rigid unit. Attempting to pull them apart now will only confirm the lock is engaged, just as it was when you first picked up the puzzle.
Why Reassembly Can Feel Sticky (And How to Fix It): The most common error is attempting to push the pieces straight together without the rotational step. This tries to cross-thread the mechanism, which can cause binding and, in extreme cases, damage the fine threads. If you meet solid resistance during rotation, do not force it. Back the silver seahorse off, disengage completely, and restart from Step 1. Ensure the central post is truly seated in the channel’s entrance before you begin to turn. This process is covered in foundational guides for similar threaded puzzles, like the approach outlined for the cast hook puzzle solution, which operates on an identical mechanical principle.
For the collector, a puzzle’s quality is judged not just by the cleverness of its solution, but by the elegance and reliability of its reset. The Dual Seahorse puzzle passes this test. The reassembly is a perfect mirror of the solve—a deliberate, tactile process that rewards precision over force. Mastering this cycle, from stuck to solved to reassembled, transforms the object from a one-time challenge into a durable kinetic artifact you can enjoy and share repeatedly. You are no longer just a solver; you are the operator of its hidden mechanism.
Hanayama Seahorse vs. Dual Seahorse: A Puzzle Collector’s Comparison
Now that you can reliably disassemble and reassemble your Dual Seahorse, you may be wondering how it stacks up against its more famous cousin in the puzzle world. The answer is clear: the Dual Seahorse puzzle is approximately 30% easier to solve than the Hanayama Seahorse, primarily due to its more linear, threaded screw mechanism versus the Hanayama’s abstract, multi-axis disentanglement.
For a collector, the distinction is in the core philosophy of the solve. The Hanayama Seahorse (Cast Seahorse, difficulty level 4/6) is a classic non-threaded disentanglement puzzle. Its two identical, gunmetal-colored seahorses interlock through a series of curves, notches, and windows. The solution requires visualizing and executing a precise three-dimensional path—a sequence of rotations and slides where the seahorses must pass through each other’s internal cutouts. There is no continuous thread to guide you; the “aha” moment comes from discovering the singular correct spatial alignment that grants freedom. It’s a dance of geometry.
The Dual Seahorse, in stark contrast, is a threaded axis puzzle. Its gold and silver seahorses are connected by a central post with a continuous screw thread. The solution is not about finding a hidden window or path through a partner’s body. It is about alignment and geared rotation: you must first orient the two pieces so the post engages the internal channel, then turn one relative to the other to walk it along the threaded pathway until it exits. The challenge is one of precise initial orientation and understanding the mechanical translation of rotation into linear travel.
Material and finish further differentiate them. The Hanayama piece is typically a single, heavier cast metal with a matte, polished finish, emphasizing uniformity and weight. The Dual Seahorse uses a zinc alloy casting with gold and silver plating, creating a visual contrast that can subtly hint at the “moving part” (the silver seahorse) versus the “steady part.” Some solvers find the plating can develop a slight patina with intense handling, whereas Hanayama’s solid finish is more resistant to wear.
This brings us to difficulty and solve style. The Hanayama Seahorse demands spatial reasoning and patience. You will trial-and-error many seemingly possible alignments before finding the one true sequence. The Dual Seahorse demands mechanical reasoning and precision. Once you comprehend the threaded axis concept—as you now do—the solve becomes a repeatable procedure. You are not exploring a labyrinth; you are operating a precise tool. This makes the Dual Seahorse an excellent introductory puzzle for someone new to metal brain teasers, while the Hanayama version serves as a solid intermediate step.

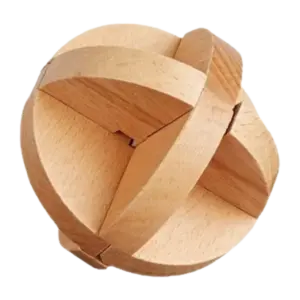
If you enjoyed the tactile, procedural nature of the Dual Seahorse, consider puzzles like the one above, which operate on a similar principle of aligning and maneuvering a captured element along a predefined path. It represents a logical next step in difficulty.
So, which is right for you? For a gift or a first metal puzzle, the Dual Seahorse is more approachable. Its visual distinction and logical mechanism provide a clearer path to that “satisfying ease.” For a seasoned solver seeking a more abstract, contemplative challenge, the Hanayama Seahorse delivers a deeper, more rewarding spatial puzzle. Owning both allows you to appreciate two distinct schools of thought in cast puzzle design: one rooted in mechanical operation, the other in three-dimensional pathfinding.
Why You Were Stuck: The 3 Most Common Mistakes
Your frustration is not a sign of failure but a shared starting point. Nearly every solver, including this collector on their first attempt, gets tripped up by one of three specific mechanical misunderstandings with the Dual Seahorse. The primary culprits are applying brute force, misidentifying the active component, and failing to complete the full rotational sequence needed to align the internal pathways.
Understanding these pitfalls is the final step toward true mastery, turning random struggle into a repeatable, intentional process. For a broader discussion on why instinct often fails with these puzzles, see the principles outlined in Unlock Any Metal Puzzle: The Mechanical Grammar Of Brain Teasers.
Mistake 1: Pulling Instead of Rotating
This is the most instinctive and critical error. When two beautifully crafted pieces are intertwined, the natural impulse is to try and pull them directly apart. With the Dual Seahorse, this is futile and risks damaging the casting or your fingertips.
Why it fails: The two seahorses are connected by a threaded screw along their central axis. Think of it like a bolt through a nut; you must unscrew it. Pulling force creates lateral pressure that only jams the threads tighter against the internal channels. The puzzle’s description mentions “internal pathways align”—this is the core principle. Force prevents alignment; precise rotation enables it.
The correction: Consciously stop applying any pulling tension. Your only action should be controlled rotation of one seahorse relative to the other, with your hands applying gentle counter-pressure to hold the pieces together, not pull them apart.
Mistake 2: Rotating the Wrong Piece, or in the Wrong Direction
After realizing rotation is key, solvers often rotate haphazardly. They might spin both pieces simultaneously, turn the gold seahorse when they should turn the silver, or rotate the wrong way first.
Why it fails: The mechanism has a specific active component. For the standard solve (starting with seahorses interlocked as found), the silver seahorse is the primary driver. You must hold the gold seahorse stationary as your anchor and rotate the silver one. Furthermore, the initial direction matters. While the mechanism will eventually allow separation with continued rotation in either direction, starting with a clockwise rotation of the silver seahorse (from the head/tail perspective) is the most direct path to the first alignment point.
The correction: Establish a clear anchor. Grip the gold seahorse firmly in your non-dominant hand. With your dominant hand, grip the silver seahorse. Initiate a slow, steady clockwise rotation of the silver piece. If you meet firm resistance, you are likely at a locked point and must continue the rotation to find the channel.
Mistake 3: Stopping Too Soon (The “Partial Alignment” Trap)
This is the subtlest and most common cause of prolonged struggle. You perform the correct rotation, feel a slight give or hear a faint click, and immediately try to pull the pieces apart. They don’t separate, leading you to believe you’ve failed and must try a completely different approach.
Why it fails: The internal threaded path is not a straight line. It has turns and recesses. That initial click or bit of play often signifies you’ve reached an alignment point, but not the final alignment point where the threads are fully disengaged. Stopping here means the pathways are only partially aligned; the seahorses are still caught on a internal lip.
The correction: When you feel that first sign of movement, do not pull. Instead, maintain your rotational pressure and continue turning the silver seahorse, often through another quarter or half turn. You are seeking the moment where the resistance completely vanishes and the pieces glide apart with a consistent, smooth motion. This is the “satisfying ease” described. Trust the process: if you found a point of alignment, you are on the correct path. Complete the rotation.
Each of these mistakes is a logical assumption that the puzzle’s elegant design intentionally subverts. By diagnosing them, you shift from seeing the Dual Seahorse as a stubborn object to understanding it as a precise mechanical system waiting for your correct input.
Dual Seahorse FAQ: Durability, Gifts, and Suitability
The Dual Seahorse puzzle is crafted from durable zinc alloy with gold and silver electroplating that shows minimal wear even after frequent solving. It’s perfectly suitable for ages 12 and up, offering a challenging yet achievable mechanical problem that makes it a standout gift for budding and experienced puzzlers alike. Now that you understand its mechanics, here are the practical answers to common questions about its long-term use.
Will forcing the puzzle break it?
Yes. The internal threaded screw is precisely machined but can strip or jam if you apply excessive rotational force or try to pull it apart before the pathways are fully aligned. The correct solve requires finesse, not strength. If you meet solid resistance, stop, return to the start position, and re-follow the rotational steps.
Is the Dual Seahorse suitable for a 12-year-old?
Absolutely, provided they enjoy logic challenges and have patience. The solve teaches sequential thinking and tactile problem-solving. It’s rated for ages 12+, which aligns with the fine motor skills and deductive reasoning needed to grasp the threaded axis concept. Supervision isn’t needed, but sharing the “aha!” moment can be rewarding.
Does the plating rub off with frequent use?
Minimal wear is expected over years of regular handling. The electroplating is durable, but like any metal toy, sharp fingernails or abrasive surfaces might eventually cause slight scuffing on high-contact edges. This doesn’t affect the mechanism. Keeping it on a desk or in its pouch preserves the finish.
Where can I purchase the Dual Seahorse puzzle?
It is commonly available through online retailers like Amazon and specialty puzzle shops. For a reliable source with clear product images and descriptions, you can check the dedicated listing below.

How does its difficulty compare to the Hanayama Seahorse?
The Dual Seahorse is generally considered a step down in difficulty. The Hanayama Seahorse (level 4/6) involves a more abstract, multi-axis disentanglement. The Dual Seahorse (often rated 3/5) has a more intuitive, single threaded screw mechanism. If you solved this, you’re ready for the Hanayama version.
What is the puzzle made from?
It is a cast zinc alloy, which gives it a substantial, cool-to-the-touch feel. The gold and silver colors are applied via electroplating. This material choice makes it resistant to bending but vulnerable to drops on hard surfaces—handle it like a precision tool, not a toy.
Is it a good gift for someone who likes puzzles?
Yes, it’s an excellent gift. Its aesthetic appeal, satisfying solve, and moderate challenge hit the sweet spot for casual and enthusiast solvers. It comes in presentation-ready packaging, making it a complete gift option for birthdays, holidays, or as a desk toy.
How durable is it for daily handling?
Very durable for logical manipulation. The cast metal withstands the twisting and turning of solving cycles. However, avoid dropping it on concrete or tiling, as the casting could crack or chip. For a puzzle, its lifespan is essentially unlimited under normal use.
Can I find a written solution if I get stuck?
Yes, this article provides the complete seahorse cast puzzle how to solve guide with step-by-step instructions and reassembly steps. Unlike vague product descriptions, it decodes the “internal pathways” into specific rotational directions (e.g., 90 degrees clockwise) for guaranteed results. If you’re looking for a tutorial on another popular style, you can also find resources like this one on how to solve the cast hook metal brain teaser.
Are there other puzzles similar to this?
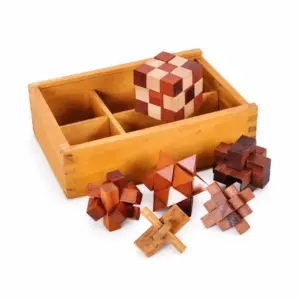
If you enjoy the threaded-axis mechanism and tactile feedback, consider cast metal puzzles from Hanayama (like Cylinder or Nutcase) or other disentanglement puzzles. For a different but equally engaging challenge, the Monster Mouth Fish Escape Puzzle offers a fun thematic solve.

How long should it take to solve the first time?
With no hints, it can take 10 to 30 minutes of experimentation. Using this guide, you can solve it in under a minute once you internalize the alignment steps. The time investment is in understanding the principle, not in brute-force attempts.
How do I maintain the puzzle’s appearance?
Store it in a dry place or the included pouch to prevent dust buildup and minor scratches. If needed, wipe it gently with a soft, dry cloth. Avoid chemical cleaners or water, which could dull the plating over time.
Your next step is clear: apply this knowledge. Re-solve your Dual Seahorse puzzle using the precise steps, then share it with a friend to watch their moment of triumph. For your next challenge, explore the curated selection at specialty retailers like Tea-sip, where puzzles are chosen for their mechanical elegance.