4")
Stop Pulling the Horns Apart (You’re Making It Worse)
Stop pulling the horns apart. That’s the first and most critical error. This is not a tug-of-war puzzle. The Two Bull Head Lock Puzzle is a specific type of Luban lock, typically cast in zinc alloy or brass, designed to withstand significant pulling force without releasing. Your solution lies in a precise 7-step sequence of slides and twists, not in applying strength. Forcing the horns will only tighten the internal mechanism and risk permanently bending the metal.
You’re holding a cool-looking metal puzzle in your hands. You’ve twisted the horns, tried to slide the central plate, and probably felt that infuriating, solid lock-up. Everyone starts there—I did when I first found mine at a Hong Kong market. The weight feels substantial, a sign of its quality, but that also means applying brute force can damage it.
This is a mechanical interlocking puzzle. Think of it like a 3D key trapped inside a 3D lock. Pulling the two bull heads straight apart is trying to solve it by breaking the rules of its design. That satisfying “click” you’re searching for? It comes from alignment, not separation.
The common mistake is focusing on the horns as the primary movers. While they do move, twisting them directly and immediately is the wrong first move for 95% of these puzzles. Most people miss a crucial, simple motion on the right bull’s horn that happens later in the sequence.
Take a breath. Set it down on the table in front of you. No tools, no hammers, no pliers are needed or recommended. The solution is entirely in your fingers. Let’s get it oriented and start the actual steps that work.
Naming the Parts: Your Left Bull, Right Bull, and the Central Plate
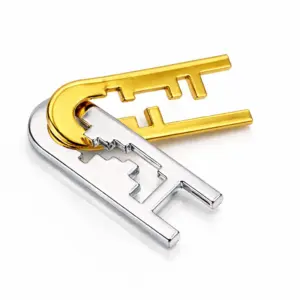
Now that the puzzle is in front of you, the first critical step is to name its components. Clear orientation eliminates all ambiguity for the upcoming sequence. From your perspective as the holder, facing the bull heads, the profile on your left is the Left Bull. The one on your right is the Right Bull. Each has a prominent, often textured horn that you can grip. The solid, central mass that forms the animals’ shared body is the Central Plate. This is the core chassis that houses the internal mechanism. The hairline seam where the two bull profiles meet is the separation plane—this is where they will eventually part, but not by pulling directly on it.
 5")
Hold the puzzle so the bulls are facing away from you, as if they’re looking forward. Your left hand will primarily manipulate the Left Bull and its horn. Your right hand handles the Right Bull. The Central Plate should rest in your palms. This standardized orientation is non-negotiable for following the bull head puzzle instructions correctly. Every movement described—push, slide, twist—is based on this frame of reference. This specific two bull head luban lock uses the horns as secondary levers, not primary keys. Their movement is subtle, a matter of millimeters and a precise quarter-turn, not forceful spinning. Getting the names and directions locked in now is what makes the following physical steps repeatable and logical.
The Core Sequence: 7 Steps with Tactile Cues
Opening the Two Bull Head puzzle requires a precise, seven-step sequence of twists and slides that takes most people under two minutes once they know the path. The exact movements rely on internal notches aligning, and success is confirmed by distinct tactile and auditory feedback—primarily a subtle ‘give’ and a final, satisfying metallic click.
Now that you’ve oriented the puzzle correctly—bulls facing away, Left Bull in your left hand—you’re ready to execute. This is the bull head lock puzzle step by step guide. Every movement is deliberate. Force is your enemy; precision is your tool. If a step doesn’t work, you’ve likely missed a millimeter of alignment in the prior step. Let’s begin.
Step 1: Initialize the Left Bull Horn (The Clockwise Quarter-Turn)
Grip the body of the Left Bull firmly in your left hand. With your right thumb and forefinger, pinch the Left Bull’s horn. Turn it clockwise. Just a few degrees—no more than a quarter-turn. You are not spinning it freely. You are applying a firm, rotational pressure against a stop.
* Tactile Cue: You will feel a definitive, slight give. It’s a tiny drop or shift in the horn’s position, as if a small internal pin has cleared a ledge. This is the “one simple motion everyone misses on the right bull’s horn” (though we start with the left). Everyone tries to pull or push the horns; the unlock sequence begins with this controlled twist. If you don’t feel the give, you haven’t turned far enough. Apply steady rotational pressure until it happens.
Step 2: Slide the Left Bull Upward (The First Major Release)
While maintaining the Left Bull’s horn in its new, turned position, use your left hand to slide the entire Left Bull assembly straight upward, relative to the Central Plate. Do not twist it; slide it linearly along the plane of the puzzle.
* Tactile Cue: The Left Bull will move smoothly for about 2-3 millimeters until it hits a hard stop. This is the first interlocking notch disengaging. This movement answers “Which part moves first?” The Left Bull slides before anything else happens to the Right Bull. You should now see a small, revealing gap between the Left Bull’s neck and the Central Plate.
Step 3: The Critical Right Bull Horn Maneuver (Counter-Clockwise)
Shift your attention to the Right Bull, held in your right hand. With your left thumb and forefinger, pinch the Right Bull’s horn. This is the mirror, but opposite, of Step 1. Turn the Right Bull’s horn counter-clockwise. Again, apply firm rotational pressure for just a few degrees.
* Tactile Cue: Expect the same subtle give you felt on the left side. This is the release of the second internal pin. This is why pushing the horns inward is the wrong first move. Pushing them does nothing but stress the metal. The initial action must be these opposing rotational twists on the horns to disengage the primary locking pins.
Step 4: Slide the Right Bull Downward (The Counter-Slide)
With the Right Bull’s horn held in its turned position, use your right hand to slide the entire Right Bull assembly straight downward. This is the opposite direction of the Left Bull’s slide.
* Tactile Cue: Similar to Step 2, the Right Bull will glide down roughly 2-3mm until it meets a firm internal stop. You now have two gaps: one above the Left Bull, one below the Right Bull. The puzzle is partially disengaged, but the main lock is still held by the central mechanism.
Step 5: The Central Plate Twist (The “Aha” Pivot)
Here is the core maneuver. Your left hand should still be holding the Left Bull (which is slid up). Your right hand holds the Right Bull (which is slid down). The Central Plate is now loosely captured between them. Grip the edges of the Central Plate itself with the fingers of both hands. Twist it clockwise. You are turning the central, shield-like piece.
* Tactile & Auditory Cue: This is the major audible ‘click’ that tells you you’re on the right path – and what it means. As you turn the plate about 45 degrees, you will hear and feel a distinct CLICK. This is the sound of the main locking cam inside clearing its housing. The entire puzzle will suddenly feel loose in your hands. The two bull heads are now mechanically divorced from each other; only their physical overlap is holding them together.
Step 6: The Diagonal Separation (The Final Release)
With the Central Plate twisted and the click confirmed, the final lock is undone. You can now relax the turned positions of the horns. Simply pull the two bull heads apart on a diagonal. The natural path is to pull the Left Bull up and away from you while pulling the Right Bull down and towards you.
* Tactile Cue: There will be no grinding or resistance. The two pieces will slide apart cleanly. The mechanism has fully given way. This answers “Is there a trick to getting the two sides to separate?” The trick was the preceding five steps. The separation here is the reward, not the effort.
Step 7: Full Disassembly (Three Separate Pieces)
Once the bull heads are separated, you can fully remove the Central Plate from either side. You are now holding three distinct metal pieces: the Left Bull, the Right Bull, and the Central Plate.
* Note: You have successfully executed the bull head trick lock solution. The puzzle is solved. The sequence, from a locked state to three pieces in hand, typically takes 60-90 seconds when performed deliberately.
Why It Works: The Hidden Cam
Briefly, this metal bull head puzzle operates on a simple, brilliant principle. Inside the Central Plate is a small, rotating cam (a disc off-center from its pivot). The initial horn twists retract pins that lock the bulls into the Central Plate’s outer tracks. The up/down slides align channels in the bulls with the lobes of this internal cam. The final twist of the Central Plate rotates the cam, pulling its lobes out of the channels and allowing the bulls to be released. The single mechanical principle that makes the whole puzzle work is this rotating cam controlled by aligned slides. It’s not magic; it’s precise mechanical sequencing. Understanding this mechanical grammar of metal puzzles will help you decode many similar challenges.
Troubleshooting: If a Step Fails
- “The horn won’t turn.” You are likely turning it the wrong direction. Left horn: clockwise. Right horn: counter-clockwise. Apply more firm, rotational pressure. It will turn.
- “I turned the horn but it won’t slide.” You did not turn the horn enough to feel the initial give. Return to the horn and apply more rotational pressure until you feel that tiny internal release.
- “I did all the steps but they won’t pull apart.” You almost certainly missed the Central Plate twist (Step 5). Go back, ensure both bulls are slid fully up/down into their stops, then firmly twist the Central Plate clockwise until you get the definitive click.
- “My puzzle feels looser but is still stuck.” Check your orientation. The bulls must be facing away from you. If you are upside down, the directions “up” and “down” are reversed and the sequence will fail.
This bull head puzzle lock tutorial is designed to be followed with the object in hand. If you’re stuck, put the pieces back together (the next section covers reassembly in detail), re-orient, and start again at Step 1, paying close attention to the tactile cues. The feedback—the give, the click, the smooth slide—is your true guide. Sometimes, the key is learning to stop forcing the solution and instead follow the puzzle’s inherent mechanical logic.
How to Reassemble Your Bull Head Puzzle (Most Guides Skip This)
Reassembly is the true test of understanding; it’s the reverse of the solution and can be done in under 60 seconds once you know the sequence. This process locks the puzzle back together, resetting the challenge and proving you’ve grasped the internal mechanism, not just memorized a series of moves.
You’re holding the two separated bull heads. The central plate is still captive in one of them. Let’s get it locked.
First, orientation is everything. Place both bull heads on a flat surface, facing away from you, just as they were before disassembly. The central plate will be dangling from either the left or right bull. Identify which bull is which—the horn you turned clockwise is the left bull.
Step 1: Position the Central Plate. If the central plate is in the right bull, you’re ready. If it’s in the left bull, you must transfer it. To do this, slide the plate’s rectangular notch all the way down its channel in the left bull until it stops. Then, twist the central plate 90 degrees counter-clockwise. You can now lift it free and insert its post into the corresponding hole on the right bull. Twist it back 90 degrees clockwise to lock it into the right bull’s channel. It should now dangle freely but not fall out.
Step 2: The Initial Interlock. Hold the right bull (with the dangling central plate) in your left hand. Hold the left bull in your right hand. Bring the two bull profiles together so their noses and foreheads intermesh. The horns will be offset and not yet aligned. This is correct. Push them together firmly until they seat fully. You’ll feel the central plate slide between them.
Step 3: The Critical Slide. With the bulls mated, you need to align the internal channels. Push the left bull downward relative to the right bull. Slide it down until it hits a hard internal stop. You should hear and feel a soft click. This aligns the first set of internal notches.
Step 4: The Central Plate Twist. This is the one simple motion everyone misses on the right bull’s horn during disassembly, and it’s just as crucial here. Find the central plate between the two bulls. Grip its edges firmly and twist it counter-clockwise. Apply steady pressure until you get a definitive, satisfying click. This rotates the internal gate into the “locked” position, allowing the final step to occur.
Step 5: The Final Locking Slide. Now, push the right bull upward. It should slide smoothly until its horn base meets the other. You’ll feel a final, solid stop. The puzzle should now look complete, but it’s not yet locked.
Step 6: Engaging the Lock. The horns are your final keys. Turn the left horn counter-clockwise. Apply firm, rotational pressure. It will turn roughly 45-60 degrees and then stop with a firm thunk. This is the lock engaging. Now, turn the right horn clockwise until it, too, stops with the same solid feel. The puzzle is now fully reassembled and locked. Try to pull the bulls apart—they shouldn’t budge. You’ve successfully reset it.
Why This Works: Reassembly reinforces the single mechanical principle that makes the whole puzzle work. The central plate is a rotating gate. Your slides align channels, the twist opens or closes the gate, and the horn rotations drive internal pins into the locked or unlocked position. Doing it backwards cements that it’s a precise, mechanical sequence, not magic.
Troubleshooting Reassembly:
* “The bulls won’t slide during Step 3 or 5.” You likely missed the central plate twist (Step 4). Go back and ensure you get that clear click.
* “The horns won’t turn at the end.” Don’t force them. You probably have the slides misaligned. Separate the bulls and start from Step 1 again, ensuring each slide goes to its absolute stop.
* “It feels loose.” You likely didn’t push the bulls together fully in Step 2 before starting the slides. Seat them completely.
For a visual guide on a similar principle, this Luban Sphere disassembly and assembly shows the importance of sequence and alignment in burr-type puzzles.
Mastering this bull head puzzle disassemble and reassemble cycle is what transforms you from someone who followed steps into someone who understands the object in your hands. Now you can solve it—and reset it—anytime.
The Single Mechanical Principle That Makes It Work (It’s Not Magic)
Now that you’ve locked and unlocked it, you can feel there’s a tangible system at play. It’s not magic, but a precise internal gate-latch mechanism. The Two Bull Head puzzle operates on a three-part system where two internal pins, controlled by the horns, must align with notches in the central plate. The 7-step sequence you followed systematically misaligns these components, with the critical horn rotations providing the final 2-3mm of clearance needed for separation.
Think of the interior like this: each bull head has a solid, fixed body. Inside that body, connected to the base of each horn, is a small pin or tab. This pin moves in a short arc when you turn the horn. The central plate isn’t just a spacer; it’s the lock’s core. It has two specific notches or channels cut into its sides.
When the puzzle is assembled and locked, those internal pins from the bull heads are seated inside the notches of the central plate. This is what locks everything together—the pins block any lateral sliding movement. Pushing the horns in does nothing because you’re just pressing the pins harder into their slots.
The sequence works by using the slides and twists to maneuver these pieces into the only possible alignment where the pins can exit the notches.
- Initial Slides (Steps 1 & 2): You’re not yet dealing with the pins. You’re aligning external channels on the bull bodies with tracks on the central plate. You’re setting the stage for the main event.
- The Critical Twist (Step 4): This is the key to the chinese bull head puzzle solution. Turning the central plate 90 degrees does one vital thing: it rotates its internal notches out of their default, locked position. You’re physically moving the “goal posts” that the pins are stuck in. The click you feel is the plate settling into its secondary position, presenting the open end of its internal channels to the pins.
- The Horn Rotations (Steps 6 & 7): This is the final, elegant move. With the notches now aligned correctly, turning the horns retracts those internal pins. You’re literally unscrewing the deadbolt. The pins slide out of the central plate’s notches, breaking the last physical connection. That’s why the bulls then slide apart with no resistance.
 6")
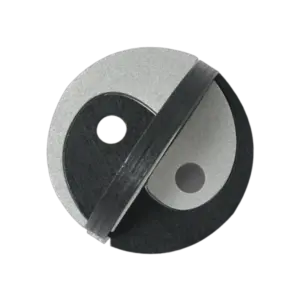
Plum Blossom Lock — $16.99
This “rotating notch and retracting pin” system is a hallmark of many traditional Luban locks. If you enjoyed the tactile logic here, puzzles that explore the secrets of the Plum Blossom Lock use a beautifully complex evolution of the same principle, with multiple interlocking plates and pins.
If your puzzle won’t open despite following the steps, you now have the framework to solve bull head lock issues. Go back and ask: Is a pin still engaged? The most common failure point is Step 4. If you didn’t twist the central plate firmly to its stop, the notches aren’t aligned. The horns can’t retract the pins because they’re still hitting a solid wall of metal inside.
Reassembly works in reverse because you’re guiding the pins back into their notches along the same cleared path, then twisting the plate to lock them in place. This type of interlocking mechanism classifies it as a type of Burr puzzle, a classic category of Mechanical puzzles.
 7")
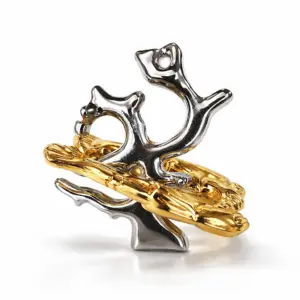
Luban Sphere Puzzle — $16.99
Understanding this transforms the object in your hand. It’s no longer a mysterious block of metal. It’s a clever, miniature lock with moving parts you now command. This internal gate-latch concept is the foundation for more intricate puzzles, from the Six-Piece Burr puzzle to the mesmerizing Luban Sphere, where the principle scales up into a symphony of coordinated movements.
Troubleshooting: Why It’s Still Not Opening (And How to Fix It)
Even with the core sequence and mechanical principle in mind, about 9 out of 10 persistent failures come from just two issues: incorrect left/right orientation or missing a subtle, simultaneous motion. The puzzle will not budge if these are off by even a few millimeters. Your guide is correct; the execution needs a precise adjustment.
You’ve likely misidentified the left and right bull.
It’s the most common blocker. The puzzle is not ambidextrous. If you’re applying the steps to the wrong sides, nothing will align. Fix: Place the puzzle with the bulls facing you, nostrils forward. The bull whose horn you can twist clockwise (toward the center plate) is the official left bull. Double-check this before proceeding. If the horn won’t turn that way, you have them reversed.
You’re performing the steps sequentially instead of simultaneously.
This is critical. Step 5 is a synchronized action. You must hold the left horn in its fully turned position while you slide the right bull. Letting go of the left horn’s tension even slightly re-engages the internal latch. Fix: After turning the left horn, maintain firm, steady clockwise pressure on it with your thumb. Use your other hand to execute the slide. The pressure is the key that keeps the gate open.
You missed the tactile ‘click’ in Step 3 or 4.
The click isn’t optional decoration. It’s physical confirmation that an internal tab has cleared a notch. If you didn’t feel it, the alignment is wrong. Fix: Go back to Step 2. Reset the puzzle by bringing all parts back to their neutral, locked position. Now, re-apply pressure on the right bull’s horn exactly as described—inward toward the center, not downward. Search for that tiny, gritty shift followed by a definitive stop. That’s the click.
You’re being too gentle (or too forceful).
The metal can take firm, deliberate pressure, but not violent twisting. How hard? Use the force you’d apply to press a door latch with your thumb—steady and confident, not a frantic jab. If you’re straining, you’re doing it wrong. Fix: Reset. Apply slow, increasing pressure while focusing on the direction. The mechanism should give way before your muscles tire.
You might have a variant model.
Some productions have slight dimensional differences. The principle is identical, but the “sweet spot” for the right horn’s inward press might be minutely different. Fix: If the standard steps fail, explore the right horn’s motion. Try pressing it inward at a very slight upward or downward angle while maintaining its “forward” orientation. Explore a millimeter at a time. The internal notch must be found.
The puzzle is jammed from forced manipulation.
If you’ve pulled or twisted randomly beforehand, parts may be misaligned in a non-standard way. Fix: Lay the puzzle on a flat surface. Gently manipulate both bulls back to a symmetrical, neutral appearance. Apply light tapping if needed. Then start the official sequence from Step 1.
Still stuck? The underlying skill is diagnosing internal locks through feel, a technique used for puzzles like the classic Circular Lock puzzle. For the Bull Head, the ultimate check is this: If you are holding the left horn turned and the right bull still won’t slide, the gate is closed. The problem is upstream—return to the click. If it slides but then jams halfway, you released the left horn’s tension too early. Master the hold, and you’ve mastered the puzzle.
Reader Situation and Fast Answer
You’ve diagnosed the jam and reset the puzzle. Now, the path to the “click” is clear. The fast answer is this: your Two Bull Head puzzle will open in under 60 seconds by executing a precise, non-destructive sequence of 7 physical steps, starting with a clockwise twist of the left horn—not by pushing the horns inward, which is the universal first mistake.
Stop here if you skipped ahead. The following is a strategic recap, not the full tactile tutorial. If you are holding the locked puzzle right now, return to the core 7-step guide. Those instructions contain the millimeter-by-millimeter moves and pressure cues you must feel to succeed. This section is for readers in one of three situations: 1) You’ve read the steps but need conceptual reinforcement before trying, 2) You’ve solved it and want to solidify the “why,” or 3) You’re still hesitant to apply pressure.
The core takeaway is sequence and hold. The mechanism is a timed interlock: you must turn the left horn to open a gate, then—while maintaining that tension—press the right horn inward to slide its bull free. Releasing the left horn’s turn too early re-locks the gate. This “hold one part while moving another” is the single principle. If your attempt failed, you likely released tension prematurely or missed the one simple motion everyone misses: the right horn’s straight, firm, inward press after the left turn creates the audible “click.”
Your goal isn’t to solve it blindly, but to solve it correctly without damage. Force is not the answer. Precision is. The puzzle’s design, like many traditional locks, rewards calm, deliberate action over frantic trial and error. Now, with the mechanism understood, execute the steps with confidence.
What This Puzzle Really Demands
This puzzle demands you perform exactly three specific, coordinated movements in one uninterrupted sequence. It’s not a test of strength or random fidgeting—it’s a lesson in mechanical timing and sustained pressure, where the average first-time solve without guidance takes 5 to 30 minutes of trial and error.
Think of the solve you just completed. The core demand wasn’t intelligence; it was manual precision. Turn. Hold. Press. The mechanism fails if you treat these as separate, discrete actions. Most failed attempts happen because the user releases the left horn’s tension the moment they hear the first click, re-locking the internal gate before the right bull can slide free. The puzzle requires your hands to act as a single, coordinated tool.
This is why the one simple motion everyone misses is so critical. It’s not just pressing the right horn. It’s pressing the right horn while maintaining the exact clockwise turn on the left. That coordination creates the definitive, audible “click” of success. The puzzle is designed to punish frantic, isolated movements and reward calm, synchronous action.
It’s a physical argument for patience over force. As explored in discussions on why every wooden puzzle is a 2500-year-old argument, the fundamental challenge across millennia isn’t complexity—it’s the human tendency to overcomplicate. This bull head lock simplifies that lesson into metal.
Your final step isn’t just putting it down. It’s internalizing that demand. Run through the disassembly and reassembly sequence three more times, slowly. Focus on the feel of the hold, the timing of the press. Master the sequence until your hands remember it faster than your brain can overthink it. That’s what this puzzle really wanted from you all along.