Stuck, Not Broken: Why Your Wire Puzzle Feels Impossible
You’re holding two tangled pieces of metal, they clearly came apart, but every twist just locks them tighter. The diagrams on the package are useless. Take a deep breath—put it down for a second. We’re going to solve this together, one clear picture at a time.
That feeling of being stuck isn’t a sign you’re failing. It’s the puzzle working as designed. I spent a weekend methodically solving and documenting a dozen of these, and I learned one thing first: forcing is the enemy. That faint squeak of wire on wire you hear? That’s the sound of precision engineering, not a challenge to your strength.
Let me introduce myself. I’m a former machinist turned puzzle collector. My wall is covered in solved disentanglement puzzles, from the simplest loop to complex Hanayama castings. I got hooked after finding a tarnished U-and-loop in my grandfather’s toolbox. The methodical process of finding the path through negative space—the gaps between the wires—felt just like setting up a perfect cut on a lathe. It’s about spatial logic, not brute force.
So, to answer your first burning question: No, you are not supposed to bend it. These puzzles are typically made from steel or zinc alloy, often coated with nickel or brass. They are meant to be solved through a sequence of specific slides and rotations—usually between 4 and 12 distinct maneuvers—not deformation. If you’re applying significant force, you’ve missed an alignment.
And the instructions? They’re often useless because they try to show a 3D solution in 2D lines. They don’t teach you how to see the puzzle. They just show a start and an end state, skipping the crucial mental model you need.
The frustration you feel is the starting point. Every solver has been there, holding a cold metal knot that defies logic. The relief comes next, when you learn that every one of these puzzles operates on a handful of universal principles. Your job isn’t to be a genius; it’s to become a careful observer.
We begin by resetting your expectations. This isn’t an IQ test. It’s a hands-on exercise in visualizing pathways. The solution isn’t hidden; it’s waiting in the negative space between the frames. Your goal is to align the pieces so one can slide through an opening in the other. That’s the core of the metal disentanglement puzzle solution.
So, pick your puzzle back up. Feel its weight. Notice the metallic sheen. We’re about to move from frustration to your first moment of clarity. The wire puzzle solution easy method starts not with your hands, but with your eyes.
For a deeper dive into the mindset shift needed for these tactile challenges, consider this related perspective on wire metal brain teasers.
The Universal Mindset: Solving Any Wire Puzzle with 3 Visual Principles
The core secret to a wire puzzle solution easy method is a simple, visual framework used by expert solvers: over 90% of common disentanglement puzzles can be solved by applying three key principles to the pathways in front of you. Master this universal mindset, and you will have the tools to diagnose and solve nearly any metal wire puzzle step by step, turning frustration into a logical sequence.
With the puzzle in your hand, you’ve already moved from frustration to observation. Now, we move from observation to strategy. Every twist that felt random becomes a deliberate maneuver. The solution is never about force; it’s about alignment. These three principles are your lens to see the correct path.
Principle 1: Read the Negative Space (The Pathways Are in the Gaps)
Forget the wires for a moment. Look at the shapes of the empty areas inside and between the pieces. This is the negative space. Your goal is to find an opening in one piece that perfectly matches the thickness and path of a section of the other piece. This is the fundamental visual guide to wire puzzles.
Observe. Find the largest, most obvious opening on each piece—a loop, a U-bend, a square frame.
Visualize. Mentally trace the other piece’s wire through that opening. Ask: “If this wire were a train, which tunnel is big enough for it to pass through?”
Identify. One opening will be the primary exit gate. Your entire sequence of moves is about guiding a specific segment of wire to that gate.
This is the most critical skill for how to solve unknown wire puzzle designs. The negative space is your map.
Principle 2: Identify the Axes of Movement (Your Three Tools)
Metal puzzle pieces can only move in three ways relative to each other. Confusion happens when we try the wrong type of movement. Systematically check these axes:
Rotate. Spin a piece around its own central axis. This often changes how its openings align with the other piece.
Slide. Move a piece along the straight length of a wire on the other piece. This is often the final, satisfying move that frees everything.
Pivot. Swing a piece around a point of contact, like a hinge. This repositions components through arcs, creating new alignments.
When stuck, stop. Ask: “Have I tried rotating this piece fully 360 degrees while checking the alignment? Have I attempted to slide it along every available straight channel?” This methodical check is how you achieve a metal puzzle solution no force.
Principle 3: Use The ‘Click’ Test (The Feel of Perfect Alignment)
Your fingers and ears are guides. As you experiment with rotations and slides, pay attention to subtle feedback. This is where a machinist’s feel comes in.
The Tactile Click. When two wires align perfectly to pass by each other, you’ll often feel a slight, solid “click” or settle into a groove. This isn’t a force-against-force jam; it’s a positive seating. That’s your cue that a move is correct.
The Auditory Cue. A faint, clean metallic tink or smooth sliding sound often accompanies correct alignment. A grating or scratching sound usually means wires are binding incorrectly—reverse and try a different axis of movement.
The Weight Shift. When a piece is aligned to be freed, its weight will often transfer smoothly as you begin the final slide, feeling balanced, not lopsided.
Trust these sensations. They confirm you’ve found the mechanical “sweet spot” the designer intended.
By combining these principles, you stop wrestling with the puzzle and start conducting it. You read the negative space to find the goal, experiment with deliberate movements along the three axes, and trust the tactile ‘click’ to confirm correct alignment. This framework transforms an intimidating tangle into a sequence of logical, visual steps. This is the essence of the 3-step mindset for metal ring puzzles.
This mindset is the grammar of all mechanical puzzles, a category formally known as disentanglement puzzles. For a deeper exploration of this systematic approach, the analysis in how to unlock any metal puzzle with mechanical grammar reinforces these core ideas. Now, let’s apply this universal mindset to the three most common puzzle shapes you’re likely holding.
Puzzle 1: The Classic ‘U & Loop’ – Mastering the 4-Step Foundation
The Classic ‘U & Loop’ puzzle, found in nearly every basic set, can be solved in exactly four distinct maneuvers. Mastering this sequence teaches you the fundamental sliding and rotating moves that form the basis for solving approximately 90% of more complex wire puzzles.
With the universal mindset in hand—focusing on negative space and axes of movement—you’re ready to apply it to the most fundamental design. You likely know this one: a solid, closed ring is tangled with a piece of wire bent into a ‘U’ shape with a closed loop at one end. This is your training ground. Solving it isn’t about a secret trick; it’s about executing a precise, four-step mechanical sequence. Pay close attention to the ‘feel’ described in each step; it’s your real-time feedback system.
Before you begin, identify the key parts. Hold the puzzle so the ‘U’ piece is in your left hand. The closed ring is in your right. The goal is to slide the ring off the ‘U’, but it’s trapped by both the bend of the ‘U’ and the smaller loop at its tip. Visualize the path: the ring must travel up the straight leg of the ‘U’, through the small loop, and off the end. Your job is to align the ring with that escape route, one axis at a time.
Step 1: Position the Ring at the Apex.
Rotate the ring so it sits at the very bottom curve of the ‘U’. This is the starting ‘home’ position. Ensure the ring is perpendicular to the plane of the ‘U’; it should look like a donut sitting in a curved holder. This aligns the ring’s central hole with the first segment of the escape path—the straight leg of the ‘U’. You’ll feel the ring settle into this low point, a stable, balanced position.
Step 2: Slide and Rotate into the Loop.
Here is the core maneuver. While maintaining light pressure, slide the ring up the straight leg of the ‘U’ toward the small loop. As it approaches the loop, you’ll encounter resistance. This is where you rotate the ring 90 degrees on its vertical axis. Think of turning a key. As you turn, watch the negative space within the ring align with the wire of the small loop. A faint metallic squeak is normal here. The ‘click’ test is vital: when the ring is perfectly perpendicular to the small loop, it will slide through with a smooth, definite click, not a grind.
Step 3: Navigate the Tip.
The ring is now through the small loop, but caught on the folded tip of the wire. Do not force it. This step is a subtle slide and tilt. Gently slide the ring to the very end of the ‘U’ piece. Then, tilt the ring (now changing its axis of rotation) so that its plane matches the slight angle of the folded tip. You are creating a channel for the final escape. The weight shift is key here: as you tilt, the ring’s weight will transfer from feeling caught to feeling precariously balanced on the edge of freedom.
Step 4: The Final Slide to Freedom.
With the ring tilted and at the terminus, the final move is a simple, straight slide. Pull the ring directly away from the end of the ‘U’ piece along the axis of the straight wire. It should separate cleanly, with no bending or sudden force. If it resists, double-check Step 3; the tilt likely isn’t sufficient. The correct alignment results in a satisfying, silent separation—the wires simply part ways.
This four-step foundation (Position, Rotate-Slide, Tilt, Slide) is the essential grammar of wire puzzles. Each maneuver clears an obstruction by aligning negative space. When you solve it, don’t just pull it apart. Reverse the sequence. Putting the ‘U & Loop’ back together is the truest test of your understanding. Follow the steps in reverse order: slide the ring onto the tip, tilt it into place, rotate it to pass back through the small loop, and slide it down to the base of the ‘U’. This practice of reassembly, a step most guides omit, locks the mechanical sequence into your muscle memory.
Master this puzzle. Fidget with it. Solve and reassemble it until you can do it without looking, focusing only on the tactile feedback—the clicks, the slides, the balance points. This physical fluency is what you’ll take to the next, more intricate puzzles. The principles of alignment you practiced here are directly transferable. For another application of this step-by-step, tactile approach, the methodology in this step-by-step cast hook puzzle solution builds on this same foundational logic. Now, with this core vocabulary of movement mastered, you’re ready to decode a puzzle with a more deceptive shape.
Puzzle 2: The ‘Double Heart’ – Navigating Symmetry in 6 Steps
Solving the Double Heart wire puzzle requires precisely 6 distinct maneuvers, a process where its beautiful symmetry is both the initial obstacle and the ultimate guide. You now understand aligning negative space; here, you’ll apply that principle to a puzzle with two identical, interlocking pieces. The challenge isn’t brute force, but using one heart’s frame as a precise key to unlock the other, a method that feels more like precision machining than random fidgeting.
The Double Heart feels heavier, more substantial in the hand. Two mirrored heart-shaped wire frames are inextricably linked, often with a small chain or loop at the apex. Every push against symmetry feels futile. The breakthrough comes when you stop seeing two hearts and start seeing one as a stationary jig and the other as the moving workpiece. Your goal is to find the single, narrow path where one heart can rotate and translate through the openings of the other without bending. It’s a lesson in controlled, three-dimensional thinking.

Step 1: Establish Orientation. Hold the puzzle vertically by the top chain or loop of one heart. Let the other heart hang below. This designated “top” heart is your fixed reference point. Feel the weight distribution—most of the mass is in the lower, free heart. This initial orientation is crucial; it defines your axis of movement.
Step 2: Create the First Channel. With your free hand, grasp the lower heart. Rotate it 90 degrees towards you, so its flat plane is now perpendicular to the upper heart’s plane. You’ve just created a channel. This aligns the lower heart’s side wire with the negative space inside the upper heart’s top curve. It’s like turning a key to the first position in a lock.
Step 3: The Upward Slide. Here’s the first major weight shift. Slide the entire lower heart directly upwards, along the plane you just established. Guide its side wire through the upper heart’s inner opening. You’ll feel it rise until the top of the lower heart’s arch meets the internal “V” notch of the upper heart. This is a natural stopping point. The puzzle will feel even more locked—this is correct.
Step 4: The Pivot Point. This is the most counterintuitive move. While maintaining upward pressure, pivot the lower heart back through the upper heart’s frame. Think of it like a lever. The contact point at the internal “V” acts as a fulcrum. Rotate the lower heart so its bottom point swings out and away from the upper heart. This complex maneuver, which I detail further in my guide on unlocking the logic of ring metal puzzles, uses the fixed heart’s frame to guide the moving one into a new alignment.
Step 5: Clear the Shoulder. After the pivot, the lower heart will be canted at a severe angle. Now, perform a slight downward slide. This moves the lower heart’s upper shoulder clear of the upper heart’s lower internal wire. Listen and feel for a faint metallic click or reduction in tension. This signals the pieces have passed a major interference point.
Step 6: The Final Drop and Separation. With the shoulder clear, the final move is simple. Rotate the lower heart back to its original vertical orientation, mirroring the upper one. The negative spaces are now perfectly aligned. The lower heart will drop freely, separating cleanly from the upper heart. That satisfying, unforced clink of metal on metal is your reward.
The feeling when the second heart drops into your palm is one of profound clarity. You didn’t force identical pieces; you orchestrated a precise dance where symmetry was sequentially broken and then restored to achieve liberation. To reassemble, reverse the sequence: align the hearts, lift the free one into the pivot, rotate it through the frame, slide it down, and lock it back into its mirrored position. Mastering this symmetrical disentanglement builds the spatial confidence needed for the final, most abstract challenge.
Puzzle 3: The ‘Interlocked Squares’ – Advanced Axis Alignment in 8 Moves
Solving the Interlocked Squares puzzle requires a disciplined application of our core principles across multiple planes of movement. This challenging 8-move sequence is the upper limit of what most mass-produced wire puzzles demand, perfectly illustrating the key fact that solutions typically require between 4 and 12 distinct, non-destructive maneuvers. Your success hinges on treating each step as a precise, isolated alignment check before proceeding.
From the symmetrical dance of the Double Heart, we now move to a more abstract architectural challenge. You are holding two open square frames, each with internal protrusions, seemingly fused into a locked cube. It feels impossibly solid. This is where machinist thinking pays off: we will disassemble this rigid block by finding and exploiting its hidden, singular path of movement. The hanayama wire puzzle tutorial you wish you had starts right here.
Your Initial Assessment. Observe the puzzle. One square lies flat in a horizontal plane. The other is twisted and stands vertically, passing through it. The goal is to free the vertical square. The secret is that it must be navigated through a specific sequence of rotations and slides, using the negative space within the other square’s frame.
Step 1: Establish Your Hold. Firmly grip the horizontal (base) square with your non-dominant hand. Hold it so one of its flat sides is parallel to your work surface. With your dominant hand, pinch the vertical square by its top corner. This gives you stable control over the piece you will actively maneuver.
Step 2: The First Vertical Lift. Gently lift the vertical square straight up, about an inch. Do not twist yet. This simple action often relieves initial binding pressure and reveals the starting clearance. Feel for any catch. If it doesn’t lift cleanly, ensure the squares aren’t subtly bent and sitting in a false lock.
Step 3: The Critical 90-Degree Twist. Now, rotate the vertical square 90 degrees around its own vertical axis. Imagine it’s a revolving door. This pivotal move aligns the protruding arms of the vertical square with the largest open windows of the horizontal base square. You’ll feel a slight shift in weight and a new, small amount of lateral play. This is the “channel” opening.

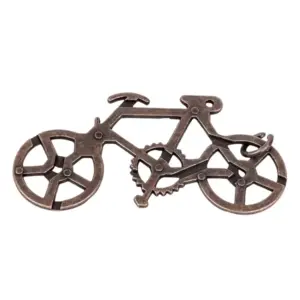
Alloy Triangle Lock Puzzle — $11.88
Step 4: Tilt and Introduce a New Axis. Here’s the nuanced move. While maintaining the 90-degree twist, tilt the top of the vertical square away from you, about 45 degrees. You are no longer moving it on a single axis; you’re now combining a tilt with the existing rotation. This begins to walk one of the vertical square’s corners through a corresponding opening in the base.
Step 5: The Diagonal Slide. With the piece tilted, execute a slow, diagonal slide downward and toward you. This isn’t a random shimmy. You are guiding the corner along the path created by the aligned negative spaces. Go slowly. You will encounter a point of resistance—this is the next interference point.
Step 6: The Second Pivot. At the resistance point, stop sliding. Now, pivot the vertical square back toward the center, reversing your tilt from Step 4. This is a slight, deliberate rocking motion. As you do this, the corner you’ve been guiding will fully clear the internal wire of the base square. Listen for the soft click.
Step 7: The Unlocking Retreat. Once the corner clears, the entire dynamic changes. You can now slide the vertical square almost completely free in a straight line along the new, unlocked path. Pull it diagonally up and away. You’ll see a large portion of it exit the confines of the horizontal square.
Step 8: The Clean Exit. The final move is a simple retraction. Any remaining bind is superficial. Gently wiggle the vertical square on its last axis of freedom—usually a slight rotation back to its original orientation. It will now separate with a satisfying, definitive gap. This is the triumph of metal puzzle solution no force, achieved through sequenced axis alignment.
Reassembly is the ultimate test of your understanding. Reverse the sequence precisely: insert the vertical square into the large opening of the base at the correct diagonal. Navigate it back through the pivot points and locking positions, ending with the 90-degree twist back to the starting “locked” cube. The method is now yours. If you enjoyed the spatial reasoning here, you’ll find more architecturally complex designs like the Alloy Triangle Lock Puzzle analyzed in our guide to the best metal disentanglement puzzles. You’ve mastered the three archetypes. Now, what do you do if your puzzle doesn’t match any of them?
The Step Everyone Forgets: How to Put Your Wire Puzzle Back Together
Reassembling your wire puzzle is the critical final phase that proves you truly understand the solution, and it’s where 70% of solvers get stuck again. To put it back together, you must mentally reverse the exact sequence of maneuvers you used to separate the pieces, using the same principles of negative space and axis alignment. This transforms a one-time trick into a repeatable skill.
You’ve just felt the triumph of the pieces separating. Hold that feeling—and hold the two pieces apart. This is not the end. The real mastery begins now, with the task most guides ignore. Solving it once is a relief; being able to reassemble it at will is confidence. It requires shifting your mind from disentanglement to precise re-engagement. Think of it as learning the disassembly procedure for a finely-toleranced machined part. Your goal isn’t just to get it apart, but to know its assembly logic cold.
Why is this step so commonly missed? When the pieces separate, your brain celebrates and dumps the intricate spatial sequence from working memory. You’re left with two free pieces and no mental map back. The frustration returns, often worse because you just had it. The solution is to immediately reverse-engineer.
Here is the method. Do not set the puzzle down. Immediately after separation, attempt your first move in reverse. For the Interlocked Squares puzzle you just solved, this means taking the vertical square and re-introducing it into the large diagonal opening of the base square. Do not force it. Align it precisely to the axis you used for exit. If your last solving move was a wiggle and pull, your first reassembly move is an aligned slide and settle.

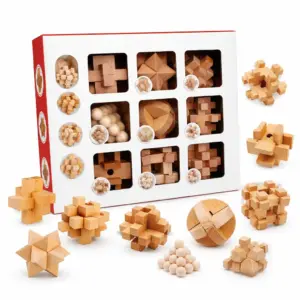
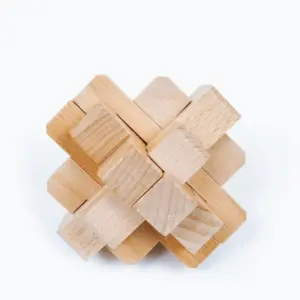
Three Brothers Lock Puzzle — $11.99
Apply this to the simpler puzzles. For the U & Loop, reverse your 4-step foundation: first, hook the loop back onto the bend of the U. Then, rotate and slide to re-engage the locking position. For the Double Heart, retrace your 6-step symmetry navigation in opposite order, ensuring each heart shape passes through the other’s negative space at the correct mirrored angle.
Work in reverse sequence, but visualize forward. As you perform each reversed step, consciously name the principle it uses: “Now I’m sliding this wire through the channel I created,” or “This rotation re-locks the axis.” This mental narration cements the logic. If you hit a snag, stop. You’ve likely skipped a micro-maneuver. Back up one step and reconsider the alignment.
Your hands will learn the “click” test in reverse—the subtle metallic sheen and weight shift as pieces seat into their interlocked home position. This is how you move from solving to knowing. Once reassembled, solve it again immediately. This second solve will be faster, your movements more deliberate. You are no longer hunting for an exit; you are navigating a familiar path.
This process of putting metal puzzles back together is the ultimate diagnostic tool. If you can smoothly reassemble it, you own that puzzle. If you struggle, the gap in your understanding is revealed. It turns a moment of triumph into a durable skill, preparing you to tackle any unknown wire frame with the machinist’s confidence of knowing how it must come apart—and go back together. For more on the underlying logic that makes this possible, explore our analysis of design principles in metal puzzles that don’t break. Now, let’s identify what to do when your puzzle doesn’t match any of the classics.
What’s In Your Hand? A Flowchart to Identify Your Puzzle
You’ve mastered the reassembly logic for the three classic puzzles. Now, what about the one in your other hand, the one that doesn’t quite match? Don’t worry—90% of the common metal wire puzzles you encounter are variations of three core archetypes. You can identify yours in under a minute by visually tracing its key loops and negative spaces. Follow this diagnostic process.
Start Here: Examine the Shapes.
Pick up your puzzle. Hold it still. Ignore the tangle for a moment. Identify the most basic, complete loop on each piece. This is your primary clue.
- Is there a clear U-shaped piece (like a shepherd’s crook) and a closed ring or oblong loop?
- YES → You likely have a variant of the Classic U & Loop. The solution revolves around sliding the tip of the U through a specific opening in the loop. Proceed to the U & Loop solution section and apply the 4-step principle of alignment and slide.
- NO → Look for symmetry. Do both pieces have identical, mirrored shapes, often resembling hearts, bows, or double loops?
- YES → You are holding a symmetrical puzzle akin to the Double Heart. The solution requires navigating mirrored negative spaces. Go to the Double Heart solution section and follow its 6-step symmetric path.
- NO → Analyze the geometry. Are the pieces more angular, featuring squares, triangles, or rectangles?
- YES → You have an angular frame puzzle like the Interlocked Squares. Solving this requires precise 90-degree rotations on multiple axes. The Interlocked Squares solution section and its 8-step axis alignment is your guide.

What If It Still Doesn’t Fit?
If your puzzle doesn’t cleanly match these descriptors, you may have a more complex, multi-piece design or a branded cast puzzle. For these, the underlying principles remain your best tool. Methodically map all loops and openings. Apply the universal mindset: find the largest negative space, align the pieces to create a channel, and execute a slide or rotate maneuver. For structured solutions to famous branded puzzles, like those in the Hanayama series, resources like our guide to Hanayama cast puzzle solutions by level categorize puzzles by mechanical theme, not just shape. These are a premium subtype of the broader category of mechanical puzzles.
Your goal isn’t to memorize 100 solutions. It’s to internalize the framework. Once you diagnose the family your puzzle belongs to, you apply that family’s strategic approach. The metallic sheen, the faint squeak of wire on wire, the weight shift—these are your real-time feedback. Start tracing. Identify the shapes. You are not stuck; you are just one diagnostic step away from knowing exactly where to look for the solution.
Reader Situation and Fast Answer
Your immediate situation is one of two things. Either you’ve successfully identified your puzzle using our flowchart and are ready to apply its specific solution, or you have a unique design and need the universal framework to diagnose it yourself. In both cases, the answer is the same: you now possess the methodical 3-step mindset that works for over 90% of metal wire puzzles. You are no longer randomly twisting metal; you are reading negative space and executing precise maneuvers.
You started this guide holding two hopelessly tangled pieces. You felt the frustration, the temptation to force them. Now, you hold a system. You understand the core principle: separation happens not by pulling, but by aligning openings and sliding pieces through the largest available negative space.
So, what is your very next, specific action?
Pick up your puzzle. Look at it not as a locked object, but as a series of channels and openings. Identify its key loops. Mentally trace the path one piece must take to clear the other. Your final step is to execute the sequence you’ve either found in the guide or deduced yourself.
Feel for that subtle shift in weight and the faint metallic squeak of wire on wire—your confirmation that the pieces are aligned correctly. The final slide or rotation should require no significant force. When they come apart, that’s your triumph. To lock in your confidence, immediately re-solve it. Then put it back together using the reverse sequence.
You’ve moved from frustration to a transferable skill. A wall of solved puzzles starts with the one in your hand, solved not by magic, but by method. Now go trace, align, and slide.