Quick intro — why this guide?
Short version: this little wooden sphere looks chill but hides a clever interlock. If you’re here to enjoy satisfying clicks, learn the parts, or make a tidy SEO-friendly article — welcome. This guide breaks the puzzle into two clear parts: wood block identification and step-by-step disassembly & assembly. Read on, follow the steps, and feel that sweet “pop” of success.
Wood block identification (know your six pieces)
The Luban Sphere Puzzle is made of six wooden pieces. They aren’t identical — they work together like a tiny mechanical orchestra.

Two Symmetrical Pieces (the “equator” pair)
- Shape: Essentially half-ring / semi-cylinder blocks with a wide groove (mortise) running through them.
- Role: They form the ball’s waist or equator and act as the structural backbone.
Four Asymmetrical Pieces (unique, interlocking parts)
All are half-cylinders too, but with different male/female features on their flat edges and curved faces:
- One piece has a distinct central protrusion (a tenon-like bump).
- One piece has a clearly shaped groove (a matching mortise).
- Two pieces are similar but differ in small details; for one of them the orientation of its groove is critical during assembly.
Why this matters: knowing which are symmetrical and which are not is the fastest way to stop fumbling and start solving.

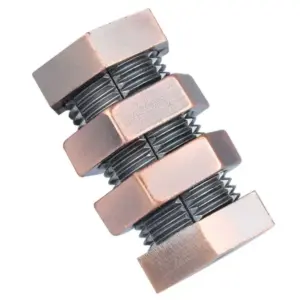
Luban Sphere Puzzle
Luban Sphere Puzzle: a six-piece interlocking wooden brain teaser sealed by one hidden key piece. Wiggle the key free, pop the sphere open, then rebuild two identical and four unique pieces in the one correct sequence until the seams disappear. Fully resettable for repeat solves, it suits desk fidgeters, wooden puzzle collectors, and anyone swapping screen time for hands-on problem solving. $16.99 at Tea-Sip.
Disassembly (how to take it apart safely)
Be gentle. These joints are made to lock, not to be forced.
- Find the “key” piece.
- Wiggle the sphere gently. The key is usually the piece with one obvious protrusion or a special groove that moves first.
- Remove the first piece.
- Once you spot the key, slide or pull it out gently. It should unseat with a soft motion, not a pry.
- Work the loosened structure.
- After the key is out the rest loosens. Continue to wiggle and slide the remaining pieces free.
- Finish until you have 6 pieces.
- Lay them out and group the two symmetrical pieces together so you can see the difference.
Pro tip: Always use fingertip pressure and patience. Forcing parts risks dents or broken tenons.
Assembly (reverse the magic — do this slowly)
Assembly demands correct order and correct orientation.
- Lay out all 6 pieces.
- Separate the 2 symmetrical pieces from the 4 asymmetrical ones. Visualize the equator first.
- Start with the protrusion + matching groove.
- Pick the asymmetrical piece that has the central protrusion. Face the protrusion toward you.
- Take the piece with the matching groove and align it so it nests with the protrusion. Press gently until they interlock — you should see a rough “H” or cross shape forming.
- Attach the first symmetrical piece (critical orientation!).
- Choose one of the symmetrical (identical) pieces. Make sure its groove faces up, not down. If it’s upside down later steps won’t work.
- Press it onto the ends of the “H” structure until it snaps into place.
- Attach the second symmetrical piece.
- Place the second identical piece on the opposite side. Press down gently so it forms a closed “belt” around the assembly.
- Install the remaining asymmetrical pieces.
- Pick a remaining asymmetrical piece — usually the one with a single groove — rotate it 90°, align its groove to the matching bump, press toward you until it seats.
- Repeat with the final piece from the other side. You may need to rotate pieces as you go.
- Final rotate & check.
- Rotate the structure back to its normal orientation (another 90° if you’d rotated parts earlier). Give it a soft wiggle to confirm everything is snug.
Final check: the completed sphere should feel solid. No wobble. If it’s loose, disassemble and recheck orientations — you likely reversed a symmetrical piece.
Common mistakes & fixes
- Symmetrical piece upside down: This blocks later steps — flip it and retry.
- Forcing pieces: If something resists, stop. You probably have an orientation wrong.
- Mistaking similar asymmetrical pieces: Compare grooves carefully — one piece’s groove direction is a clue.
FAQ (for schema and readers)
Q: How many pieces are in a Luban Sphere Puzzle?
A: Six wooden pieces — two symmetrical and four asymmetrical.
Q: Is there a universal “key” piece?
A: Usually yes — one piece moves first and frees the rest. It often has a distinctive protrusion or groove.
Q: Can I force it open?
A: Don’t. Gentle wiggling and correct orientation are the right tools. Forcing can damage tenons.