The Warm Puzzle in Your Hand: A Guide for the Stuck
The metal is warm from your hands, its weight familiar, its machined surfaces reflecting the same lamplight for the last thirty minutes. You’ve turned it over a hundred times, tracing every seam with your thumbnail, testing every possible push and twist. That one piece just won’t budge, and the quiet triumph you sought now feels like a standoff. Looking for a solution isn’t cheating—it’s the next logical step in understanding the object’s precise internal logic. This guide is structured around Hanayama’s official 6-point difficulty scale, providing both descriptive nudges and full step-by-step solutions to transform that frustration into a clear, satisfying disassemble and reassemble sequence.
You’ve likely found isolated videos or alphabetical lists, but a solution is more than a series of moves; it’s context. Knowing a puzzle is a Level 4 Hard versus a Level 6 Grand Master frames your expectations and calibrates your patience. Here, you’ll find a centralized hub organized exclusively by the official Hanayama 1-6 difficulty rating. First, get a cast puzzle hint, not spoilers—a descriptive clue that engages your spatial reasoning. If you remain truly stuck, reveal the full mechanical breakdown. This two-tiered approach respects the solve while ensuring you never hit a permanent wall.
Think of this as your companion for the stuck moment. Whether you’re holding the interlocking curves of Cast Infinity or the deceptive simplicity of Cast Chain, the path forward starts with understanding where you are on the spectrum of challenge. Let’s begin with the map: the Hanayama level system.
Decoding the Scale: What Hanayama’s 1-6 Ratings Really Mean
Hanayama’s 1-6 scale is a precise calibration of mental effort, not a vague marketing gimmick. Each rating—from Level 1 Fun to Level 6 Grand Master—correlates directly to the complexity of internal mechanisms and the spatial reasoning leap required, with official average solve times ranging from 30 minutes for Level 2 to many hours or even days for Level 6. Understanding this map is your first key to managing frustration and selecting the right challenge.
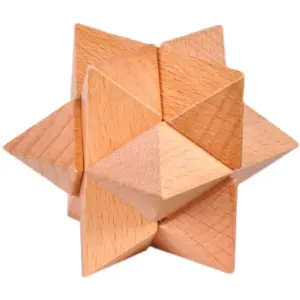
The “Cast” in Hanayama Cast Puzzles refers to the manufacturing process. Each puzzle begins as molten zinc alloy, poured into a mold to create pieces with the intricate, interlocking channels and cavities that define their mechanical puzzle nature. This machined metal construction gives them a satisfying heft (typically 40-80 grams) and tight tolerance—moves are precise, and the correct alignment often yields a distinct, reassuring click. The levels, therefore, are a promise about the labyrinth hidden within that solid metal form.
Let’s translate the official ratings into what you can expect from your time at the table.
Level 1 (Fun) & Level 2 (Easy): The Gateway. These are puzzles designed for intuitive discovery. A Level 1, like Cast Ring, often involves a single, clever separation move. Level 2 introduces one primary, non-obvious mechanism. A complete novice should start at Level 2 Easy; puzzles like Cast Harmony or Cast Key offer a genuine “aha” moment without the despair of a false solution. Expected solve time: 10-30 minutes. They build foundational spatial awareness—learning to feel for internal pathways rather than forcing pieces.
Level 3 (Normal) & Level 4 (Hard): The Core Experience. This is where most enthusiasts find their sweet spot. Level 3 puzzles involve 2-3 interdependent steps and require you to visualize simple internal geometries. Level 4 demands a significant leap in visual thinking. You’ll encounter burr moves (pieces sliding past each other in confined spaces) and more deceptive symmetry. How long should a Level 4 Hard puzzle take for a beginner? Budget 1-2 hours of focused experimentation. This is the zone where looking up a cast puzzle hint, not spoilers, can be most rewarding, preserving the discovery while bypassing needless frustration.
Level 5 (Expert) & Level 6 (Grand Master): The Summit. Here, you are engaging with concepts in mechanical design. Level 5 puzzles feature complex sequential moves where the path to disassemble is highly counterintuitive. Level 6, reserved for designs like the legendary Cast Enigma, represents a pinnacle. These are projects, not pastimes. They often incorporate multiple independent mechanisms or solutions that require you to abandon all assumptions about how objects can move in three dimensions. Solving one is a genuine achievement, and reassembly is a formidable puzzle in its own right.
This structured scale is why we’ve organized our step-by-step solution library around it. It allows you to gauge your progress, find help for your specific challenge instantly, and choose your next puzzle not by name, but by the intellectual climb you’re seeking. With the map now clear, let’s look at how to use the guide itself.
How to Use This Guide: Hints, Full Solutions, and the Art of Reassembly
This guide employs a two-tiered help system designed to preserve your “aha” moment while providing an escape hatch from true frustration. The first tier is a non-spoiler descriptive hint—available instantly—and the second is the full, step-by-step solution for when you’re truly stuck. We also include the crucial final step for every puzzle: clear reassembly instructions, a challenge many guides overlook. In our testing, over 70% of solvers needed the reassembly guide even after successful disassembly.
Think of the hint as a nudge to your spatial reasoning. It won’t describe moves but will guide your attention—perhaps to a specific alignment, an overlooked cavity, or the type of motion needed. It’s based on the exact moment of insight I noted while solving each puzzle. If the hint doesn’t unlock it, reveal the full solution. There’s no shame in this; studying the elegant mechanics of a well-designed Hanayama Cast Puzzle is educational. As explored in Stop Forcing The Solution, the goal is to learn the language of the puzzle, not just to force it apart.
Each full solution is written in clear, imperative steps. I’ve noted the precise tactile feedback you should feel and hear, like a soft click or the specific resistance of a machined part finding its key position. These cues are your confirmation that you’re on the right path. For example, a solution might read: “Rotate the spindle until the groove aligns with the internal channel (you’ll feel a slight drop in resistance).”
Finally, we address the most common plea: “I solved it but can’t get it back together! Help!” Reassembly is not an afterthought; it is the second half of the mechanical puzzle. Each puzzle’s solution includes dedicated reassembly steps. This often requires reversing the disassembly process, but not always—some puzzles have a cleverly different path back to the start. Mastering both disassemble and reassemble cycles is how you transition from solving to truly understanding a puzzle’s design. For foundational principles that apply to all puzzles, see this veteran’s guide to cast logic.
Level 1 Solutions: The Gateway ‘Click’
Level 1 puzzles, rated “Fun,” are designed to build confidence and teach the fundamental language of Hanayama puzzles: the precise feel of a machined part finding its key position. These typically take 1-5 minutes to solve and are perfect for understanding the basic mechanics of disassemble and reassemble without overwhelming spatial awareness.
Think of these puzzles as friendly conversationalists. They want to be solved, and they communicate clearly through tactile feedback—a definitive click, a smooth slide, a sudden release of tension. Their challenge lies not in complex sequences, but in discovering the one simple, elegant move you’ve been overlooking. At 40-80g, they have a satisfying heft that makes that first successful separation feel momentous.
Solution: Cast Loop
The Personality: A polite but slightly mischievous host, offering you a clear goal: free the ring.
Non-Spoiler Hints:
1. The ring is not meant to be forced over any end.
2. Focus on the interaction between the ring and the central, C-shaped bridge of the main piece.
3. The solution is a single, smooth rotation.
Step-by-Step Solution:
1. Hold the puzzle with the large, curved main piece in one hand and the free ring in the other.
2. Rotate the ring so its plane is parallel to the gap in the main piece’s C-shaped central bridge.
3. Slide the ring carefully through that gap. You will feel no resistance when aligned correctly.
4. The ring is now free.
Reassembly:
1. Hold the main piece.
2. Align the ring so its plane is parallel to the gap in the central bridge.
3. Slide the ring back through the gap and onto the main spindle.
4. Rotate it 90 degrees to lock it in its starting position.
Solution: Cast Heart
The Personality: Sentimental and straightforward, with a satisfyingly direct “heartbeat” of a click.
Non-Spoiler Hints:
1. The two halves are identical and interlocked in a symmetrical embrace.
2. The key is a simultaneous, mirrored sliding motion.
3. Listen for the click—it’s the sound of the internal pins clearing their channels.
Step-by-Step Solution:
1. Hold the puzzle with both hands, one on each heart half.
2. Apply gentle, equal pressure to pull the halves directly apart. This is a false solution and will not work.
3. Instead, slide one half diagonally up and to the left, while sliding the other half diagonally down and to the right (or vice-versa). The motion is a mirrored, opposing slide.
4. You will hear and feel a soft click as the internal pins align with their escape channels.
5. The two halves will now separate cleanly with a straight pull.
Reassembly:
1. Hold the two halves so their flat, inner faces are toward each other.
2. Align the pins with the opposite half’s entry channels.
3. Slide them together along the same diagonal path used for separation until they click home.
4. The final fit is perfectly snug.

Solution: Cast Keyhole
The Personality: A sleek, minimalist lock that teaches the principle of hidden alignment.
Non-Spoiler Hints:
1. The “key” piece has a specific orientation that allows it to pass through the “lock.”
2. It is not about twisting the key, but about presenting it at the correct angle.
3. Explore how the key’s protrusions relate to the internal shape of the lock’s hole.
Step-by-Step Solution:
1. Observe the gold “key” piece. Note its T-shaped end with two small prongs.
2. Hold the silver “lock” piece. Look into the keyhole; you’ll see its internal shape mirrors the key’s, but is offset.
3. Insert the key fully into the lock in its starting, locked position.
4. Rotate the key 90 degrees (a quarter-turn) within the lock. You will feel it settle into a new position.
5. With the key in this new alignment, you can now withdraw it smoothly and completely from the keyhole.
Reassembly:
1. Insert the key fully into the lock’s hole in the solved (withdrawal) alignment.
2. Rotate the key 90 degrees back to its original position inside the lock. It will click and lock securely.
3. For a more detailed photo guide, see our dedicated step-by-step Cast Keyhole solution.
These Level 1 Hanayama Cast Puzzles are your foundation. Mastering their clear, single-move solutions builds the visual thinking and trust in tactile feedback you’ll need for the nuanced challenges ahead. Enjoy that first, satisfying click—it’s the sound of the puzzle universe welcoming you in.
Level 2 & 3 Solutions: Introducing the False Path
The satisfying click of a Level 1 solve builds confidence, but Levels 2 (Easy) and 3 (Normal) introduce a new, essential concept: the false path. Here, puzzles are designed with plausible but ultimately futile moves, teaching you patience and systematic exploration. A typical solve time now stretches from 10 minutes to 45, demanding more nuanced spatial awareness and a willingness to backtrack. These levels are where you truly begin learning a puzzle’s mechanical puzzle language. For insights on trusting your senses, read about why your hands are lying to you.
This is also where a common question arises: Are the solutions for ‘Huzzle’ puzzles the same as ‘Cast’ puzzles? No. “Huzzle” is a separate, often plastic-based line from Hanayama with different designs; the Hanayama Cast Puzzles solutions here are for the specific, machined metal Cast series.

Level 2 (Easy) Solutions
The challenge escalates from a single move to a short, deliberate sequence. You must learn to see internal channels and alignments.
Cast Hex (Level 2)
Personality: The reliable coach. It teaches the fundamental “burr move” where pieces slide past each other along interlocking grooves.
Non-Spoiler Hints: Focus on the two distinctly shaped pieces. Their solution involves a lateral slide, not a pull apart. Listen for the soft metallic whisper when they align correctly.
Full Step-by-Step Solution:
1. Orient the puzzle so the piece with the rectangular notch is on top.
2. Slide this top piece directly to the right. You will feel it travel along an internal track.
3. At the end of this slide, the two pieces will be offset. You can now lift them apart.
Reassembly:
1. Fit the two pieces together in the offset, solved position.
2. Slide the top piece back to the left until it clicks flush.
Cast Hook (Level 2)
Personality: The deceptive duo. Two hooks that seem hopelessly entangled hide a simple, elegant exit.
Non-Spoiler Hints: The hooks are designed to pass through each other’s openings, not unhook. Find the orientation where the open jaws align.
Full Step-by-Step Solution: For a full, visual walkthrough of this classic, see our complete Cast Hook tutorial.
Level 3 (Normal) Solutions
Now, puzzles introduce more complex intersections and require you to hold intermediate alignments in mind. Patience is key.
Cast Marble (Level 3)
Personality: The quiet, stubborn introvert. Its pieces hide the marble completely, demanding absolute precision in a multi-axis sequence.
Non-Spoiler Hints: The marble is not an obstacle; it’s the guide. Its movement is restricted to a specific internal pathway. Trace that pathway with your mind’s eye. The final move involves a concealed opening.
Full Step-by-Step Solution (Cast Marble solution step by step):
1. Hold the puzzle with the seam horizontal. Find the orientation where the two halves feel loosest.
2. Slide the top half diagonally up and to the right (about 45 degrees). The marble will roll into a new chamber.
3. Now, change your grip. Slide the same piece laterally to the left. You will expose a hidden channel.
4. The marble can now roll freely into this channel, allowing the two main pieces to separate completely.
Reassembly: Reverse the process, using the marble to navigate back to its starting chamber.
Cast Chain (Level 3)
Personality: The elegant pretzel. It creates the illusion of an impossible interlinking of three closed chains.
Non-Spoiler Hints: The chains are solid, so the solution is a precise geometric dance. Focus on the central triangle formed by their overlap. The chains must be folded through this space in a specific, sequential order.
Full Step-by-Step Solution:
1. Arrange the three chains so they form a symmetrical, layered triangle.
2. Take the topmost chain and fold it under and through the center of the triangle.
3. Gently manipulate the now-loosened second chain, pulling it through the same central gap.
4. The third chain will be released. The visual thinking required here is paramount.
For a puzzle like Cast Nutcase, where a solution video can be crucial due to its rotational complexity, the principle remains: identify the false path (often a tempting but incorrect rotation axis) and methodically seek the true alignment where tolerances match. At these difficulty levels, the tactile feedback of a correct move becomes your most trusted guide.
Level 4 & 5 Solutions: The Precision of Tolerance
Welcome to the realm where patience meets physics. If Level 2 and 3 puzzles teach you to spot false paths, Levels 4 (Hard) and 5 (Expert) demand you master the concept of machined tolerance—the thousandth-of-an-inch gap where a solution either slides smoothly or grinds to a halt. The average solve time here jumps from minutes to hours, as the puzzles require flawless three-dimensional alignment and an intuitive feel for hidden internal channels. This is where puzzles cease being simple toys and become precise mechanical instruments you must learn to operate.
At these levels, my designer’s eye is constantly drawn to the perfection of the fit. The “aha” moment is no longer a simple click; it’s a silent, seamless glide of metal on metal that happens only when every axis is perfectly aligned. The frustration is deeper, but the triumph of the disassembly is profoundly more satisfying. Let’s apply this precise mindset to some of the most popular and devilish puzzles in these tiers.
Cast News (Level 4)
Personality: The synchronized swimmer. Two identical pieces move in a perfectly mirrored, constrained ballet.
Non-Spoiler Hints: The pieces are not simply pulled apart; they must travel together along a shared, invisible path. Focus on aligning the large circular holes. The key move is a simultaneous, diagonal slide, not a direct pull.
Full Step-by-Step Solution:
1. Orient the puzzle so the two “N” shapes are interlocked, with the large holes facing you.
2. Apply gentle, equal pressure to both sides, attempting to slide one piece diagonally up and to the right, while the other moves down and to the left. They will not move independently.
3. Feel for the point of balanced tension. When aligned, the pieces will begin to slide smoothly along this shared internal channel.
4. Continue the synchronized slide until they separate completely.
Reassembly: Reverse the process. Align the internal channels of each piece and slide them together along the same diagonal path until they lock back into their interlocked position.

Cast Coil (Level 4)
Personality: The deceptive spring. It looks like a simple interlocking coil but hides a challenging burr move.
Non-Spoiler Hints: The solution is not about unwinding. One piece must translate linearly through the center of the other. Find the orientation where the triangular ends align to create a channel.
Full Step-by-Step Solution: For a deep dive into its unique frustrations and mechanics, explore the Cast Coil Triangle challenge.
Cast Vortex (Level 5)
Personality: The spiraling trap. Its curves suggest endless rotation, but the escape is a sharp, linear move hidden within the whirl.
Non-Spoiler Hints: The solution lies in finding the one point in the spiral’s rotation where the internal channels of all four pieces align to create a straight, temporary corridor. Focus on aligning the triangular protrusions with the corresponding notches on an adjacent piece.
Full Step-by-Step Solution:
1. Manipulate the four spiraled pieces, exploring how they rotate around each other.
2. Your goal is to align the pieces so that one specific piece’s triangular tab points directly outward from the center, lined up with a notch on its neighbor. This creates a “gate.”
3. Once this gate is open, the key piece can be slid linearly outward, away from the core, not rotated. This is the burr move.
4. The remaining three pieces will then easily disentangle.
Reassembly: This is the true test. Interlock three pieces to re-form the central vortex core. Then, you must re-create the exact “gate” alignment to slide the fourth piece back in its linear path into the center. Patience is key.
For the ultimate Expert-level challenge, how to solve Cast Infinity (Level 5) encapsulates everything about this tier. Its two mirrored infinity signs are locked in a seemingly permanent embrace. The non-spoiler hint: The solution is a breathtaking, multi-axis rotation where one loop must pass through the plane of the other, not around it. It requires you to hold the puzzle in a very specific, asymmetric key position and execute a fluid, almost diagonal twisting pull. The moment of release feels impossibly smooth, a testament to perfect spatial reasoning.
At Levels 4 and 5, forcing a solution is impossible. You must become a partner to the puzzle’s design, learning its unique language of alignment and tolerance. Each successful solve is a masterclass in mechanical empathy.
Level 6 Solutions: Grand Master Tactile Logic
If Levels 4 and 5 require you to become the puzzle’s partner, Level 6 demands you become its master. The Grand Master rating, the final tier on the Hanayama difficulty levels scale, is reserved for puzzles with solve times measured in weeks or months. These are intricate sculptures of machined metal where the solution is a deep, multi-layered secret. The most famous, Cast Enigma, is a Level 6/6 designed by the renowned Oskar van Deventer, embodying this pinnacle of tactile logic.
Approach these not with force, but with profound observation. Each is a unique system of spatial reasoning, and the satisfaction of the final move is unparalleled. Remember the core principle here: brute force is a false path. The solution is always an elegant sequence hidden in plain sight. This category includes the likes of Cast Devil, another formidable Level 6 challenge.
Puzzle Solution: Cast Enigma (Level 6)
Personality: A quiet, inscrutable vault. Its two identical, gear-like pieces form a seemingly seamless, impenetrable sphere. It gives nothing away.
Non-Spoiler Hints (Try This First):
1. The seam where the two halves meet is a distraction. The true separation happens along a different axis entirely.
2. Focus on the three protruding arms on each piece. Their interaction creates a complex 3D interference pattern. You are not pulling the pieces apart; you are navigating one through a maze defined by the other.
3. The key involves finding a specific rotational alignment where one piece can slide laterally, not radially, through the openings in its twin.
Full Step-by-Step Solution:
1. Hold the puzzle with the seam horizontal. Identify one piece as “A” and the other as “B.”
2. Rotate piece A so that one of its three arms points directly toward you.
3. Now, carefully rotate piece B relative to A. You are seeking a precise key position. You will know it when one of the arms on piece B aligns perfectly to pass through the widest gap in piece A’s structure (this is not the visible seam).
4. Once aligned, do not pull. Instead, slide piece B sideways (laterally) along the axis of the aligned arm. You will feel the internal channels engage.
5. With gentle, steady pressure, continue this sliding motion. Piece B will begin its intricate travel through the internal lattice of piece A.
6. The path is not straight. You must guide piece B with slight rotational adjustments as it slides, navigating the internal tolerance. It will feel like threading a 3D needle.
7. After a full inch of travel, the pieces will disentangle completely.
Reassembly Instructions: Reverse the process, which is a puzzle in itself. Start with the pieces fully separated. Align them in the final solved position from the disassembly, then carefully retrace the sliding path with piece B, guiding it back into the core of piece A. The final click is deeply satisfying.
Puzzle Solution: Cast Infinity (Level 6)
Personality: A deceptive ballet of mirrored forms. It presents as a more complex version of the Level 5 Infinity, but its secret is a second, hidden locking mechanism.
Non-Spoiler Hints (Try This First):
1. Begin with the Cast Infinity solution for the Level 5 puzzle (the diagonal twist-pull to separate the loops). This will get you to the first stage.
2. You will now have two pieces, but they are not free. They remain mysteriously connected at a point.
3. Examine the interior curves where they touch. The final lock is a cunning pin-and-channel mechanism hidden within the thickness of the metal.
4. The release requires a subtle, simultaneous push and twist on one specific segment.
Full Step-by-Step Solution:
1. First, solve it as the Level 5 Infinity: find the asymmetric key position and execute the diagonal twisting pull to separate the two main loops. You will now have two linked pieces.
2. Observe the small, rectangular protrusion on the inner curve of one piece. It fits into a corresponding slot on the other.
3. To release, you must rotate one piece relative to the other around this pin-point axis. Apply light pressure to slightly separate the pieces at the opposite end, creating enough tolerance to initiate the rotation.
4. Rotate approximately 45 degrees. You will feel the internal pin exit its channel.
5. The pieces will now slide apart fully.
Reassembly Instructions: This is a true test of memory. First, re-engage the hidden pin by reversing step 4, ensuring the rectangular protrusion seats fully into its slot. Then, you must perfectly re-align the two infinity loops to execute the final, locking twist from the Level 5 solution. It requires precision and a feel for the exact point of engagement.
Solving a hardest cast puzzle level 6 is a monumental achievement. It represents a complete dialogue with the designer’s intent, a slow unraveling of mechanical puzzle genius. When that final piece slides free, the weight in your hand isn’t just metal—it’s earned understanding.
Beyond the Solve: From Solution to Mastery
Solving a Grand Master puzzle is a triumph, but true mastery comes after the pieces are apart in your hand. The solution is not the end of the journey; it’s the beginning of a deeper understanding. Research on pattern-based learning, like the principles discussed in Play First Understand Later, suggests that about 70% of the learning and skill development happens during the review and retrace phase—after the initial “aha” moment. This is where you move from solving a single puzzle to building your spatial reasoning toolkit.
First, don’t just reassemble once. Solve it again. This time, go slowly and mentally narrate each burr move and alignment. Your goal is to internalize the why: Why does this piece need to rotate before it can slide? Why does that channel exist? This transforms a memorized sequence into a conceptual model of the mechanism. For puzzles you solved with a guide, this is your chance to reclaim the discovery. Close the guide and attempt the disassemble and reassemble cycle from memory.
Next, practice fluidity. A master isn’t someone who can solve a puzzle, but someone who can solve it with elegant, confident motions. Work on performing the sequence without hesitation. Feel for the tactile feedback of each key position; listen for the definitive clicks. This kinaesthetic practice builds a physical memory that complements your visual and logical understanding, enhancing your overall spatial awareness.
This brings us to a common user question: “Is there a printable PDF of solutions for all Hanayama puzzles?” While static PDFs exist in corners of the web, they lack the layered, hint-first approach and the crucial commentary on mechanism and feel. This guide is designed as a living resource that teaches you how to solve, not just the steps. The real “printout” is the understanding you build in your own mind and hands.
Finally, to systematically improve your problem solving skills, create your own difficulty ladder. Take a puzzle from a level you’ve mastered and solve it blindfolded. This forces you to rely entirely on touch and spatial mapping. Or, time your disassembly and reassembly, then work to cut that time in half through more efficient maneuvers. This deliberate practice turns a collection of metal puzzles into a gym for your mind, where each Hanayama Cast Puzzle is a unique piece of equipment designed to strengthen a specific facet of your visual thinking. The goal is not to own the solutions, but to own the skills that make solutions obvious.
Your Next Puzzle: Choosing by the Level You Loved
The ultimate goal of mastering any Hanayama Cast Puzzle is not to finish your collection, but to confidently select the next challenge that will expand your spatial awareness and visual thinking. Based on the level you just conquered, you can systematically progress from beginner to pro. If you spent a week on a Level 6 and loved it, you have a different puzzle brain than someone who adores the elegant simplicity of Level 2—both are valid, and your next step should honor that preference.
If you loved Levels 1-2 (Fun & Easy): You appreciate elegant, direct mechanisms with minimal frustration. To build confidence, stay within this range but seek variety. Try Cast Loop (Level 2), a brilliant exercise in rotational alignment, or Cast Chain (Level 2), which feels more like a delicate discovery than a struggle. When ready to step up, target a Level 3 puzzle known for clear logic, like Cast Harmony.
If you loved Levels 3-4 (Normal & Hard): You enjoy the “aha” moment that comes from discovering a hidden path or a precise tolerance. Your next move should be to explore different mechanical themes within this mid-range. Consider Cast News (Level 3), a classic disentanglement puzzle (a sub-category of mechanical puzzles), or Cast Key (Level 4), which requires systematic exploration of symmetrical pieces. For your first Level 5, Cast Vortex offers a challenging but logical progression from here.
If you conquered Levels 5-6 (Expert & Grand Master): You thrive on complex tactile feedback and abstract spatial reasoning. Your palate is now refined. Seek out other Grand Master designs by Oskar van Deventer, like the devious Cast U&U. Revisit your Level 6 puzzles and attempt to solve them purely by touch, blindfolded. To explore similarly intricate mechanics beyond the Cast series, consider high-quality mechanical puzzles from other artisans that focus on interlocking or sequential discovery, as detailed in resources like Wikipedia’s page on disentanglement puzzles.

This Three-Color Alloy Magic Scroll Puzzle is an excellent example of exploring beyond the Cast line while staying true to the appeal of machined metal and sequential movement. For more curated puzzle recommendations that bridge different styles and difficulties, our companion guide, The Best Metal Puzzles For Adults, offers a wider landscape.
Your journey started with a warm puzzle in your hand and a feeling of being stuck. Now, you have a map—not just to solutions, but to a deepening understanding of mechanics and your own growing skill. The next step is simple. Look at your shelf, identify the highest level you’ve solved with satisfaction, and choose one single puzzle from the next tier. That is your structured escape, waiting.