Stop Trying to Force It: The First Rule of Horseshoe Puzzles
The first rule is this: if you’re using force, you’re off the path. In over 99% of cases, a classic horseshoe and ring puzzle is perfectly solvable—the solution relies on a specific, non-forceful manipulation of the pieces in your hands. Your instinct to muscle the ring free is a sign you’re missing the key spatial trick, not that your puzzle is broken.
You’re holding the two linked horseshoes, turning them over and over, feeling that tiny, tantalizing gap the ring almost fits through. The temptation to force it is real.
Stop.
Put it down.
I’ve been there—at a county fair, spending my last ticket trying to win one of these from a carny who just smirked. I’ve also tested enough of these from my flea market collection to know the distinct, gritty slide of metal that’s being forced versus the smooth, satisfying clink of a correct move. That frustration you feel? It’s the intended starting point of this disentanglement puzzle. The relief comes from learning its language.
The core concept governing this entire mechanical puzzle is gap creation. You cannot pull the ring straight off because a physical bar (the chain or a welded bridge) blocks it. The solution isn’t about finding a magical, oversized opening; it’s about manipulating the horseshoes to temporarily create a usable gap where none seems to exist. This is a topological dance, not a test of strength.
Your puzzle’s difficulty is dictated almost entirely by one thing: tolerance. This is the engineering term for the precise gap between links and the internal diameter of the ring. A puzzle with generous tolerances (a thinner chain or a larger ring) might be solved in under two minutes by a first-timer. One with tight tolerances, where the ring just barely clears the links, can be an hour-long exercise in millimeter-perfect alignment. This variation is why one person calls it “easy” and another insists it’s “impossible.”
So, is yours defective? Almost certainly not. A true defect would be a poorly executed weld that physically blocks the ring’s necessary path, or a ring with an internal diameter smaller than the chain’s thickness—a true manufacturing error. These are exceedingly rare. What’s far more common is the puzzle being “stuck” in a position that isn’t the starting alignment for the solution. (A quick reset: hold one horseshoe in each hand, let the connecting chain hang loose, and let the ring rest at the bottom of the curves. That’s “home.”)
The frustratingly simple truth is that the solution, once seen, feels obvious. But getting there requires surrendering the urge to pull, twist, or pry. Your goal in this first stage is to shift your mindset from “How do I remove this?” to “How do I move these pieces to create an exit?” If you find this mental shift helpful for other puzzles, you can apply the three‑step mindset for solving any metal ring puzzle broadly. Hold that question. The next step is to learn the names of the moves.
Naming the Parts: A Visual Glossary of Your Puzzle
Before we choreograph the moves, let’s agree on what to call each piece. Your classic horseshoe and ring puzzle consists of three primary components: two identical horseshoe-shaped pieces connected by a short, two-link chain, and a single metal ring looped through both. Understanding this precise anatomy—and the subtle variations between puzzles—is the mechanical grammar of brain teasers you need to speak the solution’s language.
The Key Components:
* The Horseshoes (or “U-Shapes”): You have two of these. Each has a closed end (the curved, solid part) and two parallel arms that create an open end. The inside space between these arms is the channel. This is the primary path the ring will travel along.
* The Connecting Chain: This short chain of typically two links is permanently attached (often welded or forged) to the closed end of each horseshoe. It’s the tether that keeps the two horseshoes forever linked, defining the puzzle’s core constraint.
* The Ring (or “O”): The free-moving objective. Its internal diameter is the critical measurement. It must navigate around the chain links and through the channels of the horseshoes.
Crucial Features & Terminology:
* The Gap: This refers to the narrow space within a chain link. The ring must pass through these gaps. Its size relative to the ring’s thickness is the tolerance—the primary dictator of difficulty.
* The “Welded” vs. “Non-Welded” Distinction: This is the biggest variation. In a welded puzzle version, the chain links are fused shut at their seams. In a non-welded version (or properly closed-link) version, the links are simply bent closed, often leaving a microscopically tighter seam. Welded links can sometimes have a small, irregular blob of weld material that slightly reduces the functional gap, creating a more frustrating, “false-wall” feel. A well-made, non-welded version with precise, smooth gaps is often considered the purist’s challenge.
The material matters, too. A forged or machined steel version will feel solid, with a satisfying clink and smooth slides. A cheaper cast version might feel lighter, have slight texture (a “gritty slide”), and may exhibit more variation in its gaps. Whether yours is a vintage flea-market find, a shiny brass version, or a modern Hanayama-tier precision object, the parts and their names remain the same. Identifying yours helps you understand its unique “personality”—a tight-tolerance forged puzzle requires more patience and precision than a loose, cast one. This foundational knowledge transforms random wiggling into intentional manipulation. Now, with our shared vocabulary set, we can map the ring’s escape route.
The Step-by-Step Unlinking Sequence (Photo Guide)
The solution to the classic horseshoe and ring puzzle involves a precise, four-phase mechanical sequence that leverages the puzzle’s topology, typically taking a first-timer between 60 seconds and several minutes to execute correctly. It is a pure disentanglement process with no hidden latches, requiring only patience and the following movements.
Now that you’ve identified the chain links, ring, and horseshoe ends, you can move from random wiggling to intentional action. This sequence is a dance of precise alignment and controlled motion. While this guide describes each movement, following along with a photo or video reference (like a horseshoe puzzle solution YouTube guide) alongside these written steps is highly recommended.

Phase 1: Preparation and Orientation
Hold the puzzle in your dominant hand. Position it so the two horseshoes are parallel to each other, with their open ends pointing to your left and their closed ends to your right. The connecting chain should be draped between them. The loose ring will be around both horseshoes. Your goal here is simply to establish a consistent starting point for proper horseshoe alignment.
Phase 2: The Cross and Link
This is the most critical and counterintuitive move. You must deliberately cross the horseshoes to create a new, usable path.
1. Rotate the top horseshoe 180 degrees along its long axis. Imagine turning a doorknob: the end in your fingers twists so the horseshoe’s open end flips from pointing left to pointing right, while the closed end flips from right to left. It now forms an ‘S’ shape relative to the bottom, stationary horseshoe.
2. Slide the now-crossed top horseshoe downward, so its open end passes through the center link of the chain connecting the two puzzles. (If it feels jammed, you likely didn’t complete the full 180-degree rotation). This links the crossed horseshoe through the chain’s center.
3. You have now created a temporary, complex link. The ring is still trapped, but you’ve introduced new slack and new geometric relationships.
Phase 3: Finding the Exit Gap
With the horseshoes crossed and linked through the center chain, the topology has shifted. You must now maneuver the ring into a position where it aligns with a real exit point—one of the gaps at the open ends of a horseshoe.
1. Guide the ring along the twisted path of metal. You will need to wriggle the ring carefully, first toward the closed ends of the horseshoes, then back along the new path created by the cross.
2. The objective is to get the ring to loop around only one of the horseshoe’s arms. You’ll feel it settle into a new position where it’s no longer encircling both horseshoes fully, but is caught on a single, specific curve. This is the “ah-ha” moment of gap creation.
Phase 4: The Final Removal
Once the ring is isolated on a single arm, the solution becomes obvious.
1. Maneuver the ring to the very tip of that horseshoe’s open end.
2. Tilt and slide the ring directly off the end of the metal. There is no force needed. If it doesn’t slide off cleanly, double-check that the ring isn’t still snagged on a tiny burr or weld (see Troubleshooting section) or that you haven’t missed a subtle twist in Phase 3. The ring should come free with a satisfying clink of successful ring removal.
This step-by-step solution relies entirely on the twist and slot maneuver of Phase 2. The common failure point is an incomplete rotation, which prevents the horseshoe from sliding through the chain link cleanly. If you’re stuck, go back to the start, ensure your horseshoes are parallel, and execute a full, confident 180-degree turn. The process shares a mechanical logic with other classic wire puzzles, where the solution often involves moving parts into a more entangled state first to find the path to freedom, much like the principle behind solving a complete step‑by‑step tutorial for a metal brain teaser. You have now mastered the unlinking sequence. The ring is free. But the true elegance of this mechanical puzzle lies in why this particular dance of metal works, which we’ll explore next.
The ‘Why’: The Topology Secret That Makes It Possible
You’ve separated the ring. The physical steps are clear. But the lingering question is why—why does that specific, counterintuitive twist the horseshoes create the path to freedom? The answer lies in a branch of mathematics called topology, and it transforms this from a neat trick into a lesson in spatial reasoning. The horseshoe puzzle is solvable because the ring is not truly knotted to the assembly; it is merely linked through a specific 3D path that can be manipulated and shortened until a large enough gap appears. The entire solution hinges on one principle: strategic gap creation.
In topology, which studies properties preserved through stretching and bending (but not tearing), the puzzle is a classic two-component link. The goal is to show the ring and the linked horseshoes are “unlinked” without cutting. Your hands perform a topological proof. The critical move—rotating one horseshoe 180 degrees so its open end faces the chain—doesn’t just move metal; it reconfigures the 3D pathway the ring must travel along. You are folding the path in on itself, bringing the ring’s point of confinement (the chain link) to the one place it can escape: the open end of a horseshoe.
Think of the ring’s starting position as being trapped on a closed loop of “track” formed by the two horseshoes and their chain. It can slide freely along this track, but it can’t get off because the track has no endpoints. The twist maneuver in Phase 2 fundamentally alters the track’s layout. By rotating one horseshoe, you temporarily route the track through the chain link, which acts as a gate. This aligns the ring’s confined pathway directly with an exit—the gap at the horseshoe’s tip. The final “slotting” and sliding is you guiding the ring off the end of this newly arranged track. The tolerance, or that 1-2mm gap between the chain links and the ring’s thickness, isn’t a manufacturing flaw; it’s the essential topological window you exploit.

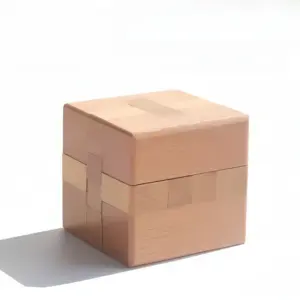
Cupid’s Heart Chain Puzzle — $13.15
This gap creation concept is the master key to many wire puzzles. I test this principle on other puzzles in my drawer: the infamous “P” shape, the double-heart, even the Hanayama Cast series. The solution always involves moving parts into a more entangled intermediate state to find a new alignment where an escape route materializes. It feels paradoxical—to solve it, you must first make it look worse. This is the core of topological disentanglement. For the horseshoe, the “worse” state is the twisted, seemingly tighter configuration. Only from that vantage point can you see the hidden exit.
Understanding this turns you from a step-follower into a puzzle-solver. When you encounter another classic horseshoe puzzle or a similar metal ring challenge, you won’t just memorize moves. You’ll ask: “Where is the closed loop trapping the piece? How can I reconfigure the path to create a gap at an open end?” You start to feel the solution in your hands as a series of spatial negotiations, not just a secret handshake. This is why a welded puzzle with tighter tolerances feels harder—it gives you less margin for error in executing the topological realignment, but the underlying principle remains identical.
This elegant dance of metal is a perfect, tactile introduction to link theory. There’s no “magic,” just geometry and patience. The frustratingly simple truth is that the ring was never permanently captured; it was just waiting for you to manipulate its world into a shape where it could walk out the door. For a deeper dive into the satisfying logic behind these mechanical puzzles, our exploration of decoding the cool heavy knot in your hand applies this same lens to even more complex knotted objects.
The Often-Forgotten Second Half: How to Reassemble It
You’ve conquered the separation—the ring is free and the horseshoes remain linked. The frustratingly simple truth is that true mastery of a disentanglement puzzle isn’t just about taking it apart; it’s about knowing how to put it back together. The reassembly is, point-for-point, the solution sequence played in reverse. Understanding this is the final key to internalizing the puzzle’s topology and being able to confidently reset it for a friend.
Don’t just place the ring on the table. Hold the linked horseshoe and ring puzzle in your dominant hand as if you’re about to start the solve from scratch. The goal is to thread the ring back through the carefully negotiated path it just escaped from. Follow these steps, which are the mirror image of the separation.
Step 1: Establish the Starting Position.
Hold the two linked horseshoes by their curved ends in one hand, letting them hang naturally with the short chain forming a ‘V’ at the bottom. With your other hand, hold the metal ring. You are beginning at the final state of the solution, so we are now walking backwards to the start.
Step 2: Create the Entry Gap.
This is the reverse of the final “escape” move. Position the ring so its plane is parallel to the open ends of both horseshoes. You must recreate the large, aligned gap you finished with. Slide the ring onto the open end of one horseshoe, just past the first link of the chain. (If it won’t go, ensure the horseshoes aren’t twisted—they must be aligned as they were at the moment of separation).
Step 3: The Double Twist and Slot.
Here is the core reverse solution. You must now perform the double rotation, but in the opposite direction.
– First, rotate the horseshoe without the ring 90 degrees toward you, so its open end points at your chest.
– Second, and this is the crucial one, rotate the horseshoe that has the ring on it 90 degrees away from you. Its open end should now point forward.
You have now recreated the twisted, offset configuration. The path through the chain links is aligned.
Step 3.1 (The Common Sticking Point):
Wriggle the ring gently. It should now be able to slide along the length of its horseshoe, through the gap in the chain links, and onto the second horseshoe. You will feel a definitive click or slide as it passes through the central junction. This is the sound of the ring being recaptured. (If it’s jammed, you likely reversed the order of the twists in Step 3. Go back to Step 2 and try the opposite rotation for each piece).
Step 4: Return to Neutral and Secure.
Once the ring is looped through both horseshoes, reverse the initial single twist you performed at the very start of the solution. Simply rotate the entire assembly so both horseshoe openings point upward. The ring is now trapped on the central span, threading both horseshoes and the chain—the classic starting position of the classic horseshoe puzzle.
Reassembly isn’t a chore; it’s the best test of whether you’ve genuinely understood the sequence or merely memorized it by rote. It reinforces the spatial map in your mind. When you can disassemble and reassemble in under a minute, you’ve moved from following instructions to embodying the solution. This is also the perfect way to diagnose a truly stuck puzzle: if you can smoothly reassemble it using this mirrored method, then any difficulty in separating it again is due to puzzle tolerance and technique, not a defect. For more on the art of reconstruction, the principles here are echoed in a four‑step guide to reassembly for other intricate puzzles.
Now, with the wire puzzle restored, you can appreciate its clever, closed loop. You’ve not just solved it; you’ve cycled it through its complete mechanical state. Try handing your freshly reset horseshoe and ring puzzle to a friend and see if you can guide them verbally through the gap creation trick. If you can, you’ve truly mastered it.
Diagnosing a Truly Stuck or Defective Puzzle
Having just reassembled your classic horseshoe puzzle, you now have the perfect diagnostic tool. If you can smoothly put it back together, any subsequent struggle to separate it is almost never due to a defect—it’s the puzzle’s tolerance at work. Genuine manufacturing flaws are rare; fewer than 1 in 20 of these mass-produced wire puzzles have a true, unsolvable issue. The real challenge lies in distinguishing a high-difficulty version from a broken one.
Let’s define our terms. A “stuck” puzzle is one that is solvable but has tight clearances or requires precise, patient manipulation. A “defective” puzzle has a physical obstruction that makes the canonical solution geometrically impossible. Your first step is to stop forcing and start inspecting.
The Usual Suspect: Tolerance, Not Treachery
Most frustrations labeled as “stuck” come from the puzzle’s gap between links. High-quality, challenging versions have a ring and chain link gap with a tolerance of less than a millimeter. This demands clean, aligned movements. If your ring grinds and catches, you’re likely experiencing this designed difficulty, seen in many non-welded version puzzles. Gently work the ring back to a known starting position (like the reassembled state) and try the separation sequence again, moving slower than you think is necessary. A drop of light machine oil on the ring’s contact points can quiet a gritty slide.
The Jam Points: Where Things Halt
Two spots commonly jam. First, during the key twist the horseshoes step, if they are not rotated fully perpendicular, the ring will catch on the inner shoulders of the horseshoes. Second, when sliding the ring through the final chain link, if the horseshoes are not held in perfect parallel alignment, the ring binds. If stuck, reverse the last move you made. Don’t muscle it; backtrack.
Red Flags of a True Defect
Now, for true defects. Conduct this visual and tactile audit:
- The Welding Blob: On welded puzzle versions, inspect the chain link welds. A poor weld can overflow into the central channel, creating a metal bead the ring cannot pass. Run a toothpick along the inside of the link. If it snags on a rough, protruding lump of weld, that’s a culprit.
- The Mismatched Ring: Is the ring obviously too large for the gaps? Compare it to solution videos online. A ring diameter even 1-2mm oversize can block the solution.
- The Deformed Link or Horseshoe: Look for any bends or dents, especially on the open ends of the horseshoes or the chain links. A bent link effectively changes the puzzle’s topology.
If you find a weld blob, you can sometimes carefully file it down with a needle file, but this voids any return policy. A bent piece can often be gently coaxed back into shape with smooth-jaw pliers padded with cloth. For more on the durability and logic of well-cast puzzles, the principles in our guide to a veteran’s guide to cast logic apply here.
The Final Test: The Paper Trick
Still unsure if it’s you or the puzzle? Try this. Once you have the ring in the final, narrow gap between the two chain links (the last step before freedom), attempt to slip a single sheet of printer paper through that same gap alongside the ring. If the paper slides through but the ring does not, your technique needs refinement. If the paper cannot pass, the gap is physically obstructed or too small, indicating a potential defect.
Remember, this disentanglement puzzle is meant to be a friction-based dance of metal, not a test of strength. If your diagnostic points to a defect, contact the seller—a reputable manufacturer will replace it. But if it points to tolerance, take a breath. You’re not stuck; you’re simply facing the hardest metal ring puzzle version of this classic, and that makes the eventual, satisfying clink of success all the sweeter.
Variations, Difficulty, and Choosing Your Challenge
The final, satisfying clink of the ring hitting the table hinges on one mechanical truth: puzzle tolerance. This single design variable—the precise gap between the chain links and the ring’s thickness—can transform solving time from a quick 2-minute victory to an hour-long spatial negotiation. Your struggle (or ease) with this classic horseshoe puzzle isn’t just about technique; it’s a direct result of which variation you hold.
Tolerance is Everything. In manufactured puzzles, like the finely machined Hanayama Horseshoe Puzzle (often called “Horseshoe Ring”), tolerances are tight and consistent. The gap is minimal, demanding exact alignment and smooth, deliberate moves. This is the purist’s challenge. In common DIY or souvenir welded puzzle versions, the tolerance is often more generous, as it’s dictated by the welder’s skill and the chain link’s innate spacing. A larger gap makes the ring removal path more forgiving, shortening solve times dramatically.
Welded vs. Non-Welded: A Tale of Two Challenges. The ubiquitous welded version, where the two horseshoes are permanently linked by a welded chain, is the gateway. Its difficulty is variable but generally moderate. The true non-welded version, where the horseshoes are separate pieces entirely, is a rarer and more complex beast. Here, you must manage the freedom of three independent pieces, not just the ring and a fixed assembly. For a deep dive into other precision-crafted challenges, our curated list of the best metal disentanglement puzzles highlights what expert-level tolerances feel like.
Is This Suitable for a Child? Absolutely, with a caveat. The horseshoe and ring puzzle is a fantastic, screen-free tactile challenge for ages 10 and up, developing spatial reasoning and patience—a great beginner-friendly guide to intellectual deduction puzzles. For younger hands (8+), seek out a version with clearly larger gaps—often sold as “beginner” wire puzzles. Avoid the high-tolerance brass version marketed to collectors for a first-time solver; frustration should be a spice, not the main course.
Beyond the Horseshoe: The Wider World of Wire. Once you’ve mastered the gap-creation trick here, you’ve learned the core language of disentanglement puzzles. Your next logical step is the legendary “P” puzzle or the devilish “Devil’s Halo.” These puzzles operate on similar topological principles but with different “gates” and paths.

Choosing Your Next Challenge. If you enjoyed the logical, methodical dance of the horseshoe, seek out puzzles labeled “cast” or “machined” for consistent quality. Look for puzzle reviews that mention “smooth action” or “precise fit”—code for good, fair tolerances. Start with moderate puzzle difficulty ratings before jumping to the hardest metal ring puzzle titles. Remember, the goal is the “aha!” moment, not indefinite struggle. The horseshoe puzzle teaches that the barrier is often conceptual, not physical—a lesson that applies to every great mechanical puzzle waiting in your drawer.
More Than a Fairground Toy: A Brief History of the Horseshoe Puzzle
The horseshoe puzzle, with its seemingly stubborn classic horseshoe puzzle design, isn’t a modern invention. It belongs to a tradition of handheld disentanglement puzzles whose history can be traced back hundreds, perhaps even thousands, of years, evolving from simple rope and wood “god locks” into the mass-produced metal puzzle staples of the 20th century. Its enduring presence is a testament to the perfect balance it strikes between simple form and clever spatial reasoning.
This specific configuration likely solidified its place in the 1800s and early 1900s, becoming a staple at county fairs and in puzzle catalogs. Its appeal was twofold. For the public, it was a classic wire puzzle—a portable challenge of patience and intellect, often sold as a “thinker toy.” For metalworkers, particularly blacksmiths and later welding students, it became a standard welding practice project. Crafting the welded puzzle version teaches fundamental skills: precise bending, consistent gap (puzzle tolerance) creation, and clean welding of the chain links. This dual identity explains its variations—from rough, hand-forged versions to the sleek, brass version casts you might find today.

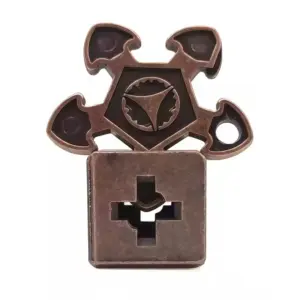
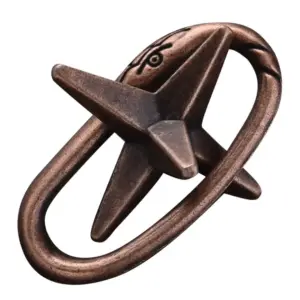
Chinese Koi Puzzle lock — $16.99
The puzzle on your desk connects you to this lineage. Its solution, which you’ve now mastered, is a direct lesson in applied topology explanation—a small, tactile theorem. Modern manufacturers like Hanayama have elevated such classics into collectible art objects, but the core challenge remains unchanged. To explore another beautiful piece from this vast history, consider the history of the elegant Chinese Koi puzzle lock, which translates ancient locking mechanisms into a stunning mechanical puzzle.
The horseshoe puzzle is a quintessential example of the broader category of mechanical puzzles, specifically within the sub-genre of disentanglement puzzles, where the goal is to separate one or more pieces from a linked assembly without forcing them.
So, the next time you pick it up, remember you’re not just holding a frustrating trinket. You’re handling a piece of practical history—a lesson in metalworking, a century-old test of spatial logic, and proof that the most satisfying solutions are often, as you now know, frustratingly simple. Your next step? Close the loop. Share it with a friend, watch their hands repeat the dance you’ve perfected, and pass on the “aha.”