The Last Piece is Placed. Now the Real Work Begins.
That final, satisfying click echoes. You lean back, pride swelling. You’ve conquered this intricate landscape of wooden pieces. For a moment, it’s perfect.
Then, the reality hits. A deep breath, a hesitant nudge of the table—the entire masterpiece threatens to slide into chaos. The dread is real. How do you freeze this moment of triumph without turning your hours of focus into a sticky, warped mess?
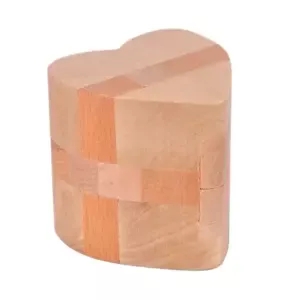
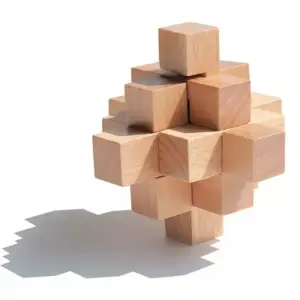
This is the pivotal juncture for every wooden puzzle enthusiast. And here’s the truth most guides miss: framing wood is a fundamentally different craft than framing cardboard. Your puzzle isn’t just a printed image; it’s a tactile, dimensional object. Its thickness demands respect. Its delicate knobs and whimsy pieces (those unique, shaped wooden pieces) are vulnerable. The common advice to “just glue it” becomes a real danger—too much liquid adhesive can seep between pieces, causing them to swell, warp, and permanently bond in a lumpy, ruined state.
I learned this the hard way. Early in my framing career, a client brought me a hand-cut vintage puzzle, a family heirloom. A previous attempt at preserve-ing it with a well-intentioned glue bottle had turned it into a permanently curled, glossy brick. That moment sparked my mission: to educate on methods that honor the puzzle’s craft, not compromise it.

18 Piece Wooden Puzzle — $16.99
Whether your completed puzzle is a complex scene or a delightful starter set like the one above (you can explore more in our 18 Piece Wooden Puzzle Complete Guide), the goal is the same: transition it from a tabletop activity to a piece of wall art without damage. This guide is that bridge. We’ll move from the anxiety of “how do I keep this together?” to the clarity of understanding your options, and finally, to the confidence of executing a display method that keeps your puzzle intact—and your pride fully on show.
Your Crossroads: The Ultimate Method Matrix for Wooden Puzzles
That initial anxiety—the fear of ruining your hard-won masterpiece—is rooted in a lack of clear paths forward. With a cardboard puzzle, the internet shouts one primary answer. But with your thicker, more delicate wooden puzzle, you have a spectrum of options, each with its own philosophy and outcome. This is your decision hub. Your choice here dictates every tool you’ll gather and every step you’ll take, so let’s map the territory with absolute clarity.
The core question that governs everything is one of intent: Do you want this to be permanent, archival art, or a preserved state you could potentially disassemble and solve again someday? Your answer splits the universe into two camps: the adhesive-based permanent methods and the reversible, no-glue techniques.
To visualize this, follow this simple decision flow:
Start → “Do I ever want to take this puzzle apart again?”
├── Yes (Reversible Intent) → Choose: Reversible No-Glue Method or Double-Glass Sandwich.
└── No (Permanent Art) → Choose: Permanent Glue Method or a professional-quality Ready-Made Shadow Box.
Within these camps, four primary methods emerge. The matrix below compares them across the critical axes for a wooden puzzle display.
Wooden Puzzle Framing Method Matrix
| Method | Best For | Durability | Approx. Cost (DIY) | Skill Level | Key Pro | Key Con |
|---|---|---|---|---|---|---|
| Permanent Glue | Heirloom pieces; maximum security. | Excellent, archival. | $25-$60 | Intermediate | Solid, one-piece stability; handles unique shapes well. | Irreversible; risk of warping if done incorrectly. |
| Reversible No-Glue | Future solving; loaner puzzles; testing layouts. | Good, but not permanent. | $20-$50 | Beginner-Friendly | Non-destructive; pieces remain pristine. | Not as rigid; potential for sagging over very large spans. |
| Double-Glass Sandwich | A clean, modern display; intricate piece shapes. | Very Good. | $15-$40* | Beginner to Intermediate | No adhesive on the puzzle; highlights piece thickness. | Heavy; requires precise frame depth/spacers. |
| Ready-Made Shadow Box | Simplifying the process; accommodating extreme depth. | Excellent (commercial). | $40-$150+ | Beginner | Built for thick wooden pieces; no depth modifications needed. | Highest cost; limited size/style options. |
| The double glass puzzle frame* method can be very cost-effective if using discounted frames and plain glass, hence the wide range. |
But cost is a major factor, and it’s not just about materials—it’s about value for your goal. Here’s how the routes compare when you factor in all avenues:
Framing Cost Comparison: Professional vs. DIY
| Approach | Avg. Cost Range (Standard Size) | What You’re Paying For | Best Suited For |
|---|---|---|---|
| Professional Custom Framing | $150 – $400+ | Expertise, conservation materials (UV glass, acid-free mats), perfect finish. | Priceless, vintage, or artist-signed wooden puzzles where budget is secondary to archival perfection. |
| DIY Shadow Box (Store-Bought Kit) | $30 – $80 | Convenience, a pre-built deep-profile frame, basic glass. | Hobbyists wanting a guaranteed fit for thick wooden pieces without building from scratch. |
| DIY “Dollar-Store” Double-Glass Method | $15 – $40 | Ingenuity, a completely reversible display, and the satisfaction of a clever hack. | The crafty puzzle solver prioritizing a no glue method and a minimalist look on a tight budget. |
This matrix and cost breakdown exist because framing a wooden puzzle is fundamentally different from framing its cardboard cousin, a topic covered broadly in our definitive guide to framing puzzles. A standard picture frame press-seals a thin poster. A shadow box frame creates a protective chamber for a three-dimensional object—which is exactly what your assembled puzzle is. The double-glass sandwich method, a favorite on Reddit for its cleverness, treats the puzzle itself as the spacer, clamping it securely between two panes. Meanwhile, the reversible no-glue method using specialist adhesive tape or sheets respects the puzzle’s integrity above all.
Choose your path not out of uncertainty, but with the confidence of knowing what each journey entails. Your next step—gathering your arsenal—will flow directly from this decision.
Assembling Your Arsenal: A Wood-Specific Toolkit
Now that you’ve chosen your path from the Method Matrix, it’s time to gather your tools. This isn’t a one-size-fits-all list; your toolkit will be tailored to your chosen method. Think of this as a mise en place for framers: having the right material at the ready is what separates a controlled, successful project from a frantic, potentially damaging one.
First, the universal essentials. Regardless of your method, you will need a frame with the correct interior dimensions (it must match your puzzle’s finished size) and a deep enough profile to accommodate your thick wooden pieces. A standard picture frame won’t do; you need a shadow box frame or a standard frame you can modify with spacer bars to create depth. A clean, flat workspace larger than your puzzle is non-negotiable. Soft, lint-free cloths for cleaning and a gentle brush (a makeup brush works perfectly) for dusting off wooden pieces are also must-haves.
For the Permanent Glue Method:
* Puzzle Glue (Mod Podge Puzzle Saver or equivalent): Opt for a thicker, brush-on formula over a runny liquid. This minimizes the risk of seeping between pieces and causing swelling.
* A Notched Spreader Tool or Foam Brush: This is the hero of the operation. My old rule stands: never trust a glue bottle without a spreader. A small notched trowel (like for tile adhesive) or a dedicated puzzle spreader allows you to apply a perfectly thin, even coat. A foam brush is a second choice, but it can leave streaks and absorb too much glue.
* Acid-Free Foam Board or Rigid Backing Board: This is your permanent mount. “Acid-free” is critical for long-term preservation; regular cardboard can yellow and weaken over decades, damaging your art.
For the Reversible No-Glue Method:
* Painter’s Tape or Puzzle-Specific Adhesive Sheets: Painter’s tape (1.5″ to 2″ wide) is a proven, low-tack option. Puzzle adhesive sheets are cleaner and easier but can be pricier. Both allow for future disassembly.
* Rigid, Acid-Free Backing Board: Again, this supports the puzzle. Foam board is lightweight and easy to cut.
* A Sharp Craft Knife & Straight Edge: For trimming the backing board and any adhesive sheeting to the exact puzzle size.
For the Double-Glass Sandwich Method:
* Two Identical Sheets of Clear Glass or Acrylic: The core of the method. For a truly clear display, seek out anti-reflective or museum-grade options. Acrylic is lighter and safer but scratches more easily.
* A Deep “Float” Frame: This method requires a frame with a channel deep enough to hold two panes of glass plus the full thick wooden pieces puzzle sandwiched between them. The puzzle acts as its own spacer.
* Frame Clips or Points: To secure the layered sandwich tightly within the frame’s rabbet.
For the Ready-Made Shadow Box:
* The Shadow Box Itself: Ensure its interior depth exceeds your puzzle’s thickness by at least 1/8″ to avoid pressure on the pieces.
* Mounting Method: This could be acid-free adhesive tape (for a reversible hold), archival photo corners, or even a Velcro® system to secure the puzzle to the box’s backer.
* UV-Protective Glass/Acrylic: Highly recommended for any method, but especially for a shadow box frame meant as permanent wall decor. It filters out the direct sunlight that causes fading.
Your chosen arsenal respects the craft of your wooden puzzle. With these specific supplies in hand, you’re ready to prepare the puzzle itself—the most nerve-wracking, and rewarding, part of the process.
The Crucial Pre-Flight: Flattening and Securing Your Masterpiece
Now that you have your tools laid out, the most tactile part begins: preparing your wooden puzzle for its final act. This isn’t just a step—it’s the foundation. A puzzle that isn’t perfectly flat will create gaps under the glass cover, and pieces that aren’t temporarily secured can shift in a heart-stopping moment during transfer. This stage requires a patient, meticulous touch to preserve every detail of your hard work.
First, address the surface. Gently blow away any loose dust. For stubborn particles, use a soft, dry makeup brush (never a cloth that could catch on knobs) to whisk them from the grooves. Your goal is a clean canvas.
Next, flattening. This is where the well-intentioned disaster often occurs. While a rolling pin is a classic tool, using it directly on a wooden puzzle is a recipe for crushed, delicate wooden knobs. The pressure is too concentrated. Here’s the safe method:
1. Place your completed puzzle on a perfectly flat, rigid surface like a large foam board or table.
2. Cover the entire puzzle with a smooth, protective barrier. A large sheet of wax paper or parchment paper works perfectly—it’s non-stick and distributes pressure.
3. Now, with the paper shield in place, you can use your rolling pin. Start from the center and roll outward with gentle, even pressure. Apply pressure. Glide. Repeat. You’re coaxing it flat, not stamping it down.
4. Check for any stubborn warps. For a slight bow, place a flat, heavy board (like a large book) over the paper-covered puzzle and let it sit for a few hours.
For a truly stubborn warp in the thick wooden pieces, a professional trick is to slightly dampen the back of the puzzle (never the image side) with a very fine water mist, cover it with wax paper, and weight it flat as it dries. Proceed with extreme caution—water and wood require respect.
Once flat, you need to temporarily secure the puzzle for the move to its backing board. If you’ve chosen a no glue method, this is your only hold. Even if you plan to glue, this keeps everything aligned.
1. Carefully slide your rigid backing board (e.g., 1/8″ foam board) underneath the puzzle. An assistant is invaluable here, but a large, thin spatula can help you shimmy it under.
2. With the puzzle centered on the board, apply low-tack adhesive tape. Painter’s tape is ideal. Run long strips across the back, adhering tape to the backing board and just over the edges of a few outer pieces. Don’t tape every piece—just enough to prevent sliding. The key is reversibility; painter’s tape will peel away cleanly later if needed.
Your wooden puzzle is now a stable, flat, and secured unit. It’s no longer a fragile assemblage of parts, but a solid piece of art ready for its permanent mounting. This preparation is the quiet, critical work that makes the final assembly look effortless.
Deep Dive A: The Permanent Bond (Mastering the Glue Method)
So, you’ve followed the pre-flight checklist—your puzzle is flattened, secured to its backing board, and you’ve chosen permanence. This is the point where most tutorials say “just glue it” and leave you staring at a bottle of goop, heart pounding. Let’s replace that fear with a precise craftsperson’s technique. I approach gluing a wooden puzzle like applying a fine French polish: it’s about an impossibly thin, even seal that becomes one with the wood, not a gloopy shell that sits on top of it. My mission, born from that ruined vintage puzzle, is to show you how to achieve a permanent bond that honors, rather than obscures, the art.
The core principle for wooden pieces is this: wood is a living, breathing material that reacts to moisture. Dump a thick layer of liquid adhesive on it, and the fibers will swell, causing pieces to cup, edges to curl, and your beautiful image to distort. The goal is to use the minimum effective dose.
Your First and Most Important Tool: The Spreader
Forget the bottle’s nozzle or a paintbrush. You need a flexible, flat-edged spreader—a small plastic putty knife, an old gift card, or a dedicated puzzle glue spreader. This is the only way to control the application. (This is where my running joke comes in: I trust a glue bottle about as far as I can throw it—without the cap on. The spreader tool is your interpreter, turning its chaotic speech into a quiet, controlled whisper.)
The Step-by-Step Seal
Work on a perfectly flat, protected surface. Your puzzle should already be centered on its rigid backing board (1/8″ foam board or similar) and lightly taped at the edges to prevent shifting.
Start from the Center.
Pour a modest puddle of puzzle-specific glue (never white school glue or wood glue—they have too much water) directly onto the center of the puzzle. A quarter-sized amount is a good start.Spread Outward in Thin, Overlapping Passes.
Use your spreader to drag the glue from the center toward one edge. Apply firm, even pressure to force the adhesive down into the seams between pieces. Your aim is to see a consistent, slight sheen across the entire surface, not opaque puddles. If you see the color of the puzzle image darkening significantly in a spot, you have too much glue there. Scrape the excess back toward your working area.Fill the Gaps, Not the Knobs.
Pay special attention to coaxing glue into the lines between pieces—this is what creates the structural bond. For thick wooden pieces with intricate, laser-cut knobs (whimsies), carefully work the spreader around them. Do not let glue pool in the cavities between knobs, as it will create unsightly glossy pockets. The puzzle surface should look uniformly matte-wet when done correctly.The Edges are Critical.
As you reach the border, ensure the glue seals the outer edge of the puzzle to the backing board. This perimeter seal is a key defense against future curling.Inspect and Walk Away.
Tilt the puzzle under good light. Look for any missed dry spots (they’ll appear dull) and apply a tiny dab more glue to spread over them. Then, place it perfectly flat in a dust-free area to dry. Do not move it for the time specified on the glue bottle—often 2-4 hours for a surface dry, and a full 24 hours for a complete cure. This patience is non-negotiable. Rushing this drying step is how warping happens.
The Anxiety Points: Addressed
- “What if the glue seeps through the cracks and glues my puzzle to the table?” This is why your backing board is essential. You are gluing the puzzle to the board, which is your permanent foundation. The board is the sacrificial layer between your puzzle and the work surface.
- “My puzzle feels bumpy after gluing!” This is almost always caused by uneven application causing some pieces to swell slightly more than others. The prevention is the meticulous spreader technique above. If it happens, once fully cured, you can sometimes gently sand the very back of the backing board with fine sandpaper on a flat block to level any high spots.
- “Should I glue the back too?” For wooden puzzles, almost never. A single, careful front application that wicks into the seams is sufficient. A second coat on the back introduces more moisture and risk for zero structural benefit.
For those seeking an even deeper dive into adhesive types and techniques for complex wooden puzzles, resources like the guide on gluing a wooden puzzle together can offer supplementary perspectives. But remember, the mantra here is less is more. When done right, the glue will dry clear and hard, transforming your assembled pieces into a single, rigid preserved panel ready for the final frame. You’ve not just glued a puzzle; you’ve laminated a moment in time.
Deep Dive B & C: The Reversible Path (Tape Backing & The Reddit Sandwich)
So, you’ve considered the permanence of glue and decided, “Not for this one.” Maybe it’s a family heirloom you want future generations to solve again, or perhaps the mere thought of liquid near your wooden pieces still gives you pause. This is where the craft gets clever. We’re moving from permanent lamination to reversible engineering. The goal is to secure every piece firmly for display, but in a way that, with patience, could be undone. Let’s explore two brilliant, non-destructive paths.
Method B: The Reversible Backing – Precision with Tape
This method turns your puzzle into a solid panel by securing it from the back onto a rigid backing board, using either specialized puzzle adhesive sheets or a grid of painter’s tape. It’s the gold standard for no glue puzzle framing.
You’ll Need: Your flattened wooden puzzle, a rigid backing board (foam board or archival matboard cut to size), a sharp utility knife, a ruler, and either puzzle adhesive sheets (like Mod Podge Puzzle Saver Sheets) or a high-quality 1.5” wide painter’s tape (low-tack is key).
The Step-by-Step:
- Prepare the Foundation. Place your backing board on a clean, flat surface. Carefully slide your completed, flattened puzzle onto it, ensuring it’s centered. This board is now your permanent structural base.
- The Tape Grid Strategy (Painter’s Tape Method). This is where patience pays. Do not attempt to cover the entire back in one go.
- Flip the puzzle and board over together, gently. Support the puzzle face with a large, flat book or board as you flip.
- Starting from the center, apply strips of painter’s tape horizontally across the puzzle back, overlapping the pieces and sticking firmly to the backing board. Leave small gaps between strips.
- Apply another set of strips vertically, creating a grid. The goal is to create multiple points of gentle adhesion for each piece, distributing the hold. The critical nuance for thick wooden pieces is to avoid pulling the tape taut. Lay it on with light pressure. Pulling creates tension that can warp the puzzle over time or cause pieces to pop when the tape eventually contracts.
- The Adhesive Sheet Shortcut. If using puzzle saver sheets, the process is simpler but requires a deft touch. Peel the backing and carefully lower the adhesive sheet onto the puzzle back, starting from one edge to avoid air bubbles. Use a flat tool, like a plastic card, to burnish it down firmly, ensuring contact with every piece and the backing board. Trim any excess.
- Secure the Perimeter. Finally, run a continuous strip of tape around the entire outer edge of the puzzle, creating a solid seal between the puzzle mass and the backing. This prevents dust ingress and adds edge stability.
Pro-Tip from the Studio: If using foam board, its surface can be too smooth for tape to adhere well long-term. Give it a very light sanding with fine-grit paper to create some tooth for the tape. And always do a test strip on a corner piece first—if it’s hard to peel back up without lifting the puzzle’s paper veneer, the tape is too aggressive.
Method C: The Double-Glass Sandwich – A Reddit-Famous Classic
This is the method that puzzle forums adore for its elegant simplicity and utter respect for the artifact. The double glass puzzle frame concept is exactly what it sounds like: your puzzle is encased between two panes of glass, held in place by compression and the frame’s grip, with zero adhesive. It’s secure, completely reversible, and showcases the thick wooden pieces beautifully from both sides—perfect for laser-cut puzzles with intricate back patterns.
Sourcing the “Sandwich” Components: Here’s the real DIY wooden puzzle frame tutorial magic. You cannot use a standard single-glass frame.
* The Frame: You need a frame with a channel deep enough to hold two panes of glass plus the puzzle’s thickness. A shadow box frame is ideal, or you can modify a standard deep frame with spacer bars.
* The Glass: You’ll need two identical panes of glass or clear acrylic (acrylic is lighter and safer). The front pane is your glass cover; the back pane is your… well, back. Both should be cleaned immaculately.
The Step-by-Step Assembly:
- Clean Room Operation. Work in a dust-free area. Clean both sides of each glass pane with a glass cleaner and a lint-free microfiber cloth. Any speck trapped inside is there forever.
- Build the Base Layer. Place your first pane of glass on your work surface. Carefully center your flattened wooden puzzle on top of it. Marvel for a second at how the glass highlights the puzzle’s cut lines and thickness.
- Complete the Sandwich. Gently lower the second pane of glass on top of the puzzle. You now have a Glass-Puzzle-Glass stack. The weight of the glass alone will begin to hold everything in place.
- The Dry Fit Test. Before final assembly, carefully lift the entire sandwich and slide it into your frame’s recess. This tests the depth. The front lip of the frame should fit snugly over the stack, applying even pressure across the entire surface. If it’s too tight and bows the glass, you need a deeper frame or spacers. If it’s loose, the puzzle can shift.
- Final Sealing. If the fit is perfect, proceed. Secure the sandwich in the frame using the provided points, tabs, or framer’s points. Then, seal the back as you normally would with dust paper and hanging hardware.
Why This Method Wins Fans: It applies no chemicals, no tape, and no tension. The puzzle is held by uniform pressure. It’s also the only method that truly allows for a double-sided display. The primary caution is ensuring the frame dimensions are correct—too tight, and you risk cracking the glass or damaging puzzle knobs; too loose, and the puzzle will rattle. It’s a method that demands precision in measurement, but rewards you with a flawless, archival-quality presentation.
Choosing Your Path: The Tape Backing method gives you a single, solid panel that’s easier to handle and fits into a wider variety of shadow box frames. The Double-Glass Sandwich is the purist’s choice, offering a museum-like clarity and total reversibility, but requires more specific essential materials. Both, executed with care, will transform your completed puzzle into secure wall decor without a single drop of adhesive, preserving the integrity of your wooden pieces for years, or even for the next solver.
Deep Dive D: The Built-in Solution (Choosing and Using a Shadow Box)
Having explored methods that rely on tapes and glass sandwiches, we now turn to the most elegant, purpose-built option. For puzzles with significant thickness or intricate, sculptural pieces, a shadow box frame is often the only correct answer. It’s the built-in solution, designed from the outset to accommodate depth, transforming your completed puzzle from a flat image into a true dimensional display.
The Ready-Made Route: How to Choose
Your first task is to measure your puzzle’s true height, not just its width and length. Lay a ruler across the top of the assembled puzzle at its thickest point (often the center). This measurement is your minimum required depth. When shopping, look for a shadow box frame with an interior rebate depth that exceeds this measurement by at least 1/8 inch. This breathing room is critical—forcing a puzzle into a too-shallow box will put pressure on the wooden pieces, potentially cracking the front glazing.

(While the charming kit above is for a different kind of 3D project, it perfectly illustrates the deep-recess, multi-layered nature of a true shadow box—ideal inspiration for your puzzle display. For more on the creative potential of shadow boxes, see our feature on the DIY Castle Music Box Night Light Shadow Box.)
The Modification Path: Creating Depth from a Standard Frame
Can’t find a ready-made box in the right size or style? You can modify a standard frame. This is where my framer’s toolkit comes out. You’ll need wooden spacer bars (available at framing suppliers) or even strips of foam core board.
1. Measure and Cut. Determine how much depth you need to add to your standard frame to clear the puzzle. Cut your spacer material into four lengths to match the inner perimeter of the frame.
2. Build the Well. Adhere these spacers directly onto the back of the frame’s front panel (the lip that holds the glass), creating a deep well. Use a strong wood glue or double-sided tape rated for framing.
3. Proceed with Your Method. Your puzzle, now secured to its backing board via your chosen reversible or permanent method, will be placed into this newly created well. The original frame’s back is then re-attached over everything, securing the assembly.
Mounting Within the Recess
Placing your puzzle into the deep cavity of a shadow box is the final, careful step. If you used the Tape Backing method, you have a rigid panel that can simply be centered and secured with small brackets or framer’s points driven into the sides of the box’s interior. For an un-backed puzzle or one prepared for the Double-Glass Sandwich, you’ll need to create a stable base.
Cut a piece of foam board or archival mat board to fit the interior footprint of the shadow box perfectly. This becomes your mounting platform. Center your puzzle assembly on this platform. Use minimal dabs of museum putty or acid-free double-sided tape on the backing board (never the puzzle itself) to hold it in position. This platform then gets secured into the shadow box.
The result is a pristine, professional display where your wooden puzzle appears to float within its own space, protected from dust and pressure, its craft fully honored. It’s the definitive solution for framing thick jigsaw puzzles, turning anxiety into the deep satisfaction of a perfect fit.
The Final Lockdown: Sealing the Frame and Securing for Hanging
Your wooden puzzle is now a perfectly assembled sandwich of glass, art, and backing board, ready for its final case. This is where we move from craft to curation, sealing your work against time and gravity.
Sealing the Back: The Dust Cover
Flip the entire frame assembly face-down on a clean, soft surface. Run a strip of framer’s tape or strong packing tape across the seam where the frame’s back meets its sides. This seals out dust and insects. For a professional finish, cut a piece of acid-free backing paper (brown craft paper works) slightly larger than the frame’s back. Apply double-sided tape to the frame’s rabbet edge, then smooth the paper over the entire back, trimming the excess with a sharp blade. (This is also the perfect place to add a signed label with the puzzle’s name and date—a lovely detail for future generations.)
The Hanging Hardware: No Shortcuts Here
This is the most critical step for safety. A framed puzzle, especially in a shadow box frame, is heavy. Those standard sawtooth hangers or single eye-wires? They are for light prints, not your dense, glass-clad masterpiece.
1. Choose D-Rings and Braided Wire. For any frame over a few pounds, use a pair of steel D-rings. Screw them securely into the frame’s side rails, one-third of the way down from the top. This creates a stable, angled hanging point. Connect them with braided picture-hanging wire, leaving enough slack so the wire, when pulled taut, reaches just below the top of the frame.
2. Match the Hardware to the Wall. For drywall, you must use wall anchors. Plastic expansion anchors work for moderate weights; for heavier displays, toggle bolts are your failsafe. Always drill into a stud if possible—it’s the only guarantee. (I once skipped this, trusting a “heavy-duty” anchor. Let’s just say the sound of a crashing frame at 3 a.m. is a powerful teacher.)
3. Use Two Hooks. When hanging, install two hooks or anchors into the wall, spaced to match the D-rings. This distributes the weight dramatically and prevents the frame from tilting or pulling free.
Final Check and Placement
Before lifting, ensure all points securing the back are tight. Carefully clean the glass with a microfiber cloth. Enlist help to lift and hook the wire onto both wall hooks simultaneously. Once hung, give the frame a gentle but firm downward tug to test its security. Then, step back. Your completed puzzle is no longer a project on a table—it is art, preserved and presented to be admired. This DIY project culminates in the deep satisfaction of a display built to last, honoring every wooden piece within.
Preservation and Pride: Hanging Your Art to Last
Now that your framed puzzle is secure and sealed, the final, most rewarding step begins: choosing its permanent home on your wall. This is where preservation meets pride. Your careful work deserves a setting that protects the art while showcasing it beautifully. Let’s ensure your display endures.
The two greatest enemies of your wooden puzzle are light and humidity. Direct sunlight is a slow, irreversible vandal; it will fade the image and can dry out the wood over time. Hang your piece on a wall that receives indirect light. For the best protection, if you used a glass-fronted frame, consider upgrading to UV-protective glass or acrylic—a worthwhile investment for a cherished piece. Avoid bathrooms, kitchens, or exterior walls prone to moisture and temperature swings, which can promote warping.
For hanging, you’ve already secured it with proper hardware. But think about rotating display as a preservation strategy. Even light from lamps can have a cumulative effect. Every six months, consider swapping it with another artwork. This simple habit keeps any single piece from bearing the brunt of environmental exposure. For more inspiration on showcasing puzzles as dynamic art, our guide on how to display wooden puzzles properly offers great ideas.
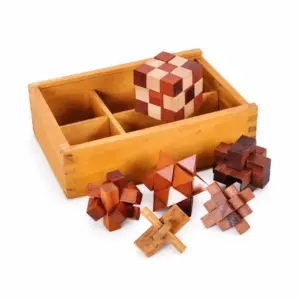
Wooden puzzle display ideas aren’t limited to a single static frame. A dynamic collection tells a story. Create a gallery wall of your completed conquests, mixing sizes and frame styles (all using the methods we’ve covered, of course). For a truly unique display, consider branching into 3D wooden puzzles that become functional art, like a glowing lantern. They offer a different kind of DIY project and become their own sculptural centerpiece, bridging the gap between traditional jigsaws and other forms of mechanical puzzles.

(Items like the Gothic Wooden Lantern 3D Puzzle above show how the world of jigsaw puzzles expands into stunning 3D art.)
Finally, step back. The anxiety of “how do I preserve this?” has been replaced by the quiet confidence of a job done meticulously. You haven’t just glued pieces to a board; you’ve curated a moment of patience and achievement, contributing to the long tradition of the puzzle as a form of personal expression. Each glance at the wall now brings a wave of satisfaction—the completed puzzle, a testament to your skill, is now permanent wall decor. You’ve honored the craft of the puzzle itself, and that is the ultimate pride of display.
Troubleshooting: Salvaging Curls, Gaps, and DIY Disasters
You’ve sealed the frame and planned the perfect spot. But what if, despite your care, something goes awry? Even with a meticulous approach, the unique nature of wooden puzzle pieces can present last-minute challenges. Don’t panic. Here’s how to salvage common issues without starting from scratch.
The Dreaded Curl: When Glue Warps Wood
If you used a liquid adhesive and notice pieces curling at the edges, you acted too fast. The wood absorbed moisture unevenly. Stop. Let it dry completely for 24-48 hours. Once bone-dry, place the puzzle under a large, flat board weighed down with heavy books for another 48 hours. (This is why I preach the spreader tool—a thin, even coat is everything.) For severe warping, you may need to carefully disassemble the affected section, lightly sand the warped backs, and re-adhere using a minimal amount of puzzle-specific glue or a strong double-sided adhesive tape.
Gaps and Shifting After Mounting
A gap in your completed image means the puzzle shifted during the final assembly. This is common if the backing board wasn’t secured immediately after applying your mounting method. For a glued puzzle, this is permanent. For a taped or reversible mount, you have a chance: carefully open the frame back, loosen the securing points, and nudge the entire puzzle assembly back into alignment on the board before re-securing.
The Frame That Doesn’t Quite Fit
If your shadow box frame is slightly too shallow, causing the glass to press on the thick wooden pieces, do not force it. This pressure can crack the glass or damage delicate knobs. The solution is to remove the frame’s existing backer and replace it with a thinner foam board or particle board. Alternatively, you can add deeper spacer bars between the glass and the frame rabbet to create the needed cavity.
So, When Do You Call a Professional Framer?
After all this, you might wonder: was DIY worth it? Absolutely, for most projects. But call a pro if:
* The puzzle has extreme sentimental or monetary value.
* You’re dealing with antique, brittle wood or a highly irregular shape.
* Your DIY attempt has led to significant, irreversible damage (like major warping or a glue flood).
* You desire a museum-quality, custom float mounting that showcases the puzzle’s craftsmanship.
Your goal was framing puzzles without damaging them. If you’re facing a solvable hiccup, breathe. Assess. Use the right salvage technique. Your patience is the final, most essential tool. Now, step back once more—your art is ready for its spotlight. For those who have ventured into more architectural wooden puzzles, seeing a completed piece like the Gothic Wooden Lantern 3D Puzzle can be a reminder of the beautiful diversity within this craft.