The Click, The Panic, and the Promise: It’s Not Broken
You were fidgeting with it, heard a faint click, and now you’re holding four separate, seemingly identical bands of metal in your palm.
Don’t worry. This isn’t broken. It’s functioning as designed. That click was the sound of a mechanical puzzle ring releasing its interlock—a feature, not a failure. Your job now isn’t repair; it’s reassembly. And we’ll get it back together.
That moment of panic is universal. On forums and Reddit threads, you see the same desperate post: “My puzzle ring fell apart in my pocket and I have no idea how to solve it!” The frustration is real. You’re not just holding rings; you’re holding a tactile brain teaser that just reset itself. Take a breath. This guide is built for the moment you’re in right now.
The principle behind every puzzle ring is elegantly simple. It’s not magic or glue holding it together. It’s precision. Each band has a specific groove or notch milled into it. These grooves are engineered to ride along and hook under the other bands’ shanks in a precise sequence. When aligned correctly, they create a locked, three-dimensional knot—often resembling a figure of eight or infinity symbol—that is remarkably strong. Force is the enemy here; understanding is the key. This makes it a classic type of mechanical puzzle, where the solution lies in manipulation rather than deduction.
One of those bands in your hand is special. It’s often called the master band. It usually has the most pronounced groove or a unique shape. It acts as the key that locks the entire assembly together. Your first task in any puzzle ring tutorial is to find it.
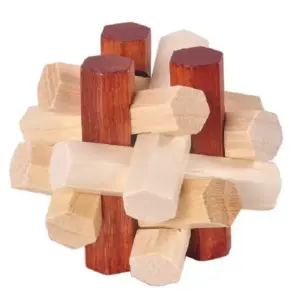
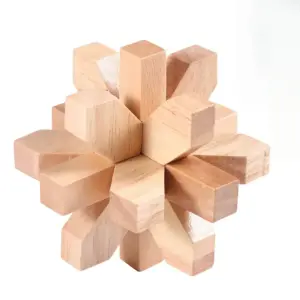
Rings can have 3, 4, 6, or 8 bands. Four is the most common by far—the classic design you’re likely holding. The assembly process for each type is a variation on the same theme of interlocking paths. A 6 band puzzle ring or an 8 band puzzle ring follows a more complex sequence, but the core logic of grooves and shanks remains.
Where most instructions fail you is after the first misstep. You follow a step, it doesn’t fit, and you’re left wondering what invisible mistake you made. That’s why this guide is different. We’ve built a failure diagnosis into every stage. If your bands won’t slot into place, we’ll map that exact problem to a visual checkpoint so you can self-correct. No more blind trial and error.
Consider this your reset. The panic is over. The promise is this: by understanding the simple mechanical principle and having a map for the inevitable wrong turns, you will hear that final, satisfying click. For more insights into the mindset needed, our piece on How To Solve A Puzzle Ring Without Losing Your Mind echoes this philosophy.
Let’s start by figuring out exactly what you’re holding.
Before You Bend Anything: The Universal Pre-Assembly Checklist
Perfect. You know you have a puzzle, and you’re ready to solve it. This is where 90% of attempts go wrong—not during the assembly, but right here, before a single band touches another. Rushing leads to forcing, and forcing leads to bent metal. Your first and most crucial task is to become a detective. Let’s identify exactly what you’re holding.
Step 1: The Band Count & Layout.
Lay all the pieces on a flat, clean, well-lit surface. A plain, dark cloth or towel works wonders to cut glare and keep bands from rolling. Now, count. Not the number of curves or loops, but the distinct, separate metal bands. You likely have a 4 band puzzle ring (the classic), but you could have 3, 6, or 8. This count dictates your entire reassemble puzzle ring roadmap.
Step 2: The Critical Hunt for the Master Band.
Now, pick up each band individually. Slowly rotate it between your fingers, examining both the inner and outer surfaces under the light. You are looking for one band that is different. On most rings, one band will have a distinct groove or notch cut into it, often about a third of the way along its length. This is the master band puzzle ring key. It is the linchpin of the entire mechanism.
- What to look for: The groove is a precise, machined cut, not a scratch. It may look like a small, flat section or a shallow channel. Sometimes, instead of a groove, one band may have a slightly different shape or a soldered joint. Its job is to act as the final “lock” that the other bands slide into.
- If you can’t find it: Don’t panic. On some simpler 3 band puzzle ring designs, or certain antique styles, the “master” function is achieved by a specific orientation of identical bands. Set the most symmetrical or pristine-looking band aside as your tentative master. You’ll confirm during assembly.
Step 3: Understand Orientation.
Look at the shape of each band. They are not just circles; they are three-dimensional paths. Notice the “U” or V shaped rings curve. For the upcoming steps, you will need to know which way is “up.” We’ll define it simply: the open end of the “U” points up toward the ceiling. Lay your bands back down, all with the U-shape facing the same direction. This consistent starting orientation is non-negotiable.
Think of it like this: you’re not just putting together a 4 piece puzzle ring; you are aligning a series of gates and channels. The master band’s groove is the final gate that only opens when every other band is on the correct path. This principle holds true whether you have the common 4-band or a formidable 8 band puzzle ring. I once repaired a complex piece nicknamed “The Metal Starfish”—a ten-minute job once I found its master channel amidst what looked like a bowl of spaghetti.
Your Pre-Assembly Mantra:
* I have counted my bands.
* I have found and isolated the band with the groove (my master band).
* All bands are oriented the same way (U-shape up).
Now, and only now, are you prepared to begin the tactile dance of solve a puzzle ring. You have the map. Let’s start walking the path.
The Golden Rule: The One Move That Permanently Ruins Puzzle Rings
You have your map, you’ve found your master band, and your fingers are itching to start. This is the moment where frustration most often overrules patience. You try the first move, it doesn’t slide, so you push harder. You hear a faint, sickening crunch instead of a clean click. This is the single point of failure I’ve seen in hundreds of antique puzzle ring repair jobs.
The golden rule is this: If it doesn’t slide, it doesn’t belong. Forcing is failure.
Understand the material in your hands. Most puzzle rings, especially vintage or heirloom pieces, are made from silver, gold, or other malleable precious metals. Modern ones might be stainless steel, which is springier but can still be deformed. These are not indestructible blocks of titanium; they are finely crafted wire or bands designed to move past each other with precise clearance. When you apply lateral pressure—pushing sideways, prying with a flathead screwdriver, or squeezing with pliers—you are not solving the puzzle. You are permanently altering the geometry of the channels and grooves. A bent band will no longer align with its partners. The ring may look assembled, but it will feel sloppy, gaps will appear, and the satisfying, locked-in tension will be gone. This is a core lesson in Why The Metal Puzzle Ring Remains The Ultimate Test Of Spatial Humility.
This directly answers the desperate search for puzzle ring won’t go together. When the ring “won’t go,” it’s not defying you. It is communicating. It’s telling you that one band is upside-down, the master groove isn’t facing the correct shank, or the sequence is out of order. Your job isn’t to muscle through the error; it’s to listen, backtrack, and re-check your orientation. The principle of reassemble is one of guided alignment, not conquest.
I keep a small box of “lesson learned” rings in my shop. One is a beautiful sterling silver 6 band puzzle ring where the owner, in a fit of frustration, used jewelry pliers to try and snap the final band into place. They succeeded, but in doing so, they crushed the master band’s groove flat. The ring is now a static, mangled knot. It cannot be taken apart without cutting, and it can never function as a puzzle again. The repair cost exceeded the ring’s value. The lesson was expensive.
So, let’s set the toolbox aside. You do not need pliers, screwdrivers, or any other lever. The only tools required are your hands, your eyes, and the patience to take apart your partial progress and start a step over. The correct motion in puzzle ring assembly is almost always a gentle, wiggling slide or a rocking rotation. If you meet solid resistance, stop. That is your checkpoint. Do not mistake “hard” for “almost there.”
Adopt the mindset of the watchmaker, not the blacksmith. This is a dance of finesse, where success is measured in millimeters and degrees. Your reward for this discipline is the profound satisfaction of that final, smooth movement, where everything aligns and settles into place without forcing, locked by pure, elegant mechanics.
The Core Sequence: Assembling a 4-Band Ring, Frame-by-Frame
So, you’ve identified your four bands and you’re holding them with the patience of a watchmaker. This is where that discipline pays off. We will walk through the most common puzzle ring configuration—the classic 4 band puzzle ring—with exacting detail. I want you to visualize this not as a magical trick, but as a precise mechanical operation. If you have followed the pre-assembly checklist, your master band (the one with the distinct groove or notch) is clean, unbent, and you’re ready to begin its assembly.
First, let’s cement the principle. To solve a puzzle ring is not about strength; it’s about positioning. The groove in the master band is a track. The other three bands are designed to ride in that track, one after the other, in a specific order, locking each other down as they go. Your goal is to build a stable, interlocked knot that appears impossibly solid.
Here is your step-by-step instructions, frame by frame.
Step 1: Position the Master Band.
Hold the master band in your non-dominant hand (your left, if you’re right-handed). Pinch it between your thumb and forefinger so the groove is facing up, toward your thumb. The band should form a wide “U” shape. This orientation is non-negotiable. The groove is the runway; everything must land on it.
Step 2: Introduce the First Companion Band.
Pick up a second band. You will lay this band across the master band’s “U”. Position it so it sits in the bottom of the master band’s “U”, perpendicular to it. The band you just placed will also form a “U” shape, but it will be lying on its side, cradled by the master band.
(Checkpoint: You should now see a shape like a lowercase ‘t’ or a plus sign, but with all bands gently curved.)
Step 3: The Critical Pivot — Forming the “Figure of Eight”.
This is the infinity symbol, the core of the mechanical puzzle. With your free hand, grasp the ends of the band you just placed (the one lying across). Gently rotate it 90 degrees. As you rotate, one half of this band will slide into the groove of the master band. This is the first true interlock.
(What you should see: The two bands now form a linked, twisted pair—a lazy figure-eight. The master band’s groove is now cradling a portion of the second band. This is your first “click” of understanding.)

Step 4: Seat the Third Band — The “Shy” One.
Pick up your third band. This one needs to be convinced. Its path is to go under the first companion band (the one you just rotated), but over the leg of the master band on one side. Slide one end of this new band into the exposed groove of the master band, on the opposite side of where the second band is already locked in.
Gently wiggle it. You will feel it want to nestle alongside the second band within the master band’s groove. This step often feels tight; that’s correct. Use a gentle rocking motion, not force. The goal is to have three bands now sharing the master band’s groove.
Step 5: The Final Band — Completing the Interlock.
Take your fourth and final band. Its job is to lock everything down. You will place it over the third band, but its ends must tuck under the loops formed by the second band on either side. This is the most counterintuitive move.
One technique: Hold the partial assembly from the side. You’ll see two “tunnels” or openings. Thread the fourth band through these openings. As you push it through, its ends will naturally find their place into the remaining space in the master band’s groove.
Now, apply gentle, even pressure from both ends of this final band, pushing it toward the center. As you do, the entire assembly will contract and tighten.
The Final Movement:
You won’t hear a dramatic click. You’ll feel a settling. All four bands will draw together into a cohesive, symmetrical ring. The master band’s groove will be completely occupied. Gently roll the ring between your fingers. It should be firm, with no loose bands wobbling. You have successfully executed the puzzle ring instructions for the standard configuration.
Failure Diagnosis: If Your Ring Won’t Cooperate
If a step feels impossible, stop. Here’s your troubleshooting guide, born from hundreds of repairs:
- If Step 3 (the figure-eight) won’t form: The master band’s groove is likely not facing your thumb. Re-pinch it, groove-up. The second band must slide into the groove, not just rest against the band’s side.
- If Step 4 (the third band) won’t slide in: The most common fault. The partial assembly has likely twisted. The master band’s groove must remain an open, accessible channel. Gently take apart what you have and restart from Step 1, ensuring the master band’s orientation is rigidly maintained.
- If Step 5 (the final band) seems to have nowhere to go: The third band is probably not fully seated in the groove. Go back and ensure the third band is nestled deeply alongside the second within the master track. There should be a clear, straight path for the final band’s ends.
- If the assembled ring feels loose and falls apart: One band is not fully engaged in the groove. This is often the third or fourth band. The reassemble process requires you to push all bands firmly but gently toward the center until all slack is removed. The final shape should be a tight, flat knot.
This sequence is the foundation. For a visual companion to these step-by-step instructions, our guide on How To Solve The 4 Band Puzzle Ring offers another perspective. Remember, the victory is in the correct alignment, not the muscle. When it settles, that’s the silent, satisfying proof of a puzzle solved.
Stuck? Your Assembly Diagnostic Flowchart
You’ve followed the step-by-step instructions but the pieces aren’t cooperating. This is where most guides leave you. As a restorer, I’ve heard every version of this frustration. Let’s diagnose your specific block. Find your symptom below.
Symptom 1: The Bands Won’t Slide or Interlock
The Quote: “I’m trying the figure eight thing but they just won’t go over each other. Am I supposed to force it?” — Reddit user, r/puzzles
Diagnostic Check:
* Is your master band upside down? This is the #1 cause. The groove must face inward, cradling the other bands. Flip it.
* Are you starting with a true ‘infinity symbol’? If your initial two-band loop is twisted or folded, nothing else will align. Lay it flat on the table. The crossing point must be clean.
* Is a band bent? Hold each band up to the light and look down its length. Any slight kink will jam the entire assembly. A gentle roll on a flat table can reveal a wobble.
The Fix: Stop pushing. Reassemble from the very beginning, verifying the master band’s groove orientation after each step. The mechanical puzzle requires precision, not pressure. If the process feels alien, you’re not alone. Many people struggle with the real way to solve metal puzzles, where what feels right is often wrong.
Symptom 2: The Final Band Has Nowhere to Go
The Quote: “I get three bands together, but the fourth one just hovers. There’s no space for it to click in.” — Puzzle Ring Forum post
Diagnostic Check:
* Are bands 2 and 3 fully seated in the master groove? They must be nestled side-by-side, deep in the channel. If one is riding high, it blocks the path. Use a fingernail to gently tap them down flush.
* Did you skip the ‘rotate’ step? After placing the third band, you must rotate the entire formation to expose the entry path for the fourth. The ends of the final band need a straight shot into the groove’s opening.
* Do you have a 6 or 8-band ring? If your ring has more than 4 bands, the 4 band puzzle ring instructions won’t work. Go back to the pre-assembly checklist.
The Fix: Don’t introduce a new band. Go back one step. Ensure the third band is fully home, then execute the 90-degree rotation. You should see a clear lane.

Symptom 3: It Goes Together But Falls Apart Immediately
The Quote: “I finally got the click, but then it just comes undone in my hand. Why is my puzzle ring falling apart?“ — Etsy message to my shop
Diagnostic Check:
* Is there slack in the system? An assembled ring should be a tight, flat knot. Gently squeeze all bands toward the center. You should feel them tense up. If you can wiggle any band, it’s not locked.
* Is the master band the correct one? On some rings, two bands have grooves. You may have used the secondary groove. The true master band creates the primary channel that locks everything.
* Is it a variant design? Some forged puzzle ring designs from makers like Arcanum Designs use a slightly different interlock. If it consistently fails, you may have a 3-band or 6-band style.
The Fix: Apply gentle, even compression from all sides. Listen for a second, subtler click as all parts settle. If it persistently fails, take apart and double-check your ring type. This moment is about tactile feedback, not force.
This diagnostic approach—matching symptom to root cause—is the same logic used for all mechanical puzzles. The principle is universal: when a move feels wrong, it is. Your job isn’t to overpower the puzzle ring, but to listen to it. For more on this mindset, our guide on Why Your Hands Are Lying To You delves deeper. Now, let’s address what to do if your ring isn’t the standard 4-band.
Beyond Four: A Quick Guide to 3, 6, and 8-Band Variations
If your ring consistently fails the diagnostic checks, you might be holding a different puzzle entirely. The 4-band is the classic, but puzzle rings come in families—3, 6, and 8 bands are common. (You may even encounter a rare 7 band puzzle ring, which typically follows logic similar to a 6-band.) The core mechanical principle of interlocking grooves remains, but the sequence and number of “key” bands scale up. Don’t force a 6-band process onto a 4-band ring; start by identifying what you have.
First, Identify Your Ring Type.
Lay all bands completely flat and parallel on a table. Count the distinct, continuous loops. This is your band count. Now, look for grooves. A 3 band puzzle ring typically has one master band. A 6 band puzzle ring often has two master bands working in tandem. An 8 band puzzle ring is usually two interconnected 4-band units. This identification step prevents immediate frustration.
For a 3-Band Ring:
This is often the best puzzle ring for beginners due to fewer moving parts. The process is a streamlined version of the 4-band method.
1. Find the single master band with its distinct groove.
2. Hold it in a “U” shape, groove facing up.
3. Take the two plain bands. Thread one through the master band’s “U,” then weave the second through both the master band and the first plain band to form a tight, triangular interlock.
4. The final shape is a compact trifold, not a figure-eight. The reduced number of bands means misorientation is the primary failure point.
For a 6-Band Ring:
Complexity increases. You are often dealing with two master bands and a layered construction. Patience is non-negotiable.
1. You will likely have two grooved master bands. Identify them.
2. The assembly frequently involves creating two separate 3-band subunits first, using the method above, and then linking those subunits together via the remaining bands.
3. Alternatively, some designs follow a “double figure-eight” pattern. If you have animated assembly instructions for a 6-band, watch for this layered, sequential lock. The final assembly will feel dense and immovable when correct.

Alloy Triangle Lock Puzzle — $11.88
For an 8-Band Ring:
This is advanced territory, often seen in antique puzzle ring repair projects. You are essentially solving two interlinked 4-band rings.
1. Do not attempt to handle all eight bands at once. Look for natural pairs or sets that seem linked.
2. The most reliable method is to solve one 4-band core completely, following our core sequence. Then, treat the remaining four bands as a second, separate puzzle that weaves through the assembled core. This requires meticulous attention to the path of each new band.
3. This is where the principle of disentanglement puzzles (a sub-category of mechanical puzzles) becomes crystal clear: every band has one true path. Forcing any part will jam the entire assembly. Brands like Stuller or Puzzle Ring Emporium often supply specific guides for their multi-band designs.
The universal takeaway? Whether it’s a 3 band puzzle ring or an elaborate 8 band design, the logic is modular. Master the 4-band sequence first—it’s the foundational language. The process for other counts builds on that fluency, adding more “words” to the same grammatical structure. If you’re looking to build this foundational skill with other mechanical puzzles, our guide on How To Solve Metal Puzzles applies the same patient, diagnostic mindset.
From ‘Aha!’ to ‘Always’: Pro Tips for Keeping It Together
That final, satisfying click means you’ve successfully navigated the logic of a classic mechanical puzzle. But the journey doesn’t end with assembly. The shift from solving to wearing introduces new questions. Let’s lock in that success and ensure your ring remains a source of pride, not a recurring frustration.
First, Know What ‘Right’ Feels Like.
A correctly assembled 4 band puzzle ring (or any variant) should feel solidly interlocked, with a subtle, even tension when you gently try to wiggle the bands. It is tight, but it should not feel forced. If you feel a sharp point of resistance or see a gap where bands seem to strain against each other, a band is likely misaligned in its groove. Backtrack one step and re-seat it. This tactile feedback is your most reliable guide.
Putting It On and Taking It Off.
Never twist or pull the ring apart over your knuckle like a solid band. You’ll stress the interlocks.
1. For putting it on, gently slide the assembled ring onto your finger. The goal is to avoid any lateral pressure that could torque the bands against each other.
2. For removal, use a slight rocking motion from side-to-side while pulling straight off. Do not let it catch on your knuckle and splay open. This simple technique is one of the most overlooked puzzle ring tricks for longevity.
Cleaning Without Catastrophe.
Do not disassemble your ring to clean it. For a silver or gold ring, use a soft-bristled toothbrush, mild dish soap, and lukewarm water. Gently scrub the assembled knot, rinsing thoroughly. The disentanglement puzzle is designed to hold together; soap and water won’t harm it. For deeper cleaning of intricate forged puzzle ring designs, an ultrasonic cleaner is safe for the metal but can be startling—it makes the ring buzz violently but effectively blasts out grime from every groove.
Why Does It Feel Loose or Fall Apart Later?
If your ring comes apart in your pocket or with light handling, the assembly is incomplete. The most common culprit is the final band not being fully seated in its governing groove. Return to the final step of the core sequence and apply firm, straight pressure to ensure every band is home. Over time, with repeated reassembly, the metal can experience microscopic wear, creating a very slight looseness—this is normal for a heavily used piece.
Addressing Fit and Wear.
Puzzle rings are not easily resizable due to their complex assembly. If it’s too tight, your only ethical option is to have a jeweler source or craft a larger version. If it’s slightly too large, a small, clear silicone ring-sizer sleeve on the finger can help. Remember, the ring is a wire puzzle; bending it for fit will destroy its function. The entire journey is a lesson in patience with puzzle rings.
Your patience has rebuilt it. Now, with these practices, you can wear it with confidence, knowing you understand its mechanics inside and out.
When the Puzzle is the Damage: Assessing a Truly Broken Ring
You’ve mastered the reassembly. You know its tricks. But what if, after all attempts, the pieces refuse to interlock? Sometimes, the puzzle ring isn’t being stubborn—it’s signaling damage. Let’s perform a bench jeweler’s assessment.
Run a Flatness Check.
Lay each band completely flat on a hard, level surface like glass or a mirror. Gently press down along its length. Observe. Does any band rock, see-saw, or show a visible gap? This indicates a bend. Even a subtle curve in one wire shank will prevent the precise assembly required for the final click.
Inspect the Critical Groove.
Find the master band. Examine its groove under bright light. Are the walls of the notch sharp and defined, or are they rounded, polished smooth from decades of wear? Significant wear can make the interlock too loose. More critically, look for a hairline crack in the metal right at the base of the groove—this is a stress point and a common failure site.
Diagnose: Stubborn vs. Broken.
If the bands are straight and the groove is intact, your ring is likely just being a tough mechanical puzzle. Return to the diagnostic flowchart. If you find a bend or a crack, the puzzle has shifted from logical to physical.
Can It Be Fixed? Yes, Almost Always.
A professional jeweler with laser welding capabilities can repair a broken solder joint or a cracked groove. A bent band can often be carefully reshaped using nylon-jaw pliers without marring the metal. This is not a DIY fix. Attempting to straighten a silver or gold band with regular tools will often kink it further, permanently ruining the assembly.
Your Actionable Next Step.
First, confirm the damage using the checks above. If you confirm a bend or crack, stop forcing it. Place all the bands in a small bag to avoid loss. Then, take them to a local, independent jeweler who does on-site repairs—mention it’s a forged puzzle ring. Show them the specific issue. They’ll give you an honest assessment.
Remember, the frustration of a broken ring is different from the challenge of a solve. You’ve already learned the latter. For the former, sometimes the smartest move is knowing when to call in a fellow craftsperson. The principles of careful handling and understanding material limits discussed in Metal Puzzles That Dont Break A Veterans Guide To Cast Logic apply directly here. Now, you’re equipped to diagnose not just the puzzle, but its condition.