The Solid Cube in Your Hand: A Wooden Illusion
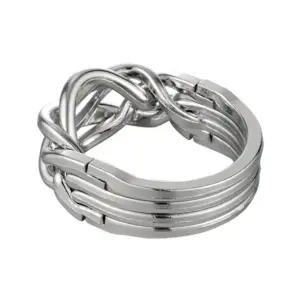
The first time I held a solved six-piece burr, it felt less like a puzzle and more like a wooden secret. There was no rattle, no give—just a silent, geometric solid that seemed to defy its own assembly.
Now, look at your pieces. You’re holding six notched sticks, a pile of disorganized potential. The frustration is real. It feels chaotic, a far cry from the perfect cube on the box. Good. That’s the intended starting point. This classic burr puzzle isn’t about wild leaps of imagination; it’s about structural logic and incremental understanding. Your goal is not to “think outside the box.” Your goal is to build the box from the inside out.

The secret is in the negative space. Those notches you see aren’t random; they are precise voids designed to accept the solid wood of another piece. When aligned correctly, these six independent components transform into a single, self-supporting structure. The final cube should feel heavier than its parts, a testament to its interlocking integrity. It shouldn’t creak or shift. It becomes a monolithic object—the ultimate friction fit.
This is the core illusion. As an engineer, I see a truss system. As a woodworker, I see joinery without glue. For you, the solver, it’s a path from scattered chaos to silent order. The “click” you’re seeking is both a physical sound and a mental one—the moment the three-dimensional logic snaps into place in your mind.
Before we decode the notches, understand this: the puzzle in your hands is the result of a century of refinement. It represents a specific, elegant solution plucked from a combinatorial explosion of possibilities. Your journey from frustration to that solid cube is a direct line through mechanical history, one careful alignment at a time. For a broader foundation, see our complete guide to the six-piece burr.
The silent cube is waiting in your pile of pieces. Let’s find it.
Notch Literacy: Decoding the Language of Sticks
That silent, monolithic cube you just visualized is, of course, an assemblage. To build it—or to solve it—you must first dissect it mentally. This means learning the language of its components. Forget thinking of them as six identical sticks. In the classic 6-piece burr puzzle, the pieces have distinct roles, defined solely by the placement of their notches.
Hold your pieces side-by-side. You will likely see three types, often in a 2:3:1 ratio. First, the Internal Pieces. These have notches cut into them from two adjacent faces, creating an L-shaped void. In the assembled cube, these pieces reside deep inside the structure, their solid wood forming crucial locking tenons. Next, the External Pieces. These typically have a single, larger notch removed from one face, or sometimes a more complex pattern. They form the visible outer shell of the cube. Finally, the Key Piece (sometimes called the “last piece” or “locking piece”). This is the linchpin. It often looks the most asymmetrical, with a tenon that slides into the final, intricate void left by the other five. Finding this piece is half the battle in solving.
Now, let’s define our terms precisely, as a woodworker would. A notch is the void—the negative space you cut or see missing from the stick. The tenon is the resulting solid wood protrusion left between notches. The space is the cavity in the assembled puzzle where a tenon from another piece will reside. Successful interlock happens when every tenon perfectly occupies a complementary space, with no gaps and no forced pressure. This is the heart of the friction fit—it should be snug, not tight. (A telltale sign of a poorly made puzzle is the need for hammer taps; a well-made one slides home with a firm, satisfying push.)
This brings us to a critical, non-negotiable factor: grain direction. All six pieces must be oriented so the wood grain runs lengthwise along the stick. Cutting notches across the end grain (the short side) creates a fatal weakness; those delicate tenons will snap with minimal pressure. Every quality handcrafted wooden burr respects this law of material science.
With this vocabulary, we can decode the puzzle’s stated difficulty. You may see a burr described as “6-piece burr, level 5.” This refers to the Burr Number system. The “level” indicates the minimum number of moves required to free the first piece when disassembling the solved puzzle. A “move” is a straight-line translation of a piece, with no rotation. So, a level 5 puzzle requires you to sequentially slide five different pieces (often in a specific order) before the first key piece can be fully removed. This is the highest level achievable for a notchable 6-piece burr, a testament to the deep combinatorial explosion inherent in the design. There are over 100,000 possible notch combinations, but only a select few yield this elegant, multi-step lockup. A simpler puzzle might be “level 1” or “level 2,” where the solution is found quickly through trial and error. The level tells you the depth of the logic you’re up against.
Understanding this system transforms your approach. You are no longer randomly probing for a fit. You are executing a disassembly sequence in reverse. You now know you are building towards a configuration where pieces are not just mutually supportive, but sequentially dependent. This is the intellectual shift—from playing with notched pieces to navigating a mechanical algorithm. Your hands now have a theory to guide them.
The Solver’s Definitive Walkthrough (With Failsafe Checks)
Armed with the language of notches and the conceptual map of Burr levels, you’re now ready for the tactile algorithm. This is where theory meets grain. The most common classic 6-piece burr is often a “level 5” design—meaning its assembly is the reverse of a five-move disassembly. Your goal isn’t to build the cube from the outside in, but to construct an internal locking cage that the final pieces encapsulate. Let’s translate that combinatorial lock into a sequence your hands can follow.
Step 1: Identify Your “Key” or “Lock” Piece.
Lay your six pieces out. You’re looking for a piece with a distinctive notch pattern. In the most prevalent classic design, one piece will have a single, centered notch cut into one of its faces, located such that it divides the stick into two equal arms. This is often your primary lock. If your pieces all look similar, you may have a symmetrical design; don’t panic. The sequence itself will reveal the key.
Step 2: Form the Central Triple-Cage.
This is the foundational heart of the geometric solid. Pick up three pieces. Orient them so their length runs vertically in your hand. The goal is to interlock their notches to form a stable, three-legged core that can stand on its own.
* Take Piece A. Hold it vertically. Its notched face should be pointing to your left.
* Take Piece B. Hold it vertically. Slide its top third into the notch of Piece A. Their notches should mesh, allowing Piece B to hook onto Piece A at a right angle.
* Now, take Piece C. This is often your “key” piece. Position it vertically so its single centered notch faces towards you. Carefully lower this piece down so that the intersecting joint of A and B slides into its central notch.
If done correctly, you will now have a three-dimensional tripod structure. It should look like three legs of a stool meeting at a central point. This assembly is stable and will not collapse. This is your internal cage.
Step 3: Add the First Locking Piece.
Your cube has three axes. You’ve built along one. Now you will lock the cage along a second, perpendicular axis.
* Identify Piece D. It will typically have two notches: one near an end, and one offset from the center.
* Orient your cage so one of its open “squares” faces you. Slide Piece D horizontally through this square opening. The notches on Piece D must engage with the vertical legs of your cage. You will feel it start to bind and secure the vertical pieces together. Push it until it is flush, forming two sides of your growing cube.
Step 4: Add the Second Locking Piece (The Mirror).
This step is where the infamous “Wrong Solution” commonly occurs.
* Take Piece E. It is almost always the mirror image of Piece D. If Piece D had its notches in a specific pattern (e.g., “notch near left end, notch right of center”), Piece E will be the opposite (“notch near right end, notch left of center”).
* Rotate your entire assembly 180 degrees along the vertical axis. Insert Piece E horizontally from the opposite side you inserted Piece D. It must follow the same path but mirrored. When correctly inserted, Pieces D and E will be symmetrically opposed, applying equal pressure to the core cage.
* The Failsafe Check: If your puzzle now feels stable and cube-like but the sixth piece won’t fit, you likely have a stable but incorrect assembly. You may have inserted Pieces D and E from the same relative orientation instead of mirrored opposites. The cube will hold together but the final notch geometry will be misaligned. The fix: remove Piece E, rotate the entire assembly 180 degrees, and re-insert it from the true opposite face.
Step 5: Insert the Final Piece – The Keystone.
All that remains is the final, often unobstructed, path for Piece F.
* With the cage now locked by D and E, there will be one clear channel left, perpendicular to both the vertical cage and the horizontal lock pieces.
* Take Piece F. It usually has a simpler notch pattern designed to cap the structure. Slide it straight in. You should feel a satisfying, progressive friction fit as it engages the notches of the vertical pieces and the ends of the horizontal lock pieces. A final, soft push should seat it flush.
* You now hold a silent, solid cube. There is your tactile triumph.
To Disassemble – Reverse the Logic:
Remember the “level” concept. It won’t just fall apart. To solve the mechanical puzzle, you must reverse-engineer the assembly.
1. Slide Piece F out. This is move one.
2. Carefully choose which horizontal lock piece (D or E) can now slide. Often, only one will be free to move without binding. Remove it. That’s move two.
3. You may now need to slide the other locking piece (move three), and perhaps even shift one of the vertical cage pieces (moves four and five) before the central “key” piece can finally be withdrawn, completing the level 5 disassembly sequence.
This walkthrough demystifies the process, turning trial and error into informed navigation. For more on the mindset behind successful solves, including why assembly attempts often fail, explore our article on why most interlocking puzzle attempts fail and how to win. The interlocking puzzle is no longer a source of frustration but a physical expression of sequential logic, waiting in your hands to be clicked together and taken apart, again and again.
The Workshop Decision: Jig, Hand Tool, or CNC?
That feeling of the final piece sliding home—the tactile triumph of a perfect friction fit—often sparks a new, more ambitious thought: “Could I make this?” The leap from solver to maker is a profound one, transforming you from an operator of logic to a creator of it. Your primary question is no longer “how does this go together?” but “how is this made to go together?” The answer lies not in a single tool, but in a philosophy of precision. Having navigated the combinatorial explosion of assembly, you now face the workshop’s version: a vast landscape of potential approaches. Let’s chart it.
Your choice of method isn’t just about the tools on your bench; it’s about the experience you seek. Do you want the intimate, grain-feeling dialogue of a handcrafted wooden heirloom? The repeatable, engineering-grade accuracy of a powered setup? Or the digital perfection of CNC techniques? Each path leads to a solid cube, but the journey imprints its character on the wood.
The Hand-Tool Purist’s Path: Chisel, Saw, and Soul
This is the most direct conversation you can have with the material. It requires minimal gear: a sharp marking gauge, a fine-toothed backsaw or dozuki, a set of sharp chisels (1/4″ and 1/2″ are ideal), a mallet, and a shooting board or bench hook for clean 90-degree crosscuts.
The Process: You’ll start with a perfectly square blank. Mark your notch depths and widths with obsessive care—the pencil line is your covenant. Saw down to the depth line, carefully staying on the waste side. Then, using your chisel bevel-down for control, pare away the waste in thin layers, creeping up to your final line. Test the notched pieces against each other constantly.
- Pros: Unmatched connection to the craft. Low barrier to entry cost. Teaches incredible sensitivity to grain direction and tool pressure. The resulting puzzle has a subtle, human character that machine-made pieces lack.
- Cons: Achieving true consistency across all six pieces—and their mirrored notches—is the supreme challenge. A variance of even half a millimeter in a critical notch can turn a friction fit into a sloppy rattle or an immovable bind. This method is slow, demanding, and a true test of fundamental skill.
- Insider Tip: Your first woodworking project here should be a dedicated “notching jig” for your bench hook—essentially a raised fence with a depth stop—to guide your saw vertically. It’s a meta-puzzle that pays dividends in accuracy. (And if you enjoy this kind of fundamental joinery, the principles echo those found in ancient carpentry wisdom from the Lu Ban Jing).
The Power Tool Precisionist: The Jig is the King
This is the method for the engineer in you, where repeatability is god. A table saw equipped with a crosscut sled and a simple, purpose-built jig is your workhorse. A dado stack is useful but not mandatory; multiple passes with a standard blade work perfectly.
The Process: The core of this approach is a two-stage jig. First, a crosscut jig on your sled ensures every piece and every notch-end is cut to an identical length. Second, a notching jig—a block clamped to your sled’s fence with a stop to register the piece and set the notch’s distance from the end—guarantees every cut is identically placed. You raise the blade to the exact notch depth and run each piece through, rotating it to cut all four sides of a notch.
- Pros: Excellent, repeatable accuracy. Relatively fast once the jig is dialed in. Allows for efficient batch production. The logical extension of the solver’s sequential mindset into the workshop.
- Cons: Requires a safe, well-tuned table saw and time to build accurate jigs. There’s a “setup tax”—you’ll spend more time building the jig than cutting the first puzzle. The roar of the saw can feel far removed from the silent mechanical puzzle in your hand.
- Insider Tip: Use a “sacrificial test blank” of the same stock to dial in your notch depth. Aim for a fit that requires a firm thumb-press to seat, then back off the blade height by a paper’s thickness. The final fit is achieved not at the saw, but with a few careful passes of a sanding block on the mating surfaces.
The Digital Artisan: CNC’s Realm
Here, the puzzle design exists as pure geometry in CAD software before a toolpath ever touches wood. A CNC router executes the design with microscopic tolerance, capable of producing not just the classic puzzle but incredibly complex puzzle variations with curved internals or non-orthogonal cuts that are impossible with hand tools.
The Process: You begin with a 3D model. The software calculates the toolpaths for a chosen endmill (a 1/4″ or 3/8″ flat endmill is typical). The machine then methodically cuts each piece from a board, holding tolerances often within 0.005″. Sanding is still required to achieve the final feel.
- Pros: Ultimate precision and perfect piece identity. The only practical way to produce certain high-level, rare puzzles and intricate variations. Once the file is set, reproduction is trivial.
- Cons: High upfront cost and steep learning curve for both CAD and CAM software. Can feel like “pushing a button,” divorcing the maker from the physical act of cutting. The precision is so absolute that it leaves no room for the gentle adjustments a hand-tool user employs to achieve a fit.
The Universal Truths: Wood and the Magic of Fit
No matter your tool path, two factors remain constant and critical.
Wood Selection: This is non-negotiable. You need a stable, fine-grained hardwood that cuts cleanly and wears well. Maple is the gold standard for its pale color, tight grain, and durability. Walnut offers beautiful contrast and works beautifully. Cherry ages gorgeously but is slightly softer. Avoid softwoods and open-grained woods like oak—they will compress and wear, ruining your precise friction fit.
Achieving “The Click”: The fit is everything. It’s the culmination of your entire process. Aim for a fit where the pieces slide together under firm hand pressure, leaving no visible gap, and require a deliberate, straight pull to separate. This is achieved in the final 5% of the process: careful, incremental hand-sanding of the notch walls. Use a hard sanding block to preserve flatness. Test constantly. The goal is not to remove material evenly, but to identify and relieve only the high spots causing binding. This is where trial and error meets craftsmanship—the final, quiet dialogue between your hands, the wood, and the geometric solid you are bringing into being.
The tool you choose defines your relationship to the puzzle, but the precision you achieve defines the puzzle itself. Whether by chisel, jig, or bit, you are not just making sticks with notches; you are materializing an algorithm, building a physical interlocking puzzle whose final, silent click is the sound of a problem perfectly solved, twice over.
Beyond the Standard Cube: Variations That Bite Back
Mastering the classic burr is a tactile triumph. You’ve materialized the algorithm, felt the silent click of a perfect friction fit. But that cube on your bench is just the first page of a much longer story. Once you understand the language of notches, you start to hear other dialects—variations that twist the fundamental rules and demand a new kind of interlocking puzzle thinking. Welcome to the world where the standard cube is the tutorial level.
The most visceral leap is to the Diagonal Burr. Forget orthogonal entries. Here, the six square sticks are notched to assemble along a 45-degree axis, spiraling around a central void. The final form is a cube, but the path to get there requires abandoning every right-angle instinct you just built. The pieces slide in with a helical logic, each one rotating the puzzle’s internal skeleton in a way that feels more like threading a three-dimensional screw. This isn’t just harder; it requires a different mental model. You’re no longer building a Cartesian grid; you’re negotiating a diagonal combinatorial explosion.

Then there’s the family of orthogonal burrs identified by letters: Burr B, Burr C, and so on. This is where the puzzle design gets specific. The classic burr you likely just solved is often called the “Puzzle Knot” or “Burr A.” Burr B is its more sophisticated sibling. While using the same six, square-cross-section pieces, the notch pattern is different, leading to a dramatically altered assembly sequence and a higher level of difficulty (moves). Where the classic burr might have a solution requiring 5 or 6 moves to release the first piece (its “Burr Number”), Burr B patterns can be more deceptive, often requiring a non-intuitive withdrawal sequence that isn’t the reverse of assembly. This is the root of that common Reddit complaint—assembling a puzzle stably but incorrectly. You may have built a “solid” cube, but if it requires a hammer to disassemble, you’ve found a false solution. Burr B designs punish that error. You can explore a catalog of such forms in resources like the Example Variations of 6-Piece Burrs from Brandeis University.
The universe of these puzzles is vast because the variable is simple yet profound: the arrangement of notches on six sticks. With three possible notch states (full, half, or none) on each of four faces at multiple positions, the math yields over 100,000 possible notch combinations. Yet, as Bill Cutler’s famous 1978 computer analysis proved, only a tiny fraction—a few hundred—produce a solid, six-piece, three-axis-interlocking geometric solid. From this sea of possibilities, specific, named designs like Burr B or Burr 39 were fished out and became stars in the puzzle collections of enthusiasts.

For the maker, this is where six piece burr plans become essential. You’re no longer notching identical pieces; you’re following a precise map for six unique sticks. The cutting notches require even greater precision, as the assembly tolerances are often tighter. A single notch cut a half-millimeter too deep can create internal slop that cascades, leaving the final cube loose. This is the realm of meticulous jig setup or CNC techniques. The reward for such precision is ownership of a rare puzzle that truly tests a solver’s grasp of Burr theory.
Why explore these? Because they complete your education. Solving a Diagonal Burr rewires your spatial reasoning. Building a Burr B from exotic woods like bocote or purpleheart tests your craftsmanship against a historical benchmark. They transform the puzzle from a single clever object into a window into a vast field of mechanical puzzle design. You begin to see the lineage from those 1893 patent drawings to the digital files shared on forums today. This journey, from the frustration of six disorganized sticks to the creative ambition of crafting your own variation, is what turns a pastime into a passion. It’s a path well worth exploring, as detailed in our look at exploring puzzles that go beyond the classic burr.
The standard cube taught you the rules. These variations teach you how to break them—and that’s where the real fun begins.
From Hoffman’s Patent to Your Workbench: A Compact History
Those variations—the Diagonal Burr, the Burr B—aren’t mere accidents of modern design. They are branches on a very old tree. To hold a six-piece burr today is to hold an object whose geometry was debated in the pages of 19th-century puzzle books, refined in mid-century workshops, and is now perfected with digital precision. Its journey from Hoffman book sketches to a handcrafted wooden cube on your bench is a story of persistent curiosity, part of the broader history of the mechanical puzzle.
It begins, for our purposes, in 1893. Professor Angelo John Lewis, writing under the pseudonym “Professor Hoffman,” published Puzzles Old and New. Within its pages, he systematically described and categorized mechanical puzzles, including an analysis of “The Six-Piece Burr.” This was a pivotal act of preservation and codification. Before Hoffman, such objects were often one-off craftsman’s whims or tavern challenges. Hoffman gave them a taxonomy, presenting the burr not as a solitary trick but as a member of a family. His technical drawings, while quaint to modern eyes, established the baseline language of notches and intersections we still use.
The baton passed to a new generation of analyst-solvers. In 1942, E. M. Filipiak’s 101 Puzzles in Thought and Logic included several burr configurations, pushing the analysis of assembly sequences further. This mid-century period was the era of the dedicated amateur—the engineer, the machinist—who would work from these published diagrams with hand tools at a basement workbench. Precision was hard-won, a product of patient sawing and fitting. The resulting puzzles were often unique, their difficulty level a direct reflection of their maker’s patience and the limits of their tools. They were truly rare puzzles, existing in singular copies.
The digital age transformed this craft from an artisanal pursuit into a globally shared science. The pivotal shift was from thinking in wood to thinking in vectors. Enthusiasts and designers like Bill Cutler used early computer programs in the 1970s and 80s to analyze the combinatorial explosion of notch patterns, definitively cataloging the possible solid six-piece burrs and establishing the maximum level of difficulty. This was the bridge from Hoffman’s cataloguing to computational truth.
Today, that evolution culminates in CNC techniques. A modern maker downloads a CAD file shared on a forum—a direct descendant of Hoffman’s line drawings—and feeds it to a machine that carves exotic woods with tolerances of thousandths of an inch. The core geometric solid remains unchanged, but the ability to consistently achieve a perfect friction fit is new. This digital-physical loop has created a golden age for collectors and makers. Brands like Cubic Dissection or artisans on Etsy can produce small runs of incredibly complex, handmade burr puzzles in woods like African blackwood or stabilized dyed maple, items that would have been museum pieces decades prior.
So, when you feel the satisfying click of your burr locking home, you’re completing a circuit over a century long. You’ve engaged with the same intellectual framework that intrigued Professor Hoffman, employed the meticulousness of Filipiak’s era, and benefited from the digital clarity of modern puzzle design. The object in your hand is no longer just a wooden puzzle; it’s a compact history of ingenuity, from the patent page to the laser-cut file, all distilled into six notched sticks. For a deeper philosophical dive into this historical thread, consider why every wooden puzzle is a 2500-year-old argument.
Your Next Move: From Solver to Collector or Craftsman
That circuit of history, from Hoffman’s patent to the hum of a CNC router, doesn’t have to end with you merely understanding it. The logical next step, now that you’ve decoded the mechanical puzzle’s secrets, is to engage with it on a new level. Your path forks here: toward the curated satisfaction of a handcrafted wooden collection, or toward the sawdust-and-triumph journey of the maker.
For the aspiring collector, the market spans from mass-produced curios to exquisite art objects. Your primary goal should be precision—a puzzle that achieves that silent, solid cube without slop or excessive force. For the classic puzzle, brands like Cubic Dissection are the gold standard, with puzzles often crafted from stunning exotic woods and machined to impeccable tolerances; expect to invest $50 and up for what are essentially functional sculptures. For a more accessible yet still high-quality entry point, explore the shops of dedicated artisans on Etsy or at puzzle-specific retailers like PuzzleMaster. Look for sellers who specify the wood type (hard maple, cherry, walnut are good signs) and who showcase clean, sharp notches.

If your budget is tighter but curiosity is high, well-made, sturdy versions exist in the $15-$30 range. They are perfect for experiencing the interlocking logic without a major investment. For broader context on evaluating and selecting puzzles, our guide on your complete guide to buying, solving, and mastering the classic dives deeper. And if the allure of hidden compartments calls, explore 7 wooden puzzle boxes for adults that don’t insult your intelligence for a different kind of mechanical intrigue.

Two Key Lock Puzzle — $11.99
For the soul itching to become the craftsman, your journey begins with a plan. The definitive online resource for puzzle design files and woodworking project plans is PuzzleWillBePlayed.com. There, you’ll find dimensioned drawings for the classic burr and dozens of its fiendish cousins, often for free. The forum at The Puzzle Place remains an invaluable hub where makers dissect cutting notches, debate jig setup, and share hard-won advice on achieving the perfect friction fit. Start simple. Download a proven plan for the classic 6-piece. Whether you use hand tools, a table saw, or a bandsaw, the principles you learned in the Solver’s Walkthrough now inform every cut you make. You are no longer just assembling; you are engineering the geometric solid itself. If the idea of crafting a complete container intrigues you, consider the next step outlined in our first-timer’s guide to building a puzzle box.
This is the perpetual click. It’s the sound a secret makes when it becomes a tool, a piece of knowledge you can hold. Whether you choose to curate a shelf of rare puzzles or fill your workshop with the scent of fresh-cut maple, you’ve moved past frustration. You are no longer just a person with six disorganized sticks. You are a keeper of the notch, a participant in a long tradition of quiet, tactile genius. The puzzle is solved. Now, what will you build?
Reader Situation and Fast Answer
You’ve just finished reading, the puzzle’s history decoded, its logic laid bare, and perhaps your own first attempt at a handcrafted wooden version sits on the bench. The initial intimidation of six identical pieces has vanished, replaced by the understanding of notched pieces and their satisfying interlock. You’ve achieved tactile triumph. The path splits here, and the choice is yours.
If you’ve successfully assembled your classic puzzle and the joy of that final click is still fresh, channel that momentum. Don’t let it become a static shelf piece. The logical next challenge is to graduate from wood to metal, where the principles of mechanical puzzle assembly remain, but the stakes—and the satisfaction—are different. For a guided tour of this adjacent world, where the tools are picks and the rewards are sharp, resonant solves, continue your education with a veteran’s guide to cast metal puzzles that don’t break.
If the urge to create has taken hold, your next move is to enact the workshop decision you’ve already considered. Pull your chosen plan from PuzzleWillBePlayed.com, select your stock (maple for durability, walnut for contrast), and commit to the first cut. The journey from a rough blank to a perfect geometric solid you can take apart and put back together is a deeper form of mastery than solving alone.
The fast answer to your situation is this: Act. Apply your new literacy in puzzle design immediately, before the click fades from memory. Select your next project—be it solving a harder variation, sourcing exotic woods, or machining a perfect set with CNC techniques—and begin. The six sticks on your table are no longer a source of frustration. They are an invitation, and you now speak the language.