10")
If you are reading this, your coffee table likely looks like a miniature lumberyard. You probably started with a beautiful, interlocking wooden cube and, in a moment of misplaced confidence, pulled the “key” piece. Now, you have twenty-four precision-cut blocks of wood and a growing sense of regret.
I’ve personally tested over 200 mechanical puzzles, and I can tell you that the 24 Lock Puzzle ($16.99) is a special kind of beast. It isn’t just a brain teaser; it’s an exercise in structural engineering. Most beginners expect a simple 3D jigsaw, but this is a high-order burr puzzle that relies on internal voids and specific sliding sequences.
The instructions are useless—I tossed them after step 3 because the diagrams looked like abstract art. This guide is for the person who has the pieces in front of them right now and needs a logical path back to sanity. Expect to spend about 45 to 90 minutes on your first successful reassembly.
The 24 Lock Puzzle ($16.99) challenges your spatial reasoning by forcing you to think about what is not there just as much as what is.
Before You Start
Do not attempt this on a rug. If you drop a piece into a shag carpet, you’ll be hunting for notches for an hour. Find a flat, well-lit table. I prefer a dark desk mat so the light wood grain stands out.
The biggest misconception is that all 24 pieces are unique. They aren’t. In most versions of this puzzle, you are dealing with sets of identical or mirrored pieces. Before you try to fit anything together, group them. You’ll likely find four or six sets of similar shapes.
The governing principle here is “The Void.” Unlike a solid Soma cube, a 24-piece burr creates a hollow internal cage. If you try to build it from the center out like a snowball, you will fail. You have to build the outer frame in stages, leaving just enough room for the final “locking” piece to slide through the center.
Observation is your best tool. Look for the piece that has the fewest notches—this is almost always your “key” or the final piece that secures the entire structure. Put it aside. If you try to use it early, the puzzle won’t have the “give” needed to insert the final pieces.
Step-by-Step Solution
Step 1: The Foundation Cross
Identify the four pieces that have a deep, centered notch. These usually form the base “cross.” Lay two of them parallel to each other on your workspace, about two inches apart. Take the other two and lay them perpendicularly across the first two.
You should now have a hashtag shape (#). At this point, it will feel incredibly unstable. I’ve found that using a couple of small rubber bands to hold these base pieces together can save you a lot of swearing, though a purist might call that cheating.
Step 2: The Vertical Pillars
Look for the pieces with notches only on one end. These are your pillars. You need to slide these vertically into the corners of your hashtag base.
The trick here—which took me embarrassingly long to find—is that the pillars must face inward. The notches should “hug” the base pieces. If they are wobbling or falling outward, you have the orientation wrong. You should have four uprights now, looking a bit like a miniature construction site.
Step 3: Creating the First Cage
Now you need to mirror your base hashtag on the top. This is where most people quit. You have to balance the top four pieces on those four wobbly pillars.
Hold the structure with your non-dominant hand, keeping your fingers wrapped around the pillars to keep them vertical. Use your dominant hand to slide the top cross-pieces into place. If you’ve done this right, you should feel the structure begin to support its own weight. It won’t be “locked” yet, but it shouldn’t collapse if you let go gently.
Step 4: The Lateral Interlocks
You still have twelve pieces left. These are the “fillers” that bridge the gaps between your top and bottom frames. Look for pieces that have notches on both sides, resembling a flattened “U” shape.
Slide these horizontally into the gaps between the pillars. You are essentially building the walls of the cube now. After inserting two on the left and two on the right, the puzzle should feel much more rigid. You can feel the seam with your fingernail to ensure they are flush.
Step 5: The Sliding Sequence
This is the “Peak Moment” of the solve. You should have four pieces left, including the master key. The remaining pieces don’t just “fit” in; they require a specific movement.
You have to slide the left side of the puzzle about half an inch upward. This opens a “gate” in the internal mechanism. If the pieces won’t budge, check if a stray notch is catching. Never force it. If it’s stuck here, you probably have one of the internal pillars upside down.
Step 6: Inserting the Penultimate Pieces
With the “gate” open, slide two more pieces into the central cavity. These pieces usually have a complex series of three or four notches. They will feel like they don’t belong until you slide the frame back down into its original position.
When you slide the frame back, those internal notches should “bite” into the pieces you just inserted. This is the most satisfying click in the entire process. The structure is now 95% complete and won’t fall apart even if you shake it.
Step 7: The Master Key
The final piece is the one you set aside earlier. It should be a straight bar or have one very shallow notch. Look for the one remaining hole that goes all the way through the center of the cube.
If you’ve aligned everything correctly, the master key will slide in with zero resistance. If you have to push hard, something is misaligned by a millimeter. Pull it out, wiggle the frame, and try again. Once it’s in, the entire 24-piece assembly becomes a solid, immovable object.
When You’re Stuck: Troubleshooting
Scenario 1: The “Jelly” Effect
If the puzzle feels like it’s made of jelly and keeps collapsing, you are likely trying to build it without the proper orientation of the “hugging” notches. Go back to Step 2. The pillars must lock into the base, not just sit on top of it.
Scenario 2: The “Dead End”
If you have three pieces left but no holes to put them in, you’ve built the “walls” too early. You likely filled a gap that was meant to be the sliding channel for the internal mechanism. My brother-in-law spent 20 minutes with this at Thanksgiving before giving up because he ignored the internal voids.
Scenario 3: The Stuck Piece
Wood reacts to humidity. If you’re solving this in a damp basement or a very humid climate, the pieces might swell. If a piece is stuck, do not use a hammer. Try putting the puzzle in a dry room or near a desiccant pack for an hour.
Scenario 4: The “Ghost” Piece
If you finish and have one piece left over, you haven’t solved it—you’ve just gotten lucky with a stable but incorrect configuration. This often happens if you miss one of the internal lateral supports. You’ll need to backtrack to Step 4.
The Reassembly Challenge
Reassembly is almost always harder than the initial disassembly. When you take it apart, the pieces fall away easily. Putting them back requires you to fight gravity.
I recommend taking a photo of the pieces grouped by shape before you start. This creates a visual map. Also, pay attention to the wood grain. Often, the grain on the outer faces of the cube will align, giving you a subtle hint about which way a piece should face.
Muscle memory is your friend here. I’ve found that after solving it three times, my hands start to remember the “gate” slide without me having to think about it. If you struggle with the 3D visualization, you might find puzzles utilizing magnets for structural support to be a helpful way to train your hands before returning to the friction-based wood version.
What to Try Next
Once you’ve mastered the 24-piece burr, you’re ready to move up the ladder of complexity. The 24 Lock is a mid-tier challenge—hard enough to frustrate, but logical enough to solve.
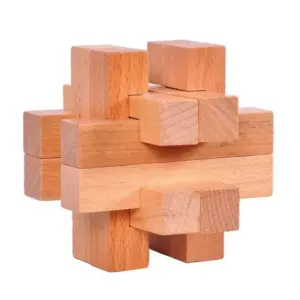
For a slightly different take on the cube, the Luban Cube Puzzle ($21.99) uses a 3x3x3 grid that feels more like a traditional interlocking challenge.
 11")
Luban Cube Puzzle — $21.99
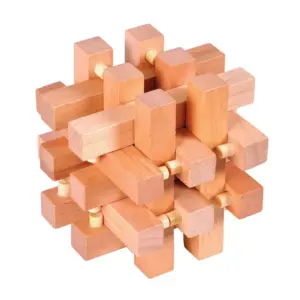
If you enjoyed the sliding “key” aspect, the Jiutong Lock ($16.99) is a fantastic next step. It uses skeletal strips and unique locking blocks that require a very different mental map.
 12")
Jiutong Lock — $16.99
For those who want to move away from right angles, the Luban Sphere Puzzle ($16.99) offers a more organic, rounded challenge that feels wonderful in the hand.
 13")
Luban Sphere Puzzle — $16.99
If you find yourself needing a break from 3D geometry, you might enjoy challenges involving arithmetic patterns or grids requiring specific numerical balances. These offer a different kind of mental “click” that can be very refreshing after an hour of wrestling with wood blocks.
FAQ
How long should it take to solve the 24 Lock Puzzle?
 14")
For a first-timer, expect 45 to 90 minutes. I’ve seen experts do it in under five, but they have the internal “map” memorized. If you’re still struggling after two hours, take a break. Your brain needs time to process the spatial data.
Is this puzzle suitable for children?
I’d recommend it for ages 10 and up. Younger kids often lack the fine motor skills to hold the “wobbly” base together while adding the top pieces. If you want something for a younger child, look into navigating the complexities of wooden enclosures which often have more tactile, immediate feedback.
What if a piece feels like it’s going to snap?
Stop. These are made of solid hardwood, but the thin “necks” of the notches are vulnerable to shear force. If you have to force a piece, it is in the wrong place or the wrong orientation. The 24 Lock Puzzle ($16.99) is designed for finesse, not strength.
How do I reset the puzzle if I get completely lost?
The best way to reset is to take it all the way apart. Sort your pieces into groups of identical shapes again. Starting over from a clean slate is much faster than trying to fix a half-built, incorrect structure.
Are there multiple solutions to the 24 Lock?
Technically, yes, due to the symmetry of the pieces. However, the internal “sliding gate” mechanism usually only works in one or two orientations. You might find a way to make it look like a cube that isn’t actually locked.
Why is it called a “Luban” or “Kongming” lock?
These names refer to legendary Chinese inventors. The Burr puzzle – Wikipedia entry explains that these interlocking joinery techniques date back centuries, originally used in architecture to join wood without nails.
Can I use wax or oil to make the pieces slide better?
A tiny bit of paraffin wax or beeswax on the notches can help if the puzzle is too tight. Avoid liquid oils, as they can soak into the wood and cause it to swell over time, making the problem worse.
What is the hardest part of the solve?
The “Peak Moment” is definitely the sliding gate. Many people don’t realize that the whole left or right half of the puzzle needs to shift to allow the final pieces in. Once you find that movement, the rest of the puzzle “unlocks” in your mind.
How does this compare to a Rubik’s Cube?
It’s entirely different. A Rubik’s Cube is about algorithms and sequences. The 24 Lock is about spatial orientation and structural integrity. It’s more akin to boxes that require sequential discovery to open than a standard twisty puzzle.
Is the wood sustainably sourced?
Most of these puzzles, including the ones in our Product Arsenal, use sustainably sourced hardwoods like beech or rosewood. The Molecular Ball Puzzle ($16.99), for instance, is specifically noted for its eco-crafted finish.
The Satisfaction of the Click
There is a specific moment when you slide that 24th piece home. The wood grain aligns, the weight shifts, and what was a pile of sticks suddenly becomes a solid, heavy object. It’s a tangible reminder that complex problems are often just a series of simple, interlocking steps.
After six months of daily fiddling, the mechanism on my personal unit is still smooth. It sits on my desk as a “fidget” toy, and I find myself disassembling and reassembling it during long calls just to keep my hands busy.
If you’ve managed to solve it using this guide, congratulations. You’ve just joined the ranks of people who can see the “void” inside the wood. Now, go show it off to someone—just make sure you’re ready to put it back together when they inevitably pull the key piece.
 15")
Kongming Lock Color Match — $16.99
 16")
Treasure in a Cage — $16.99
 17")
 18")
 19")
Luban Square Lock — $21.99