7")
Opening: The Puzzle in Your Hands
You’ve got the pieces laid out—a stack of laser-cut wooden sheets, a small bag of components, and a beautiful, silent butterfly. The promise of a music box you built yourself is tantalizing, but the first glance at those intricate layers can be daunting. If you’re here, you’re likely past the initial excitement and staring at the parts, wondering where to even begin. You’re not alone. This isn’t a simple snap-together model; it’s a functional mechanical puzzle that demands a blend of spatial reasoning and patient assembly. The good news? The solution is logical, repeatable, and immensely satisfying.
This guide is your companion. We’ll walk through the entire process, from identifying the first piece to winding the handle and hearing that first clear note. We won’t just give you a diagram; we’ll explain the why behind each step, so you understand the clockwork heart you’re creating. Expect the full assembly to take a dedicated 2 to 4 hours for a first-timer. The goal isn’t speed—it’s the deep focus and quiet triumph that comes from bringing a complex, beautiful object to life with your own hands.
Before You Start: The Mindset & Mechanics
Resist the urge to start popping pieces out immediately. The difference between a smooth, rewarding build and a frustrating one often happens in these first ten minutes. Approach this not as a race, but as a process of discovery. Your primary tools aren’t just your hands—they’re observation, a clean workspace, and the right expectations.
First, set up your arena. Clear a table with good, direct lighting. The laser-cut plywood sheets have tiny, precise tabs holding each piece; you’ll need to gently “pop” them free. Using your fingers is often enough, but having a small, flat tool like a butter knife or a dedicated wooden puzzle tool can help nudge stubborn pieces without snapping them. Have a few small containers or bowls handy to sort similar-looking gears and small parts. This simple act of organization saves countless minutes of hunting later.
Now, understand what you’re building. This isn’t a static sculpture; it’s a kinetic machine. The core principle governing this and all classic music boxes is the conversion of rotational energy into sound. When you turn the side crank, it rotates a shaft connected to a pinned cylinder. As this cylinder turns, its pins pluck the tuned teeth of a steel comb, producing the melody. Your job is to assemble the transmission that makes this happen reliably. If you’ve ever been curious about the inner workings of mechanical puzzles, the Wikipedia entry on mechanical puzzles provides excellent foundational context on how these clever devices operate.
A common misconception is that all the layered wooden pieces form the music mechanism itself. They don’t. The wooden layers create the beautiful, three-dimensional carousel structure and the gearbox frame that houses the pre-assembled music movement and gear train. Your focus will shift between constructing the sturdy architecture and then installing the delicate heart of the machine within it.
Before touching a single piece, spend five minutes examining the wooden sheets. Notice the subtle differences: some pieces have peg holes, others have gear-shaped cutouts or slots. Some are structural walls, others are decorative facades. This initial reconnaissance is the most valuable step you can take. It turns a bewildering pile of parts into a recognizable set of components, setting the stage for a logical and enjoyable build.
Step 1: Unpacking & Understanding the Core Assembly
Open the package and pour all the contents onto a clean, well-lit table. You should have several laser-cut wooden sheets, a small plastic bag containing the metal music movement, gears, axles, and a winding handle, and likely an instruction sheet. Resist the urge to pop out every wooden piece immediately. Instead, lay the sheets flat. You’ll see the pieces are held in place by small, breakable tabs. Identify the three main component groups: the large, ornate pieces that will form the layered butterfly and base structure; the smaller, intricate pieces with gear teeth and peg holes; and the thin, frame-like pieces.
Now, locate the pre-assembled music movement in the bag. This is the heart of the puzzle. It consists of a metal cylinder with pins (the tune), a steel comb, a winding key, and a drive shaft. Your entire build culminates in connecting your handmade gear train to this shaft. Understanding this end goal is crucial—every wooden gear you assemble must ultimately transfer motion smoothly to this unit.
Carefully separate the wooden sheets. Start by gently pushing out the largest base plate and the four main layered butterfly panels. Set these aside. Then, methodically remove all the small mechanical components: the various-sized gears, the crank handle piece, and the spacers. Keep them grouped by type on your workspace. You’ll notice some gears have square holes, others have round ones; this isn’t random. The square holes are for axles that drive motion, while round holes are for fixed posts. This initial organization, which should take 10-15 minutes, prevents the frantic “where-is-that-tiny-gear” search later and builds your mental map of the mechanism.
Step 2: Identifying the Key Moving Parts
With your pieces organized, the next 20 minutes are about passive observation. Don’t try to fit anything together yet. Instead, pick up each major component group and study its unique role. This isn’t busywork—it’s the difference between a smooth, logical build and a frustrating trial-and-error session.
First, examine the four large, ornate panels that form the layered butterfly. Hold them up to the light. You’ll see they are not identical. Two have a series of small, aligned holes along one edge, while the other two have corresponding protruding pegs. These are your alignment guides. The panels with holes are your stationary outer layers; the ones with pegs will become the inner, moving wings. Notice also the central cut-out on each panel. This is where the vertical drive shaft from the gearbox will pass through to connect to the music movement at the very top.
Now, turn your attention to the gear pieces. Separate them into three functional piles:
1. Drive Gears: These are the larger gears with square or hexagonal center holes. Their job is to transfer rotational force from the crank, through the gear train, and up the shaft.
2. Spacer Gears & Bushings: These are the smaller, often flatter pieces with round holes. They don’t transfer drive; they act as bearings or washers to keep other gears aligned and spinning freely on their axles.
3. The Crown Gear: This is a unique piece—a medium-sized gear with teeth angled at 90 degrees. Its sole purpose is to change the axis of rotation from the horizontal crank to the vertical drive shaft. You’ll only have one of these.
Finally, identify the structural pieces: the two main rectangular side plates that form the gearbox walls, the base plate, and the top platform. The side plates are mirror images. Look for the pre-cut slots and holes. The series of small holes near the bottom are for fixed posts, while the larger, open slots are tracks for the moving axles of the drive gears. Understanding which holes are static and which allow movement is the core mechanical principle of this build. If you get this wrong, your gears will bind. A good test is to take a spare peg and see if it fits snugly (a post hole) or if it can slide (an axle slot).
This identification phase builds your mental schematic. When you later read an instruction to “place the large gear on the left axle,” you’ll already know which gear and which axle slot they mean, saving you from the common mistake of forcing a spacer gear onto a drive axle and jamming the entire mechanism.
Step 3: The Initial Disassembly Sequence
Now, with the parts identified, we begin the controlled deconstruction. This isn’t about brute force; it’s about reverse-engineering the assembly logic. The goal is to remove the components that are meant to be removed first, revealing the underlying chassis. Start by placing the assembled box on your workspace with the crank handle on your right side.
First, address the butterfly and its linkage. Gently lift the decorative butterfly from its post on the top platform. It should come off with a slight upward pull. Set it aside in your “solved components” area. Next, locate the thin, L-shaped wooden connector arm that runs from the vertical drive shaft to the butterfly’s post. You’ll see it’s attached with two small pegs. Carefully wiggle and pull this arm straight up and off its pegs. This is often the first point of frustration—if it’s tight, don’t twist it. Apply equal upward pressure on both ends simultaneously to avoid bending the delicate wood. Removing these pieces exposes the top of the drive shaft and the music movement.
Second, we tackle the gear train. The key here is working backwards from the final output. Find the smallest gear on the vertical drive shaft (the one that meshes with the music movement’s comb). Using your fingernail or a flat tool, gently pry this gear upward. It’s press-fit onto the shaft. If it resists, rotate it slightly back and forth while applying upward pressure; this breaks any friction lock from dried glue or sawdust. Once this pinion gear is off, you can lift the entire music movement unit out of its slot in the top platform. Set it down carefully—the steel comb is fragile.
Now, address the crown gear. Look at where the horizontal crank shaft meets the vertical drive shaft. The crown gear is the mediator here. You’ll need to slide the entire vertical drive shaft upward to disengage it from the crown gear’s teeth. To do this, you must first create slack. Gently push the crown gear slightly toward the center of the box along its axle. You should feel a millimeter of play. While holding that position, use your other hand to lift the vertical drive shaft up and out of its lower bearing hole. This is a checkpoint: if the shaft won’t budge, you likely haven’t fully disengaged the crown gear. Don’t force it. Re-seat everything and ensure the crown gear can move laterally on its axle. Once the drive shaft is free, you can then slide the crown gear off its horizontal axle. You’ve now decoupled the two primary axes of motion.
Finally, remove the large and medium drive gears from the left side. These are on axles that slide in those elongated slots you identified earlier. Simply push each axle toward the center of the box. The axle will slide in its track, allowing the gear to disengage from the central crank gear. Once disengaged, you can lift each gear-and-axle assembly straight up and out. You should now be left with the bare wooden frame: the two side plates, base, top platform, and the central crank assembly still intact on the right side. This is your foundation. The puzzle’s secret isn’t a hidden compartment; it’s the precise, interdependent order of this disassembly. If you’ve reached this bare frame, you’ve successfully completed the most counter-intuitive phase. The common mistake is trying to remove the side plates first—that leads to a jammed, frustrating mess because the internal components are still locked in place by the gears. You’ve avoided that.
Step 4: Navigating the Layered Butterfly Mechanism
Now you’re looking at the bare wooden skeleton of the music box. The central crank assembly is still mounted on the right side plate, and the butterfly platform sits above it all. This is where the puzzle’s namesake—the layered butterfly—comes into play, and it’s the most visually rewarding part of the solve. The goal is to disassemble the layered wings and the central platform to reveal the music movement beneath. The mechanism here is a clever lesson in sequential constraint: each piece must be removed in a specific order dictated by hidden pins and slots.
 8")
First, turn your attention to the butterfly itself. You’ll see it’s constructed from two distinct wing layers (a top and a bottom) pinned to a central hub. The entire assembly is mounted on a vertical post that rises from the crank mechanism. Do not try to pull the wings straight up. Instead, place a finger on the top of the central hub and apply gentle downward pressure while you examine the base of the butterfly platform—the square wooden plate it’s attached to. This plate is not fixed; it’s held by four small, discreet wooden pins that fit into the corners of the lower frame. Your first move is to lift this entire platform off. Find a thin, flat tool (the edge of a guitar pick or a flat-head jeweler’s screwdriver is perfect) and gently slide it between the platform and the frame at one corner. Apply a slight prying motion upward. You should feel a tiny pop as a pin releases. Work your way around each corner until the platform lifts free. If it’s stubborn, double-check that you fully removed the large drive gear earlier; its axle can sometimes protrude just enough to block the platform’s path.
With the platform removed, the butterfly assembly is now isolated on its post. Here’s the subtle trick: the post is not a simple rod. It has a flat side. Look closely where the post meets the hub of the butterfly. You need to rotate the entire butterfly assembly until you feel a slight give—this aligns an internal keyway. I found turning it counter-clockwise about 30 degrees did the trick. Once aligned, you can lift the entire butterfly straight off the post. If it doesn’t budge, you’re not aligned. Don’t force it; rotate slightly more until it slides up smoothly. You’ll now hold the beautiful, layered butterfly in your hand.
The final step to accessing the music movement is removing the central crank assembly from the right side plate. This looks intimidating but follows a logical rule. Notice the metal crank handle is on the outside, and a series of gears and a cam are on the inside. The entire unit is held to the wooden side plate by two things: the central post you just removed the butterfly from, and a small, hidden locking pin near the base. To release it, you must first push the central post inward (toward the inside of the box frame). I used the blunt end of a pencil. Push firmly but evenly on the top of the post. You’ll feel it slide inward about 2-3mm, and you should hear a faint click. This retracts a locking lug from a slot in the side plate. Once this happens, the entire crank assembly will be loose. You can now grasp it by the outer handle and gently pull it straight out, perpendicular to the side plate. It will slide out, bringing its axle and gears with it. Congratulations—you’ve now fully disassembled the functional puzzle. The music movement, a self-contained metal unit, is now clearly visible, sitting in the recess of the base. You can lift it out to inspect the pinned cylinder and steel comb, the heart of the melody. This moment, seeing the intricate mechanics laid bare, is the true reward. The puzzle isn’t about finding a hidden treasure; it’s about systematically uncovering the engineering that creates the treasure—the music itself.
Step 5: Accessing the Music Box Movement
Now that the crank assembly is removed, you’re looking at the heart of the puzzle: the music movement. It’s a small, self-contained metal unit nestled in a recess in the wooden base. This is the component that holds the melody, and accessing it fully is the final key to understanding the entire mechanism. Don’t just lift it out yet—first, observe how it’s secured. You’ll notice it sits within a rectangular wooden frame. On one side, there’s a small, rectangular opening. On the opposite side, you should see a tiny, flat metal spring clip. This clip is the only thing holding the movement in place; it applies gentle pressure against the metal casing.
To remove the movement, you need to release this spring pressure. The safest tool is a flat, thin object like a plastic spudger, a guitar pick, or the edge of a credit card. Insert your tool into the rectangular opening on the side opposite the spring clip. Your goal isn’t to pry, but to act as a wedge. Gently push the tool in between the wooden frame and the metal casing of the movement. As you apply steady, light pressure, you’ll be levering the entire movement toward the spring clip side. You should feel and see the movement shift slightly (about 1-2mm). This compression will cause the spring clip to disengage. Once it does, you can simply lift the music movement straight up and out of its recess with your fingers.
Common Mistake: Trying to pry the movement up from the top or yanking it out by force. This can bend the delicate spring clip or, worse, damage the pinned cylinder inside. The movement must slide horizontally first to unlock, then lift vertically. If it’s not budging, re-check that the crank assembly is fully removed—its axle might still be engaged in the movement’s winding mechanism, acting as a hidden lock.
With the movement in hand, you can finally appreciate the miniature engineering. One side has the winding key and the governor (the fan-like piece that regulates speed). The other side reveals the brilliant comb—a series of tuned steel teeth—and the pinned cylinder. This cylinder is the “program” for your melody; each pin plucks a specific tooth in sequence. Turning the key winds a mainspring, and when released, the cylinder rotates, the pins pluck the comb, and your tune plays. This is the elegant payoff. You haven’t just opened a box; you’ve methodically deconstructed a machine to reveal the poetry of its function. The puzzle’s solution is this moment of clarity, holding the source of the music in your palm.
When You’re Stuck: 5 Common Hang-Ups & Fixes
Even with a clear guide, the tactile nature of the Layered Butterfly means you’ll hit friction points. Wood grain can catch, a piece might seem glued shut, or the mechanism feels dead. Before frustration sets in, work through these five common scenarios. The fix is almost always a subtle reversal or a shift in pressure, not brute force.
Hang-Up 1: The Crank Handle Won’t Pull Out
You’ve found the handle, but tugging does nothing. It might even spin freely without extracting.
The Fix: Stop pulling. The handle isn’t a simple pull-tab; it’s a cam. Apply gentle inward pressure toward the box while simultaneously rotating it. Try a quarter-turn clockwise, then counter-clockwise, maintaining that slight push. You’re feeling for a point where the internal cam aligns with a channel in the wooden axle. When aligned, the handle will slide out with minimal resistance. Forcing it can shear the tiny wooden dowel that acts as its axle.
Hang-Up 2: The Butterfly Layer Feels Permanently Fused
After removing the crank, the decorative butterfly and gear layer seems utterly immobile. Prying a fingernail between the layers risks splintering the fine laser-cut wood.
The Fix: Re-examine your grip. You are likely holding the entire puzzle, unintentionally securing both layers with your palm. Place the puzzle flat on your workspace. Use only your fingertips on the very edges of the top butterfly layer. Now, try a slight twisting motion, not just lifting. The connection is a simple press-fit; twisting breaks the suction of the wood grain. If it remains stuck, a tiny amount of lateral slide might be needed first—imagine sliding a drawer open a millimeter before lifting it.
Hang-Up 3: Gears Are Jammed or Won’t Turn
You’ve exposed the gear train, but the gears are locked. Forcing them can strip teeth.
The Fix: This is almost always an alignment issue from the previous step. The gear layer sits on three small wooden posts. If one post isn’t fully seated in its corresponding hole in the base, the entire layer sits at a slight angle, binding the gears. Carefully lift the gear layer straight up (don’t twist this time) and reseat it. Listen for a soft click or feel a definitive stop as it settles flush. Then, manually turn the large central gear with a finger to see if the train moves freely before proceeding.
Hang-Up 4: The Music Box Movement is Stuck in Its Recess
You’ve removed the gear assembly, but the metal movement won’t budge. Prying from the top is a recipe for damage.
The Fix: Remember the two-phase removal: slide then lift. Ensure the crank’s axle is completely out. Look into the recess; you should see a small metal spring clip on the side of the movement’s casing. This clip hooks under the wooden frame. You need to push the movement horizontally in the opposite direction of that clip to unhook it. Use a flat, thin tool like a guitar pick or a plastic spudger. Insert it between the movement’s casing and the wooden wall, applying gentle leverage to shift the unit sideways. Once unclipped, it will lift easily.
Hang-Up 5: Reassembly Feels Impossible (The “It Fit Before” Problem)
Getting it back together is famously trickier. Pieces that came apart smoothly now refuse to align.
The Fix: This is a precision issue, not a design flaw. First, ensure every sub-assembly is in its exact solved state. The butterfly wings must be folded flat, not angled. The gear train must be at a neutral starting position. When placing the gear layer onto the posts, don’t just drop it. Lower it slowly while applying the faintest rotational pressure to help the gears mesh. If the final butterfly layer won’t press down, the most common culprit is the small wooden crank axle protruding a hair too high. Gently press it further into its hole. For more general assembly wisdom, our guide on the physics behind wooden puzzle mechanisms delves into why these tolerances are so tight.
If you’ve tried all this and are still deadlocked, walk away. Set the puzzle down for an hour. Your brain processes spatial problems subconsciously, and you’ll often return to spot the one misaligned piece instantly. This is a universal truth in solving, whether you’re working on a classic wooden trick box or an intricate 3D model. Persistence pays, but strategic patience pays faster.
The Real Challenge: Reassembling the Butterfly
You’ve solved it. The butterfly is free, the gears are exposed, and you’ve heard the sweet, tinny melody of success. Now comes the true test of your understanding: putting it all back together. For many, this is where the real puzzle begins. Disassembly is about finding the one weakness; reassembly is about reconstructing a perfect, functional system from memory. It’s the difference between finding a door and building the lock.
Your first instinct might be to simply reverse your steps. This will fail. The disassembly sequence is a one-way street of releasing tension and removing constraints. Reassembly is about carefully re-establishing those constraints in the correct order. If you try to place the final butterfly layer first, you’ll find it impossible to fit the gear mechanism underneath. The correct order is a precise, layered sandwich: base, gear assembly, butterfly mechanism, then decorative top.
Start with the music movement itself. Ensure the metal crank handle is fully inserted into its wooden axle and that the axle is seated flush in its hole on the base plate. Any protrusion here will block the next layer. Next, place the large gear plate onto its mounting posts. This is a critical tactile moment. Don’t just drop it; lower it slowly while giving a slight clockwise turn. You should feel the central drive gear’s teeth mesh with the pin on the music movement’s cylinder. A soft click or a sudden ease of rotation confirms proper engagement. If the gears grind or refuse to turn, lift the plate, rotate the crank a quarter-turn, and try again.
Now, the butterfly mechanism. This layered assembly is deceptively simple. Each wing must be in its fully folded, flat position—parallel to the central body. The small wooden linkages that connect the wings to the central cam must move freely. Place this assembly onto the posts atop the gear plate. The central cam must slot directly over the offset pin on the gear beneath it. This connection is what transforms rotational motion into the fluttering wing motion. If the butterfly layer sits crooked or rocks, the cam isn’t seated. Gently lift and re-center it.
Finally, the decorative top layer with its cut-out butterfly shape. Align it over the posts and press down evenly. If it stops a millimeter short, do not force it. The most common culprit is the wooden crank axle again; press it down from the side. The second is a butterfly wing that has popped slightly out of its folded position. Address the obstruction, then press until you hear and feel a soft, final snap as the wooden locking pins seat. Turn the crank. If the gears turn smoothly, the wings flutter, and music plays, you’ve achieved a perfect rebuild. If not, the process of diagnosing which layer is misaligned deepens your mechanical intuition more than any initial solve. For those who enjoy this systematic rebuild challenge, a kit like the 3D Wooden Carousel Music Box ($43.99) offers a magnificent, multi-session project that rewards this same meticulous, layer-by-layer logic.
 9")
What to Try Next: Your Puzzle Progression Path
Congratulations on solving and reassembling the Layered Butterfly. You’ve graduated from a simple fidget toy user to someone who understands interlocking layers and gear trains. The real joy of puzzles is that this is just the beginning. To keep that momentum going, here’s a curated progression path, moving from similar challenges to entirely new mechanical frontiers.
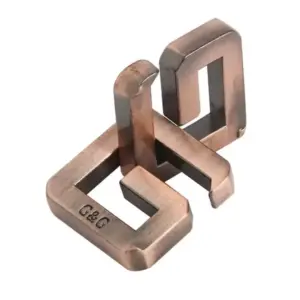
If you loved the “Aha!” moment of discovering the single moving piece in the Butterfly’s base, your next logical step is a pure disentanglement puzzle. The Interlocking Double-Ring Lian Puzzle ($15.88) distills that concept into solid metal. It’s a pocket-sized logic problem with no assembly required—just two rings that seem impossibly linked. The solution relies on a clever interplay between the open and closed rings, teaching you to think in terms of pathways and clearances rather than layers. It’s a fantastic, durable option for a quick mental reset.
 10")
 11")
For those who relished the precision and symmetry of fitting the five wedges back into the Butterfly’s spiral base, the 5 Piece Cast Spiral Metal Puzzle is your essential next challenge. This palm-sized alloy disc takes the “one key piece” concept and amplifies it. Disassembly is a quick test of observation, but reassembly is a masterclass in spatial reasoning. Each nearly identical wedge must be placed in the exact correct order and orientation to reform the seamless spiral. It’s immensely satisfying, highly portable, and perfect for developing the systematic patience you just practiced.
 12")
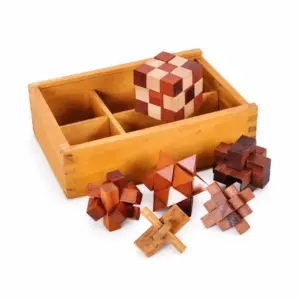
To dive deeper into functional, build-it-yourself mechanical art, the natural progression is the 3D Wooden Puzzle Treasure Box ($29.99). This kit shares the Butterfly’s glue-free, laser-cut assembly but applies it to a classic puzzle form: the trick box. You’ll build a beautiful jewelry box with a secret locking mechanism. The build process reinforces your skills in following complex instructions and fitting precise joints. Once complete, it becomes a puzzle to open and close, blending construction with ongoing play. It’s a superb bridge between assembly kits and traditional puzzle boxes.
 13")
Two Key Lock Puzzle — $11.99
Finally, to explore the historical roots of mechanical secrecy, try the Two Key Lock Puzzle ($11.99). This ancient Chinese-inspired brain teaser strips mechanics down to its bare essentials: two keys and a lock. There are no gears or layers, just pure, tactile problem-solving. It’s a lesson in applied physics and simple machines, offering a deeply historical context to your puzzling hobby. Understanding these traditional mechanisms will give you a richer appreciation for modern designs. For more on the fascinating history and variety of these devices, our guide to traditional wooden puzzle boxes is an excellent resource.
Your journey might look like this:
1. Master the Mechanism: Layered Butterfly Music Box (Done!)
2. Hone Your Logic: Interlocking Double-Ring or Cast Spiral (Pocket-sized challenges)
3. Build a Secret: 3D Wooden Treasure Box (Functional puzzle project)
4. Explore History: Two Key Lock Puzzle (Traditional brain teaser)
Each step builds on the last, developing a versatile puzzle-solving toolkit. Remember, the goal isn’t speed, but the deepening understanding of how things fit together—a skill that rewards you far beyond the toy box.
Frequently Asked Questions
Q1: How long should it take a beginner to solve the Layered Butterfly Music Box?
For a complete novice to 3D mechanical puzzles, expect 45 to 90 minutes of focused effort. The first 15-20 minutes should be pure observation—don’t rush to force anything. If you’ve solved simpler interlocking puzzles before, you might crack it in 25-40 minutes. The time isn’t a measure of intelligence; it’s about learning the puzzle’s unique “language.” Getting stuck for 10-15 minutes on a single step is completely normal. The real time-sink for most people is the reassembly, which can take longer than the initial solve.
Q2: Is this puzzle appropriate for kids?
Yes, but with guidance. We recommend it for ages 12 and up, primarily due to the fine motor skills and sustained logical patience required. A bright, puzzle-inclined 10-year-old could manage it with an adult nearby to prevent frustration. The pieces are sturdy and there’s no glue, so it’s safe, but the mechanism requires a delicate touch. It’s a fantastic family project—work on it together, taking turns testing theories. For younger children or a more purely playful family activity, our guide to puzzle boxes for family fun has excellent alternatives.
Q3: I’ve taken it apart, but I can’t get it back together. Did I break it?
You almost certainly didn’t break it. Reassembly is deliberately the harder half of the challenge. The most common mistake is trying to rebuild it in the reverse order of disassembly; the geometry often requires a different sequence. Start by re-engaging the music box movement with the central axle first, ensuring it spins freely. Then, rebuild the layered wings from the inside out, not the outside in. If a piece seems to refuse to seat, you’ve likely got the orientation wrong by 180 degrees. For more universal tips, our post on the physics of clicks and solving wooden puzzles delves into these alignment principles.
Q4: A piece feels completely stuck and won’t budge. What should I do?
First, stop applying force. Place the puzzle down and take a five-minute break. When you return, re-examine the stuck piece from all angles under good light. The issue is almost always a neighboring piece that is slightly misaligned and creating a bind. Gently wiggle or press on the pieces around the stuck component. Often, a subtle shift of an adjacent layer will release the tension. Never use tools like pliers; your fingers provide the perfect amount of feedback to avoid damage.
Q5: Can I use glue to make the assembled model permanent?
We strongly advise against it. The joy of this puzzle is its dynamic, repeatable nature. Glue would ruin the mechanical function and the ability to experience the “aha!” moment again. The precision laser-cut pieces are designed for a friction-fit that holds securely when correctly assembled. If a joint feels loose, it’s a sign that the pieces aren’t fully or correctly seated. Solving that fit is part of the puzzle. If you desire a permanent decorative music box, consider a kit like the 3D Wooden Carousel Music Box ($43.99), which is intended as a one-time build for display.
Q6: The music mechanism is stiff or doesn’t play. How do I fix it?
A stiff wind is usually caused by the internal gears of the movement being slightly misaligned with the drive axle from the side handle. Carefully disassemble just enough to separate the movement from the wooden gears. Manually turn the movement’s key with your fingers to ensure it plays freely. When reconnecting, make sure the square drive axle slides smoothly into the square hole on the movement—don’t force it. If it’s silent, the steel comb may be obstructed; a gentle puff of compressed air can clear tiny debris.
Q7: What’s the best way to learn puzzle-solving skills from this?
Treat it as a masterclass in sequential discovery. Pay attention to why each step works. Ask yourself: “What constraint did removing that piece unlock?” This teaches you about internal space, leverage, and load-bearing components. The skill transfers directly to more advanced puzzles. After this, try a pure logic puzzle with no moving parts, like the 5 Piece Cast Spiral Metal Puzzle, to train your spatial reasoning without mechanical cues.
Q8: Is it worth the price compared to a cheap plastic puzzle?
Absolutely. The difference is experiential longevity. A plastic puzzle often has one trick and feels flimsy. This wooden puzzle offers a multi-stage mechanical journey, the satisfying tactile feedback of precision-cut wood, a functional music box, and a beautiful display object. It’s a three-in-one package: a build kit, a logic puzzle, and a decorative conversation piece. You’re not buying a single solution; you’re buying hours of engagement and a durable heirloom-quality item. For the cost of a movie ticket and popcorn for two, you get an experience you can return to for years.
Q9: I get frustrated easily. Should I skip this?
If your tolerance for non-linear problem-solving is very low, this might be a high-friction starting point. Consider beginning with a more immediately gratifying puzzle that has clearer visual feedback. However, if you’re willing to reframe frustration as “data collection,” this puzzle can be a great teacher in patience. Set a timer for 20-minute sessions. When it goes off, walk away. The solution often appears when you’re not looking at it. For a more guided start, read our tutorial on how to solve wooden puzzles without losing your mind first.
Q10: Where can I learn about other puzzle box mechanisms and history?
For a deep dive into the craft, the Wikipedia entry on puzzle boxes is a thorough academic starting point. To see historical examples, the Smithsonian’s collection of a wooden puzzle assortment is fascinating. And for practical, hands-on knowledge about specific opening techniques, our own resource on the art of finding invisible seams in puzzle boxes will sharpen your observational skills for your next challenge.
Your Next Satisfying Click
The click of the final gear locking into place, the first notes of the melody playing—that’s the unique reward of the Layered Butterfly. It’s a tactile, auditory victory that a silent puzzle can’t match. If you’re chasing that feeling again, your next logical step is a puzzle that builds on the mechanical wonder you just mastered, but introduces a new layer of complexity or function.
For a direct evolution, the 3D Wooden Puzzle Treasure Box ($29.99) is the perfect candidate. It shares the same DNA of visible gears and a satisfying, functional outcome, but swaps assembly for disassembly. Your challenge isn’t to build the mechanism, but to decode it—finding the precise sequence of slides and presses to reveal the hidden compartment. It’s the “solving” counterpart to the Butterfly’s “building,” making it an excellent next test for your newfound mechanical intuition. For a deep catalog of similar functional puzzles, browse our dedicated guide to wooden puzzle boxes.
Ultimately, the best next click is the one that matches your current craving. Want more gears and music?