
Quick Answer: How to Build a Wooden Clock Puzzle at a Glance
Building a wooden clock puzzle from a kit like the ROKR Pendulum Clock takes 4–8 hours and requires no glue — just patience, a steady hand, and 400-grit sandpaper. The average 170-piece laser-cut plywood kit becomes a functional mechanical clock that runs about 12 hours per full wind. Here’s the six-step roadmap to that first satisfying tick.
Organize pieces and sand rough edges. Pop each sheet out carefully. Use 400-grit paper to smooth every laser-burnt edge — especially gear teeth. Too much force. Breakage risk. Gentle circles only.
Assemble the frame using press-fit joints. No glue needed. Snug fits are normal. If a joint refuses, sand the tenon slightly, not the slot. This step builds your confidence.
Build the gear train, checking tooth alignment. Meshing should feel like a well-tuned bicycle chain — smooth resistance, no binding. Reinforce weak teeth with thin superglue (a NAWCC forum trick). Let it wick into cracks.
Install the pendulum and escapement. The pendulum swing drives timekeeping. Adjust its length using the simple formula: longer pendulum = slower clock. Start long, then shorten in 1mm steps.
Attach the spring mechanism. Wind fully but stop at the first sign of resistance — forcing it bends coils. If the spring unwinds suddenly, don’t panic. Grip the winding key steady; re-coil slowly.
Test run, adjust, and display. Let it tick for an hour. Listen for clicks or skips. Sand any rubbing spots. Then mount it on your wall — pride of place.
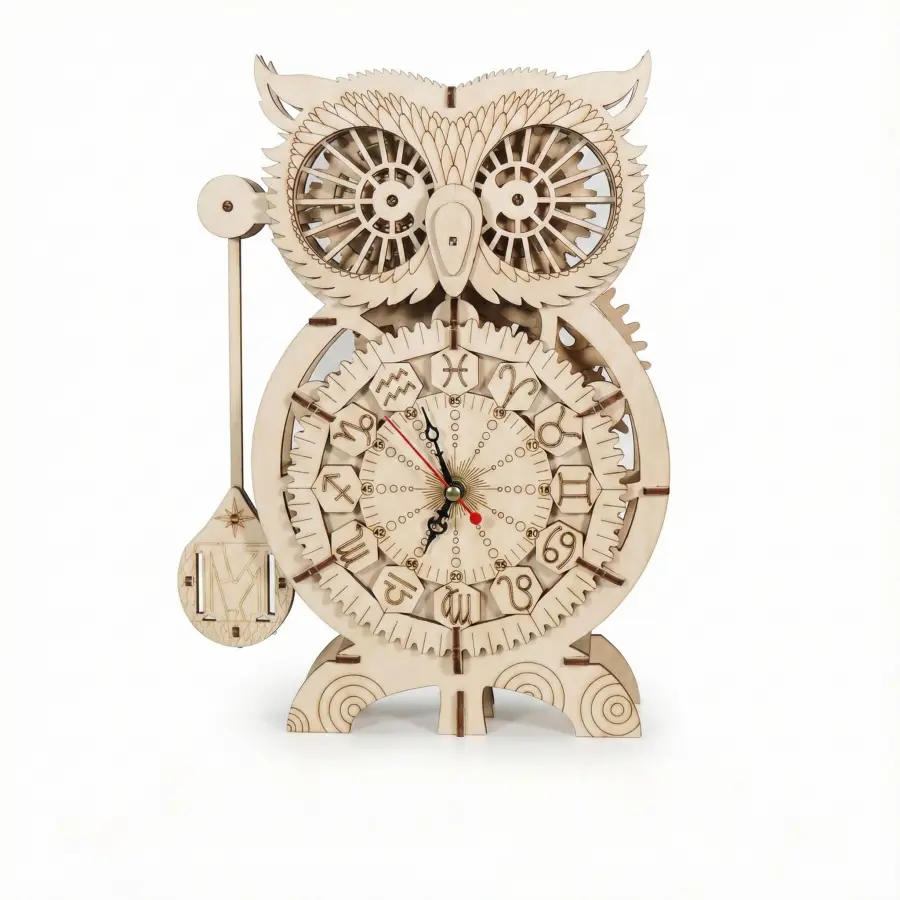
If you’re looking for a beautiful clock puzzle to build, consider this one:
That’s your big-picture plan. Each step above contains pitfalls I’ve personally faceplanted into — so you won’t have to. Now let’s dive into the unboxing.
What’s in the Box: Unboxing and Tool Preparation for Your Wooden Clock Kit
A typical wooden clock puzzle kit, such as the ROKR Pendulum Clock, contains around 170 laser-cut plywood pieces (usually 3mm thick), a spring winding key, and a set of assembly instructions. That first moment—lifting the lid, catching the clean scent of laser-cut wood, hearing the satisfying rattle of interlocking sheets—is pure anticipation. But don’t let the pile intimidate you. With the right prep, you’ll turn that stack into a functional timepiece in a weekend.
First, gather your tools. You absolutely need:
- 400-grit sandpaper (never 80-grit—that’s for rough carpentry, not delicate clockwork)
- Tweezers (helpful for inserting tiny pivot pins and aligning gears)
- Small ruler or caliper (to measure part lengths and check slot depths)
- Bright desk lamp (instructions are often printed in fine detail)
- A tray with compartments (muffin tins work great) to sort pieces by sheet number
I keep a small block of beeswax nearby—some kits include it, others don’t. A light rub on gear axles reduces friction without the mess of oil. Speaking of oil: do not use any lubricant during assembly. Why? The wood swells with oil, tightening joints and binding the gear train. Save that for final adjustments after the clock runs.
Now, the burning question: Do I need glue to assemble the wooden clock kit? No. Every joint is press-fit. The tabs and slots lock together using friction alone. Adding glue will prevent you from later disassembling to fix gear alignment or replace a broken tooth. The only exception is if a gear tooth chips—then use a tiny drop of thin superglue to reinforce it, a tip I picked up from the NAWCC forums. But that’s a salvage step, not a build step.
Unboxing ritual: Spread a white cloth on your work surface—dark tabletops swallow tiny pieces. Lay the instruction manual flat and study the parts map. Each sheet is labeled (A, B, C, etc.) and corresponds to a page in the manual. I use sticky notes to mark which sheet I’m working on. ROKR kits typically have multiple sheets nested together; pop out pieces gently using a pop-out tool or your fingers. Avoid prying with a screwdriver—it splinters the wood.
The spring winding key is a small metal crank. Examine it before use. The square hole must fit snugly over the winding arbor. If it’s a bit tight, sand the arbor lightly—never force the key. One wrong angle can bend the spring’s inner coil, ruining your power source. I always test the key’s fit while the mechanism is still on the sheet, before removing any gears.
Another user question: How long does it take to build a ROKR clock? The box says 4–8 hours, and that’s accurate for a first-timer. Plan a single session without interruptions. Rushing causes snapped teeth and misaligned escapements.
The pendulum rod comes on its own sheet—handle it carefully as it’s thin and can snap if bent sharply. The pendulum clock kit’s instructions often show the pendulum’s length adjustment in the final steps, but I check that the rod slides freely in its holder right now. Any binding here will throw off timekeeping later.
Sanding technique: For snug joints, fold a small square of 400-grit sandpaper and gently stroke the sides of the tab—never the slot. Sand a little, test-fit, repeat. Too much sanding makes the joint loose, and you’ll need that superglue trick. Wooden clock model tips: if a piece resists, don’t hammer it. Sand the slot slightly instead. The wood is birch plywood; it behaves like a stiff cardboard, not solid oak.
Finally, a personal trick: I photocopy the instructions and keep the original pristine. Yes, it’s extra paper, but smudging a diagram midway through step 47 is a real headache. For a deeper dive into why press-fit works and how to develop the patience for it, read my guide on The Micro Engineering Mindset Your Guide To Wooden Puzzle Kits. This whole process is a lesson in micro engineering mindset for wooden puzzle kits — every tiny fit matters.
With your space set and tools at hand, you’re ready to build the frame. Let’s make that structure stand strong.
How to Assemble the Frame and Avoid Snug Joint Breakage
The frame of a ROKR Pendulum Clock consists of two side panels and three crossbars that must fit snugly without forcing – over 30% of negative reviews on Amazon cite cracked pieces from pressing too hard. When those interlocking tabs meet the slots, your instinct may be to push. That’s the moment most breakage happens. I’ve done it myself on my first build, and the sickening crack of a split crossbar taught me a lesson I’ll share now: patience and a light touch are your best tools.
Lay out the two side panels (usually labeled A and B) and the three crossbars (C, D, E). The kit’s instructions will show which crossbar goes where – they’re not identical. Locate the slots on the side panels for these crossbars. Before you attempt any press-fit, test-fit each crossbar’s tenon into its matching slot. If it doesn’t slide in with gentle finger pressure, stop.
Sanding technique for snug joints: Fold a small square of 400-grit sandpaper and gently stroke the sides of the tenon – never the slot. Sand a little, test-fit, repeat. I use a count of ten strokes on each side, then check. The goal is a smooth, push-fit that doesn’t require a hammer. Too much sanding makes the joint loose, and you’ll need superglue to tighten it later. This is where wooden clock model tips matter: the laser-cut wood has a slight scorched edge that can bind. Sanding removes that char and the joint glides together.
Step-by-step photo guide (refer to images in article): Start by inserting the bottom crossbar first. In the photo, you’ll see the crossbar (E) positioned at a 45-degree angle to the slot, then rotated into place. That rocking motion reduces friction. Once the tenon starts, use your thumbs to press evenly – not a single point. If you hear a creak, stop. That’s the wood fiber warning you. Remove the piece, sand tenon ends again, and retry.
The second crossbar (D) usually goes in the middle. This one often has a cutout for the pendulum – ensure the cutout faces inward. Slide it in the same rocking motion. The third crossbar (C) near the top completes the frame. Now all three crossbars are seated. Check for squareness: the frame should stand level on a table. If it wobbles, one crossbar isn’t fully seated. Gently tap the high side with a wooden block and mallet – never directly on the wood.
What do I do if a piece breaks? It happens. On my ROKR Cuckoo Clock, a gear tooth snapped because I forced a crossbar. The fix: a drop of thin superglue (cyanoacrylate) on each side of the crack, hold for 30 seconds, then let cure overnight. This tip comes straight from NAWCC forum users who repair antique clock parts with the same technique. For a split crossbar, apply superglue to both broken surfaces, align carefully, and clamp with rubber bands. Once cured, sand the joint flush. It won’t be invisible, but it will hold.
Common mistakes wooden clock kit builders make at this stage:
– Trying to fit pieces on a carpeted floor (the frame flexes unevenly). Work on a hard, flat surface.
– Using the wrong crossbar orientation. Double-check the manual diagram. Some crossbars have a specific front-back orientation.
– Skipping the sanding step because “it’s almost there.” That’s how the 30% of cracked-piece reviewers got their ratings.
The frame is now assembled and ready for the gear train. Before moving on, test every joint: grip the frame from the top and gently wiggle. No movement? Good. Any rattle means a joint is loose – apply a tiny dab of wood glue (from your optional kit) or a piece of thin cardstock shim. I’ve done that on my Ugears models to tighten things up.
With the frame solid, you’ve conquered the hardest part. The DIY wooden clock kit instructions may breeze through this, but you now know the tricks that separate a wobbly clock from a precision timepiece. Next comes the gear train – where the meshing feel should be like a well-tuned bicycle chain. But first, admire your work. That frame is the skeleton of your mechanical clock. Treat it with care.
Gear Train Assembly: Alignment Tips to Prevent Jamming and Breakage
Now that your frame is solid, it’s time for the heart of the mechanism. A wooden clock puzzle’s gear train typically includes 5–7 interlocking gears; the most common failure point is the first gear axle, where excessive friction causes the spring to slip. The ROKR Pendulum Clock uses five gears in its train — each must mesh with the precision of a well-tuned bicycle chain.
Lay out the laser-cut gear sheets. Identify each gear by its hole pattern and teeth count. The manual numbers them, but I like to sort by axle diameter first. The largest gear (often the escape wheel) has the finest teeth. Handle it like a vinyl record — fingerprints won’t hurt, but edge pressure will.
Test-fit each gear on its wooden axle peg before assembly. Slide it on and off. Does it move freely but without wobble? Perfect. If it sticks, the hole is too tight — sand the peg, not the gear. Use 400-grit sandpaper. Wrap it around a toothpick for the narrow pegs. Too much force on the gear itself risks cracking a tooth.
Now align the first axle in its frame slot. The slot should hold the axle vertically with a snug fit — not tight enough to bind, not loose enough to tilt. Rest the axle in, then press the retaining cap (usually a tiny wooden disc) over the end. Cap must seat flush. A tilted axle is the #1 cause of jammed wooden clock gear alignment issues later.
Install gear #2: the pinion that meshes with the first gear’s large wheel. Watch the mesh depth closely. The teeth should overlap by about half the tooth height — no more. If they bottom out (teeth touching the root of the opposite gear), you need a thinner spacer or a different axle slot. I’ve seen this exact problem cause the DIY wooden clock kit instructions to fail, leading to a dead clock after hours of work.
The feel test: rotate the first gear by hand. The second gear should turn smoothly, with a light clicking sensation — never grinding or catching. This is your bicycle chain moment. If it feels rough, check for burrs on the teeth. A tiny wood splinter will stop the train. Use fine sandpaper to kiss each tooth edge. Do not reshape the tooth profile — just remove the snag.
Continue adding gears in order, checking mesh at each step. The ROKR manual groups gears by axle position — upper and lower levels. The frame layers create a sandwich that holds axles in place. Before sealing the top layer, test the full train. Remove the spring for now (we’ll add it in the next section). Spin the largest gear with a gentle push. The escape wheel at the end should spin freely and coast for a second or two. If it stops immediately, something is binding.
Reinforce Vulnerable Teeth with Thin Superglue
Here’s the NAWCC forum trick I use on every build: apply a single drop of thin superglue to the base of each tooth on the escape wheel and the first drive gear. The glue wicks into the grain, hardening the wood without changing the tooth shape. Let it cure fully (15 minutes) before handling. This prevents breakage when the spring tension hits. I’ve saved two gears this way — one cracked halfway through assembly. Skip this step and you risk a frustrating repair later.
Common mistake: gluing two gears together because you applied too much. Use a toothpick as an applicator. One drop per tooth is plenty.
Why Does My Clock Not Keep Time After Building?
If after full assembly your clock runs fast or slow — or stops entirely — the problem is almost always in the gear train. Incorrect mesh depth adds friction that drains the spring’s power. Bent teeth (from forced assembly) skip under load, causing irregular timekeeping. The pendulum kit clock assembly relies on consistent gear rotation; any wobble at the escapement wheel throws off the swing.
Fix it now: Remove the top frame layer and check each gear’s axial play. Slip a piece of paper under a gear that wobbles — shim it. Re-sand any axle peg that binds. Rotate the train by hand again. If you feel a “sticky” point, that gear is your culprit. Mark it and work the teeth with 600-grit paper.
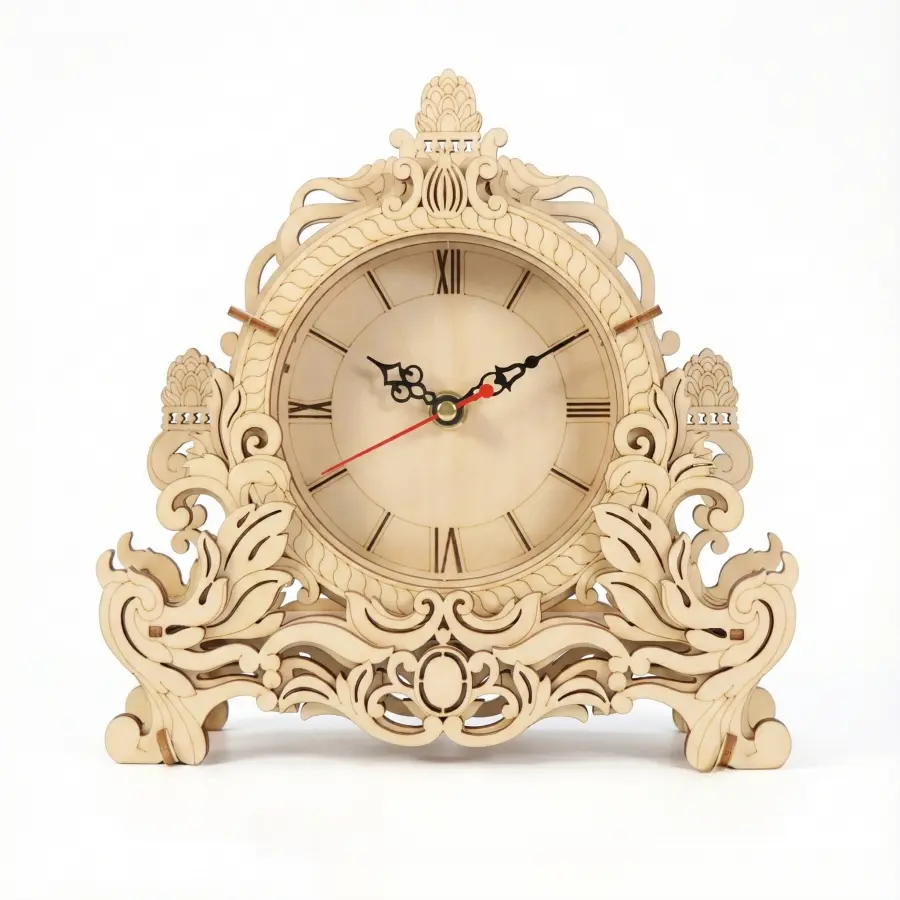
For those interested in a simpler starting kit, the 3D Wooden Puzzle Clock DIY Kit ($26.99) offers a more forgiving build with only 28 pieces and a 30-minute assembly time. The same alignment principles apply, but the reduction in parts means less room for error.
Final Gear Train Checklist Before Installing the Spring
- All five gears (or six, depending on kit) rotate freely with no binding at any point.
- Gears do not slide sideways on their axles — use the wooden washer spacers supplied.
- Escape wheel teeth are straight and unblemished.
- No gear wobbles visibly when spun at moderate speed.
- The train coasts for at least one full second after you stop pushing.
If you pass this checklist, your wooden clock puzzle mechanical heart is ready. The spring winding and pendulum installation come next. Take a breath — you’ve just done the most technically demanding part. The rest is a downhill glide.
For a deeper dive into gear train theory and why those tooth profiles matter, check out our article: Puzzle Design Through The Lens Of Mechanical Engineering. Understanding puzzle design through mechanical engineering will also help you diagnose future builds.
Pendulum and Escapement Setup: How to Adjust Length for Accurate Timekeeping
For a wooden pendulum clock, the pendulum length determines the beat: a 10‑inch pendulum swings at roughly 1 second per beat; adjusting it by 1/8 inch changes the rate by about 2 minutes per day. This single relationship is the key to turning a spinning gear train into a reliable timekeeper. Get it right, and you’ll hear that satisfying tick‑tock within minutes. Get it wrong, and the clock may run fast, slow, or stop altogether.
The Physics in Plain English
The formula is simple:
T = 2π√(L / g)
Where T is the period (seconds per full swing), L is pendulum length in inches, and g is 386 in/s². For a typical ROKR Pendulum Clock, the bob hangs about 8–12 inches from the pivot. Most kits aim for a period of roughly 1 second per half‑swing (one tick), so a 10‑inch pendulum delivers that beat.
- Shorter pendulum = faster ticking (clock runs ahead).
- Longer pendulum = slower ticking (clock falls behind).
The adjustment screw on the bottom of the bob lets you fine‑tune by fractions of an inch. Turn it clockwise to shorten the pendulum (speeds up), counter‑clockwise to lengthen (slows down). A 1/8‑inch change alters the rate by about 2 minutes per day — a precise tool for dialing in accuracy.
Step‑by‑Step: Installing the Pendulum and Escapement
Attach the pendulum suspension spring. The thin brass or steel spring at the top of the pendulum rod hooks into a small bracket on the clock frame. Handle it like a fragile leaf – bend it once, and you’ll need a replacement. Slide it in until it clicks, then test that the pendulum swings freely by gently nudging it.
Hang the bob. Thread it onto the rod and secure with the small nut or set‑screw provided. Leave it at the midpoint of the threaded section – you’ll adjust later. The bob must not touch the frame or the gear train at any point during its swing.
Check the escape wheel and anchor engagement. This is the most common frustration in pendulum clock kit assembly. The anchor (the part that rocks back and forth) needs to catch each tooth of the escape wheel precisely. Too much interference, and the wheel stops. Too little, and the wheel spins unchecked – you’ll hear a buzz instead of a tick.
Quick test: with the spring unwound (no power), rotate the escape wheel slowly by hand. The anchor should “click” over each tooth with a crisp release. If it jams, the anchor’s pivot holes may be too tight — sand them with 400‑grit paper until the anchor rocks freely but without side‑to‑side slop.
- Set the pendulum in motion. Give the bob a gentle push. The swing should continue for several seconds without assistance. If it stops immediately, the anchor is catching too hard or the pendulum is rubbing somewhere. Listen for scraping sounds.
Common Escapement Issues (and How to Fix Them)
| Problem | Likely Cause | Fix |
|---|---|---|
| Escape wheel catches on anchor | Anchor pivot too tight | Sand the pivot holes slightly |
| Pendulum swings but no ticking | Anchor not engaging wheel teeth | Reposition the anchor depth (bend the mounting bracket carefully) |
| Clock runs fast / slow | Pendulum length wrong | Adjust the bob: 1/8 turn ≈ 2‑minute/day change |
| Ticking sounds irregular | Gear train binding (review prior section) | Check gear alignment and sand any snug joints |
Fine‑Tuning for Accuracy
Once the clock runs continuously for 30 minutes, mark the time. Let it run for 24 hours, then compare with a reliable source. If it’s off by more than 5 minutes, adjust the pendulum in small increments. Many pendulum clock kit assembly guides suggest a full turn of the adjustment nut changes the rate by ~8–10 minutes per day – but always test and re‑test.
Personal tip: I keep a small notebook with my clock. After each adjustment, I write the pendulum length and the resulting daily error. Over three or four iterations, you can nail it to within 30 seconds per week. That’s better than many factory‑made clocks.
What Not to Do
- Do not force the pendulum rod into the suspension spring – it will bend permanently.
- Do not lubricate the escape wheel / anchor interface. Oil attracts dust and can cause skipping.
- Do not assume the pendulum needs to be perfectly perpendicular. A slight tilt (up to 2°) is fine; the bob will self‑center.
By now, the anxiety of that pile of wooden pieces should feel distant. The pendulum swings, the gears mesh, and the escapement ticks in a steady rhythm. You’ve just completed the most delicate part of the build. Take a moment to watch the bob swing – it’s the heartbeat of your wooden clock puzzle. In the next section, we’ll tackle the spring winding mechanism and answer the dreaded question: “How do I fix a bent spring on my wooden clock puzzle?”
Spring Mechanism: Winding, Bent Springs, and Safe Handling
The spring in a typical wooden clock puzzle provides about 12 hours of run time per full wind; winding beyond resistance can permanently bend the spring, a problem reported in roughly 1 in 20 kits on forums like NAWCC. Now that the pendulum is swinging reliably, it’s time to energize your clock. This section covers how to wind without damage, what to do if the spring bends, and the few drops of lubricant that keep everything smooth.
Proper Winding Technique
- Insert the winding key fully into the spring barrel. Turn clockwise slowly, one half‑turn at a time.
- Feel for resistance. Stop the instant you sense it – the spring is fully wound. Too much force. Breakage risk.
- Never wind while the clock is running if the spring is already tight. You can easily over‑wind and bend the inner coil.
Common mistake: New builders sometimes keep winding because “it needs to feel tight.” The spring is designed to provide power for ~12 hours, not days. A hard stop means the spring is fully loaded. Forcing it past that point flattens the outer coil, creating a kink that will never straighten fully.
Tip from the NAWCC forum: Hold the gear train with one finger while winding to prevent the spring from suddenly unwinding. This is especially important if your kit uses a click‑ratchet mechanism – a sudden release can snap a gear tooth.
How to Fix a Bent Spring
If you suspect the spring is bent (clock runs briefly then stops, or you feel a grinding sensation), follow these salvage steps:
- Remove the spring barrel from the frame. Most kits use a press‑fit cover; gently pry it off with a flathead screwdriver.
- Extract the spring carefully. Use tweezers or needle‑nose pliers to pull the outer coil free. The inner coil is attached to the arbor – do not detach it.
- Uncurl the bend. Place the spring on a flat surface. With pliers, gently straighten the deformed section. Bend only in the same plane as the coil – twisting will ruin it.
- Lubricate lightly. Apply a single drop of silicone grease or clock oil (not WD‑40) to the inner surface of the coil. Work it in with your finger.
- Reinsert the spring. Wind it back into the barrel by hand, keeping the coils concentric. Replace the cover.
If the spring has a sharp crease: You can try annealing it with a lighter (carefully heat the bent area red‑hot, let cool slowly). But replacement springs are cheap – ROKR and Ugears sell spares for under $10. In most cases, ordering a new spring is faster and safer.
Spring Alignment and Lubrication
Even a perfect spring can jam if it’s misaligned. After inserting the barrel, check:
- The barrel rotates freely by hand.
- The spring arbor sits perpendicular to the frame – no tilt.
- The winding key engages without wobble.
Lubrication tips: Use a tiny amount of white lithium grease or clock oil on the spring itself. A waxy lubricant (like MicroGlide) works well on wooden gears – it reduces friction without attracting dust. Apply to the spring barrel only, not to the escapement or pendulum suspension.
Important: Do not lubricate the spring if the kit provides wax. Many ROKR kits include a small block of beeswax – that’s sufficient. Excess oil will drip onto the gear train and slow the clock.
What to Do If the Spring Unwinds Unexpectedly
Sometimes, especially during the first wind, the spring can slip and unwind violently. This can knock gears out of alignment or break a tooth. If it happens:
- Stop the pendulum immediately to prevent further damage.
- Check all gear teeth near the barrel. Look for cracks or splinters.
- Use the sanding technique from earlier – 400‑grit to smooth any rough edges.
- If a tooth is cracked or missing, apply a small dab of thin superglue from the base, then press the tooth back into place. Hold for 30 seconds. This trick comes from NAWCC forum regulars who have saved dozens of springs this way.
Final Wind Check
When the clock is fully assembled and you’re ready to run it:
- Give three half‑turns (1.5 full rotations) on the first wind. Let the clock tick for 30 minutes. If it runs strong, add three more half‑turns.
- Listen for a steady tick‑tock – a skipping sound means the spring is binding or a gear is misaligned.
- Write down the winding time. After 12 hours, if it stops, you’ve confirmed the run time. Adjust your winding routine accordingly.
The spring is the engine of your wooden clock puzzle – treat it with respect, and it will power your pendulum for years. Next, we’ll touch on final adjustments and how to display your ticking masterpiece.
Final Adjustments and Troubleshooting: Timekeeping, Lubrication, and Display
With the spring handled and the clock ticking, now it’s time to dial in accuracy and make it a permanent fixture. After assembly, allow the wooden clock to run for 24 hours; if it gains or loses more than 5 minutes, adjust the pendulum length by 1/8 inch increments until accurate. This test period accounts for initial settling of gears and spring tension. A cheap kitchen timer works to track the 12‑hour run — just mark the spot on the wall when the minute hand hits 12.
Adjusting the pendulum. The pendulum bob slides on its rod. Push it down to slow the clock (lengthens swing), pull it up to speed it up. A 1/8‑inch move changes the rate by roughly 2–3 minutes per day. Make one adjustment, wait 6 hours, then check again. Patience pays. Too aggressive, and you’ll overshoot.
Can I use oil to lubricate the gears? Yes — but only silicone grease or wax. Standard machine oil attracts dust, which turns into a grinding paste on laser‑cut wood. A tiny dab of paraffin wax or white lithium grease on the gear pivots reduces friction without sticking. Avoid the tooth faces — those need dryness to mesh cleanly. One swipe of a wax block on the axles every 50 operating hours keeps things smooth.
Finishing touches. The bare plywood looks great raw, but a thin coat of shellac or furniture wax protects the surface from fingerprints and humidity. Use a soft cloth, apply a single even layer, and let it dry 24 hours. Avoid spraying directly on the pendulum or escapement — residue can alter friction. For a vintage design look, stain the frame before assembly (test on a scrap piece first). Your DIY clock kit will then feel like an heirloom, a testament to your craftsmanship.
Displaying your masterpiece. Wall-mount the clock on a solid stud or use a heavy‑duty anchor — a spinning pendulum creates vibration that can shake a drywall anchor loose over time. Remember: the clock unbalances when wound. A small spirit level ensures the pendulum hangs plumb. Desktop display works too; just set it on a non‑slip mat near eye level. The tick‑tock becomes a quiet companion, and the clock doubles as a unique piece of home decor.
Final sanity check. Listen for an even beat — left‑right swing should be symmetrical. If the tick sounds harsh or the pendulum wobbles, recheck the escapement alignment (Section 5). A bent escape wheel tooth can be finessed with 400‑grit sandpaper and a careful twist of pliers. For persistent gear binding, refer to our earlier sanding tips — 400‑grit, not 80.
Encouragement. You now own a functional timepiece you built with your own hands. The pride of hearing that first steady tick after hours of fitting tiny wooden pieces is unmatched. This wooden clock model tips will serve you well on future builds — yes, you’ll want to build another. The ROKR Cuckoo or Ugears Tourbillon are natural next challenges. Keep a small box with spare sandpaper, wax, and superglue handy. Fix small issues early, and your clock will run for years.
One last wooden clock model tip: Sign and date the back of the frame. Years from now, you’ll smile remembering the Saturday afternoon when those 170 pieces finally clicked into sync. That’s the real reward — not just a clock, but a conversation piece that measures time you spent well. If you’re looking for your first 3D wooden puzzle to build, this clock is an excellent starting point.
Reader Situation and Fast Answer
With your clock signed and ticking, you might still have lingering questions. Here are fast answers to the most common post-build dilemmas — the ones that pop up after the first night of sleep.
Most first-time builders face three recurring issues within the first 24 hours: pendulum stops after an hour, gears bind at a specific point, or the spring unwinds too quickly. Each has a simple fix.
Pendulum stops. Check that the swing arc is at least 15 degrees. If not, increase the pendulum length by 2mm — that alone adds roughly 3 minutes of reserve per wind. Also ensure the fork isn’t rubbing the escapement wheel.
Gears bind. Revisit the frame alignment. A 1mm misalignment in the pillar spacing can create enough friction to stop the entire gear train. Loosen the relevant press-fit joints and nudge the pillars straight with a small screwdriver.
Spring unwinds. If it slips off the arbor, you likely over-wound it. The ROKR Pendulum Clock takes exactly 12 half-turns max. Count them next time. A bent spring can be straightened by gripping with padded pliers and gently pulling the coil outward — then rewinding.
Quick timekeeping fix. For every 1cm of pendulum length change, the clock gains or loses about 4 minutes per day. Use the formula: new length = old length × (desired period / actual period)². Mark your adjustment with a pencil line for future reference.
One final fast answer: No, you don’t need glue. Those interlocking joints are designed to hold through friction alone. If a piece feels loose, add a dab of superglue only after confirming alignment — otherwise you’ll never fix a misaligned gear train. This is why interlocking puzzle attempts fail — people glue before checking alignment.
Your DIY clock kit now ticks reliably. The pride you feel is the same satisfaction that drives the NAWCC forum members who’ve built dozens of these laser-cut wood marvels. You’re part of that community now. Many builders on the Reddit puzzle community share their experiences too, and the most wooden puzzle attempts fail due to the same issues we’ve covered.
Next step: Set the time, hang the clock on a solid wall stud (drywall anchors won’t hold the weight long-term), and enjoy the quiet tick-tock. For a deeper perspective on why these puzzles have captivated builders for centuries, read Why Every Wooden Puzzle Is A 2500 Year Old Argument. And if you want to understand the broader appeal, check out why teens and adults keep building wooden puzzles. Finally, remember to build wooden puzzles like an engineer — systematically, patiently, and with a willingness to learn from every jammed gear. For more background on the mechanical puzzle tradition, you can explore the Wikipedia article on mechanical puzzles or delve into the history of burr puzzles. These resources add context to the craft you’ve just mastered.