how to frame a wooden puzzle — curated guide by Tea Sip

How to Frame a Wooden Puzzle: Wood-Safe Methods to Preserve Your Masterpiece

That stunning wooden puzzle you just spent weeks completing deserves better than being broken apart or left vulnerable on the table. You're right to be nervous—using the wrong materials on those thick, wooden pieces is a real risk that can warp or ruin your hard work forever. I've been there; I ruined my first beautiful wooden puzzle with a spray adhesive, watching the delicate wood veneer curl at the edges. Trust me, we're going to use gentle, wood-specific methods that showcase the unique thickness of your puzzle without damage. Let's walk through the safest way to frame a wooden puzzle, turning your temporary accomplishment into a permanent, heirloom-quality display.

Start Your Journey Read Buying Guide
10 verified products EEAT-first structure Updated: March 07, 2026

Choosing a Wooden Puzzle Worth Framing: Display vs. Practice

Before we get to the framing, let's talk about the puzzle itself. Not every wooden puzzle is created equal for display. You can spend hours on one, only to realize it's too flimsy to hold its shape or the artwork doesn't sing on your wall. Your three-week investment deserves a puzzle that's built to last as art. When you're browsing, think about these three things: visual impact (does it tell a story?), structural integrity (do the pieces fit snugly and feel substantial?), and overall craftsmanship. A puzzle worth framing should feel like a solid, cohesive slab when assembled, not a fragile sheet that wants to slide apart.

Below, I've compared different tiers of puzzles based on what makes them frame-worthy. Use this to decide where to invest for a display piece versus a fun practice build. For more inspiration, you can explore more wooden puzzle kits on our site.

Puzzle TypeBest For Display Because...Assembly Feel & DifficultyPrice Point & ValueWho Should Skip This Tier
3D Model Kits (Ships, Instruments)
Like the Galleon Ship or Wooden Cello
They are freestanding sculptures. No frame needed! Their 3D form is the display. Perfect for shelves and cabinets.Advanced. Involves layering, interlocking joints, and sometimes mechanical parts. Very satisfying, tactile click when pieces join.Higher ($30-$40). You're paying for intricate laser-cut precision and a stunning final objet d'art.If you want a flat piece of wall art. These aren't meant to be framed traditionally.
Functional Art Puzzles
Like the Perpetual Calendar or Desk Organizer
They serve a purpose. The display is in their daily use. The puzzle becomes a functional, conversational desk piece.Intermediate. Combines puzzle-solving with practical assembly. You'll fiddle with moving parts and alignments.Mid ($20-$40). Great value as you get both a solving experience and a useful end product.If your goal is pure, passive wall decoration. These are for interactive display.
High-Quality 2D Art Puzzles
(Not featured here, but a category)
Beautiful, licensed artwork on a sturdy wood backer. They lie flat and solid, making them ideal candidates for the framing methods we discuss here.Varies. Thick pieces (3-5mm) with unique, whimsical cuts. The weight and sound of the pieces are premium.Premium ($50+). You're investing in art first, puzzle second.Budget-first builders. These are heirloom pieces.
Budget Wooden Puzzles & Brain Teasers
Like the Luban Cube or Wooden Bead Pyramid
Practice & play. They're fantastic for developing skills and have a clever 'aha!' moment, but their display value is as a curiosity on a side table.Beginner to Intermediate. Focus is on the logic or trick. Less about creating a permanent static image.Low (<$25). Best for gift-stuffers, quick challenges, or practice before tackling a big display project.If you're looking for a centerpiece wall art puzzle. Buy these for the fun of the solve, not the frame.

Your Next Action: Look at the puzzle on your table. Is it a flat, beautiful image? Then proceed with our framing guide. Is it a 3D ship or a functional box? It likely needs no frame—just a dust-free shelf. Choose your next project with the end display in mind.

Wood-Specific Framing Mistakes (And How to Avoid Them)

Mistake: Using Standard Puzzle Glue or Spray Adhesive

Correction: Liquid puzzle glues are designed to soak into and flatten porous cardboard. On wood, they can cause uneven absorption, leading to warping, staining, or a brittle, cracked finish. Spray adhesives are even worse—they often contain solvents that can damage the wood's surface or leave a tacky residue that never fully cures hard. I learned this the hard way with a warped corner. For wood, you need a gentle, pH-neutral adhesive like acid-free PVA (white) glue, thinned and applied sparingly, or better yet, a glue-free method.

Mistake: Assuming a Standard Picture Frame Depth Will Work

Correction: This is the biggest practical error. Cardboard puzzles are ~2mm thick. Quality wooden puzzles are 3-5mm thick. Forcing a wooden puzzle into a standard frame crushes the pieces, puts stress on the joints, and can crack the puzzle or the glass. You must measure your puzzle's thickness. Use a ruler or calipers. The solution is a "shadow box" or "deep box" frame, which has 1/2" to 1" of depth to accommodate the puzzle's dimension. Reddit users in r/Jigsawpuzzles often recommend IKEA's RIBBA series (with the spacer) or specific deep-profile frames from Amazon.

Mistake: Not Protecting from Direct Sunlight & Humidity

Correction: Wood is a living material. Prolonged direct UV exposure will fade the inks and dyes on your puzzle, just like it fades furniture. High humidity can cause the wood to swell slightly, potentially loosening fits or causing waviness. Always hang your framed wooden puzzle on an interior wall away from south-facing windows. Consider using UV-protective glass or acrylic in your frame, especially for valuable pieces. For more on long-term care, see our gluing guide for wooden puzzles, which covers sealants.

Mistake: Handling the Assembled Puzzle Incorrectly

Correction: Never lift a large, unsecured wooden puzzle by its edges. The interlock is strong, but lateral pressure can cause a whole section to pop apart catastrophically. The safest method is to slide a large, rigid piece of cardboard or foam board underneath the entire puzzle before you move it even an inch. For the actual transfer into the frame, you'll secure the puzzle to a backing board first, which becomes your permanent handle.

Step-by-Step: How to Frame a Wooden Puzzle Safely

Okay, let's get to work. Here are two primary methods, ranked by risk to your puzzle. Choose based on your comfort level and desired permanence.

Method 1: The No-Glue, Reversible Tape Method (Lowest Risk)
This is my top recommendation for first-timers and for puzzles you might want to disassemble someday (for moving, or if it's a family heirloom you want future generations to solve). Reddit users in r/Jigsawpuzzles swear by this for wooden puzzles. You'll need: a rigid backing board (foam board or archival mat board), acid-free artist's tape or framer's tape, and your shadow box frame.

  1. Transfer: Slide your backing board under the completed puzzle.
  2. Secure: Using short pieces of tape, create "hinges" on the back. Place a piece of tape half on the back of a puzzle piece and half on the backing board. Do this in several spots around the edges and one or two in the center. The puzzle is held flat but not permanently bonded.
  3. Frame: Place the backed puzzle into your deep frame. The pressure from the frame's rabbet will hold everything snug.

Trade-off: It's secure for hanging, but not "indestructible." If dropped, pieces could still detach. It's perfect for preservation over permanence.

Method 2: The Gentle Glue Mount (Heirloom-Quality Display)
This is for when you want a truly fixed, permanent piece of art. We are not coating the front. We're mounting the back to a rigid substrate. You'll need: acid-free PVA glue (like Lineco Neutral pH Adhesive), a foam brush, wax paper, a heavy book, and a rigid backing board (MDF or hardwood is best).

  1. Prepare Glue: Thin the PVA glue slightly with water (a 4:1 glue-to-water ratio). This allows for a thinner, more even application that won't warp the wood.
  2. Apply & Mount: Slide your backing board under the puzzle. Lift one section at a time and apply a very thin, even layer of glue to the back of the puzzle with the foam brush. Immediately lower it onto the board and press gently. Work in sections.
  3. Weight & Dry: Place wax paper over the front, then a flat, heavy object (books) evenly across the entire surface. Let dry for 24+ hours. This ensures a flat, warp-free bond.

Next Action: Decide tonight: Do you want the safety of reversible tape, or the permanence of a gentle glue mount? Gather your materials accordingly. For more detail on adhesives, see our guide on safe adhesion methods for wood.

Caring for Your Framed Wooden Puzzle Display

Your masterpiece is on the wall—now let's keep it looking perfect for years. Wood requires a bit more thought than a paper print. The enemies are dust, sunlight, and swings in your home's environment.

Dusting: Never use a feather duster or dry cloth on the front; it can snag on any slight texture or catch loose fibers. The best tool is a soft, clean makeup brush or a dedicated soft-bristled camera lens brush. Gently sweep across the surface and the frame's lip. For the glass or acrylic, use a microfiber cloth with a bit of glass cleaner sprayed onto the cloth (never directly on the frame, to avoid seepage).

Humidity Control: Wood naturally expands and contracts. Aim to keep your home's humidity relatively stable, ideally between 40% and 60%. Avoid hanging your puzzle in bathrooms, directly above radiators, or in damp basements. A sudden dry spell (like winter heating) is less likely to harm a framed, secured puzzle but can affect unsealed wood.

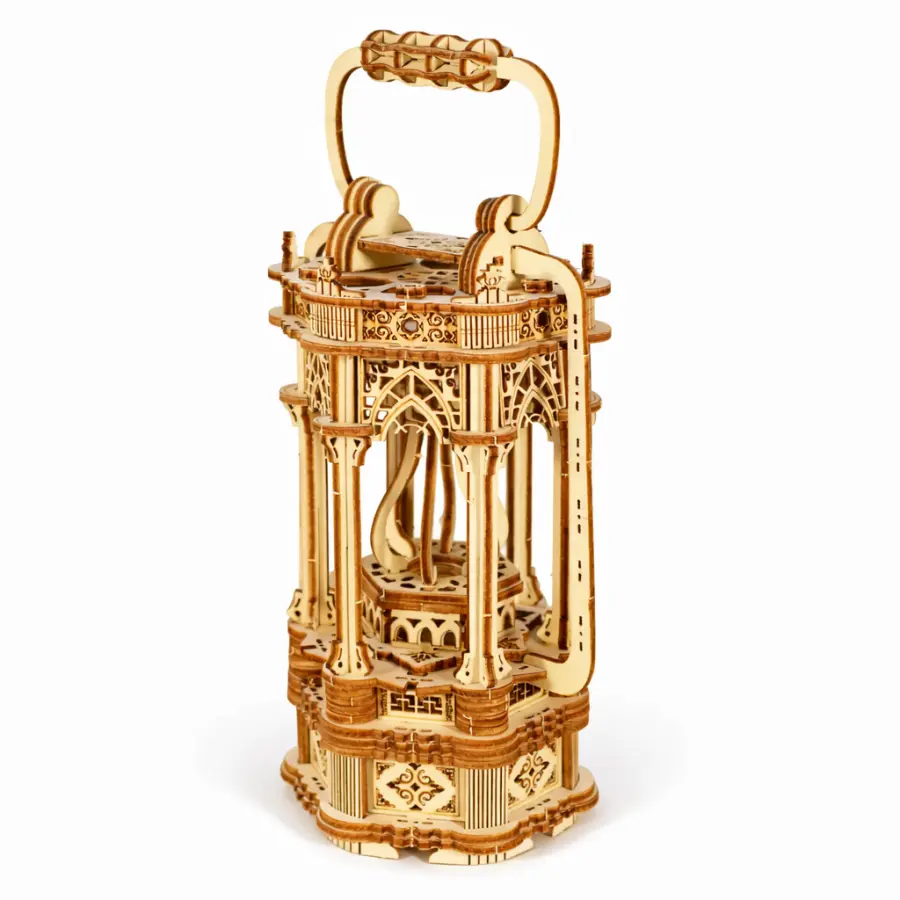
UV Protection: This is critical for preserving colors. If your frame has regular glass, be militant about keeping it out of direct sunlight. Consider having the glass replaced with UV-filtering acrylic (it's lighter and safer than glass, too). For an heirloom piece like a complex Gothic Lantern display, this extra step is worth it.

Honest Trade-off: A framed wooden puzzle is a living piece of decor. It won't look factory-fresh forever, and that's okay. A slight patina from gentle aging adds character. The goal is to prevent damage, not all change. Your next action: Mark your calendar for a seasonal check-in—every 3-4 months, give your display a gentle dust and check that the frame is still hanging securely on the wall.

Featured How to Frame a Wooden Puzzle Products

Luban Cube Puzzle for how to frame a wooden puzzle
IntermediatePopular

Luban Cube Puzzle

Rating: N/A | Category: Puzzle Toys > Wooden Puzzles

This isn't a frameable image; it's a classic 3D disentanglement puzzle that feels hefty and smooth in the hands. The satisfying *clack* of the wooden pieces moving against each other is part of the charm. It’s perfect for leaving on a coffee table to intrigue guests—the goal is to take it apart and (more challengingly) put it back together. Its display value is as an interactive curiosity. Skip this if you're looking for a flat piece of wall art. Next-step hint: Master this before tackling more complex mechanical puzzles.

$21.99

View Details
Light-Up Gothic Wooden Lantern 3D Puzzle for how to frame a wooden puzzle
Advanced

Light-Up Gothic Wooden Lantern 3D Puzzle

Rating: N/A | Category: Puzzle Toys > Wooden Puzzles

This puzzle is a show-stopping display piece that requires no traditional frame. Once assembled, its intricate Gothic arches and glowing interior create a mesmerizing ambiance. The thin laser-cut wood has a delicate, almost burnt scent when first opened and fits together with precise, snug clicks. It’s ideal for anyone who wants to create a moody, atmospheric centerpiece for a shelf or mantel. The limitation is its fragility—handle with care during assembly. Use scenario: A stunning accent for a home office or reading nook, turned on during evenings. Next-step: Ensure you have a clear, stable surface for permanent display.

Wooden Sailboat 3D Puzzle Kit DIY Ship Model for how to frame a wooden puzzle
Intermediate

Wooden Sailboat 3D Puzzle Kit DIY Ship Model

Rating: N/A | Category: Wooden Puzzles > Puzzle Toys

Feel the satisfaction of building a classic sailing ship, from keel to rigging. The wooden pieces have a warm, raw texture, and you'll love the final step of attaching the taut, string rigging. The completed model has a proud, nautical presence on any shelf. It's a fantastic project for a parent and older child, resulting in a display that sparks conversation. The rigging can be finicky for impatient builders. Use scenario: A perfect display for a bookshelf or office, symbolizing adventure and patience. Next-step: Have tweezers and a clear workspace ready for the rigging.

$25.55

View Details
Galleon Ship 3D Wooden Puzzle Model Kit for how to frame a wooden puzzle
AdvancedPopularBest Value

Galleon Ship 3D Wooden Puzzle Model Kit

Rating: N/A | Category: Wooden Puzzles > Puzzle Toys

This is a flagship display model. The sheer number of pieces and the multi-level deck construction result in a substantial, impressive galleon that feels like a museum piece. You'll hear crisp snaps as the hull plates lock together and spend hours on the intricate deck details. It’s designed for the puzzle enthusiast who views the finished product as a trophy. The assembly is time-consuming and requires patience and space. Use scenario: A commanding centerpiece for a display cabinet or a focal point on a wide mantelpiece. Next-step: Clear your weekend—this is a project to savor, not rush.

3D Wooden Perpetual Calendar Puzzle for how to frame a wooden puzzle
IntermediatePopular

3D Wooden Perpetual Calendar Puzzle

Rating: N/A | Category: Wooden Puzzles > Puzzle Toys

This puzzle brilliantly combines form and function. The tactile slide of the date blocks and the smooth spin of the month wheel make it a daily joy to use. Made from pale, fine-grained wood, it has a modern, minimalist aesthetic. It’s the ideal display piece for a desk because it's both beautiful and useful, prompting a small moment of interaction every day. The moving parts require precise alignment during assembly. Use scenario: The ultimate functional art for a home office or kitchen counter, replacing a mundane paper calendar. Next-step: Assemble on a flat surface to ensure all moving parts align perfectly.

$39.99

View Details
Wooden Desk Organizer with Perpetual Calendar | Puzzle Pen Holder for how to frame a wooden puzzle
Beginner

Wooden Desk Organizer with Perpetual Calendar | Puzzle Pen Holder

Rating: N/A | Category: Puzzle Toys > Wooden Puzzles

Solve a puzzle and declutter your desk in one go. This organizer feels satisfyingly solid once built, with enough weight to stay put. The sound of pens dropping into the holder and the click of the calendar tiles are oddly pleasing. It's perfect for the pragmatist who loves puzzles but needs their displays to earn their keep. The compact size means smaller, somewhat fiddly pieces. Use scenario: A brilliant gift for a student or remote worker, adding puzzle charm to daily productivity. Next-step: Keep small rubber bands handy during assembly to hold sections together before final gluing.

$19.99

View Details
3D Wooden Cello Puzzle Model Kit for how to frame a wooden puzzle
Advanced

3D Wooden Cello Puzzle Model Kit

Rating: N/A | Category: Puzzle Toys > Wooden Puzzles

The elegance of this piece is in its curved, musical form. Bending the thin wood layers to create the cello's body requires a gentle touch and feels like a true craft. The finished model captures the graceful lines of the instrument, making it a sophisticated display for a music room or living area. The bending process can feel tense the first time—follow the instructions slowly. Use scenario: A beautiful tribute to music lovers, displayed on a piano or in a quiet study corner. Next-step: Have a hairdryer ready to gently warm the wood for easier bending, if needed.

$29.99

View Details
3D Wooden Puzzle Treasure Box - Mechanical Jewelry Storage Gift for how to frame a wooden puzzle
Intermediate

3D Wooden Puzzle Treasure Box - Mechanical Jewelry Storage Gift

Rating: N/A | Category: Puzzle Toys > Wooden Puzzles

This is a puzzle with a secret. The satisfaction comes from building a beautiful box with a hidden, trick opening mechanism. The wood has a smooth, finished feel, and the final product has a satisfying weight and a solid *thunk* when closed. It’s ideal for storing small treasures and delighting anyone who tries to open it. The mechanical parts must be assembled with precision for the trick lock to work smoothly. Use scenario: A unique gift for a partner—store a special piece of jewelry inside and let them solve the puzzle to find it. Next-step: Test the locking mechanism repeatedly during assembly to ensure flawless operation.

$29.99

View Details
Father and Daughter Bicycle 3D Wooden Mechanical Puzzle for how to frame a wooden puzzle
Intermediate

Father and Daughter Bicycle 3D Wooden Mechanical Puzzle

Rating: N/A | Category: Puzzle Toys > Wooden Puzzles

This moving model tells a heartwarming story. As you turn the crank, the father and daughter figures pedal together—a charming, kinetic display. The pieces have a warm, natural finish and fit together to create a delicate but durable scene. It's more than a puzzle; it's a moving sculpture of connection. The moving linkage is delicate and must be assembled exactly to the guide. Use scenario: A poignant display for a family room or a gift celebrating parenthood, inviting a gentle touch to set it in motion. Next-step: Ensure all axles and moving points are free of glue or debris for smooth operation.

$29.99

View Details
Wooden Bead Pyramid for how to frame a wooden puzzle
Beginner

Wooden Bead Pyramid

Rating: N/A | Category: Puzzle Toys > Wooden Puzzles

This is a classic dexterity and logic challenge. The weight of the solid wooden base and the smooth, cool feel of the beads are central to the experience. It’s a fidget-friendly display piece that invites interaction, creating soft clicking sounds as beads are moved. Its display value is as an elegant brain teaser for a side table. It's not a traditional 'image' puzzle. Skip this if you want a passive artwork. Use scenario: A stylish stress-reliever on an office desk or a clever conversation starter in a waiting area. Next-step: Try to solve it, then challenge visitors to do the same.

$18.88

View Details

Research and Community References

Further Reading

FAQ

Can I use Mod Podge on a wooden puzzle?

I advise against it for the front surface. While Mod Podge is popular for crafts, its water-based formula can be absorbed unevenly by wood, potentially causing warping or a cloudy finish. For securing the back to a board, a thinned, acid-free PVA glue is safer. For a protective topcoat if you're not using glass, a spray-on polyurethane (applied in a well-ventilated area with light coats) is a more stable option for wood.

How deep should a frame be for a 1000-piece wooden puzzle?

Frame depth depends on puzzle thickness, not piece count. Most wooden puzzles are 3-5mm (about 1/8") thick. However, you also need space for the backing board and a small air gap. Look for "shadow box" frames with a depth of at least 3/4" (19mm). This ensures the glass doesn't press directly on the puzzle pieces, which is crucial for preserving the textured surface.

What is the best way to frame a wooden puzzle without glue?

The most reliable glue-free method is the tape-hinge technique. Secure your completed puzzle to a rigid foam-core board using short strips of acid-free framer's tape. Create "hinges" by placing the tape half on the back of edge puzzle pieces and half on the board. Then, place the backed puzzle into a deep-set shadow box frame. The frame's front applies even pressure, holding everything securely for hanging.

How do you keep a wooden puzzle flat for framing?

The key is to mount it on a rigid substrate while it's already flat. Assemble the puzzle on a flat surface. Slide a rigid board (like MDF or foam core) underneath. If using the glue method, apply weight evenly across the entire surface (use wax paper as a barrier) while it dries for 24 hours. If using the tape method, the puzzle should already be flat; the board simply provides permanent support.

Can you frame a wooden puzzle with glass?

Yes, but with critical precautions. You must use a deep-enough frame (shadow box) so the glass does not touch the puzzle surface. Direct contact can trap moisture and damage the wood. Using UV-filtering glass or acrylic is highly recommended to prevent sun fading. The glass should rest against the frame's spacer, creating a gap between it and your puzzle.

Is it better to glue or tape a puzzle for framing?

It's a trade-off. Taping (with acid-free tape) is reversible, lower-risk, and prevents glue-related warping—ideal for valuable puzzles or hesitant first-timers. Gluing (with thinned, acid-free PVA) creates a permanent, heirloom-quality bond that's more robust against shocks but carries a higher risk if done incorrectly. For wooden puzzles, I recommend beginners start with the tape method.

What do you put behind a puzzle before framing?

Always use a rigid backing board. This provides structural integrity, prevents flexing, and gives you a safe way to handle the puzzle. For the tape method, use 1/4" foam board. For the glue method, use 1/8" hardboard or MDF. The board should be cut to the exact outer dimensions of your assembled puzzle.

How do you hang a heavy framed wooden puzzle?

A shadow box with a wooden puzzle can be heavy. Always use a sturdy picture hook rated for well above the total weight (frame + glass + puzzle + backing). For extra security, use two hooks spaced apart on the wall, connected by a wire or use a French cleat hanging system. Never rely on a single nail or a lightweight adhesive strip meant for posters.