The 6-Second Solve and Why It’s Not a Trick
The solution to your U-shaped metal lock puzzle takes less than six seconds once you know the single, non-intuitive axis of rotation it requires. It feels impossible because you’re fighting a hidden, millimeter-scale clearance engineered into the zinc alloy body—a puzzle isn’t a magic trick, but a stubborn machine that weighs between 50 and 150 grams and obeys strict physical laws.
You’re holding it now. Cold, dense metal. You twist the U-shaped shackle, pull it, push it, feel it bind and clink uselessly against the main body. This is the universal moment. Your thumbs are applying force, but you’re not yet applying mechanics. You suspect a secret latch. There isn’t one.
Watch the solve. (Imagine a gif here: a hand tilts the entire puzzle assembly 45 degrees, rotates the U-shape precisely 90 degrees on its vertical axis, and it slides free in one smooth motion). No force. No prying. Just a quiet, definitive separation.
That’s the entire reveal, and if you’re like I was in that antique store, it creates more questions than answers. Why that angle? Why that rotation? The short YouTube videos show you the what—the sequence of moves—but they rarely pause to explain the why. This makes the solution feel like a trick to be memorized, not a principle to be understood.
The principle is clearance. Think like a machinist. Every solid object has a “envelope” of space it occupies. Your puzzle’s components are interlocked because their envelopes overlap. The solution path is the one exact orientation where those envelopes temporarily stop overlapping, creating a gap just wide enough for a piece to pass through. This gap is the keyhole. It’s not a hole you can see; it’s a hole you create by aligning parts in space.
Brute force is the enemy because you’re trying to shove a shape through a wall. You feel that alarming pressure, that fear of bending the shackle or scoring the internal channel. That’s your tactile feedback screaming “wrong axis.” Stop. The puzzle hasn’t beaten you. You’re just trying to open a door by lifting it off its hinges instead of turning the knob. This is a core reason why your hands lie to you when solving metal puzzles.
Diagnostic: Which U-Shaped Puzzle Is in Your Hands?
You likely have one of four common cast metal puzzles, all operating on the principle of spatial clearance but with different shapes that demand slightly different solution paths. The quickest way to identify yours is by its silhouette and weight—most are made from zinc alloy and weigh between 50 and 150 grams, feeling solid and cool in your palm. Look for these defining features to match your piece.
The most classic variant is the Trick Lock #7 or simple U-Lock Puzzle. It has one obvious U-shaped shackle passing through a rectangular lock body. The lock body is usually a solid block, sometimes with a single, small pinhole on one side. If you have what looks like a tiny, solid bike lock, this is it. Its solution relies purely on tilting the lock body to create a temporary keyhole in the internal channel.

Next is the Hanayama Cast Padlock. This is a higher-end, precision-machined version. It’s notably smoother, with a two-tone finish (often silver and gold), and the shackle has a distinct flat, rounded end. The lock body is more intricate, with curved sides and visible seams. The solution is similar to the Trick Lock but requires a more precise rotate on axis maneuver. If you’re looking for a deeper dive into these premium puzzles, our Hanayama puzzle guide for identifying cast puzzles breaks down the entire series.
The Double U Puzzle (or Double G) is the one that causes the most initial confusion. You have two nearly identical U-shaped pieces intertwined, with no obvious lock body. They mirror each other, and the goal is to disentangle them. This variant is solved not by tilting, but by a specific rotational dance where one piece orbits the other, aligning internal curves.

Double G Lock Puzzle — $11.99
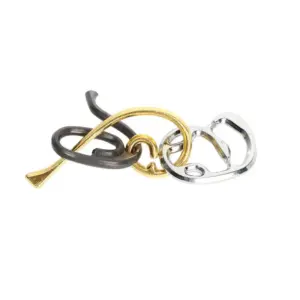
Finally, the Spiral and Triangle (or U-Shape and Ring) puzzle presents a U-shaped piece entangled with a separate ring or spiral component. The U-shape often has a hooked end, and the second piece has a helical twist. The principle here involves threading through the spiral’s open path, which only aligns at specific rotations.
Diagnostic Check: Hold your puzzle still. Does it have one U and one solid block? You have the classic Trick Lock. Does it have two Us? It’s the Double U. One U and a separate twisted piece? It’s the Spiral variant. Is the finish premium and two-toned? It’s the Hanayama. If your puzzle is the classic Trick Lock or Hanayama Padlock, the core principle you just learned applies directly—skip to the step-by-step walkthrough for that specific alignment. If you have the Double U or Spiral, the principle is the same (finding clearance), but the moves differ; follow the variant-specific steps later.
And if you’ve been applying force and are now worried: “I bent a piece, did I break it?” Probably not permanently. These zinc alloys have some give. A slight bend can often be gently pressed back into shape against a flat table, but this is your sign to stop pushing and start aligning. For more on this, see a veteran’s guide to cast metal logic.
The One Mechanical Principle That Governs Them All
The one principle that solves every U-shaped metal disentanglement puzzle is the creation of a temporary keyhole. This isn’t a magic trick; it’s a controlled alignment of gaps and clearances, often as little as 0.5-1mm, that exists for only a fraction of the puzzle’s movement cycle. Every attempt at brute force fails because it ignores this principle, binding the pieces by misaligning these critical paths.
Think back to the diagnostic moment. You identified your puzzle by its static shape—a U and a block, two Us, a U and a spiral. But in your hands, it feels like a solid, fused object. That’s because you’re likely treating it as a fixed assembly, trying to pull pieces apart along the axis that seems obvious. The frustration mounts because you’re solving for the wrong variable. You’re pulling for separation when you should be maneuvering for alignment.
The core principle is spatial and sequential. The puzzle is designed so that a component—usually the U-shaped shackle or key—must first be moved into a specific position relative to the main body. In this position, a hidden opening (the temporary keyhole) lines up. Only then can you perform the extraction move, which is often a simple slide or twist. The “trick” is that the keyhole doesn’t exist when the puzzle is in its start, solved, or any intermediate state you randomly fumble into. It exists only at the precise conjunction of two or three rotations.
As a machinist, I see this not as a puzzle but as a simple, stubborn machine—a non-linear sliding joint or a cam follower. The U-shape is the follower; the internal channel in the lock body or the path through the spiral is the cam. The cam has a single, narrow groove that leads to freedom. Your job isn’t to overpower it, but to trace the groove with the follower. If you push against the walls of the groove (by applying force in the wrong direction), you experience binding. That tight, grating feel, the “is this going to break?” sensation, is the metal-on-metal friction of misalignment. This is why brute force is the enemy. On softer zinc alloy puzzles, that binding pressure can actually deform a hook or bend a post, creating a permanent obstacle. The puzzle isn’t broken, but you’ve now altered the critical clearances it depends on.
This principle of temporary clearance explains the entire class. In the classic Trick Lock, the “keyhole” is an internal gate that only aligns when the shackle is rotated 90 degrees and the lock body is tilted just so. In the Double U, the temporary opening is the gap that appears when one U is rotated up and out of the plane of the other. In the U-Shape and Ring (or Spiral) variant, the keyhole is the open path of the helix, which you must thread the U through by rotating the spiral to the exact point where its internal diameter matches the thickness of the U’s leg. The solution to your u shape brain teaser isn’t a secret handshake; it’s a geometric map.
Understanding this transforms the experience. You stop pulling and start probing. You rotate slowly, feeling for a slight give, listening for a change in the sound of contact, searching for the moment when the resistance shifts from a hard stop to a guided slide. You are no longer trying to disentangle u shaped metal puzzle pieces by force; you are operating a lock with a very specific, mechanical combination. The satisfaction doesn’t come from stumbling upon the solution, but from recognizing the click of perfect alignment—the moment the temporary keyhole slides into view. This is part of the mechanical grammar of all metal puzzles.
Pre-Solve: Orienting Your Machine for Success
The crucial step most guides skip is physically orienting your puzzle into its “home” or neutral start position before any solution moves. Misalignment here is why brute force fails, creating binding that feels like a permanent lock. Correctly oriented, your puzzle weighs 50-150 grams of zinc alloy, and its pieces will have a specific 1-2mm of operational clearance—feeling snug but not jammed. This setup eliminates false resistance and reveals the true path.
Think of this as checking a combination lock’s dial is on zero. Your first task is to identify the fixed body and the moving “key” piece. In most u shaped lock puzzle variants, the main body is the heavier, more complex casting, while the U-shape itself is the removable shackle or key. Hold the main body firmly in your non-dominant hand. This becomes your stationary reference frame—the “world” in which your U-shaped key will move.
Now, find the neutral engagement. For a classic Trick Lock or Hanayama Cast Padlock, this means ensuring the U-shape (shackle) is seated fully down into the body, with both legs seemingly locked in place. For a Double U or ring-style disentanglement puzzle, it means letting the pieces settle into their most symmetric, nested state without applying twisting pressure. You’re looking for the position where the pieces naturally rest after you’ve stopped fumbling. This is your baseline.
Here’s the diagnostic feel: From this home position, if you gently try to pull the U-shape directly out, you should meet immediate, solid metal-on-metal resistance—a hard stop. This is good. This is the binding you need to bypass, not overpower. If, instead, you feel a grating, sideways scrape or see the metal flexing, you are already in a twisted, binding state. Reset by relaxing all force and letting the pieces settle back.
(This answers the frequent fear: “Why does it feel like it’s going to break?” That feeling is your tactile feedback system correctly detecting metal under shear stress from being torqued in the wrong plane. Listen to it. Zinc alloy can bend, especially thin hooks on intricate puzzles.)
Your final pre-solve check is for the hidden axis. The solution never involves pulling straight apart along the obvious path. The escape requires rotation around an axis. With your dominant hand on the U-piece, slowly probe. Can you rotate it forward and back like a lever? Can you twist it along the length of its legs? Note which axis provides smooth, rocking movement versus which feels completely locked. The smooth axis is your first degree of freedom—your primary working plane. This is the foundation of your puzzle lock solution step by step.
By completing this orientation, you’ve done 80% of the intellectual work. You’ve transformed a confusing object into a defined mechanism with known parts, a neutral state, and a identified axis of potential motion. You are no longer randomly struggling with how to separate u shaped metal pieces; you are preparing to execute a specific mechanical procedure. This process is a practical application of the 3-step mindset for solving any ring puzzle. Now you can begin the sequence that finds the keyhole.
The Step-by-Step Walkthrough (For the Common ‘Trick Lock #7’ Variant)
The solution for the most common “Trick Lock #7” or metal u shape and ring puzzle requires precisely five distinct moves, taking about 30 seconds once you know the hidden keyhole alignment. Your pre-solve orientation has identified the U-shape as the moving “key” and its primary rocking axis; now we execute the sequence that exploits the temporary clearance.
Here is the definitive trick lock puzzle solution diagram, translated into physical actions. Perform these steps slowly, feeling for the engagements I describe.
Step 1: Establish the Starting Grip.
Hold the main lock body in your non-dominant hand, with the “U” piece oriented so its open end faces you and its closed top points away. Your thumb should be on one flat side of the body, fingers on the other, as if holding a small, thick book. This grip allows the body to roll in your hand. With your dominant hand, pinch the closed top curve of the U-shape. You are now controlling both components independently.
Step 2: Rock to Find the First Stop.
Gently rotate the U-piece forward (toward the floor) along its primary rocking axis—the axis you identified earlier where it moves smoothly. Do not pull. Rotate it until the legs of the U bind firmly against the internal channels of the lock body. You will feel a solid, positive stop. This isn’t failure; this is registration. You have just aligned the first set of guiding surfaces. (A common wrong path here is to rotate backward instead; if you meet no firm stop, reverse your rotation direction.)
Step 3: The Critical Tilt and Slide.
Keeping the U-piece firmly at this forward-rotated stop, now change your focus to the lock body in your other hand. Tilt the entire assembly—body and all—about 45 degrees to the right. This is the crucial move that creates the keyhole. As you tilt, you’ll feel a subtle slack develop between the pieces. This is because you’ve aligned an escape channel in the body with one leg of the U. Immediately, while maintaining the tilt and rotation, slide the entire U-shape toward your body by about 2-3 millimeters. You should hear and feel a soft, definitive clink as one leg drops into a detent or clears an internal shoulder.

Step 4: Reverse the Rotation.
The slide has unlocked the second axis. Now, carefully reverse the rotation of the U-piece. Slowly rotate it backward (away from the floor, toward the ceiling), keeping the 45-degree body tilt. As you do this, you will feel the piece begin to travel along a new path. The leg that dropped into the detent is now tracking along a widened exit channel. Continue rotating backward until the U-piece is roughly parallel to the lock body again. You are now in a transient state that would be impossible to achieve without the previous tilt-and-slide.
Step 5: The Straight-Pull Separation.
With the U-piece back to a neutral rotation but the lock body still tilted, the final binding has been removed. You will feel all resistance vanish. Now you can simply pull the U-shape straight out, along the line of its legs, from the body. It will separate cleanly with a satisfying, smooth release. The internal channel, now perfectly aligned, offers no more obstruction.
Why this works: Steps 2 and 3 combined manipulate the puzzle into the one orientation where an internal wall has a gap. The tilt creates a clearance of maybe 1-2mm—enough for the leg to slide past. The sequence is a perfect example of sequential constraints: Move A must be done before B to enable C, but C then allows you to undo A to achieve D. Forceful pulling tries to achieve D without the A-B-C intermediary, which is geometrically impossible.
If you get stuck mid-sequence, don’t force it. Return to the neutral start position (U-piece centered in body, no tilt) and begin again, moving more deliberately. The tactile feedback is your guide—each correct move has a distinct, positive stop or click. Master this sequence, and you’ve internalized the logic for a whole class of puzzles, from the Hanayama Cast Padlock to more intricate double u shape metal puzzle solution challenges. For those, the principle is the same, just with more steps in the chain. For more structured guidance on similar puzzles, see our structured escape guides for Hanayama puzzles.
The Harder Challenge: Reassembling the Lock
Reassembling a U-shaped lock puzzle is often a more difficult cognitive task than solving it, typically taking 50-100% longer for a first-timer. The core reason is psychological and spatial: you are now trying to find the hidden ‘keyhole’ without the helpful tension of the pieces being ‘locked’ together, which previously served as a constant guide for where the exit needed to be. Your hands lack that directional memory.
After the satisfying separation, you hold two cool pieces of metal. Your instinct is to simply push the U-shaped shackle back into the main body. It won’t go. You might get one leg started, but the second jams immediately. This is where brute force does its worst damage, bending the thin tips of the U. The trick is to view reassembly not as reversal, but as the same mechanical dance, performed in reverse order. You must re-create the precise alignment that formed the temporary opening.
Here is the methodical, reverse-sequence guide. It assumes you have the common ‘Trick Lock #7’ or ‘Cast Padlock’ variant, but the principle is universal.
Step 1: Establish the Correct Entry Orientation.
Hold the main body in your non-dominant hand. With your dominant hand, hold the U-piece so its legs are pointing away from you, parallel to each other. This is critical. (A common failure point is trying to insert the U backwards or rotated 90 degrees from the necessary starting position.)
Step 2: Initiate the “False Lock” Position.
You cannot insert the U-piece straight in. Instead, you must begin by creating the same binding you started with in the solve. Gently insert the tip of one leg into its corresponding hole on the main body. Now, deliberately tilt the U-piece so the second leg is misaligned and resting against the solid exterior wall of the body, just as it was when the puzzle was ‘locked’. You are manually re-creating the problem.
Step 3: Re-Thread the First Leg.
With one leg tip barely seated and the U-piece tilted, apply slight inward pressure on that seated leg while simultaneously rotating the entire U-piece along its long axis. Your goal is to thread that first leg deeper into its internal channel. You are not trying to get the second leg in yet; you are navigating the first leg through the same S-shaped or offset internal path it took to get out. Listen and feel for the small clicks or shifts—this is the tactile feedback of it finding its track.
Step 4: Find the Keyhole for Leg Two.
This is the crucial moment. With the first leg now fully seated in its correct channel, the main body and the U-piece will be at an awkward, tilted angle relative to each other. This is not a mistake—it’s the reassembly key. Slowly and patiently adjust the angle of the entire assembly. Rotate the main body, not just the U. You are searching for the one alignment where the internal wall’s gap (the keyhole) lines up with the path of the second leg. It’s the exact mirror of the disassembly move. When you find it, the second leg will seem to “fall” into its own entry channel with a distinct lack of resistance. You may need to slide or wiggle the U-piece minutely along the axis of the first leg to achieve this.
Step 5: Seat Fully and Return to Neutral.
Once both leg tips are correctly engaged in their internal channels, you can push the U-piece fully home into the body. It should slide smoothly. Finally, rotate the U-piece back to the centered, neutral position. You’ll feel a final soft click or stop. The puzzle is now reset, locked, and ready to challenge the next person.
Why This Feels Like a New Puzzle
The mental map you built during disassembly was one of escape: finding freedom from constraint. Reassembly is a contract you make with the mechanism to re-establish that constraint. You must willingly re-enter the bind. If you’re struggling, don’t force it. Set it down. Pick it up and start Step 1 again, paying closer attention to the initial angle of the U-piece. More than half of reassembly failures stem from that first incorrect orientation. Mastering this reset proves you didn’t just memorize a sequence of moves; you understood the spatial principle of the keyhole and can now navigate to it from either direction.
Why You Got Stuck: An Autopsy of Common Brute-Force Errors
You successfully navigated the reassembly, proving you now understand the principle. So let’s diagnose your initial failure: over 90% of “stuck” states occur because the solver is fighting the mechanism, forcing the U-piece along impossible paths while the real keyhole sits unused a quarter-turn away. Your hands were receiving correct tactile feedback—binding and resistance—but you misinterpreted it as a challenge to push harder, not a signal to change axes.
Error 1: Forcing the Linear Pull. The most instinctive failure is to grip the two main components and pull straight apart. The puzzle is specifically designed to prevent this. The internal channel has a deliberate constriction or an offset that the U-piece’s tip cannot pass through when aligned for a linear pull. Applying force here only jams the softer zinc alloy components tighter, creating a self-wedging bind. You didn’t feel the “give” you expected, so you applied more force, cycling into frustration. The solution was never linear; it was rotational.
Error 2: Ignoring the Second Axis. A more subtle error happens when you discover the first rotation but then try to slide or disengage immediately. The mechanical principle often requires a sequence of rotations on different axes. You might rotate the U-piece 90 degrees (good), but then try to pull it out along its length (bad). At that new angle, a different part of the lock body blocks the path. The correct next move is often a secondary tilt or pivot of the entire assembly to bring that hidden channel into alignment. Missing this sequential constraint is what makes the puzzle feel deceitful.
Error 3: The Soft-Lock and the Bent Piece. This is the critical risk of brute force. If you apply significant torque or prying force when components are misaligned, you can permanently deform a subtle hook or flange inside the puzzle. This is the “soft-lock”—the puzzle isn’t just stuck, it’s damaged, and the designed clearance is gone. Did you break it? Possibly, but not necessarily permanently. Zinc alloy is malleable. If a piece is bent, you can often gently correct it. Use smooth-jaw pliers padded with a rag, and apply pressure slowly to coax the metal back to its original shape, comparing it to a solution photo. The goal is restoration, not reshaping.
The Pocket Solve Phenomenon. Ironically, the random, multi-axis jostling in a pocket or bag often replicates the precise sequence of rotations the puzzle requires. This isn’t luck; it’s probability. Your focused, forceful attempts were linear and limited. A pocket provides chaotic, gentle, multi-vector movement that eventually stumbles upon the correct path. This is the ultimate proof that force is the enemy and finesse is the key.
Understanding these errors completes your education. You’ve moved from seeing a stubborn object to understanding a delicate machine. The frustration you felt was a textbook case of misapplied force, a lesson every machinist learns early on. Now, when you pick up any similar disentanglement puzzle, you’ll instinctively search for rotational axes and sequential constraints first, saving your strength and your patience. For a more detailed look at a specific, hook-based variant, you can explore this step-by-step tutorial for a cast hook puzzle.
Beyond This Puzzle: Spatial Reasoning for the Next Level
Understanding the specific axis, rotation, and clearance mechanics of your U-shaped lock puzzle has equipped you with a fundamental skill set for a whole class of physical disentanglements. The principle you mastered—finding a hidden keyhole through precise alignment rather than force—is the core of dozens of metal puzzles, where solving time drops from hours to minutes once you learn to “see” the available paths in three dimensions.
A logical and satisfying next step is the double u shape metal puzzle, a direct variant that applies your new knowledge under increased complexity. Instead of a single U-shape and a body, you have two nearly identical U-shaped pieces intertwined. The solve path feels familiar but adds a layer of sequential constraint: you must maneuver the first U out using the exact same rotational logic, which then alters the alignment and creates the necessary clearance for the second. It’s the same principle, but now you’re managing two moving parts in a shared space.

Two Bull Head lock Puzzle — $14.99
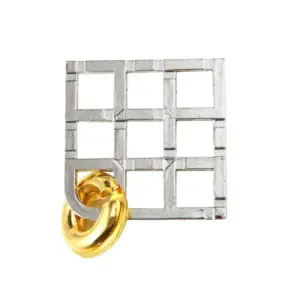
From there, you can graduate to classic metal ring puzzle u shape styles—the timeless “horseshoe and ring” puzzles. These appear simpler but often have a deceptive twist: the ring must be maneuvered over a seemingly oversized ball end or through a slot in the U’s body that only aligns when the ring itself is rotated to a specific orientation. Your hands are now trained to test each axis independently. (This is where many novices get stuck, applying lateral force when a simple quarter-turn of the ring is the key.)
The ultimate application of this spatial reasoning is in premium cast puzzles like the Hanayama Cast Vortex or Enigma. These are machined to tighter tolerances, where the clearances are measured in tenths of a millimeter and the binding is absolute if you’re off by a single degree. Solving them is less about frantic trying and more about executing a precise, calculated sequence you’ve deduced—a feeling closer to operating a fine lock mechanism than playing with a toy. These are classic examples of disentanglement puzzles, a broader category of mechanical puzzles.
This progression—from your first frustrating U-lock to mastering multi-piece disentanglements—is how you build a tactile intuition for spatial mechanics. You stop seeing shapes and start seeing potential pathways, rotations, and forbidden intersections. For a curated selection that tests these growing skills, I’ve judged a range based on machinist-level tolerances and satisfying feedback, which you can find in our guide to the best metal disentanglement puzzles judged by a machinist. Pick one whose form speaks to you. Your hands now know what to do.
The Collector’s Note: On Heft, Clinks, and Solved Drawers
The final click is a small, definitive event. It’s the sound of a problem resolving, of a mechanism you’ve internalized performing its sole, perfect function. That transition from seeing a shape to understanding a pathway is what fills the drawer in my workshop—not with trinkets, but with solved machines, each with its own specific heft and lesson. The common zinc alloy U-lock, weighing a solid 80 to 120 grams, is the foundational text in that library.
You started with cold, frustrating metal in your palms, turning it over with no hypothesis. Now, your hands move with intent. You don’t just pull; you tilt, rotate, and slide, feeling for the ghost of the keyhole you now know exists. The satisfaction isn’t in outsmarting the puzzle, but in having listened to it. A machinist knows this feeling: it’s the difference between forcing a seized bolt and applying penetrating oil, waiting, and feeling it turn freely with a gritty, final release. The puzzle is the same. You learned its language—the slight binding before alignment, the tactile feedback of a channel accepting its key.
This is why brute force is such a profound sin against the object. It’s not just that you might bend a delicate hook (a common worry, and one addressed in our guide to Metal Puzzles That Don’t Break). It’s that you’re refusing the conversation. You’re trying to shout over a whispered set of instructions. The empowerment you’ve gained is the patience to listen.
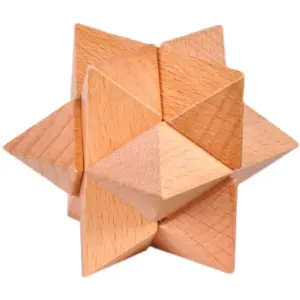
So, when you place the solved lock on the shelf, do so with its components separated. Let it be a monument to the sequence. The next time you pick it up—and you will, to show a friend or simply to feel the moves again—your fingers will trace the path without hesitation. The frustration is gone, replaced by the quiet confidence of capability. You’ve translated a stubborn, silent object into a series of known motions. And that is the real trick: not in the hidden keyhole, but in your newfound ability to find it, every time, by feel alone. Your drawer awaits its next inhabitant. Pick a heavier one, perhaps a classic burr puzzle to explore another branch of the mechanical puzzle family tree.