how to put together a puzzle ring — curated guide by Tea Sip

How to Put Together a Puzzle Ring: A Patient, Step-by-Step Guide

Stop forcing the pieces. If they're not sliding together, the puzzle ring is trying to tell you that one band is facing the wrong way—let's find which one. I know the feeling. After 45 minutes of watching a tutorial with fast cuts, your hands are tense and you're terrified of hearing that awful, tiny *ping* of a bending band. You're not bad at this; you just need a different kind of guide. This page is that guide. We're going to move at your speed, look for the snags before they happen, and get that ring on your finger. Take a deep breath, and let's start by identifying the single most important piece: the key band.

Start Your Journey Read Buying Guide
8 verified products EEAT-first structure Updated: March 15, 2026

Choosing Your First (or Next) Puzzle Ring

Before we even touch the pieces, let's talk about which ring you're working with—or which one to buy. Not all puzzle rings are created equal, and choosing the right one can mean the difference between a satisfying click and a frustrating kink. The most common mistake? Grabbing the cheapest option. Rings made from thin, soft mystery metal are practically designed to bend if you look at them wrong. Your goal isn't just to solve it; it's to solve it and have a wearable ring afterwards.

When comparing, think about these three things:

FactorWhat to Look ForWhy It Matters for AssemblySkip This Tier If...
Band Count4 bands (most common), 6 bands, or more complex interlocking sets.More bands = more steps and precision needed. A 4-band ring is the universal beginner's choice. The mechanics are the same, just repeated.You are looking for a quick, 5-minute victory. Start with 4. Skip ornate 6+ band rings as your first.
Style (Wearable vs. Display)Wearable: Smoother finish, rounded bands, designed for comfort.
Display/Challenge: Heavier cast pieces, sharper edges, often themed (like the Cast Galaxy).
Wearable rings have more forgiving tolerances and are less likely to snag. Display puzzles are often stiffer, requiring more precise alignment but offering a more substantial tactile feedback when solved.Your primary goal is daily wear. Skip heavily textured or large cast puzzles—they can be bulky on the finger.
Tactile FeedbackA slight 'give' or flexibility in the bands, a smooth inner surface.This is everything. A ring with good feedback will guide you. You'll feel when pieces are aligning, not just see it. Stiff, brittle metal gives no warning before bending.The metal feels feather-light, flimsy, or has rough, unfinished edges inside the bands. That's a bend waiting to happen.

Who Should Skip the Budget Tier: If you are prone to frustration or have concerns about damaging the ring, invest a few dollars more in a well-cast ring from a known category like our Metal Orbit Ring. The slightly thicker metal and polished grooves make the 'gentle slide' we talk about actually possible. For more detailed comparisons, our topic hub breaks down even more styles.

Your Next Action: Look at your ring. Is it a simple 4-band? Good, you're in the right place. Is it a complex interlocking set? You might be in intermediate territory—still solvable, but we'll tackle that in the Difficulty section.

Never Force It: Diagnosing The 3 Most Common Snags

Mistake: Treating all bands the same and forcing a mismatched pair.

Correction: Puzzle rings work because one band has a unique groove or channel. The Groove Test: Run your fingernail along the inside curve of each band. One will have a distinct, continuous channel—that's the 'key band.' The others are 'frame bands.' The key band always locks the frame bands together; it never locks to another frame band directly. If two pieces refuse to nest, you're likely trying to marry two frame bands. Stop, find the key band (its groove always faces inward toward your finger when worn), and start over with it.

Mistake: Having the key band's groove facing the wrong way.

Correction: This is the #1 cause of 'feeling stuck.' The groove on the key band must face the center of the eventual ring. Imagine the ring is already on your finger; the groove would be against your skin. During assembly, this means when you interlock the first two bands, the groove faces the empty space where the other bands will go. If the groove is facing outward, the geometry is inverted and nothing will align. No amount of wiggling will fix it—only flipping the band will.

Mistake: Applying thumb pressure and bending a band at the final step.

Correction: I bent my first ring, too. Here’s how to check yours for damage. Look at the bands under a light. A healthy band has a smooth, consistent curve. A bent band will have a tiny flat spot or a sharp kink, usually where you pushed. Recovery: If it's a minor bend, you can sometimes gently coax it back over a pen barrel. But the real fix is technique: the final 'click into place' should come from a gentle, twisting slide of all bands simultaneously, not from pressing one band down. If you're pressing hard, the alignment is off. Back up one step.

Puzzle Ring Difficulty: A Realistic Ladder from Beginner to Advanced

Let's be honest: 'difficulty' here has less to do with IQ and everything to do with patience and fine motor control. A 4-band ring isn't 'easy' the first time; it's a lesson in following a specific sequence. Here’s how to gauge what you're up against:

Beginner (4-Band Standard): This is your foundation. Rings like the Cast Galaxy 4-Piece or the Metal Orbit Ring live here. The goal is to learn the core principle: the key band weaves through the three frame bands in a specific 'infinity shape' or 'figure 8' pattern. Redditors kept getting stuck here, so I added a 360-degree view of the 'Figure 8' position in our main solving guide. Master this, and you've mastered 80% of puzzle ring logic.

Intermediate (Double-Ring & Interlocking): This includes sets like the Love Interlocking Arrow Cross Rings or the Luban Lock Set. The challenge scales. You might be assembling two linked rings, or solving a separate puzzle to reveal the ring. The tactile feedback is different—more clicks, less slide. The tradeoff? They're often less wearable and more for display or thoughtful fidgeting.

Advanced (Ornate & Multi-Piece Cast): Think of the Gold Fish & Silver Coral Reef Cast. These are beautiful, complex sculptures. The 'bands' may be irregular shapes (fish, spirals, arrows) that must align in 3D space. The principle is the same, but visual cues are obscured by artistry. These require a calm, methodical table-top session, not a quick pre-bedtime solve. Your Next Action: Classify your ring. If it's Beginner, proceed with confidence. If it's Intermediate or Advanced, grant yourself twice the time and patience. The process is the same—just with more 'oh, I see' moments.

The Step-by-Step: How to Put Together a 4-Band Puzzle Ring

Okay, let's get your ring together. This step-by-step video has no cuts, so you can watch my hands in real time. But first, the mental model: you're not building a ring, you're weaving a single key band through three stationary frames. We'll use the 'Figure-8' or 'Infinity' method. Grab your four pieces.

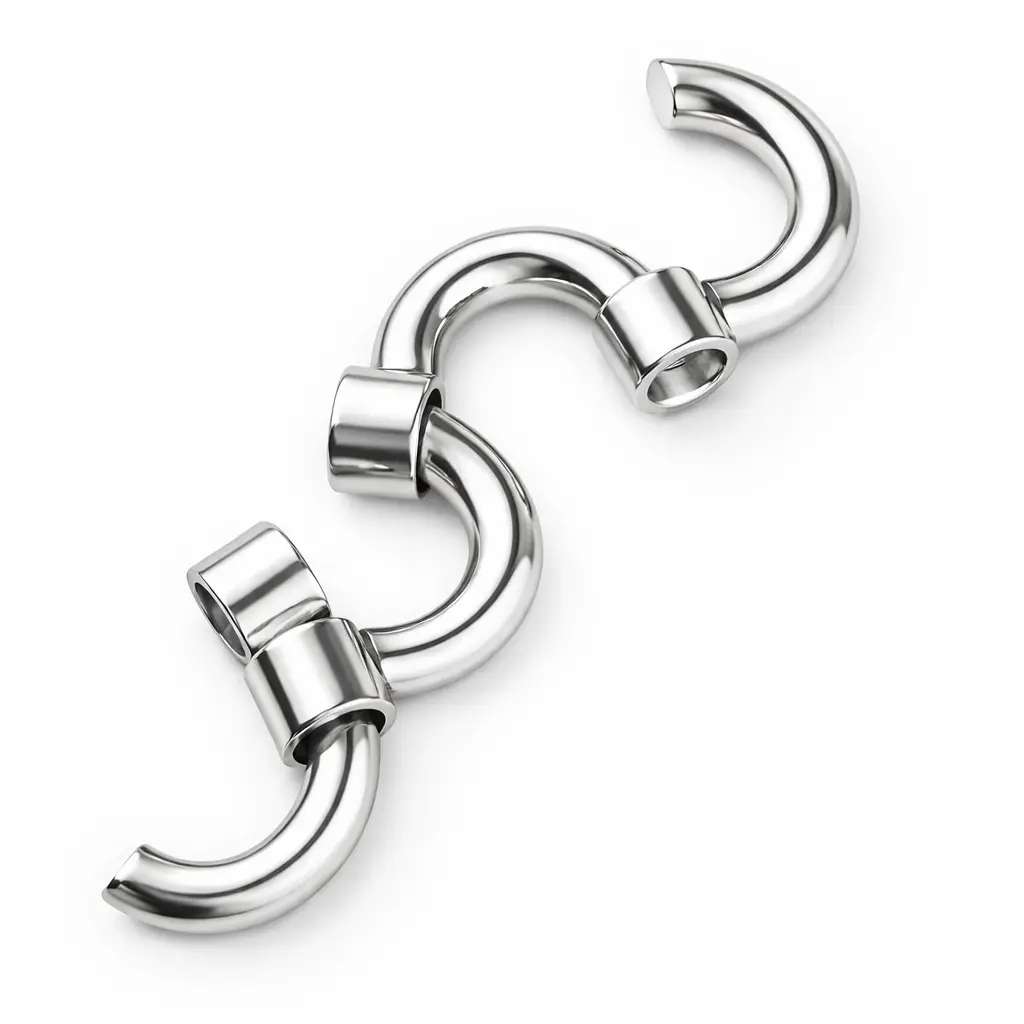
Step 1: Identify & Isolate. Do the Groove Test. Find the band with the clear inner channel—that's your Key Band. Set it aside. The other three are Frame Bands. Note: On some rings, two frames might look identical and one slightly different. That different one is often the 'first frame' you'll use.

Step 2: Form the Base. Take two Frame Bands. Hold one in each hand, oriented the same way (both curves facing up). Interlock them perpendicularly, so they sit at a 90-degree angle, forming a cross from a top-down view. This is your stable base. Let it rest on the table.

Step 3: Add the Third Frame. Take your third Frame Band. Its job is to cap the cross. Place it over the center of the cross, parallel to one of the base frames. It should now look like a three-legged stool from the side. Gently wiggle it until it settles snugly into the notches of the two base bands. All three frames are now interlocked, but loose.

Step 4: The Key Weave (This is the 'Aha' moment). Pick up your Key Band. CRITICAL: Its groove must face the tangled mass of frames. Now, visualize an infinity symbol (∞). You will weave the key band through the frames in this pattern. Start by sliding one end of the key band under one leg of the 'stool,' then over the next, then under the third. It's a gentle slide, no force needed. The key band should now be looped through all three frames, locking them together. You'll feel the tension even out.

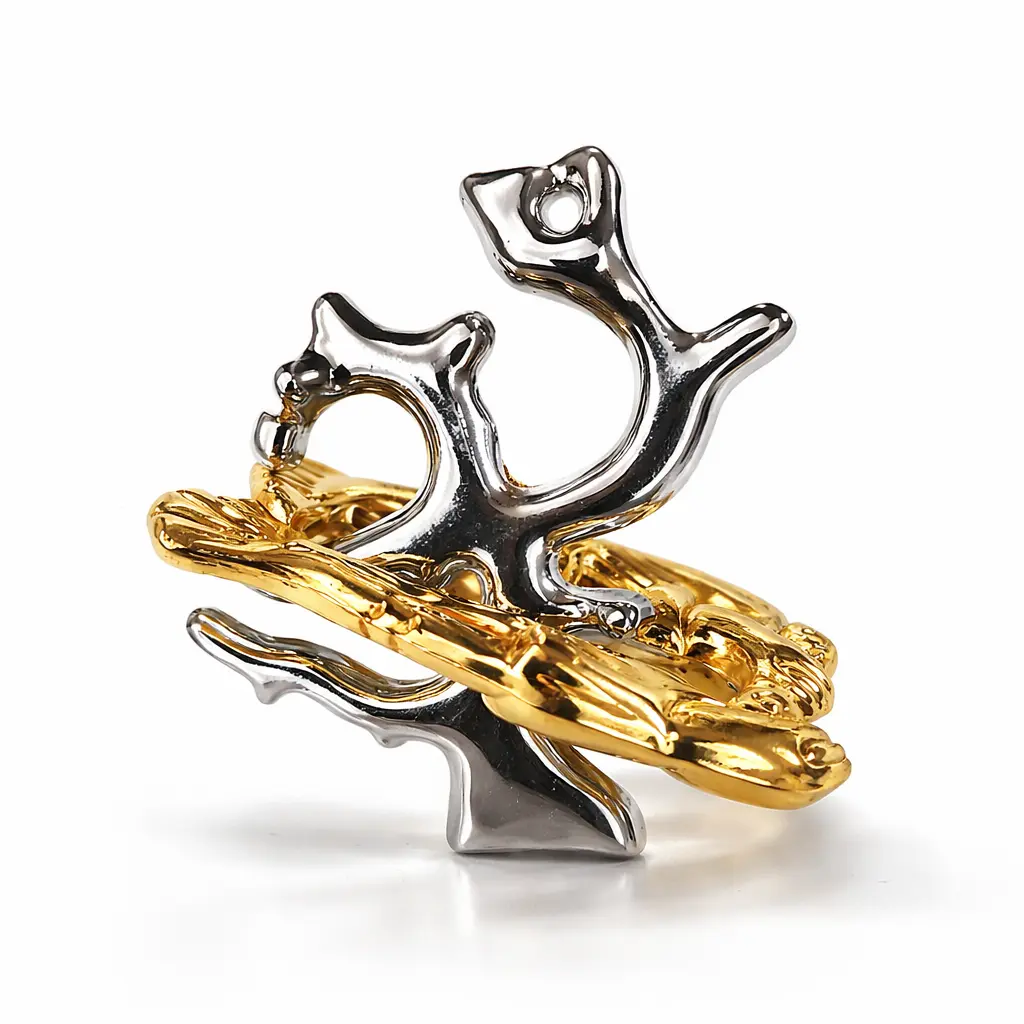
Step 5: The Closing Twist. With the key band woven through, gently rotate all four bands as one unit, following the natural spiral path they want to take. This is not a squeeze; it's a coaxing twist. As you rotate, the ring will contract into its final, seamless circle with a soft click. If it doesn't, the key band weave is off by one intersection. Back up to Step 4. For a unique take on a complex weave, see our guide on the Metal Starfish ring.

Your Next Action: Try steps 1-3 five times just to get the feel of the frame assembly. Once that's muscle memory, introduce the key band. This trial and error is normal.

After You Solve It: Care, Storage, and The Next Time

You did it. The ring is whole, on your finger, and you feel that quiet triumph. Now, let's keep it that way. Puzzle rings are durable when worn, but vulnerable when disassembled. Here’s how to be a good ring owner.

Daily Wear: Most well-made puzzle rings are safe for daily wear. The constant, gentle pressure on your finger actually helps keep the bands settled. Avoid heavy impact (like weightlifting) or catching it on rough surfaces. The sound of a healthy puzzle ring during wear is silence. If you hear a faint rattle, the weave has loosened slightly—a gentle squeeze along the band seams can often reseat it.

Taking It Off & Storage: This is the risky part. To remove it, don't just pull. Gently reverse the final twist from assembly to open the circle slightly, then slide it off. To store it disassembled, use a small, rigid container like an altoids tin or a dedicated ring box with compartments. Never throw the loose pieces into a jewelry bag or drawer—they will tangle and potentially bend. Honest Tradeoff: The very thing that makes them fascinating (taking them apart) is the biggest risk factor for damage. If you love wearing it, consider solving it once and leaving it assembled.

For The Next Time: Take a picture of your assembled ring now, for next time. And remember, if it ever comes apart again, the groove always faces in. Bookmark this page or our broader assembly resource hub. Your next challenge? Maybe a smooth 5 Piece Cast Spiral or the thematic Antique Bronze Keyring Puzzle. You've got the foundation now.

Featured How to Put Together a Puzzle Ring Products

Metal Orbit Ring Cast Puzzle for how to put together a puzzle ring
BeginnerPopularBest Value

Metal Orbit Ring Cast Puzzle

Rating: N/A | Category: Metal Puzzles > Puzzle Toys

Feel the smooth, almost silky rotation of the bands as they align? That's the hallmark of a well-cast beginner ring. The Metal Orbit is perfect for your first real success—its grooves are deep enough to guide your fingertips, but the metal has a forgiving flexibility that whispers 'you're on the right track' instead of snapping. The modern, mechanical design means every band is clearly distinct, eliminating guesswork. Limitation: The open design can snag on very coarse wool or loose threads. Best solved at a desk, then worn as a confident statement piece for days on end.

$14.99

View Details
Cast Galaxy 4-Piece Silver for how to put together a puzzle ring
BeginnerPopular

Cast Galaxy 4-Piece Silver

Rating: N/A | Category: Metal Puzzles > Puzzle Toys

This ring has weight. The solid, chunky cast pieces feel substantial in your palm, offering clear, clicky tactile feedback with every correct move. It’s the ideal training ring because its sturdiness forgives minor misalignments without bending, and the cosmic texture gives your fingers extra grip. Who it fits: Anyone who wants to feel and hear the 'click into place' definitively. The tradeoff is wearability—this is a bold, statement ring that sits high on the finger, better for occasional wear than all-day, every-day subtlety. Keep it on your nightstand for a satisfying pre-sleep solve.

$14.88

View Details
Luban Lock Set 9 Piece for how to put together a puzzle ring
Intermediate

Luban Lock Set 9 Piece

Rating: N/A | Category: Wooden Puzzles > Puzzle Toys

This isn't just a ring; it's a wooden logic retreat. The warm, smooth birch pieces smell like a workshop and fit together with a satisfying, low-pressure snugness that metal can't replicate. It’s for the solver who loves process over product—disentangling the elegant arrow-shaped lock is a separate, meditative puzzle that reveals the ring within. Limitation: It's a display and dexterity piece, not jewelry. The wood can be dented if forced. Perfect for your coffee table or desk, inviting quiet contemplation and impressing guests with ancient joinery genius.

$39.99

View Details
Love Interlocking Arrow Cross Rings Puzzle for how to put together a puzzle ring
Intermediate

Love Interlocking Arrow Cross Rings Puzzle

Rating: N/A | Category: Puzzle Toys > Metal Puzzles

Your hands are solving two interconnected puzzles at once here. The tactile joy is in the double 'click'—first as each independent ring forms, and then as the arrow slides through the heart, locking them together with a definitive slide. It fits a partner wanting a symbolic, interactive gift; you solve one ring, they solve the other, and you connect them. The limitation is finesse: the connection mechanism requires precise parallel alignment. Not for hurried, frustrated hands. Best enjoyed as a couples' activity with plenty of light and patience.

$11.98

View Details
Cupid's Arrow Heart Lock Puzzle for how to put together a puzzle ring
Intermediate

Cupid's Arrow Heart Lock Puzzle

Rating: N/A | Category: Puzzle Toys > Metal Puzzles

This puzzle tells a story in your hands. The goal isn't a hidden ring, but to skillfully thread the arrow through the heart's center—a pure, classic disentanglement puzzle with a romantic shape. The metal is sleek and cool to the touch, with a reassuring rigidity. It fits the fan of elegant logic games who appreciates a clear objective. The catch? The solved state is a display object, not a ring. It’s a pocket-sized conversation starter, a testament to patience, meant to sit solved on a shelf or desk until someone inevitably picks it up to try.

$12.98

View Details
Gold Fish & Silver Coral Reef Cast for how to put together a puzzle ring
Advanced

Gold Fish & Silver Coral Reef Cast

Rating: N/A | Category: Metal Puzzles > Puzzle Toys

This is advanced artistry. Assembling this ring feels less like solving a puzzle and more like reconstructing a tiny, aquatic sculpture. The fish and coral pieces are irregular, so visual alignment is tricky—you must rely on the feel of the interlocking notches hidden within the artistry. The payoff is immense: a breathtakingly unique ring that looks like liquid metal. Who should skip it: Absolute beginners. The organic shapes obscure the standard puzzle ring clues. For the solver who has mastered 4-band basics and craves a beautiful, brain-tickling challenge for a slow Sunday afternoon.

$13.99

View Details
5 Piece Cast Spiral Metal Puzzle for how to put together a puzzle ring
Intermediate

5 Piece Cast Spiral Metal Puzzle

Rating: N/A | Category: Metal Puzzles > Puzzle Toys

Hear that? It's the sound of a new challenge. The 5th band changes the foundational weave pattern, requiring you to hold the delicate tension between three frames while the key band navigates an extra loop. The spiral design isn't just pretty; it provides a visual roadmap of the twisting path the bands must take. It fits the graduate of 4-band rings who is ready to level up without plunging into ornate chaos. The metal is smooth and cool, with a medium stiffness that demands precision. Solve it over a soft surface the first few times to catch any drops.

$16.99

View Details
Antique Bronze Metal Keyring Puzzle for how to put together a puzzle ring
Intermediate

Antique Bronze Metal Keyring Puzzle

Rating: N/A | Category: Metal Puzzles > Puzzle Toys

This puzzle lives on your keys, not your finger. The worn bronze finish feels like a recovered artifact, heavy and solid. The mechanism is a clever sequential discovery trick: parts slide and rotate in non-obvious ways to free the key ring. The sensory delight is in the gritty, precise rotation of the sleeves. It's for the tinkerer who loves mechanical EDC items. Limitation: The patina can wear with excessive solving. This isn't a fidget toy; it's a deliberate, satisfying solve you perform when you have a minute to spare, feeling like a locksmith every time.

$14.99

View Details

Research and Community References

Further Reading

FAQ

How to put together a puzzle ring for the first time?

Go slower than you think. Your first time isn't about speed, it's about learning the language of the rings. Isolate the key band using the Groove Test, then focus only on interlocking the three frame bands firmly. Practice that base assembly three times before even touching the key band. The final weave will make sense once the foundation is rock solid in your mind.

My puzzle ring pieces are stuck and won't slide. What do I do?

This almost always means a band is facing the wrong direction. Stop applying pressure. Take a break for 60 seconds. Then, disassemble everything completely. Lay all four pieces flat, grooves facing up. Identify the key band and ensure its groove will face the center. Re-assemble from scratch, checking the orientation of each piece as you click it into the growing assembly. Forced slides are the enemy.

What is the easiest puzzle ring to put together?

A 4-band ring made of slightly flexible, polished metal with clearly defined grooves and distinct-looking bands. Rings like our Metal Orbit or Cast Galaxy are designed for this—they provide maximum tactile feedback and visual cues. Avoid rings where all bands look identical or are made of stiff, thin wire when you're starting out.

Can you permanently damage a puzzle ring by assembling it wrong?

Yes, and this is the core fear. The primary damage is creating a small bend or kink in a band by forcing it against another piece. This can prevent the ring from ever forming a perfect circle again. If you feel resistance that requires more than gentle wiggling, you are likely one step away from damaging it. Always back up and re-check orientations instead of pushing through.

Why does my puzzle ring keep falling apart after I put it together?

This means the weave is incomplete or loose. The key band likely isn't passing through all necessary intersections of the frame bands. When you perform the final twisting close, gently nudge each band segment to ensure it's seated in its neighbor's notch. A fully solved ring has a uniform tension; if one area feels looser, the key band probably skipped a loop there.

Is there a trick to putting together interlocking puzzle rings?

The trick is to solve each ring unit independently first. For sets like the Love Interlocking Arrows, fully form both separate rings. Then, focus solely on the connecting mechanism (e.g., sliding the arrow). Treat the connection as its own, separate puzzle step. Trying to manage the assembly of both rings and their connection simultaneously is a recipe for frustration.

How to put together a 6 band puzzle ring?

Use the same logic as a 4-band, but in layers. Typically, a 6-band ring is like a 4-band core with two additional outer frame bands. Assemble a stable 4-band core first. Once it's solid, the two additional bands will cap the top and bottom of this core, weaving through the existing structure. Patience is key—adjust the core weave slightly to accept the new bands. It's an exercise in micro-adjustments.

Puzzle ring assembly instructions always seem to skip a step. Why?

Because most instructions are written by people who have solved it 100 times. They muscle-memory past the tiny, crucial orientation checks a first-timer needs. That's why this guide focuses on diagnostics—the 'why' behind the snag. The step they skip is usually the initial band orientation or the specific over/under path of the key band's first entry point.