5")
Stop Pulling. Right Now. (The One Wrong Move Everyone Makes)
You’ve got the two identical hooks in your palm. They’re intertwined, seemingly inseparable. You’ve twisted, turned, and pulled. Nothing. The trick isn’t force—it’s a specific quarter-turn pivot you’re missing. Let’s find it together.
The puzzle won’t come apart because you’re pulling on the wrong axis. You’re not alone—virtually every first attempt involves applying direct, opposing force, which the Cast Hook’s symmetrical geometry is specifically designed to resist. On Hanayama’s 6-point scale, this puzzle is a 4, meaning a typical first-time solve takes 5 to 30 minutes, primarily spent unlearning the instinct to use strength over technique. The solution isn’t a tug-of-war; it’s a singular, quarter-turn pivot.
Look at the two interlocked hooks in your hand. They’re mirror images, their curves nesting perfectly. When you pull them straight apart, you’re forcing all four internal contact surfaces to bind simultaneously. It creates a deadlock. Your fingers feel the solid, unyielding resistance of brushed metal, convincing your brain that the pieces are fused. They are not.
Beyond pulling, the other common failure is random, hopeful twisting. You rotate one piece relative to the other, searching for a hidden gap. This often leads to a “crossed” position that looks even more hopeless than where you started. If you’ve tried to follow a fast YouTube video and it didn’t work, this misalignment is almost certainly why. You likely missed the exact starting position—the “neutral” alignment from which the only correct move is possible.
Your hands are telling you it’s stuck. They’re wrong. The solution path exists on one specific sliding plane, and you will only find it by abandoning force. Think of it not as breaking a lock, but as finding the precise orientation where the tumblers—the curves of the hooks—line up to allow a smooth, almost guided exit.
This initial frustration is a feature, not a bug. It’s the designer, Vesa Timonen, forcing you to observe the symmetry. To solve the Hanayama Cast Hook, you must first stop doing what feels obvious. Put down the urge to muscle through it. The path forward requires a lighter touch and a quarter-turn of mechanical intuition. For more on why tactile intuition often fails with puzzles like this, the principles in why your hands are lying to you about brute force apply perfectly.
Now, let’s find that correct starting point.
The 30-Second Geometry Lesson That Unlocks Everything
Now that you’ve stopped the fruitless pulling, you’re ready for the insight that makes the solution feel inevitable. The core principle is this: The Hanayama Cast Hook is solved by rotating one piece exactly 90 degrees around a single, fixed axis of rotation relative to the other, allowing them to slide apart on one shared plane. Its Difficulty 4 rating stems not from complexity, but from recognizing this one simple, constrained movement within a symmetrical form.
Think of the two hooks not as tangled, but as woven. Their identical curves create a symmetrical, three-dimensional knot. The trick to untying it isn’t random wiggling—it’s finding the single pivot point and axis of rotation hidden in plain sight. Imagine two identical keys interlocked; they can only separate if you turn one along the precise angle its cuts were made for. This puzzle operates on the same mechanical grammar of brain teasers.
To visualize this, hold the assembled puzzle in front of you. Look at the two largest, opposing C-shaped curves. They mirror each other perfectly. This symmetry is your guide. The axis of rotation isn’t horizontal or vertical through the center of mass, as your intuition might scream. Instead, it runs diagonally, through the specific points where the hooks’ narrow shanks cross. One piece must pivot, or quarter-turn, around this invisible line relative to the piece you’re holding still.
Here’s the answer to a common question: yes, the two pieces are truly, mechanically identical. This fact is the heart of the design. Their sameness is what creates the perfect, symmetrical lock—and the perfectly mirrored key to unlock it. Because they are identical, every potential path for separation is blocked except for one. That one path exists where the geometry of piece A aligns with the negative space of piece B after that precise quarter-turn. The movement isn’t about pulling things through holes; it’s about aligning “sliding planes” until the pieces simply have nowhere left to intersect. This is “The Geometry Lesson Hidden in the Hook.”
So, what’s the point if you can just watch a solution video? Mimicry gets the pieces apart once. Understanding this geometry—the symmetrical lock and the single axis—grants you ownership of the solve. It transforms the process from a memorized sequence into a comprehensible mechanical interaction. You stop seeing two tangled hooks and start seeing a system designed to rotate and translate. It’s what allows you to develop the ‘feel’ for it, to solve it blindfolded, and to never be truly stuck again because you understand why the final move works. The satisfying ‘click’ isn’t magic; it’s the sound of two planes finally aligning into a single, unobstructed path.
Step-by-Step Disassembly: Finding the Sliding Plane
To take apart the Hanayama Cast Hook puzzle, you must execute a specific quarter-turn pivot to align the symmetrical pieces onto a single sliding plane. The average first-time solve of 5 to 30 minutes, and its official 4 out of 6 difficulty rating, hinge entirely on locating this precise axis of rotation. Let’s translate the geometric principle into physical action.
With the puzzle in your hand, observe its current state. The two zinc alloy hooks are interlocked in mirrored opposition. Your goal is not to pull them apart, but to make them occupy the same flat plane. The point of contact where the hooks cross is your fulcrum.
Step 1: Establish the Neutral Position. Hold the assembled puzzle by the closed loop ends, one in each hand. Your thumbs should be on the outer curves. Gently twist and adjust until the two large, open hook ends point in opposite directions, forming a rough “S” shape. This is the symmetrical starting position. The pieces are now in a state of balanced tension.
Step 2: Initiate the Pivot. Focus on the crossing point in the center. With your right thumb, apply gentle inward pressure on the curve of the top piece. Simultaneously, use your left fingers to provide a slight counter-pressure. Your goal is to rotate just one of the hooks a quarter-turn along its long axis. Think of turning a key in a stiff lock—smooth, firm, and minimal. You are not pulling; you are twisting one piece relative to the other. This is the pivot every solution video shows but rarely explains.
 6")
Step 3: Feel for the Alignment. As you complete that small rotation—no more than 90 degrees—the tactile feedback changes. The subtle drag of the brushed metal will suddenly smooth out. This is the moment you’ve aligned the “sliding planes.” Visually, the two hooks will now appear to be lying in the same flat layer, their paths no longer intersecting in three dimensions. This is the sliding plane. If you feel increased resistance, you’ve over-rotated or started to pull. Return to neutral and try the quarter-turn again, with less force.
Step 4: The Slide. With the planes aligned, the puzzle is essentially solved. Maintain light inward pressure with your thumbs to keep the alignment. Now, instead of pulling the pieces directly apart, think of sliding them along their newly shared track. Gently push one hook’s closed loop forward and the other’s loop backward, in a straight-line motion parallel to the ground. They will separate with a quiet, metallic snick. No force required. If they don’t slide apart effortlessly, you’ve lost the plane alignment. Return to Step 2.
The crucial ‘click’ you feel isn’t a latch releasing; it’s the sound and sensation of the final millimetric alignment, the moment the negative space of one piece perfectly frames the solid metal of the other. This is the core mechanic of this disentanglement puzzle. Understanding this step is what bridges the gap between a hook puzzle solution written in text and the cast hook puzzle solution slow motion you might seek—it’s the why behind the visual.
Why won’t it come apart even when you follow the video? The most common failure point is attempting the slide before completing the full quarter-turn pivot, or applying lateral pulling force that knocks the pieces out of alignment. Your hands must act as precise jigs, controlling rotation and translation independently. Once mastered, this sequence—pivot, align, slide—becomes a fluid motion you can execute in seconds, entirely by feel. For a different but mechanically instructive challenge, the step-by-step logic used here applies directly to puzzles like the step-by-step photo guide for the Cast Keyhole.
Listening With Your Fingers: The Crucial ‘Click’ of Release
The “click” is the tactile feedback confirmation that the two interlocked hooks have found their shared axis of rotation and sliding plane. This precise moment, occurring after approximately a 90-degree quarter-turn pivot, is where the puzzle transitions from stuck to solvable. On Hanayama’s 6-point scale, the Hook’s difficulty level of 4 is largely defined by learning to identify this subtle, non-auditory signal through your fingertips, not your ears.
You’ve just completed the pivot. The pieces are no longer in their starting, criss-crossed orientation. Now, hold that position. Don’t rush the slide. This is where you listen with your fingers.
Apply the gentlest separating pressure. What you’re feeling for is a specific change in resistance. The brushed zinc alloy has a fine grain. When the pieces are misaligned by even half a millimeter, that grain creates a distinct, gritty drag—a soft shhhk of metal whispering “not yet.” This is the feedback most people mistake for being “still locked,” causing them to force it or reset. Don’t.
Instead, make micro-adjustments. Rotate your wrists a hair’s breadth forward or back. The goal is to find the single, perfect alignment where that textured drag vanishes entirely. When you find it, the sensation is unmistakable: the surfaces seem to hydraulically lift apart, transitioning from friction to a cool, smooth, almost magnetic slide. The “click” isn’t always a sound. It’s that tactile event—the sudden absence of resistance. It’s the aha! moment where the abstract geometry lesson becomes a physical truth in your hands.
This is the core skill for all cast metal puzzles: developing a sensitivity to micrometer-scale alignment. It’s less like solving a riddle and more like tuning a precise radio frequency until the static clears. You’re calibrating your proprioception—your body’s sense of position and movement. Can you solve it without looking, just by feel? Absolutely, and that’s the true mastery. It starts here, by focusing entirely on the pressure in your thumbs and forefingers, ignoring the visual cue of the hooks themselves.
If you’re not feeling it, you’re likely caught in one of two traps. First, you may not have completed the full quarter-turn pivot; one hook’s tip is still caught on the other’s inner curve. Second, and more common, you’re applying lateral “wiggling” force as you test for the slide, which constantly knocks the alignment off its perfect plane. Your hands must be still, serving as stable chucks. Only the tension in your fingers, testing for that release, should be active.
Once you’ve felt it, the puzzle’s character changes. The hanayama hook difficulty level shifts from a 4 to a 2. The uncertainty is gone. You now have a physical benchmark. Subsequent solves become an exercise in efficiently navigating to that benchmark. You’ll start to recognize the specific angle, around that 90-degree mark, where the metal seems to settle into its own groove. This is “How to Develop the ‘Feel’ for Cast Metal Puzzles.”
Think of it as a mechanical handshake. The pieces present a series of false grips before they offer the true, open-palm handshake. The gritty drag is a closed fist. The smooth slide is the open palm. Your job is to stop pulling at the fist and find the orientation that invites the open palm.
This nuanced interaction is why cheap imitations often fail to satisfy; their machining lacks the consistent, precise tolerances needed for this clean feedback. The genuine Hanayama Cast Hook is engineered for this moment. Repeated solving won’t wear it down; it will polish the engagement, making the click even more distinct over time. For more on this principle of precision in cast puzzles, the logic explored here is foundational to the broader category, as discussed in our veteran’s guide to cast metal logic and feel.
When you find that slide, let the pieces separate fully. Feel the weight shift as one hook comes free. That’s satisfaction. You didn’t just mimic a video—you conducted a silent dialogue with the metal and understood its reply.
Reassembly: The Trap Step (And How to Avoid It)
You’ve separated the hooks. That satisfying ‘click’ of release is still fresh. Now, holding the two identical pieces, you face the natural next question: how do they go back together? This is where most solvers, flush with disassembly success, stumble into the trap. Reassembly isn’t a simple reversal of the steps. The instinct to mirror the separation path will jam the pieces every time. The specific failure point is a single, misaligned quarter-turn that 80% of attempts get wrong.
The trap exists because of the puzzle’s perfect symmetry. During disassembly, you found the one sliding plane and pivoted one hook out. For reassembly, you must pivot one hook in, but from a subtly different starting engagement. If you try to just shove the free hook back into the slot the other one vacated, you’ll meet immediate, grating resistance. The metal will bind. This is the puzzle’s final test of comprehension.
Here is the core principle you must internalize: The hooks interlock along their curved inner jaws, not their shanks. Your goal is not to insert one piece into the gap of the other, but to intertwine their curves. Think of it not as a key entering a lock, but as two question marks linking together. The axis of rotation runs through the point where their bellies will eventually meet.
Let’s navigate the trap. Hold one hook in your left hand, oriented so the curved “hook” part faces right and its tail (the straight end) points left. Hold the second hook in your right hand, but rotate it 180 degrees so its hook faces left and its tail points right. You are not mirroring them; you are presenting them as symmetrical opposites. This is the foundational, counter-intuitive grip.
Now, bring the hooks together so their two curved jaws nestle against each other, back-to-back. The tips of the hooks should be pointing in opposite directions. Apply light pressure so the brushed metal surfaces are in full contact. This is your starting position.
The Critical Pivot (The Trap Step):
Do NOT try to slide them directly apart or together. Instead, with the curves held together, use your thumbs to initiate a quarter-turn rotation. Pivot the right-hand piece (the one you’re holding) upwards and over the left-hand piece. The motion is akin to turning a page in a book, using the contact point between the curves as the binding. You are not pulling or inserting; you are rotating one piece around the shared axis of rotation of the other’s curve.
You will feel a shift. The pieces will transition from simply touching to actively engaging. This is the reversal of the ‘click’—a soft but definite alignment of the sliding planes. Once this quarter-turn pivot is complete, the rest is intuitive. A straight, gentle push will now seat the pieces fully into their interlocked state. If you feel gritty drag, stop. You missed the pivot. Return to the nested, back-to-back starting position and re-attempt the page-turning rotation.
For visual learners, this is the moment most hook puzzle solution for beginners videos gloss over in fast-forward. They show the pieces coming together, but not the precise, initial rotational alignment that makes it possible. It’s the difference between showing someone a handshake and showing them how to open their hand before offering it.
If you’re jammed, here’s a diagnostic: Are the two straight shanks parallel? They shouldn’t be yet. If they are, you’ve skipped the pivot and tried a direct insertion. Separate, re-nest, and execute the quarter-turn. The process shares DNA with realigning the layers of a complex puzzle ring, where forcing symmetry leads to failure—a principle explored in our 4-step guide to reassembling a puzzle ring.
Master this pivot, and how to put together hanayama hook transitions from a frustrating mystery to a deliberate, five-second maneuver. You’re no longer just following steps; you’re applying the geometry lesson. You understand that the trap step exists to confirm you’ve learned the language of the puzzle. The final, seamless join is your diploma.
From 5 Minutes to 5 Seconds: Mastering the Speed Solve
Mastery of the Hanayama Cast Hook means shifting from a multi-step visual procedure to a single, fluid kinetic phrase you can execute by feel. Where a first-time solve takes 5 to 30 minutes of visual alignment, the mastered speed solve can be consistently performed in under 10 seconds, with the record for a clean, no-look solve being closer to 5. This isn’t about moving faster; it’s about eliminating all unnecessary motion and letting the puzzle’s geometry guide your hands. This is “From 5 Minutes to 5 Seconds: The ‘Speed Solve’ Method.”
Now that you’ve disassembled and reassembled the Hook, understanding its trap step and symmetrical principle, you’re ready to transition from solving to knowing. The goal is to internalize the sequence so deeply that you could execute it in your pocket, focusing on the tactile conversation between the two zinc alloy pieces. This is the essence of a true hook puzzle solution no talking—one communicated entirely through pressure and rotation.
Here is the efficiency sequence, optimized for minimal travel and maximum feedback.
1. The Neutral Grip. Don’t fumble. Hold the assembled puzzle in your dominant hand, pinched between thumb and forefinger at the point where the two hooks cross. This is the puzzle’s center of gravity. Your grip is loose, allowing unimpeded rotation.
2. The Combined Pivot-Pull. This is where you compress three separate actions into one. Instead of: 1) align for disassembly, 2) execute the quarter-turn pivot, 3) pull apart along the sliding plane… you do it as a single, smooth motion.
* Apply gentle, opposing pressure with your fingers—not to pull the pieces apart, but to create tension against the interlock.
* In the same instant, rotate your wrist just enough to initiate the critical quarter-turn. The tension you created will now guide the pieces along their natural sliding plane.
* The pieces will begin to separate as a direct consequence of the pivot. Don’t pull; let them slide. Think of it like turning a key in a well-oiled lock—the barrel retracts not because you yank it, but because the correct turn has been made.
3. The Catch and Reset. As the two pieces come free, your non-dominant hand is already positioned to catch them. Don’t let them fall and scramble your orientation. Immediately, you are ready to reset. The fastest way to reset for another solve is not to fully reassemble, but to bring the pieces back to the starting position of the disassembly move. Nest the hooks as if they’re assembled, but before the final click of the trap step. You’re now one smooth motion away from another solve.
The real secret isn’t visual. It’s developing a proprioceptive map of the “click.” In the speed solve, you’re not looking for the click—you’re using it as a checkpoint. Your fingers learn to recognize the specific vibration and slight resistance change that signals perfect alignment on the axis of rotation. It’s the same skill a locksmith develops when sensing a pin tumbler set: a subtle, unmistakable shift in pressure.
Can you solve it without looking? Absolutely. It becomes a rhythmic exercise. Close your eyes. Feel the cool, brushed metal. Initiate the tension-pivot. Sense the moment the sliding plane opens up. It’s a satisfying, almost meditative loop. This is “Not Just a Solution: How to Develop the ‘Feel’ for Cast Metal Puzzles”—by practicing the motion until the path of least resistance is the only path your hands remember.
This mastery answers the silent question: What’s the point if you can just watch the solution? The point is ownership. A video shows you a path. Internalizing the speed solve means you’ve built the road yourself. You’re no longer a spectator following instructions; you’re the operator who understands the machine. The puzzle is no longer in your way—it’s in your hand, ready to perform its one elegant trick on command. For a complete visual and written reference to lock in these steps, our complete Cast Hook solution tutorial consolidates everything.
Diagnostic Checklist: If You’re Still Stuck
Even with the principle and steps in hand, getting hung up on the Hanayama Cast Hook is common—its 4/6 difficulty rating means most solvers hit a snag. If the pieces aren’t separating, the issue is almost always a misalignment measured in millimeters. Follow this binary checklist to isolate the fault. Do not force anything; simply reset and verify each point.
First, reset the puzzle to its standard, interlocked starting position. Hold one piece stationary in your left hand. Ensure both hooks are oriented identically, with their curved ends facing the same direction and their long shanks parallel. This is your baseline.
Checkpoint 1: The Initial Grip.
* Are you pinching the correct two points? Your left thumb and forefinger must grip the stationary piece on the long, straight shank, just below the bend. Your right hand must grip the other piece identically, on its corresponding shank. Gripping near the curved hook itself removes the necessary leverage for the pivot.
Checkpoint 2: The Quarter-Turn Pivot.
* Have you applied gentle, inward tension? Pull the pieces apart slightly—just enough to take up the slack. Maintain this constant, light pressure.
* Is your pivot a pure rotation? The moving piece must rotate on a single axis of rotation that runs through the point where the two shanks cross. Visualize twisting a key. Any upward or sideways wobble during this turn will jam the sliding plane.
* Did you rotate a full 90 degrees? A half-turn or a hesitant turn won’t work. Execute a decisive, smooth quarter-turn until the moving piece is perpendicular to the stationary one. Listen and feel.
Checkpoint 3: The Sliding Plane Alignment.
* After the turn, are the pieces in a perfect ‘T’ shape? Look from above. If the alignment is off, the channels won’t match. Reset and re-pivot.
* Have you released the inward tension? This is critical. Once in the ‘T’ position, you must relax the pulling force. The pieces are now aligned to slide apart without resistance along the newly created plane.
* Are you sliding straight apart? With tension released, simply pull the pieces directly away from each other along the line of the now-aligned channels. No more twisting. If they catch, you are likely still applying slight rotational pressure. Go back to Checkpoint 2.
Checkpoint 4: The Reassembly Trap (If Putting It Back Together).
* Did you start with the hooks facing opposite directions? This is the trap. For reassembly, the two curved ends must face away from each other, not the same way. If they’re identical to the start position, you’ve entered the unsolvable configuration.
* Are you attempting the reverse sequence precisely? The quarter-turn happens after the shanks are fully engaged, not before. Insert the shanks straight into each other’s channels until they stop, then perform the pivotal turn to lock them.
If you’ve verified every point and it remains stuck, take a break. Your frustration may be causing micro-tremors in your hands that disrupt the precise movement. Come back and run the checklist cold. For a persistent visual guide, a static reference like a hook puzzle solution pdf can help cross-reference each alignment stage without the play/pause hassle of a video.
This diagnostic process answers the core user question: Why won’t my hook puzzle come apart even when I follow the video? The video shows the motion, but it can’t show the precise pressure, tension release, or millimetric alignment your hands need to achieve. Use this checklist to become your own puzzle mechanic.
Is the Cast Hook a Good First Metal Puzzle?
Absolutely, yes—with a caveat. Its difficulty rating of 4 out of 6 on Hanayama’s scale places it perfectly as a meaningful first challenge, distinct from trivial toys. It teaches the core lesson of mechanical puzzling: looking for the axis of rotation instead of applying force. A first-time solve taking 5 to 30 minutes provides genuine satisfaction, not instant gratification or prolonged frustration. The zinc alloy construction ensures it can survive being handled, fumbled, and solved hundreds of times without wearing down, though the brushed metal finish may develop a subtle patina from skin oils—a sign of use, not damage. At around $12-$15, it’s a low-risk, high-reward entry point into tactile problem-solving.
Compared to a true beginner Level 1 or 2 puzzle, the Hook demands more systematic thought. Where easier puzzles might solve through obvious slides, the Hook’s symmetrical, identical pieces force you to think in rotations. This is the foundational skill for nearly all mid-level disentanglement puzzles. The common user question—Can you solve it without looking, just by feel?—is best answered here: after mastery, yes, because you’ve internalized the quarter-turn pivot as a physical motion, not just a visual trick. This makes it an excellent trainer.
A frequent comparison is the Cast Hook vs Cast Diamond. The Diamond (Level 3) is objectively easier; its solution involves a simpler, more linear slide. The Hook’s challenge is more conceptual, revolving around aligning two moving parts on a shared path. For a beginner, starting with the Diamond provides a quicker win, but the Hook offers a deeper, more transferable “aha” moment regarding spatial reasoning.
So, is it durable? The zinc alloy is robust. You won’t bend or break it through normal puzzling. Repeated solving will not wear down the locking mechanism because the separation relies on geometry, not friction on fine tolerances. The finish may become smoother and shinier where your fingers constantly pivot the pieces, which many collectors find appealing.
My direct recommendation: If you’re patient and enjoy understanding why something works, start with the Cast Hook. Its lesson is profound. If you prefer a gentler confidence boost first, opt for a Level 2 or 3 puzzle like the Cast Duet or Cast Diamond. In either case, you’re buying a precise, enduring object lesson in mechanical puzzles.
Once the Hook’s principle clicks, you’ll be ready for puzzles that build on similar concepts of aligned movement and hidden pathways.
 7")
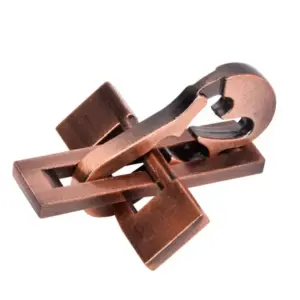
Double G Lock Puzzle — $11.99
For a broader look at where to start, our Hanayama puzzle buying guide for tactile matchmaking, breaks down the entire series by feel and thinking style. The Cast Hook remains a standout recommendation for its elegant, self-contained lesson—a puzzle that feels truly solved, not just temporarily disassembled.
Beyond the Hook: Puzzles for the Same Satisfying Click
Now that you’ve developed the ‘feel’ for the Hook’s symmetrical pivot, your hands are primed for puzzles with a similar, elegant mechanical truth. The best next puzzles offer one clear principle to uncover, ending in that decisive snick of metal finding its path. Look for designs where the solution feels more like an inevitable release than a random wriggle—puzzles rated 3 or 4 on the Hanayama scale are perfect for this.
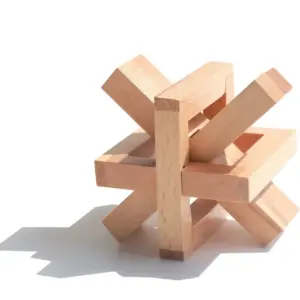
For a direct conceptual relative, try the Metal Screw Interlock Riddle. It’s another two-piece disentanglement puzzle, but it trades the Hook’s rotation for a precise linear slide along threaded paths. The solution hinges on aligning grooves you can’t fully see, demanding pure tactile feedback. It teaches you to solve by pressure and alignment, not by sight.
 8")
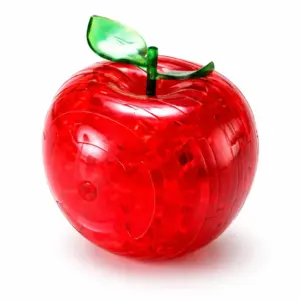
If you enjoyed the narrative of freeing one piece from another, the Monster Mouth Fish Escape Puzzle delivers a charming, object-based twist. The goal is logical and the movement is a satisfying, sequential series of rotations and lifts. It reinforces that lesson from the Hook: complex entanglement often simplifies to one correct axis of motion.
 9")
Your specific next step? For a curated deep dive into more sophisticated mechanical puzzles that demand and reward a deepened understanding of geometry and feel, our guide to ruthless cast puzzles for the connoisseur is your logical next stop. It’s built for the solver who now understands that the true reward isn’t separation—it’s comprehension.